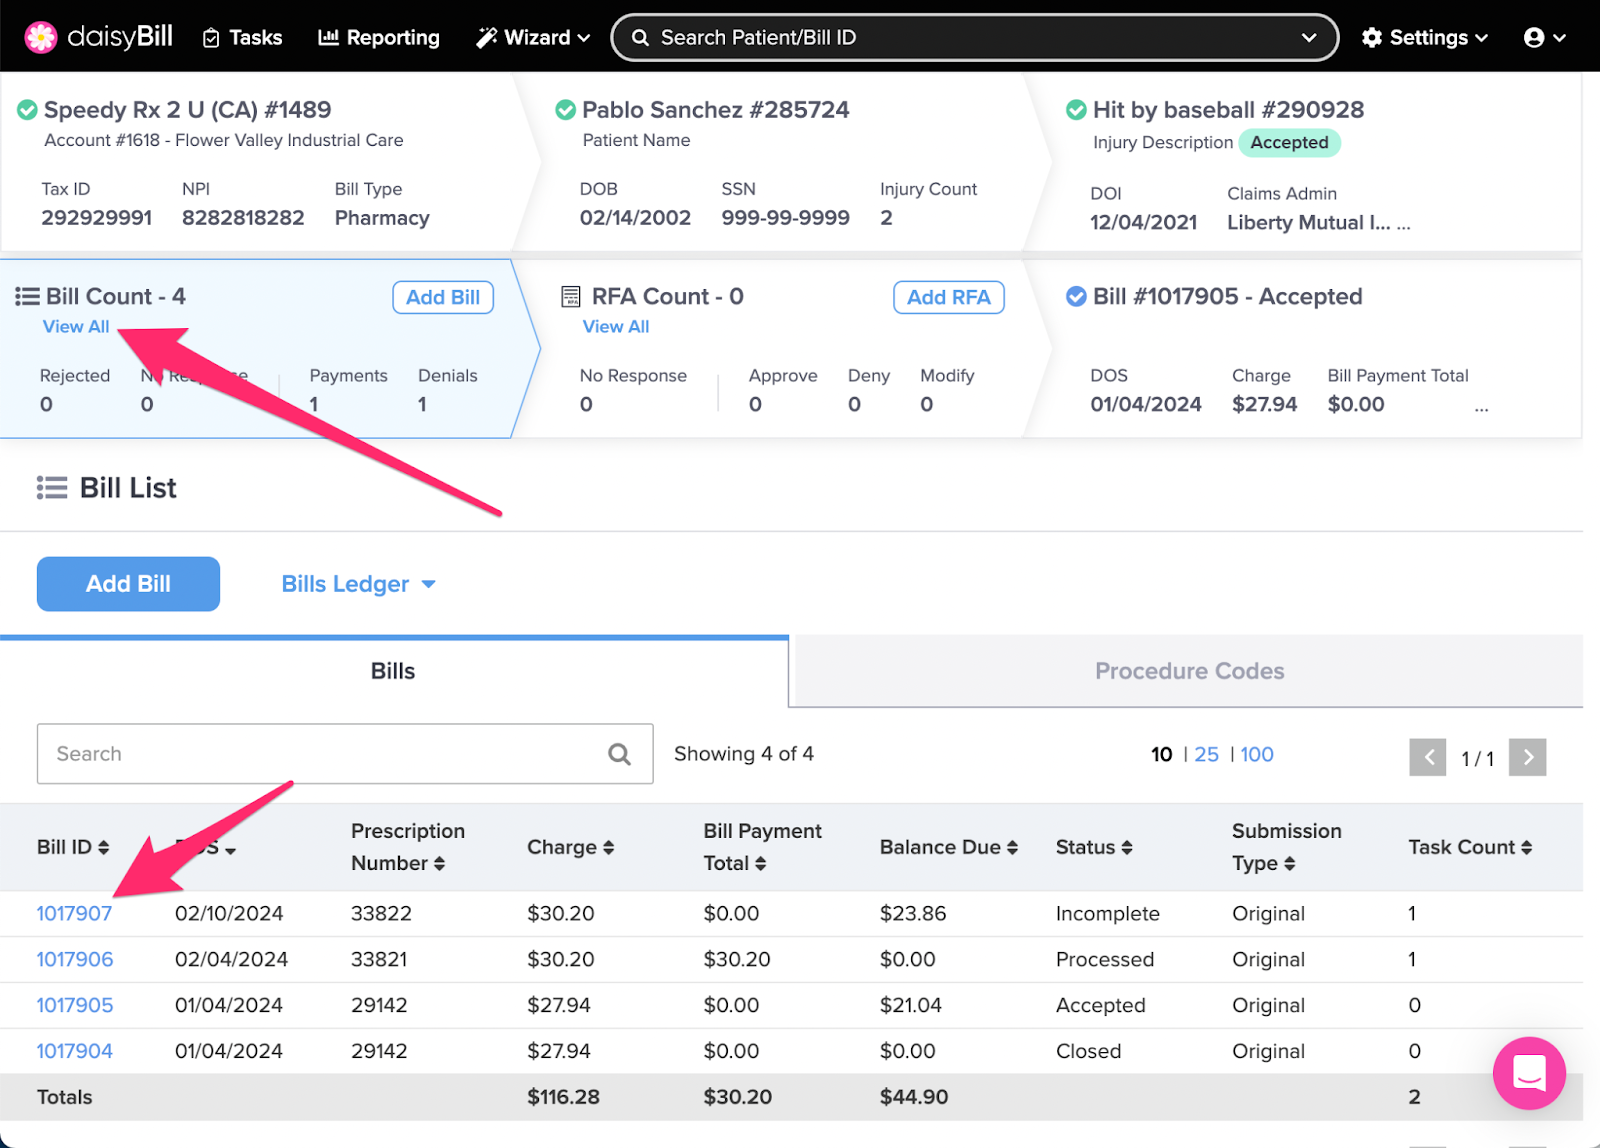
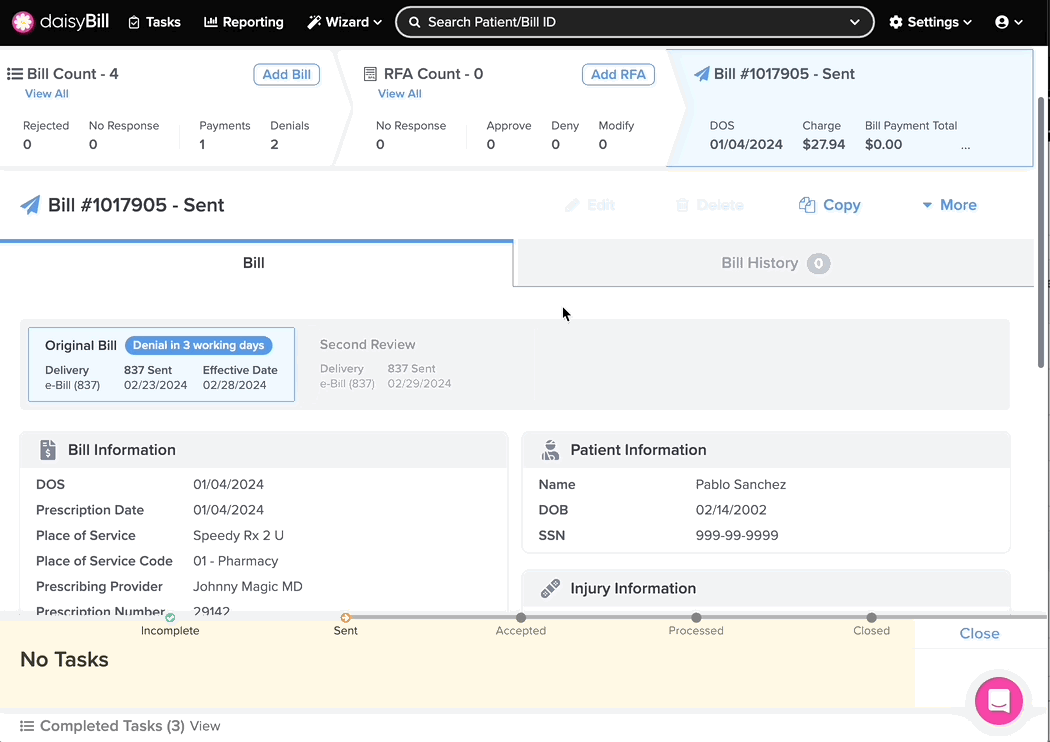
Here we are. The main event! From the Bill Page view and work Bills.
You can manage bills with these functions:
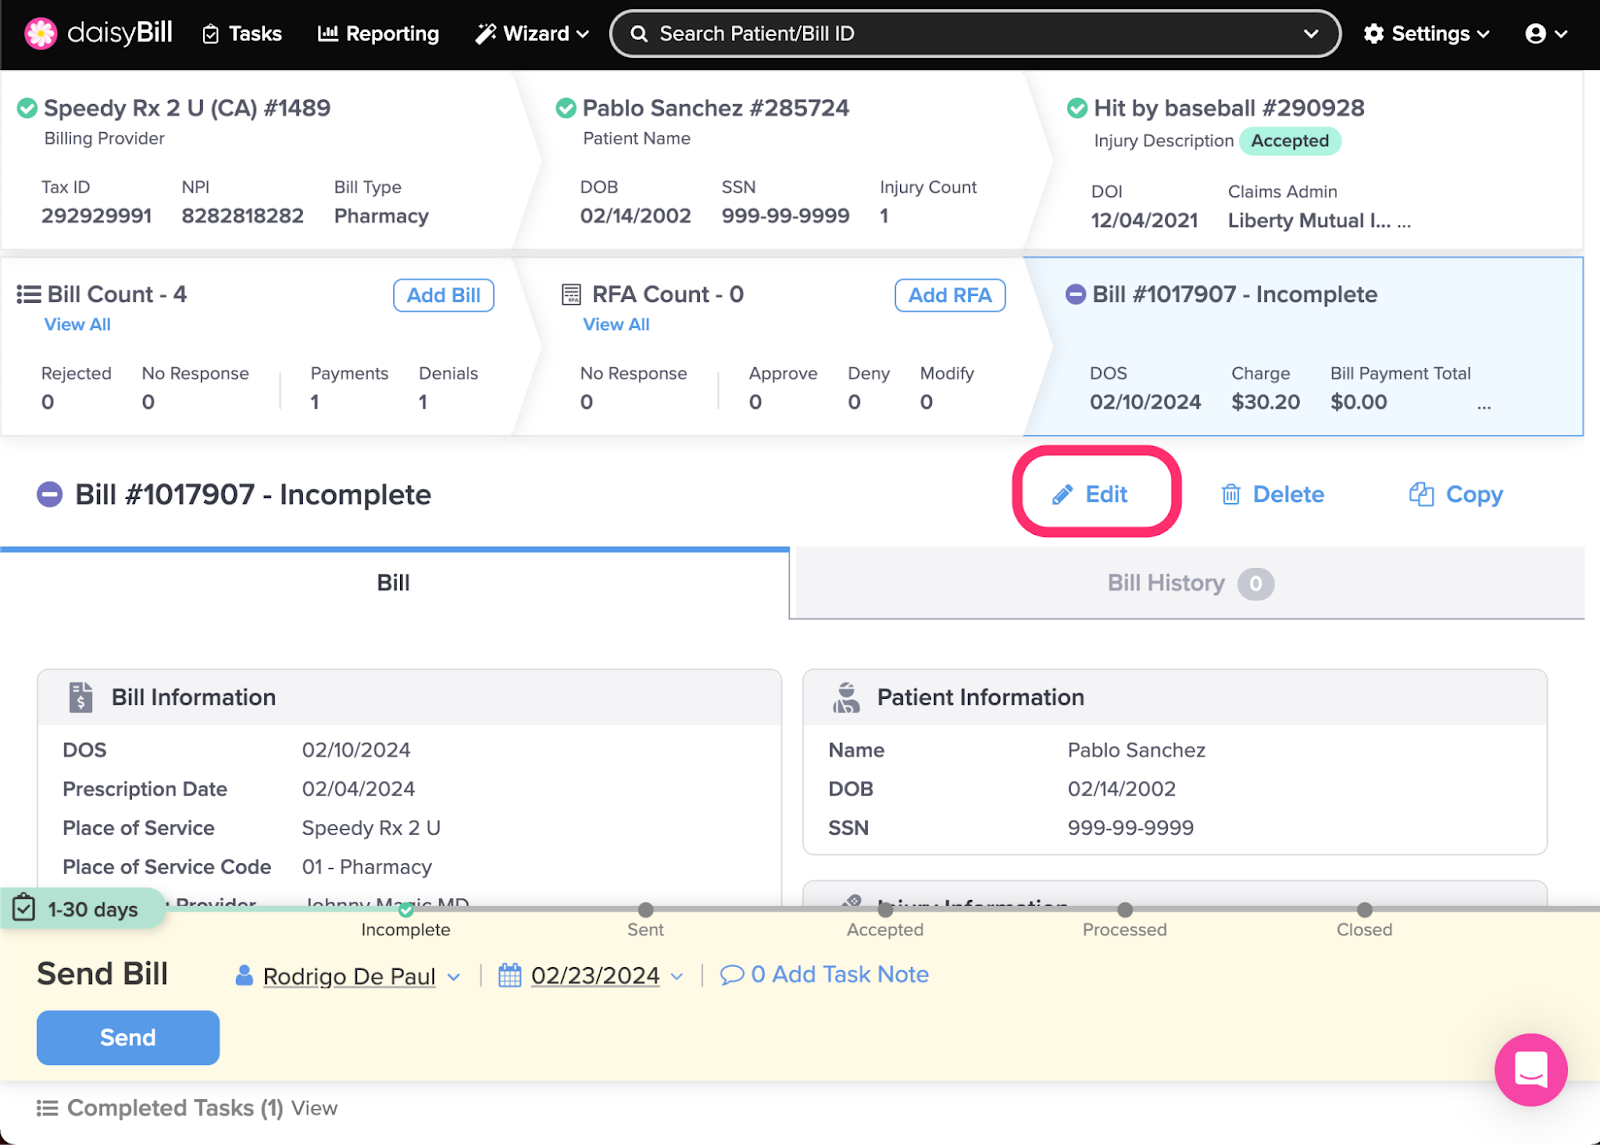
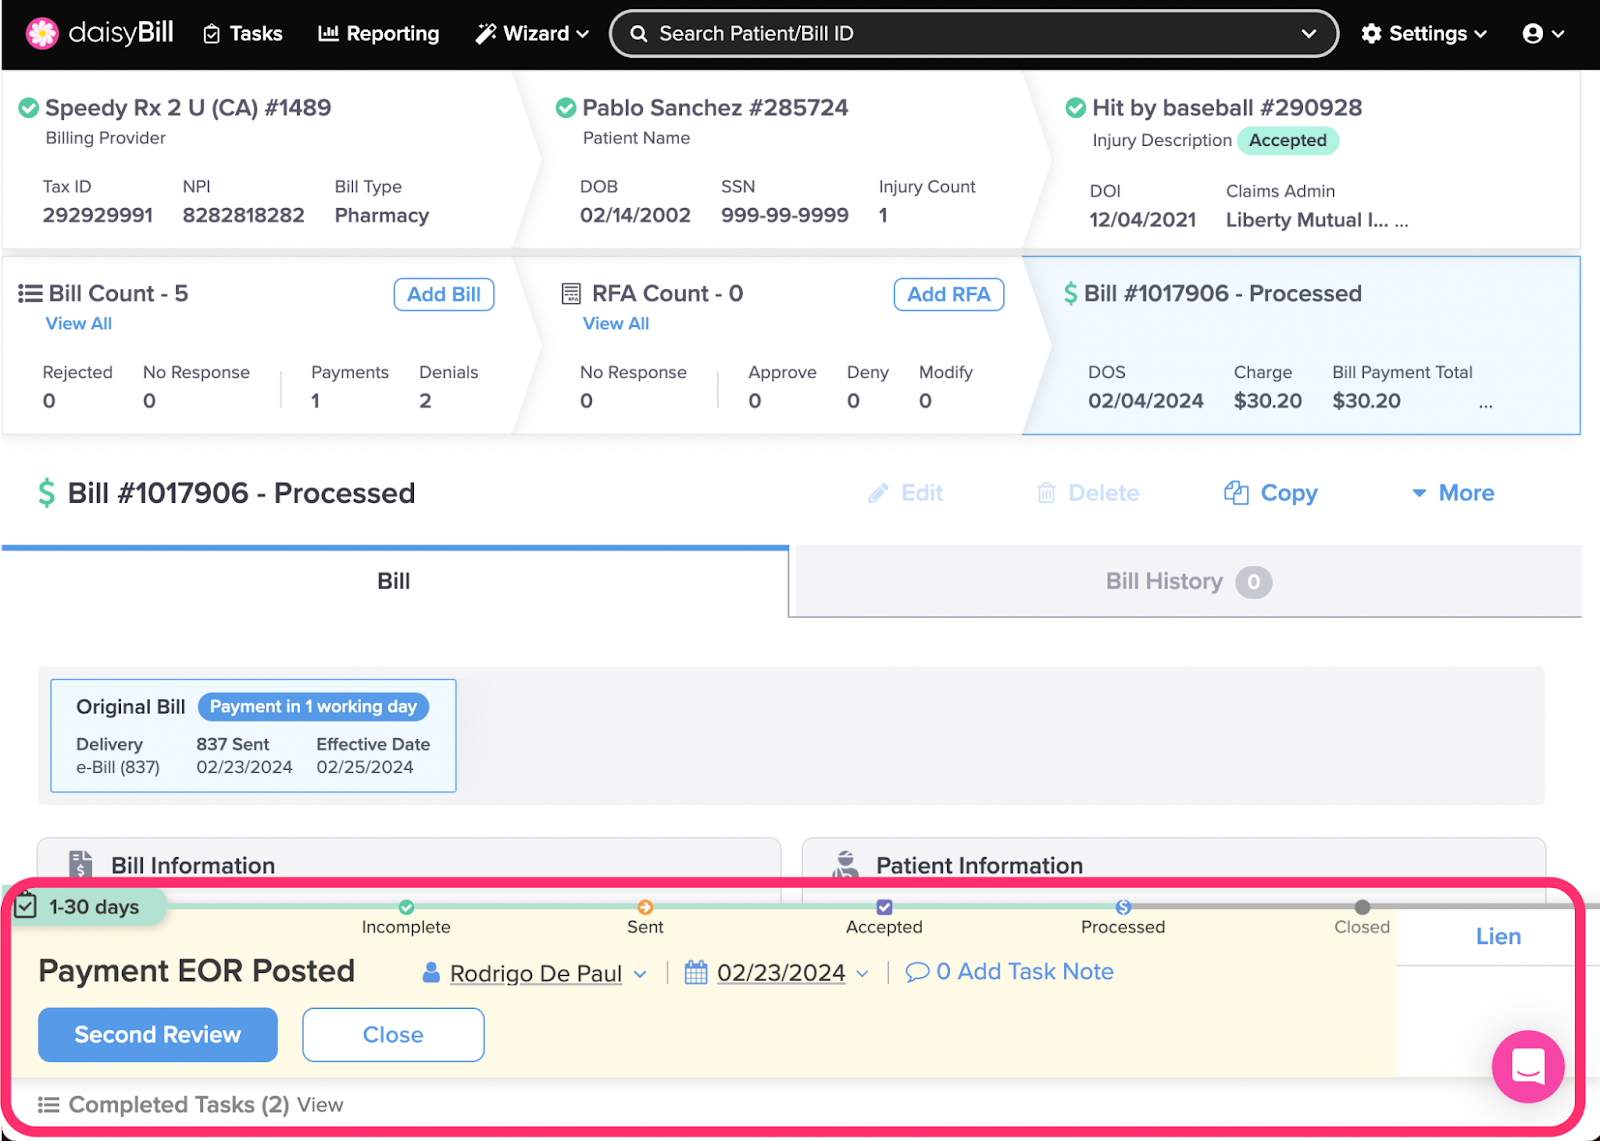
A. To edit a Bill, click ‘Edit’
B. To delete a Bill, click ‘Delete’
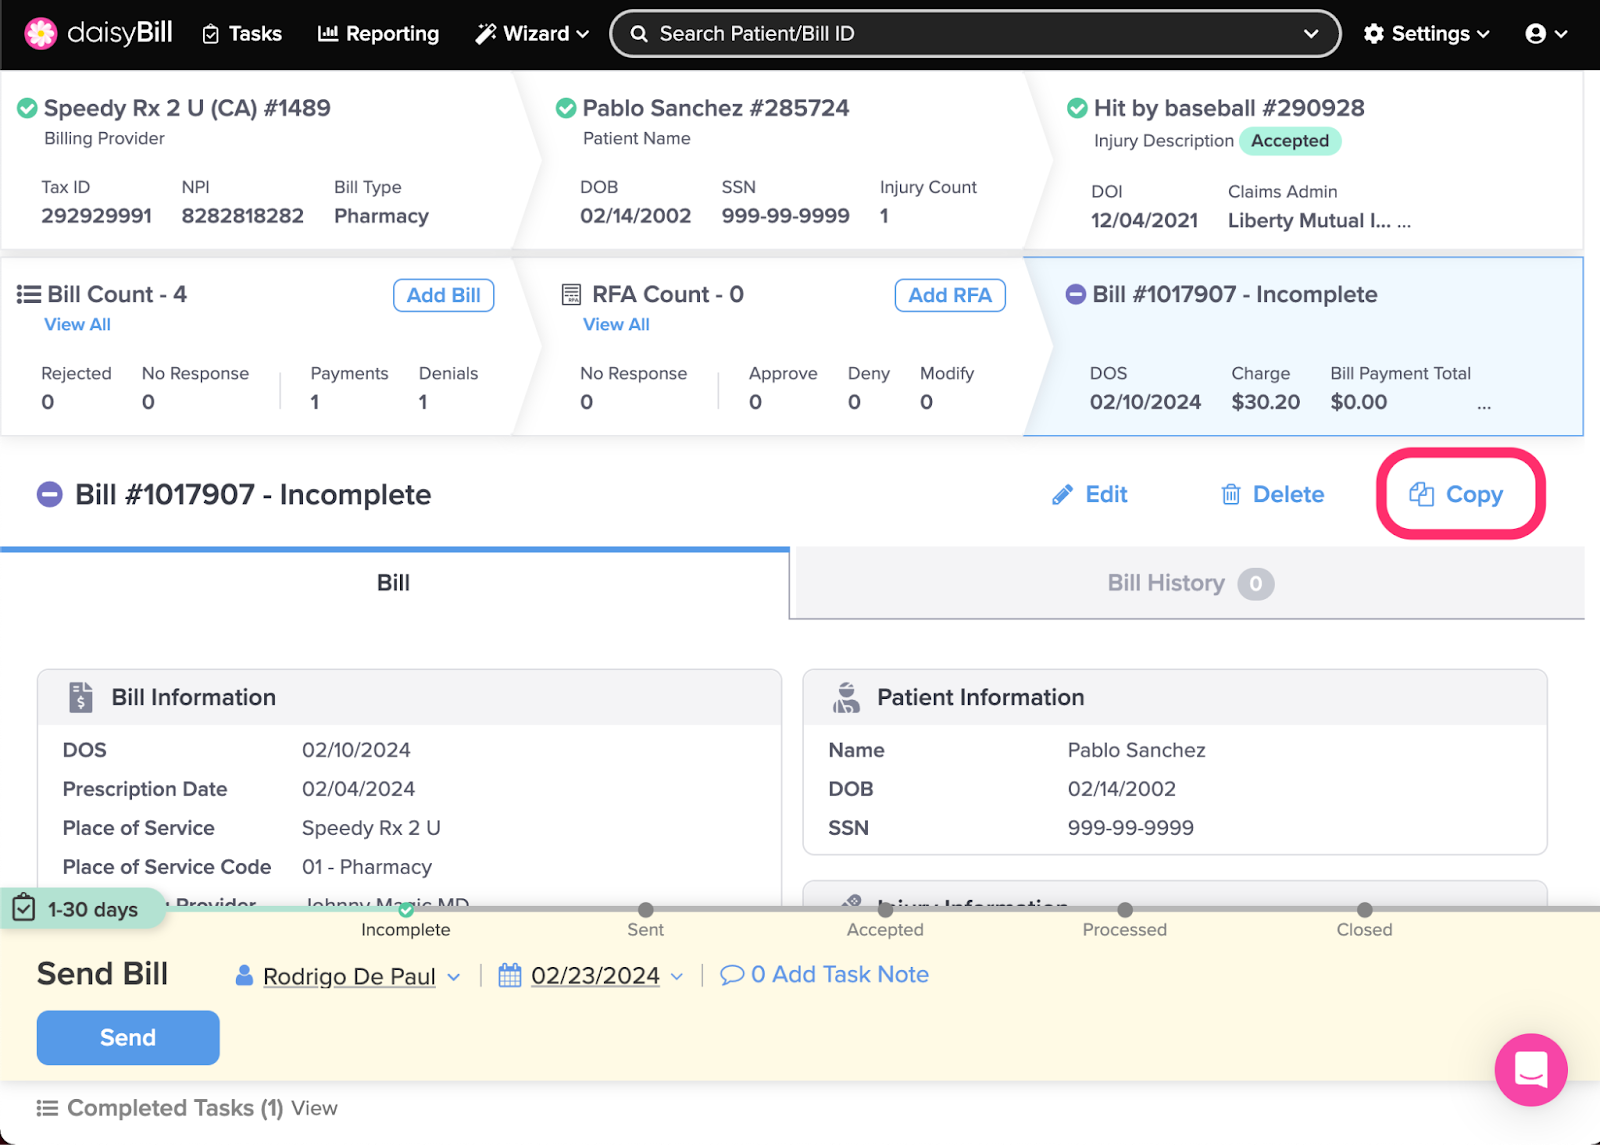
C. To copy a Bill, click ‘Copy’
D. To report a submission error, click ‘More’, then select ‘Report Error’
E. To forward a Bill, click ‘More’, then select ‘Forward’
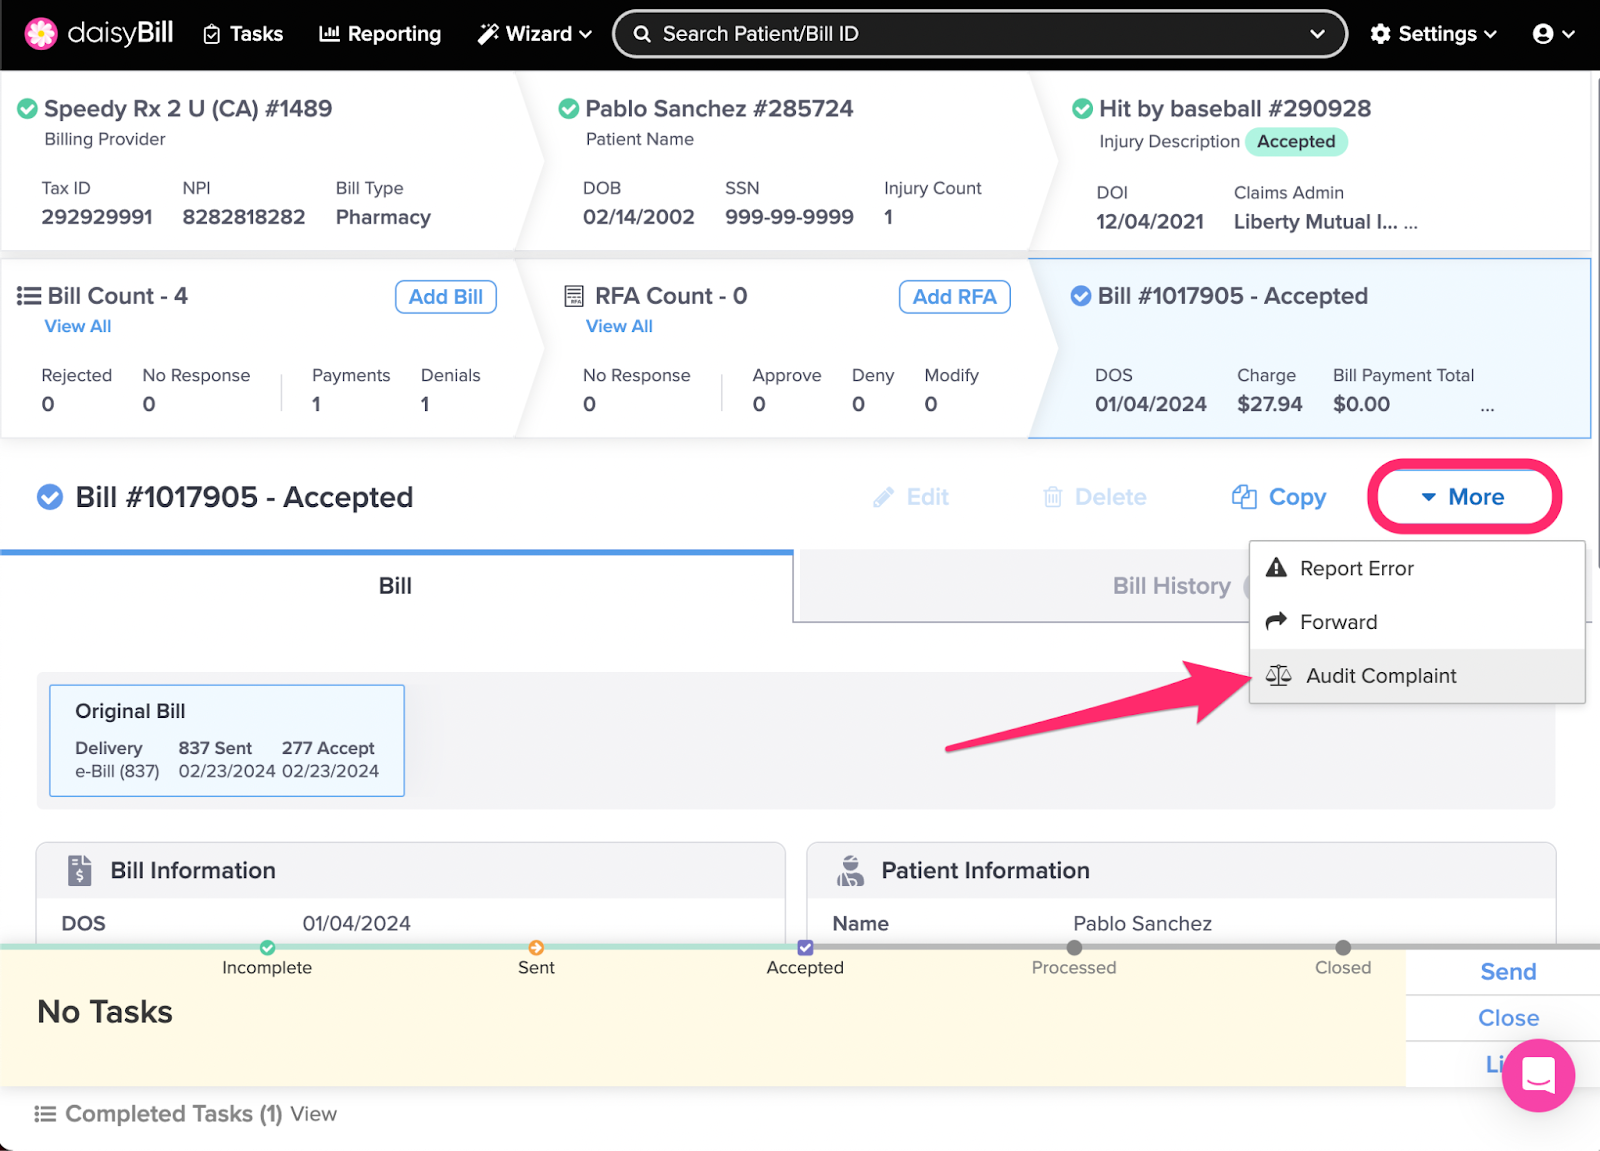
F. To create an Audit Complaint, click ‘More’, then select ‘Audit Complaint’
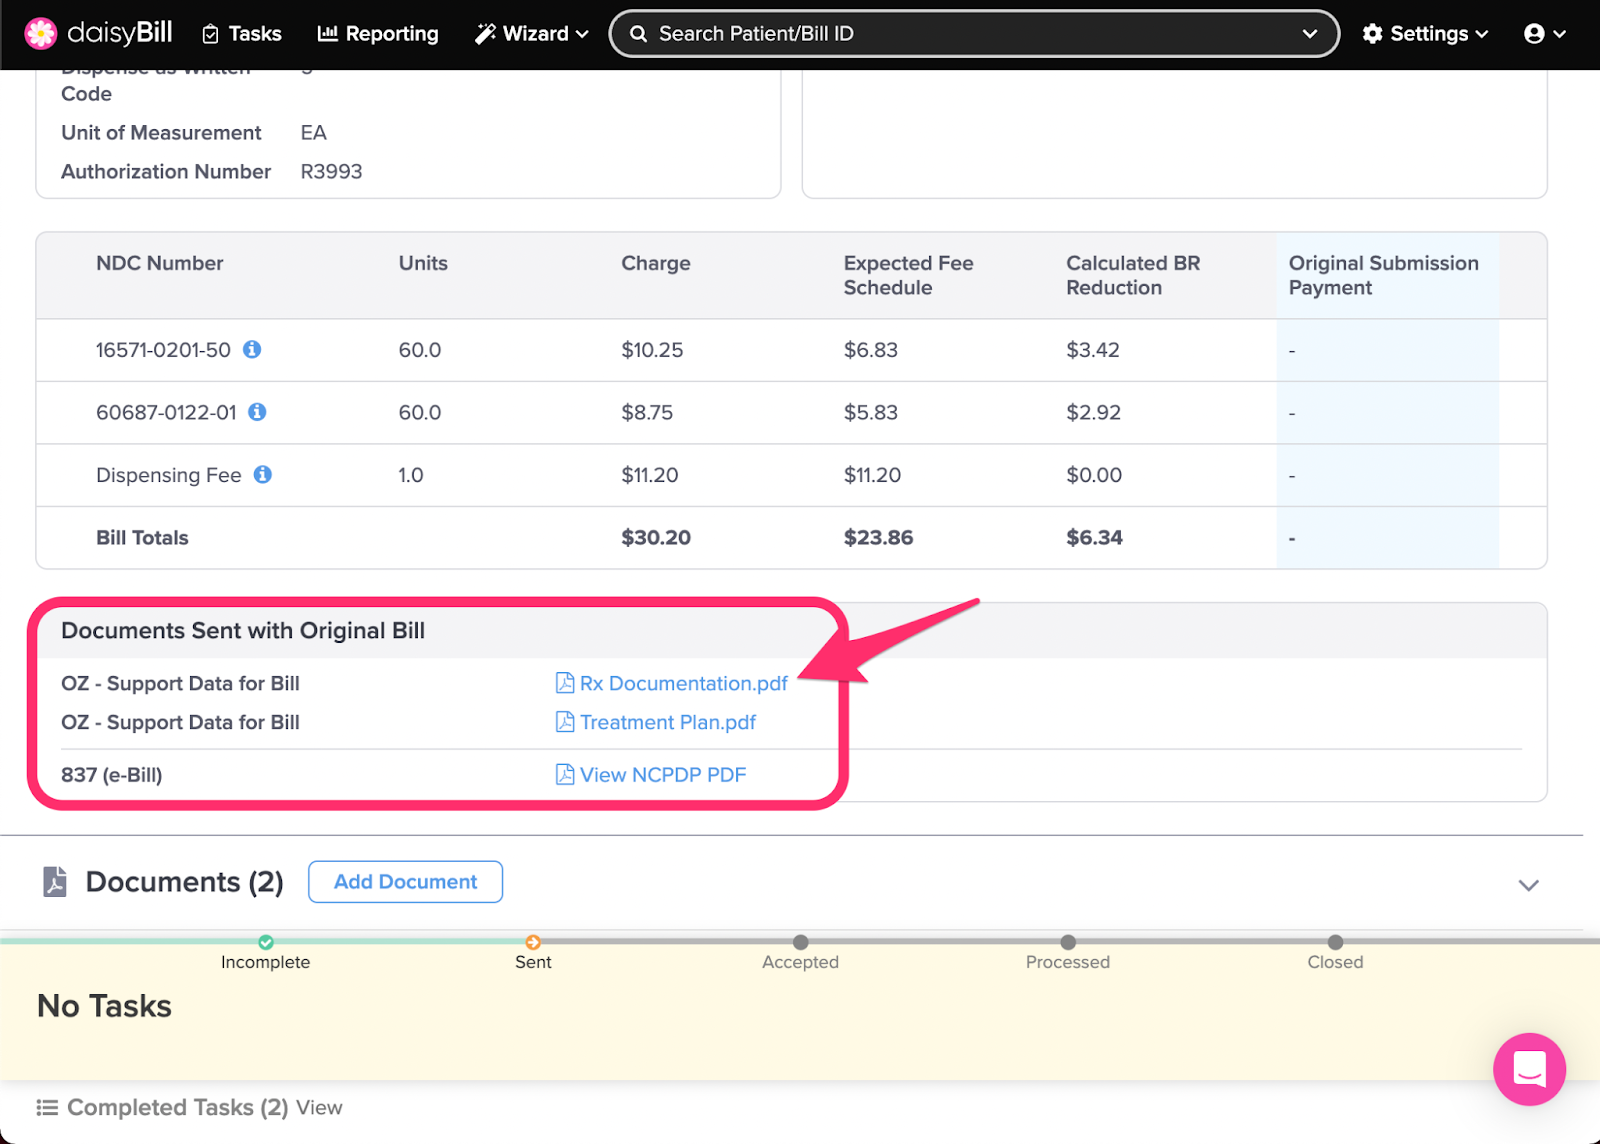
G. To view a Document submitted with your Bill, click its filename under ‘Documents Sent’
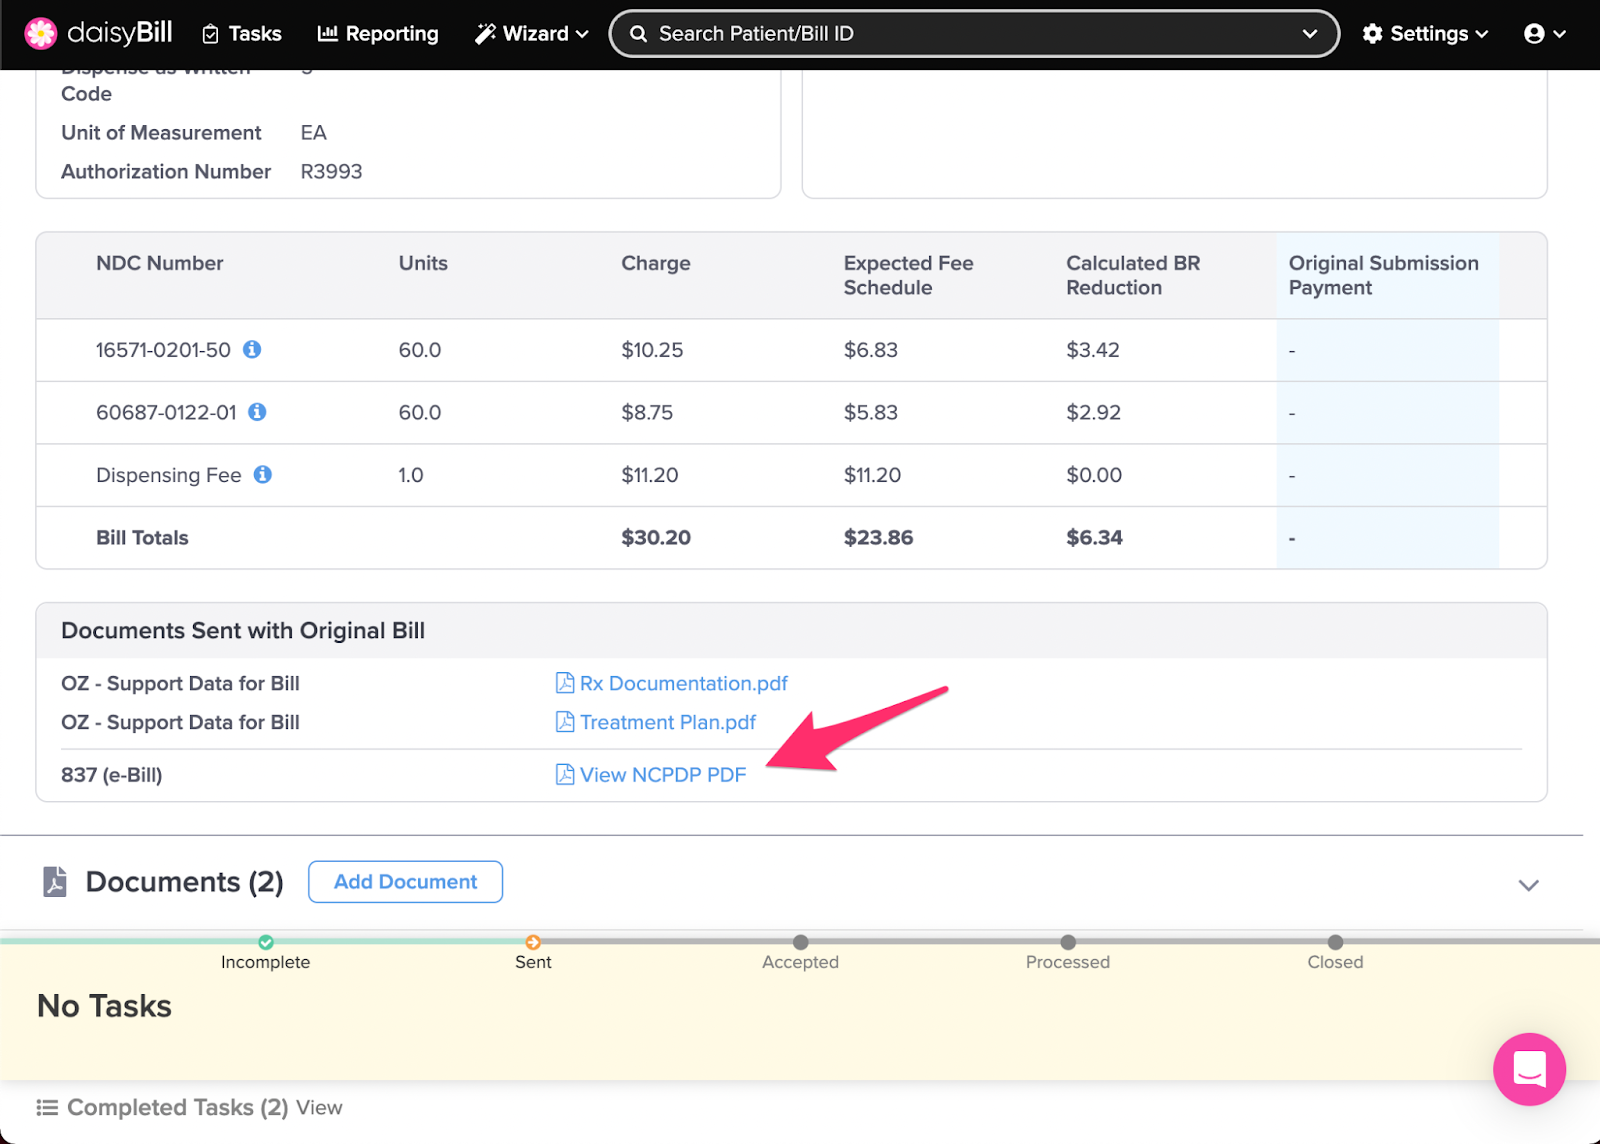
H. To view the NCPDP, click ‘View NCPDP’
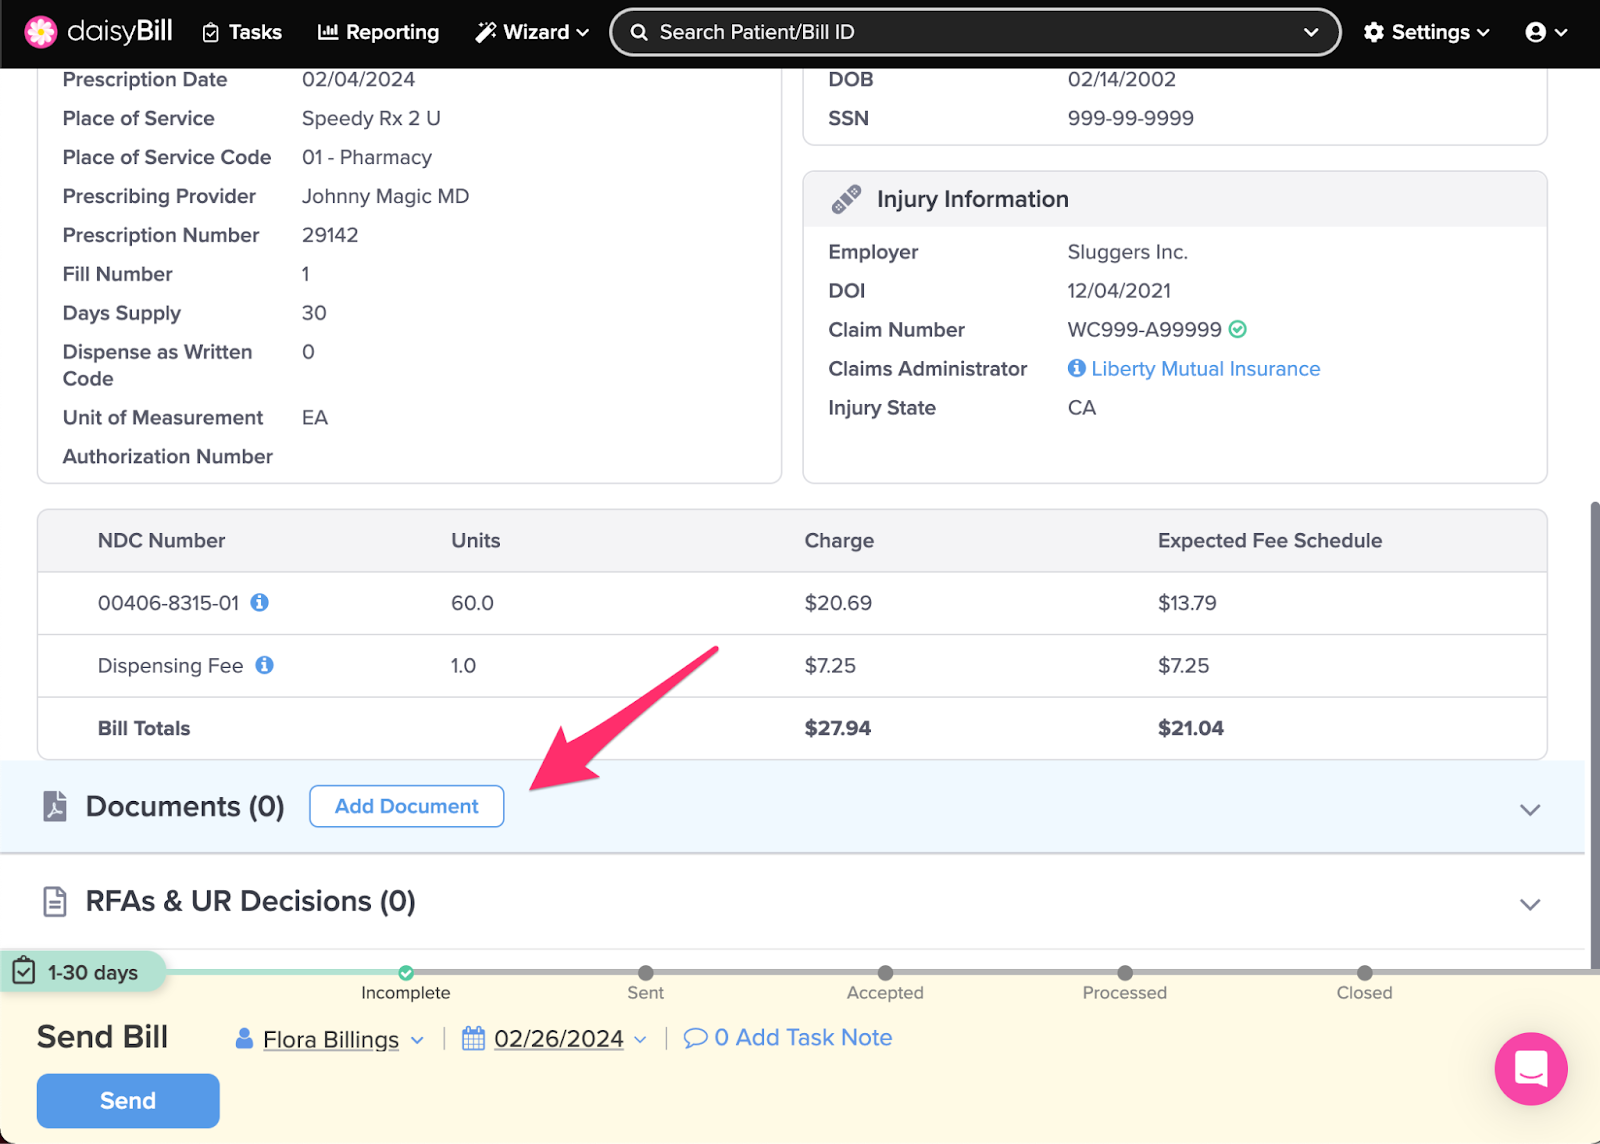
J. To add supporting documents, click ‘Add’
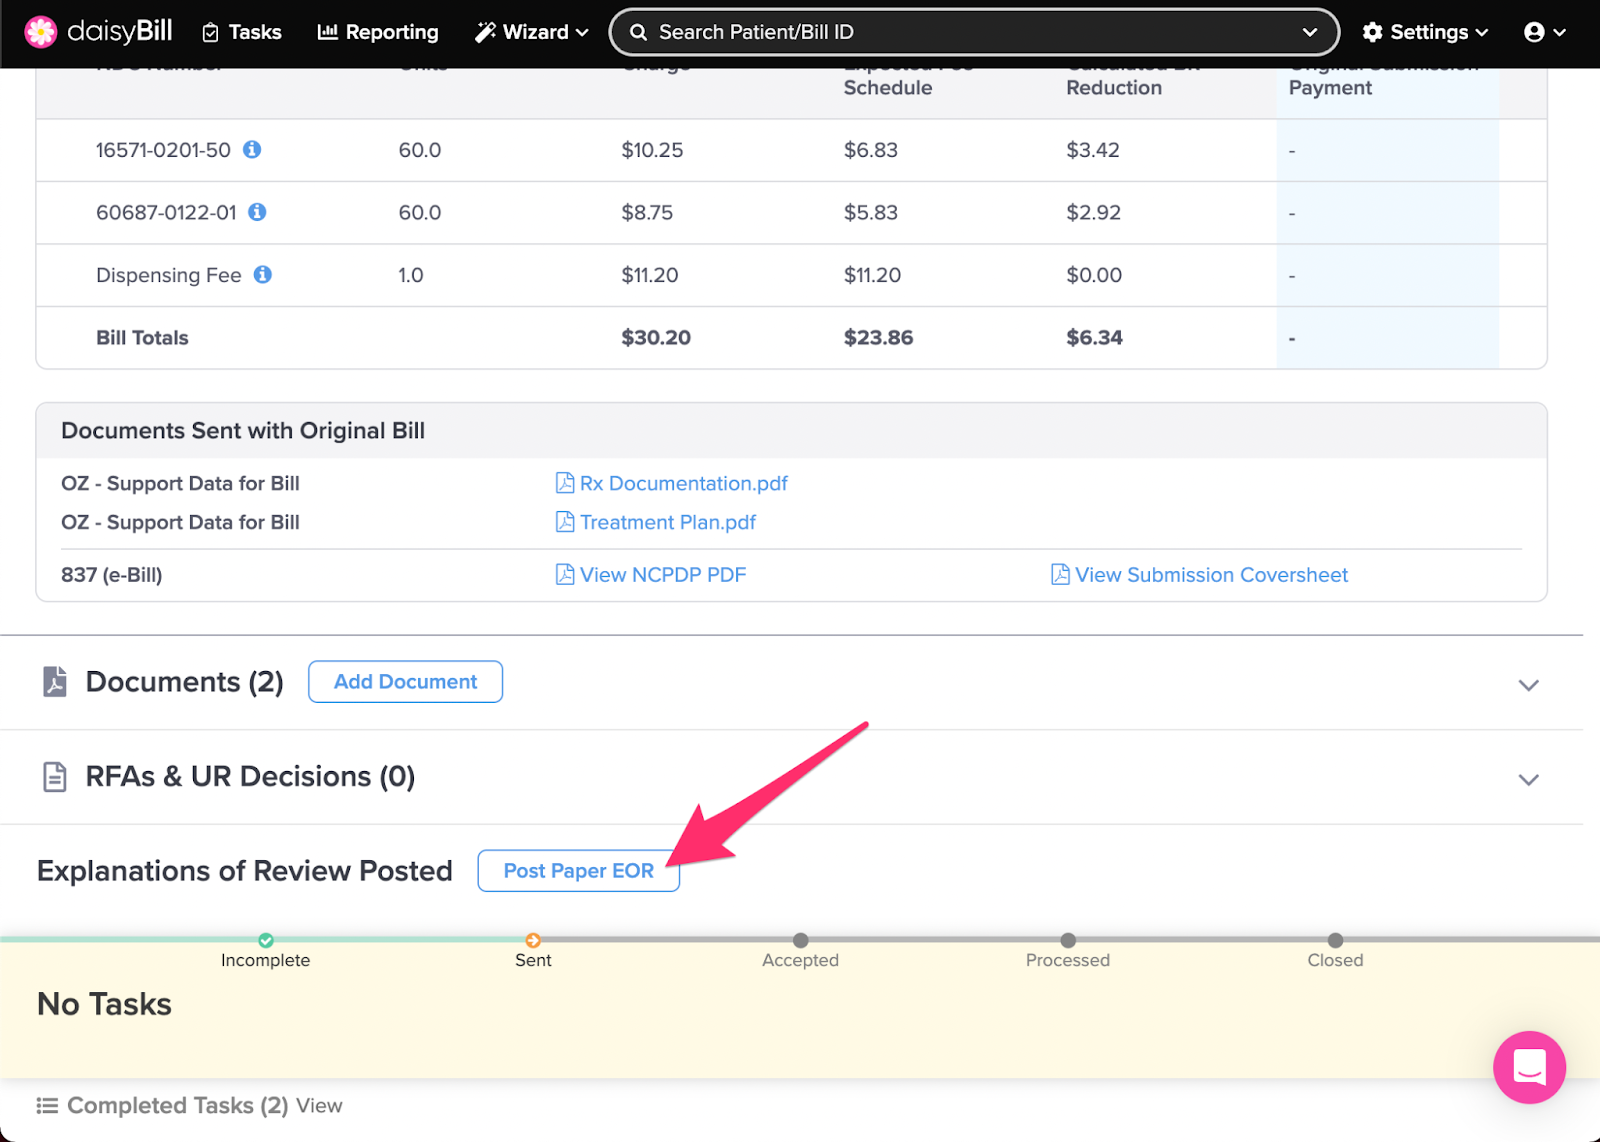
K. To manually post payments, click ‘Post’
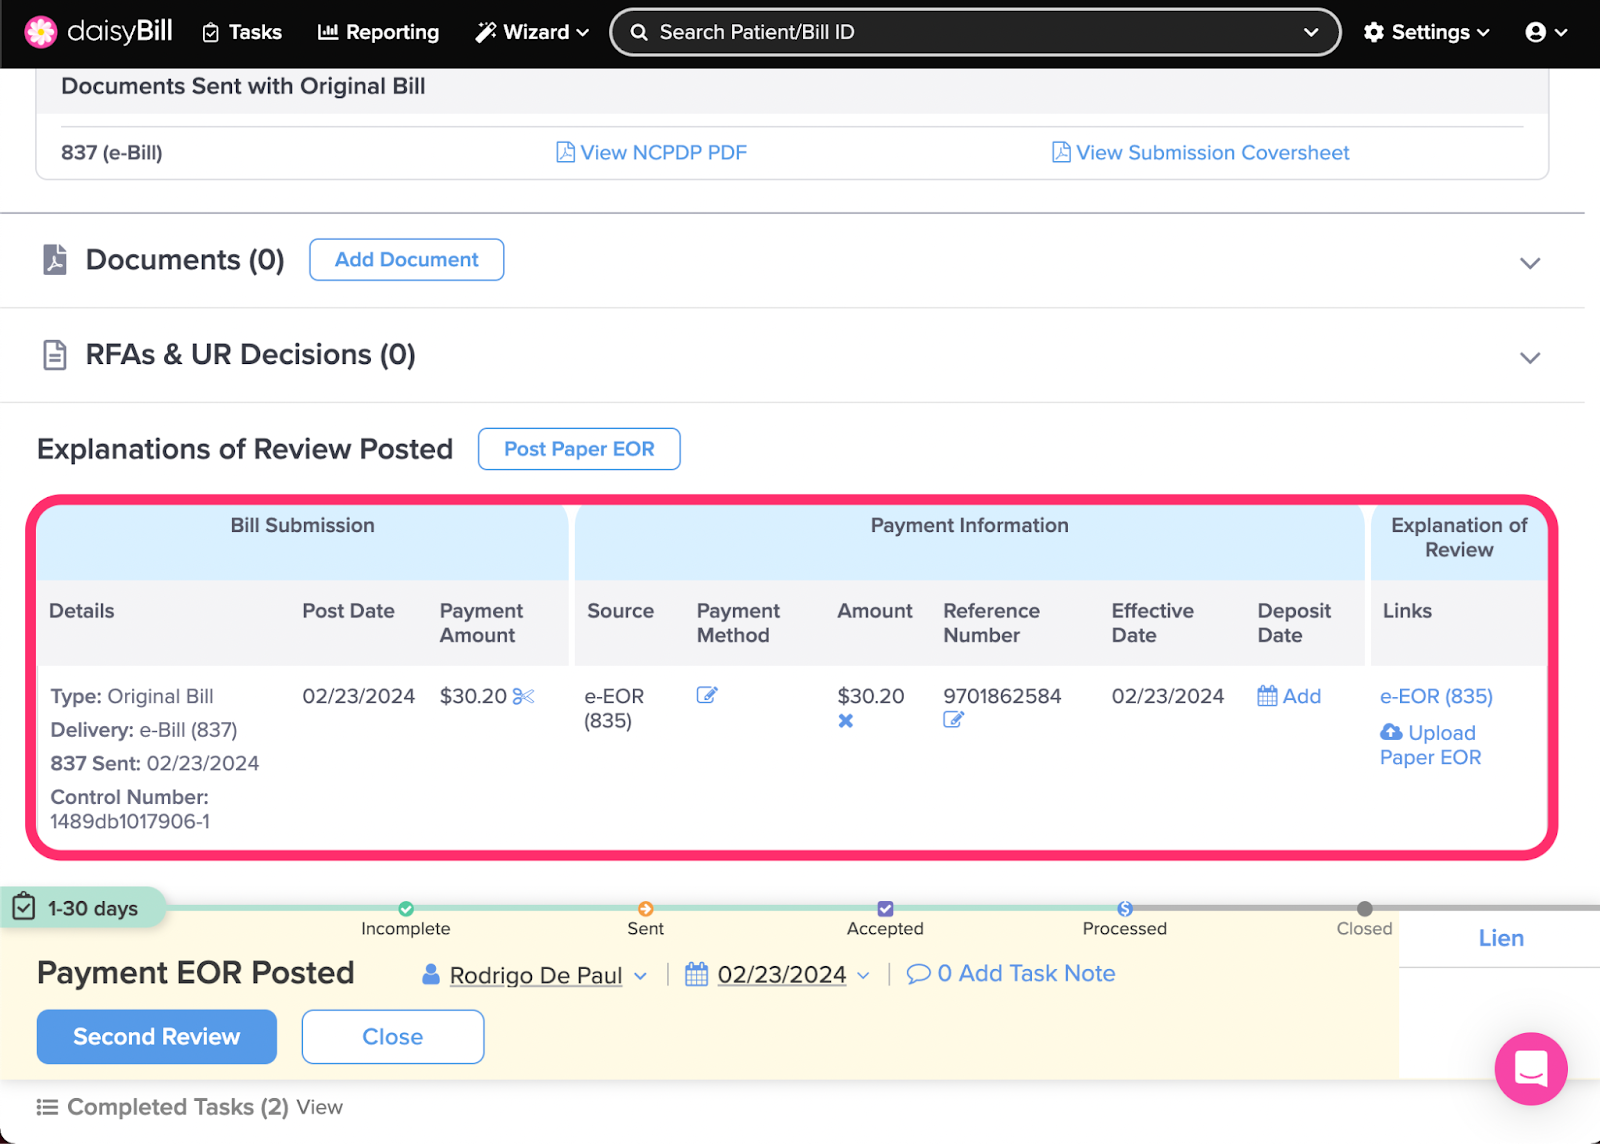
L. To view the posted Payment, click the date under ‘Posted’
M. To view the bill history, click the ‘Bill History’ tab
N. To determine next steps, view the ‘Action Bar’
From ‘List of Bills,’ click on the Bill to view its details
A. To edit a bill, click ‘Edit’
Edit Original Bills in Incomplete or Rejected Status. For more information, see the Help Article: NCPDP Edit Bill.
Once a bill is in Accepted status, it cannot be modified, deleted, or rescinded.
B. To delete a bill, click ‘Delete’
Remember, you can’t delete a Bill after submission. For more information, see the Help Article: Delete Bill.

C. To copy a bill, click ‘Copy’
Copy Bill creates an editable duplicate of the current Bill. For more information, see the Help Article: NCPDP Copy Bill.
D. To report a submission error, click ‘More,’ then select ‘Report Error’
The Report Error button appears after you submit the bill. For more information, see the Help Article: Report Error.
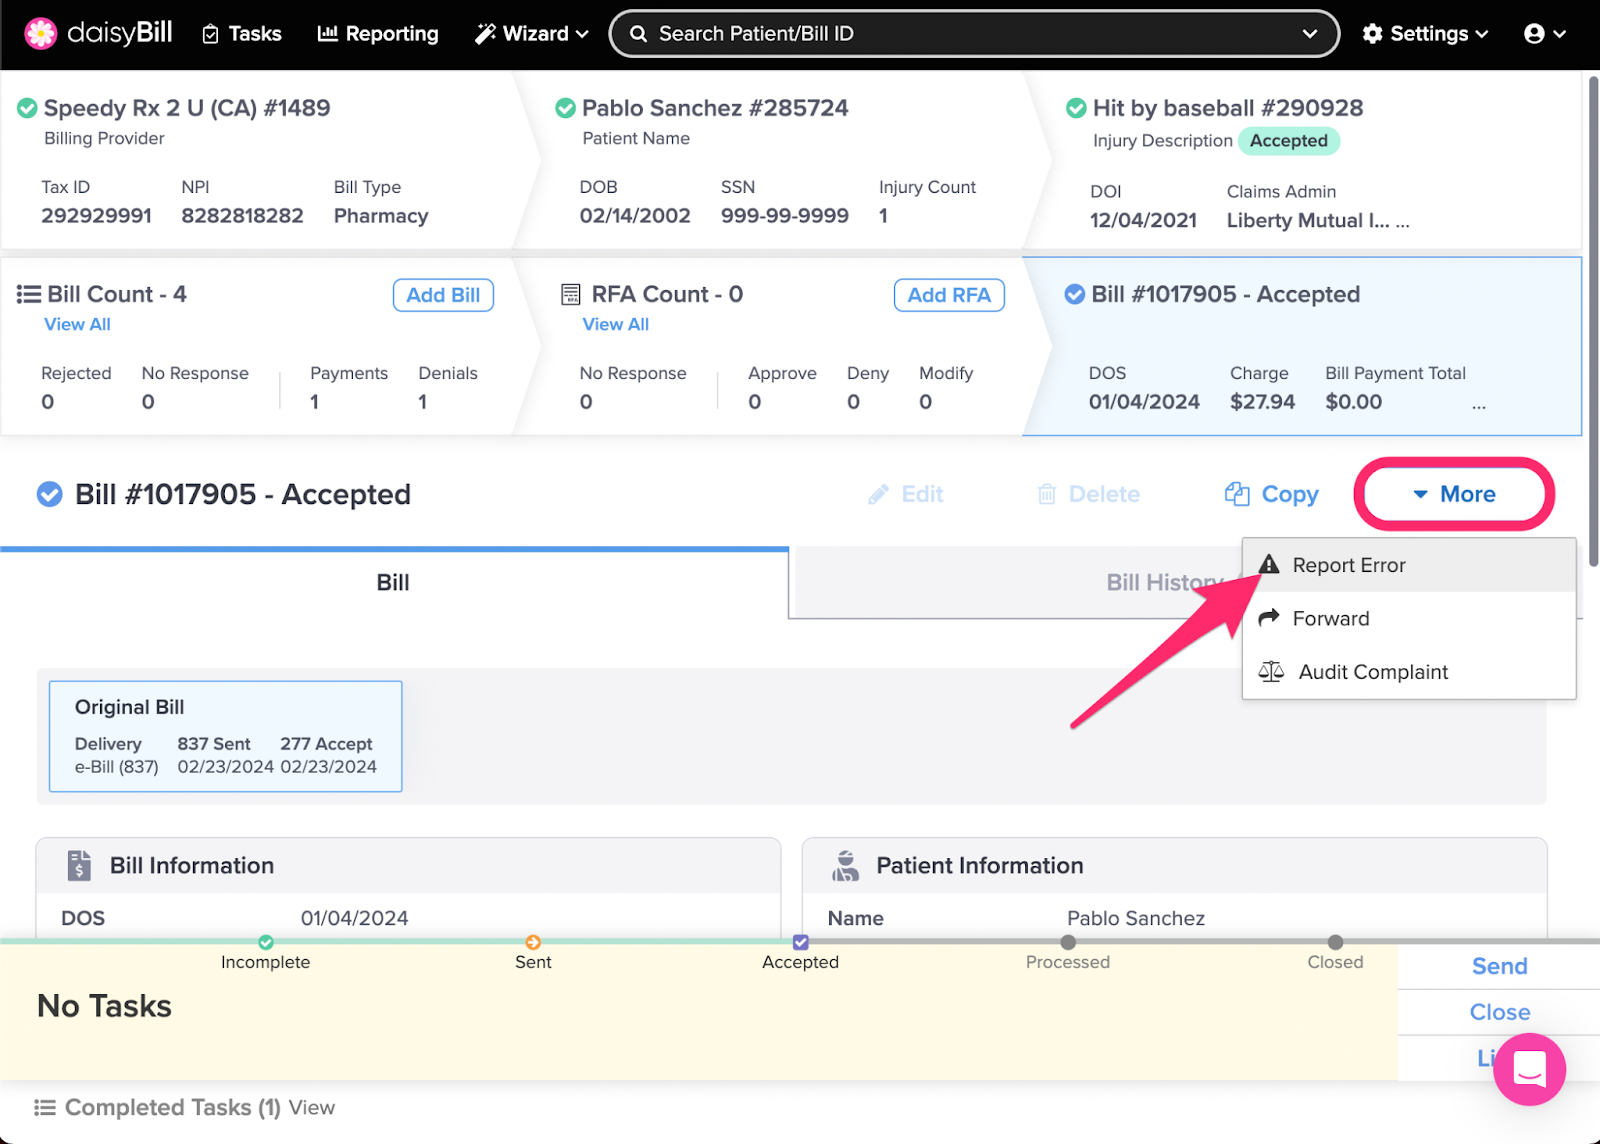
E. To forward a Bill, click ‘More’, then select ‘Forward’
The Forward feature appears after you submit the Bill. For more information, see the Help Article: Forward Bill Submission.
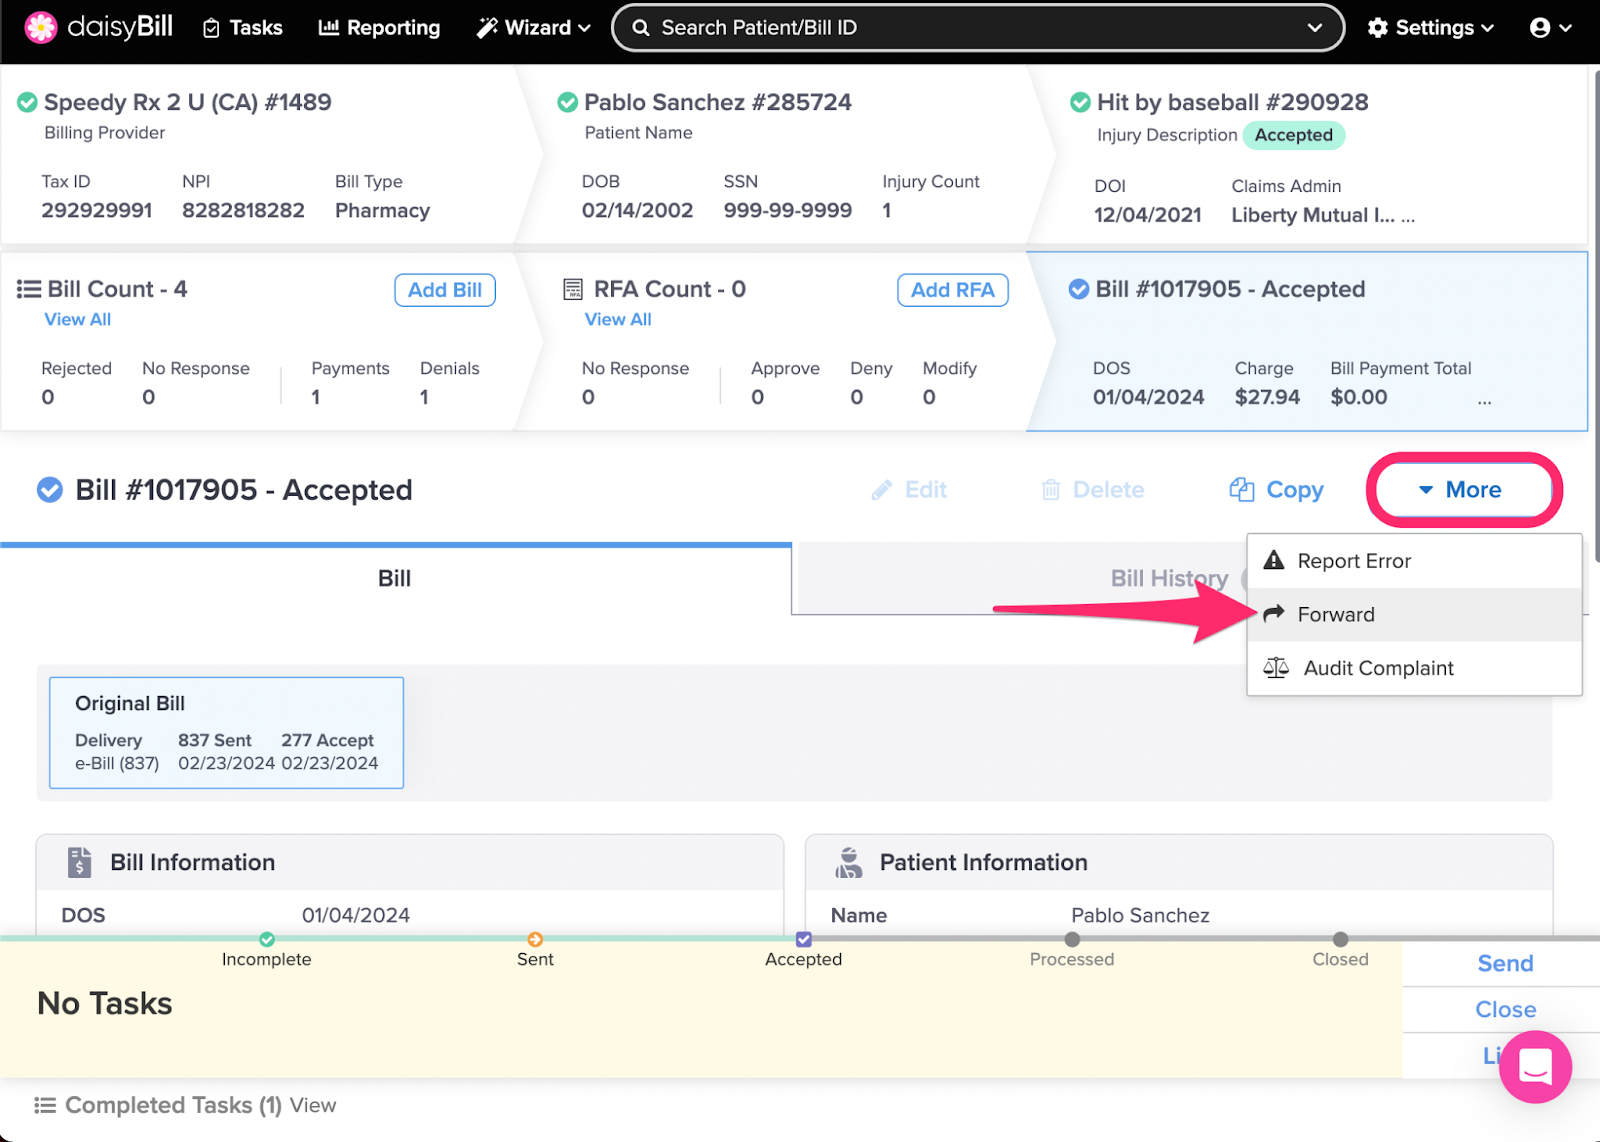
F. To create an Audit Complaint, click ‘More’, then select ‘Audit Complaint’
The Audit Complaint feature appears after you submit the Bill. For more information, see the Help Article: Create Audit Complaint.
G. To view a Document submitted with your Bill, click its filename under ‘Documents Sent’
The Documents Sent section appears after you send a Bill.
H. To view the NCPDP, click ‘View NCPDP’
The View NCPDP feature appears after you submit a Bill. For more information, see the Help Article: View NCPDP.
I. To view a particular type of bill submission, click the appropriate ‘Submissions’ tab
J. To add supporting documents, click ‘Add’
daisyBill requires most Bills to be submitted with at least one document. Documents should support the charges on the Bill. Documents can be added even after a Bill has been submitted. For more information, see the Help Article: Documents - Add / View / Edit / Delete.
K. To manually post payments, click ‘Post Paper EOR’
For more information, see the Help Article: Post: Paper EOR.
L. To view posted payments, refer to the ‘Explanations of Review Posted’ section
The Payment section is comprised of Bill Payment and Payment Information. Bill Payment shows the specific payment amount applied to the Bill. Payment Information shows the entire Payment amount issued and the Paper Check/EFT/Virtual Credit Card details. For more information, see the Help Article: Bill Payments Explained.
M. To view the bill history, click the ‘Bill History’ tab
Bill History displays submission information, Task creation and completion information, claims administrator acknowledgements, payment information, and notes. The number next to Bill History indicates the number of notes. For more information, see the Help Article: Bill History Explained

N. To determine next steps, view the task assigned in the ‘Action Bar’
The Action Bar provides information on the submission and prompts you on the next action.
Did you ever think it would be this easy?