Some claims administrators refuse to accept electronic bills, or fail to remit electronic Explanations of Review (EORs) for electronically submitted bills.
This is non-compliant behavior. Both failures require manual posting of the Paper EOR, mailed to the provider from the claims administrator. Follow the instructions below to properly post a Paper EOR.
For 835 electronic EORs, do not post the paper EOR. This results in double posting. Instead, maintain a precise record of reimbursement by uploading the paper EORs to all electronically posted bills. For more information, see the Help Article: Upload / View / Delete Paper EOR.
$0 Payment or Denial: Posting $0 reimbursements is necessary for both Original Bills and any subsequent Second Bill Reviews / Appeals. For more information, see the Help Article: Post: $0 Reimbursement or Denial.
Bulk / Multiple Bill Payments: Claims administrators often remit a single check that reimburses multiple bills. Manually posting a Bulk Payment differs slightly from posting a check representing reimbursement for a single bill. For more information, see the Help Article: Post: Multiple Bill Payment.
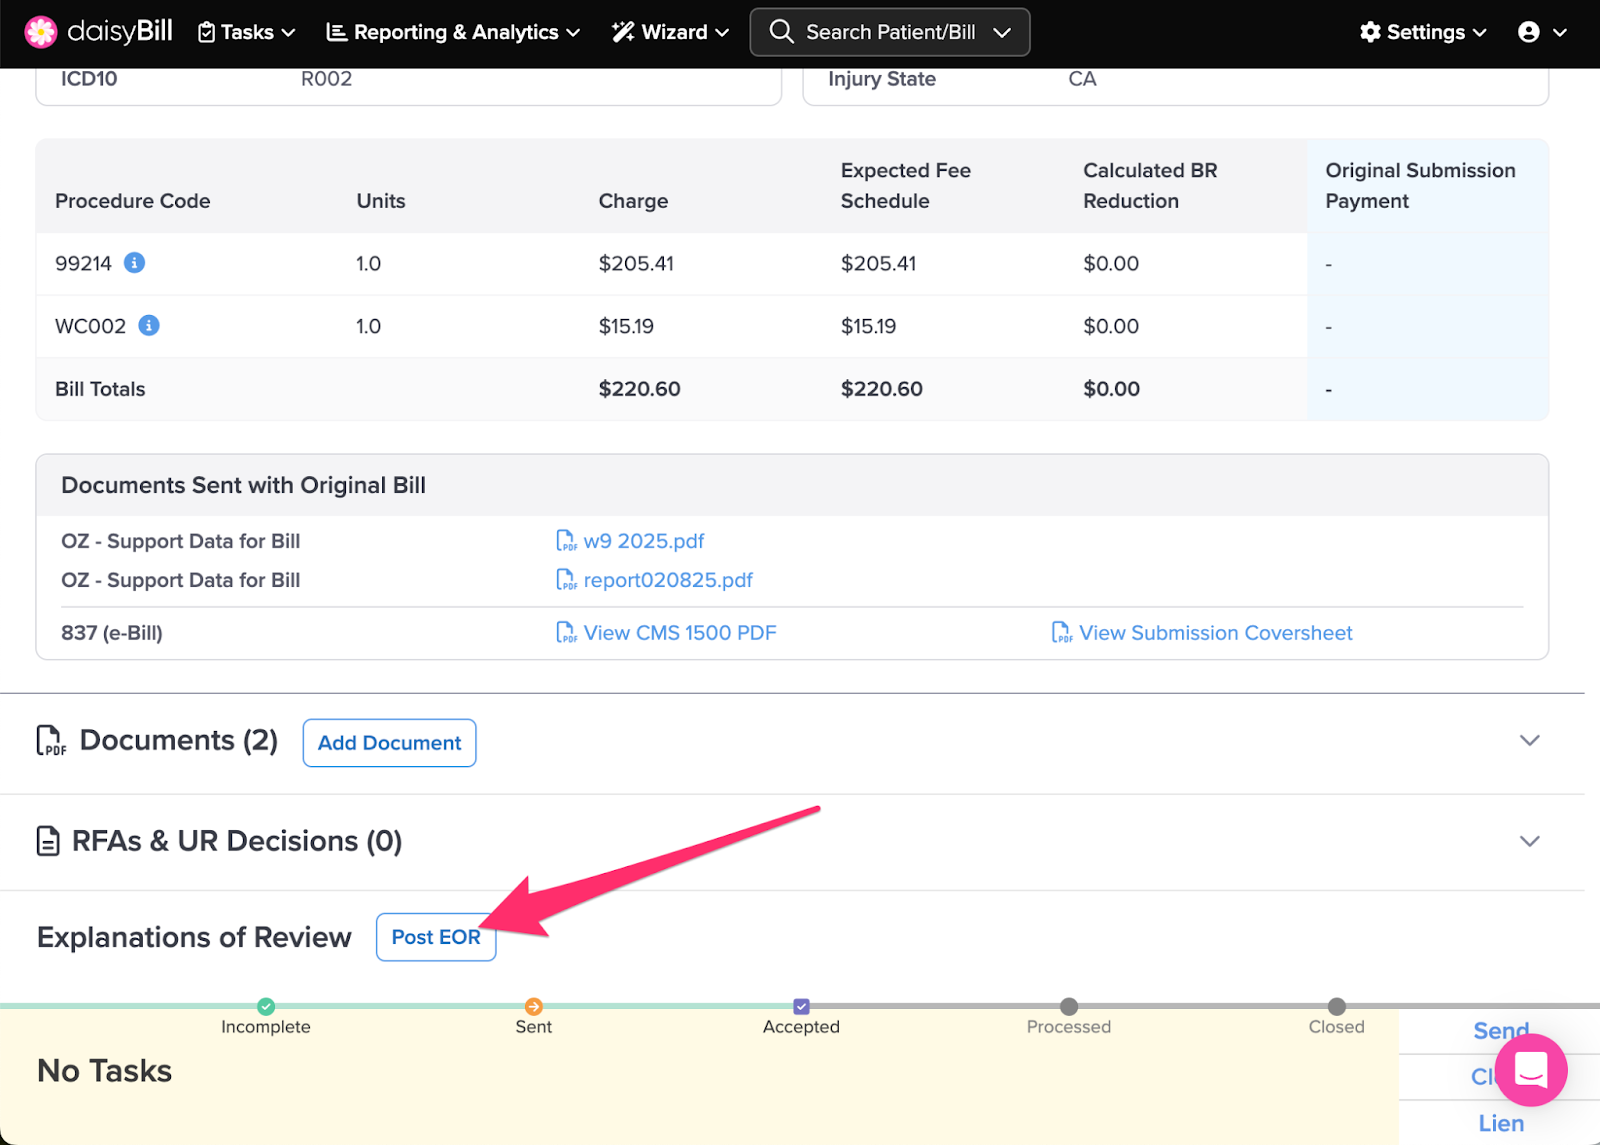
Step 1. Navigate to the bill matching the EOR, then review prior postings
To prevent duplicate posting, review previous payments, if any. If identical payments are listed, do not duplicate post.
Step 2. Click ‘Post EOR’
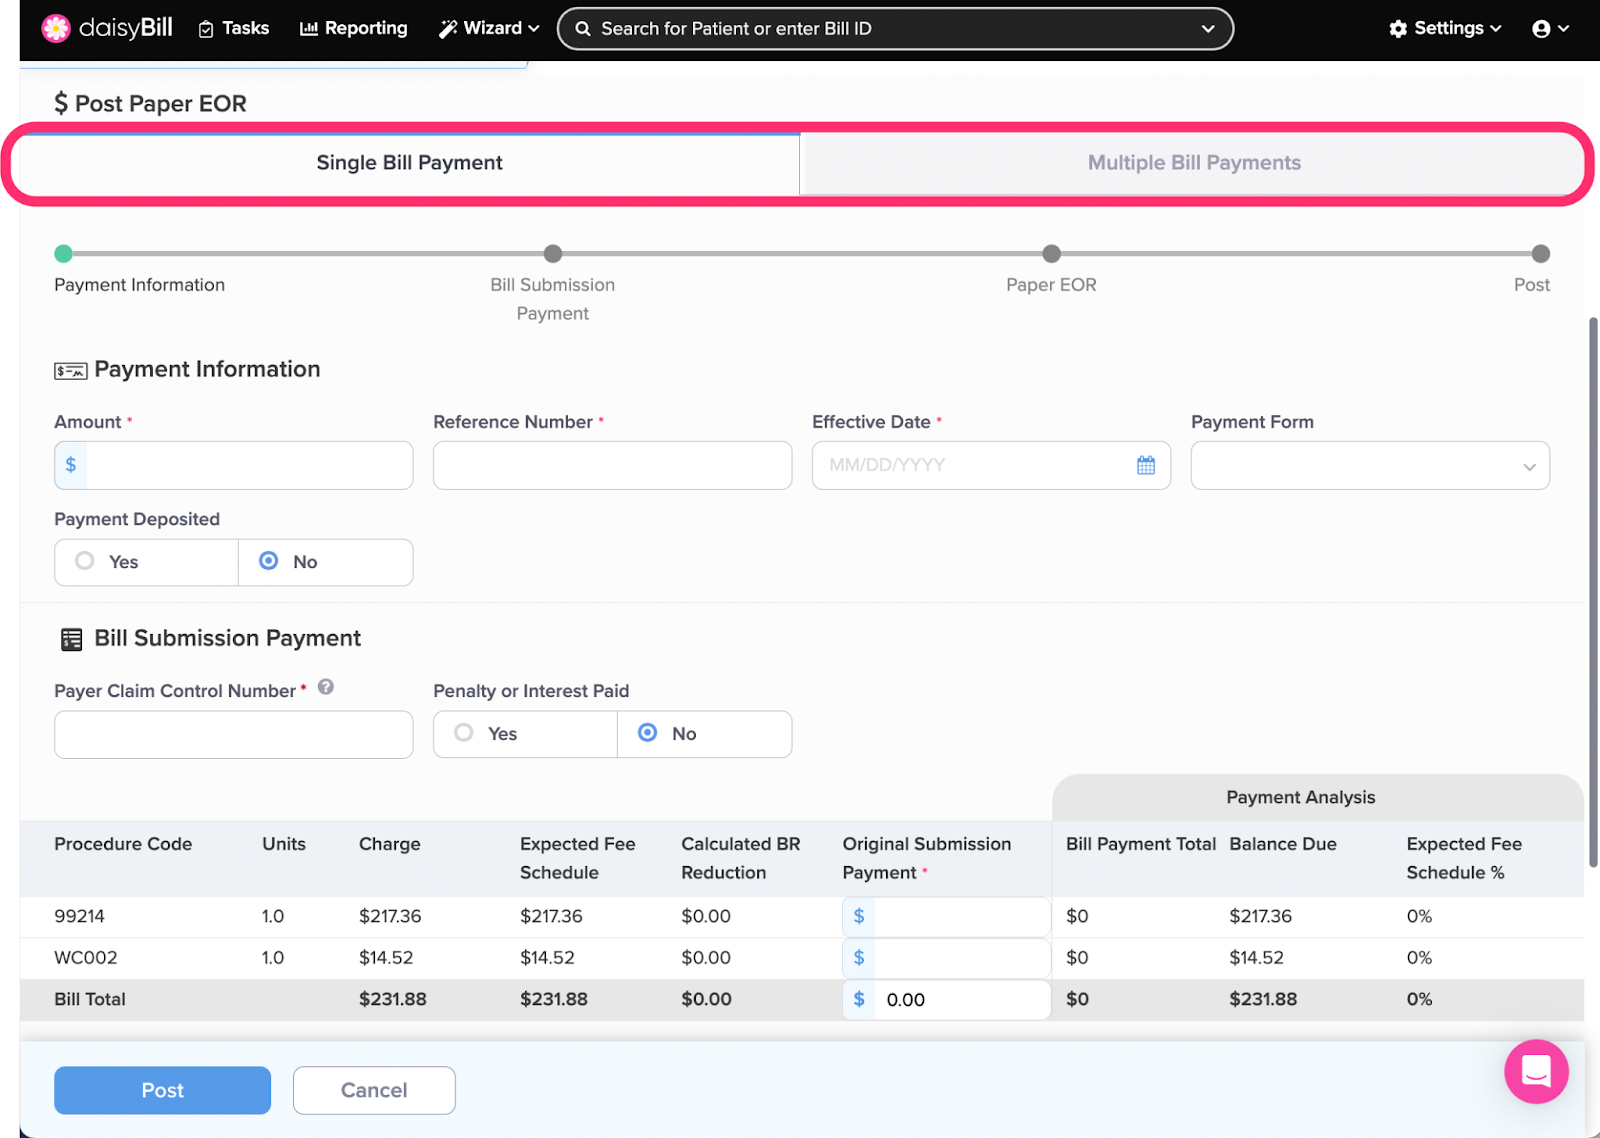
 Step 3. Determine whether the Payment is for a Single Bill or Multiple Bills.
If the payment issued is for multiple Bills, please see the Help Article: Post: Multiple Bill Payment.
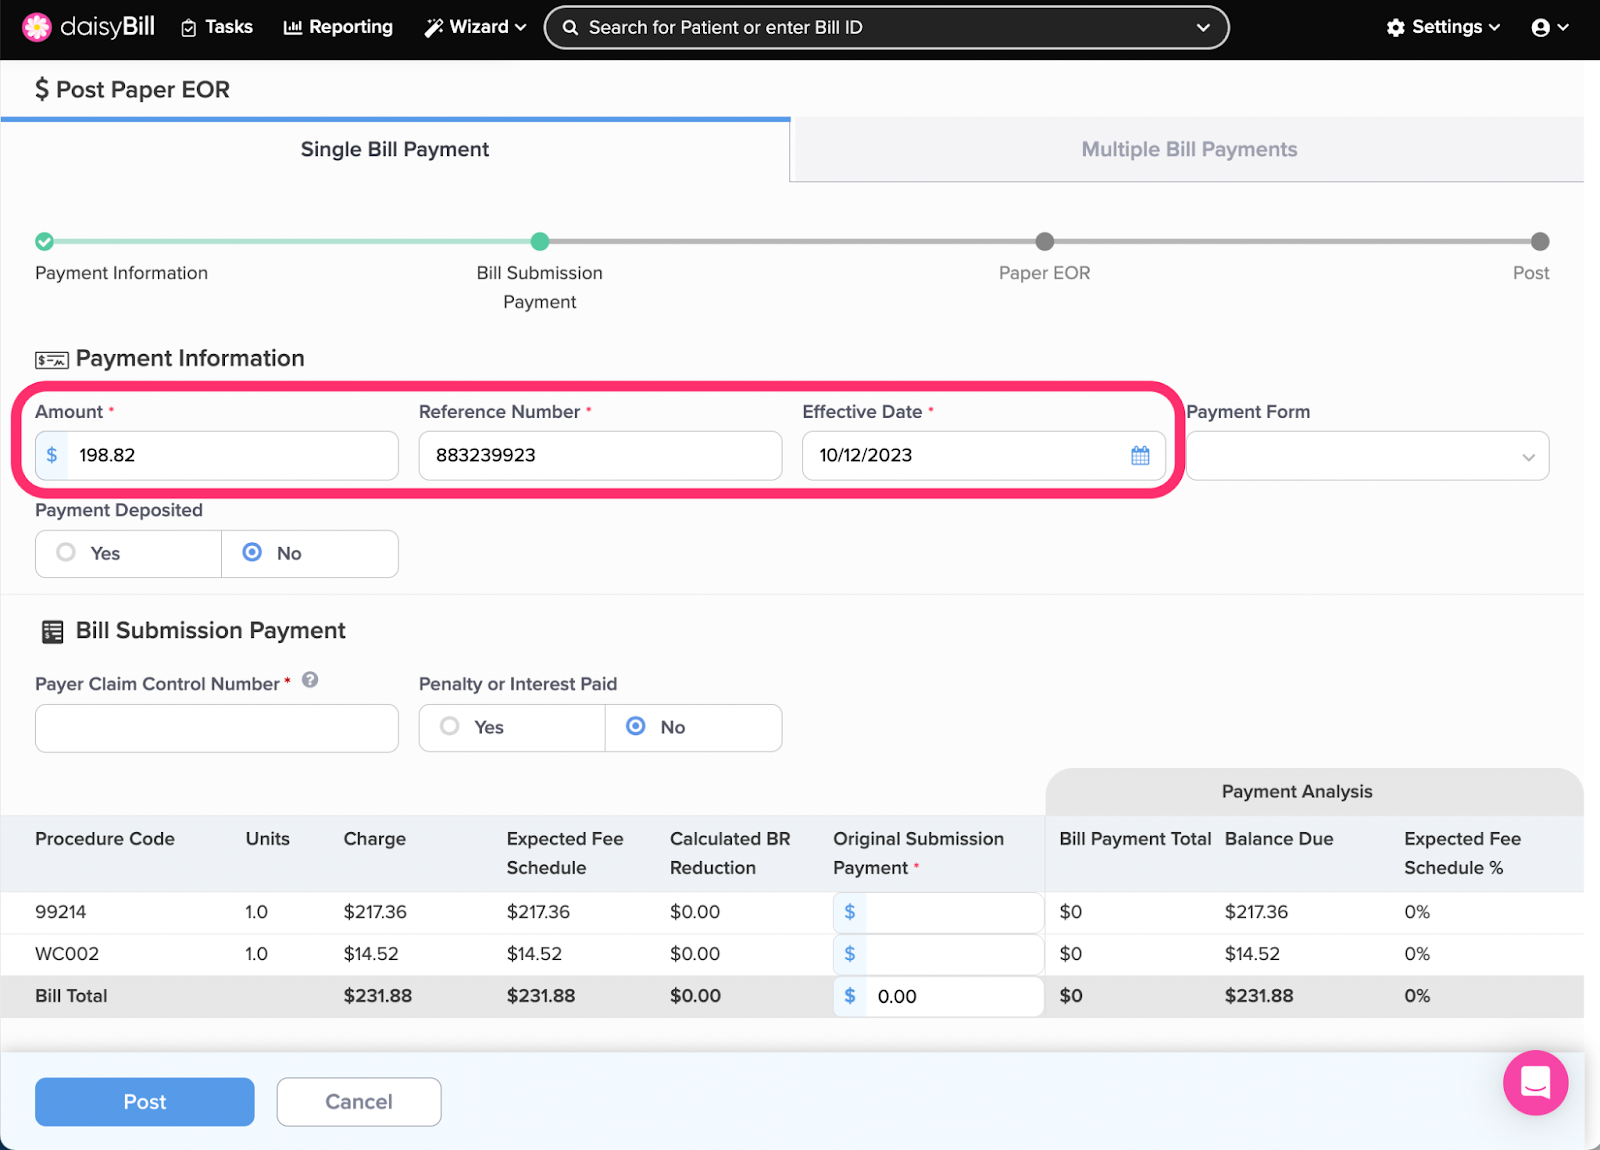
Step 4. Enter the Payment Information: ‘Amount,’ ‘Reference Number,’ and ‘Effective Date’
Amount is the total amount of the payment (e.g. the amount the check is written out for).
Reference Number is the check number, or if payment by EFT or Virtual Credit Card, the reference number for the transaction. If you’re posting a denial, you can write ‘Denial’ in this field.
Effective Date is the date of the payment (not the date you are posting). If posting a denial, use the date the EOR was issued.
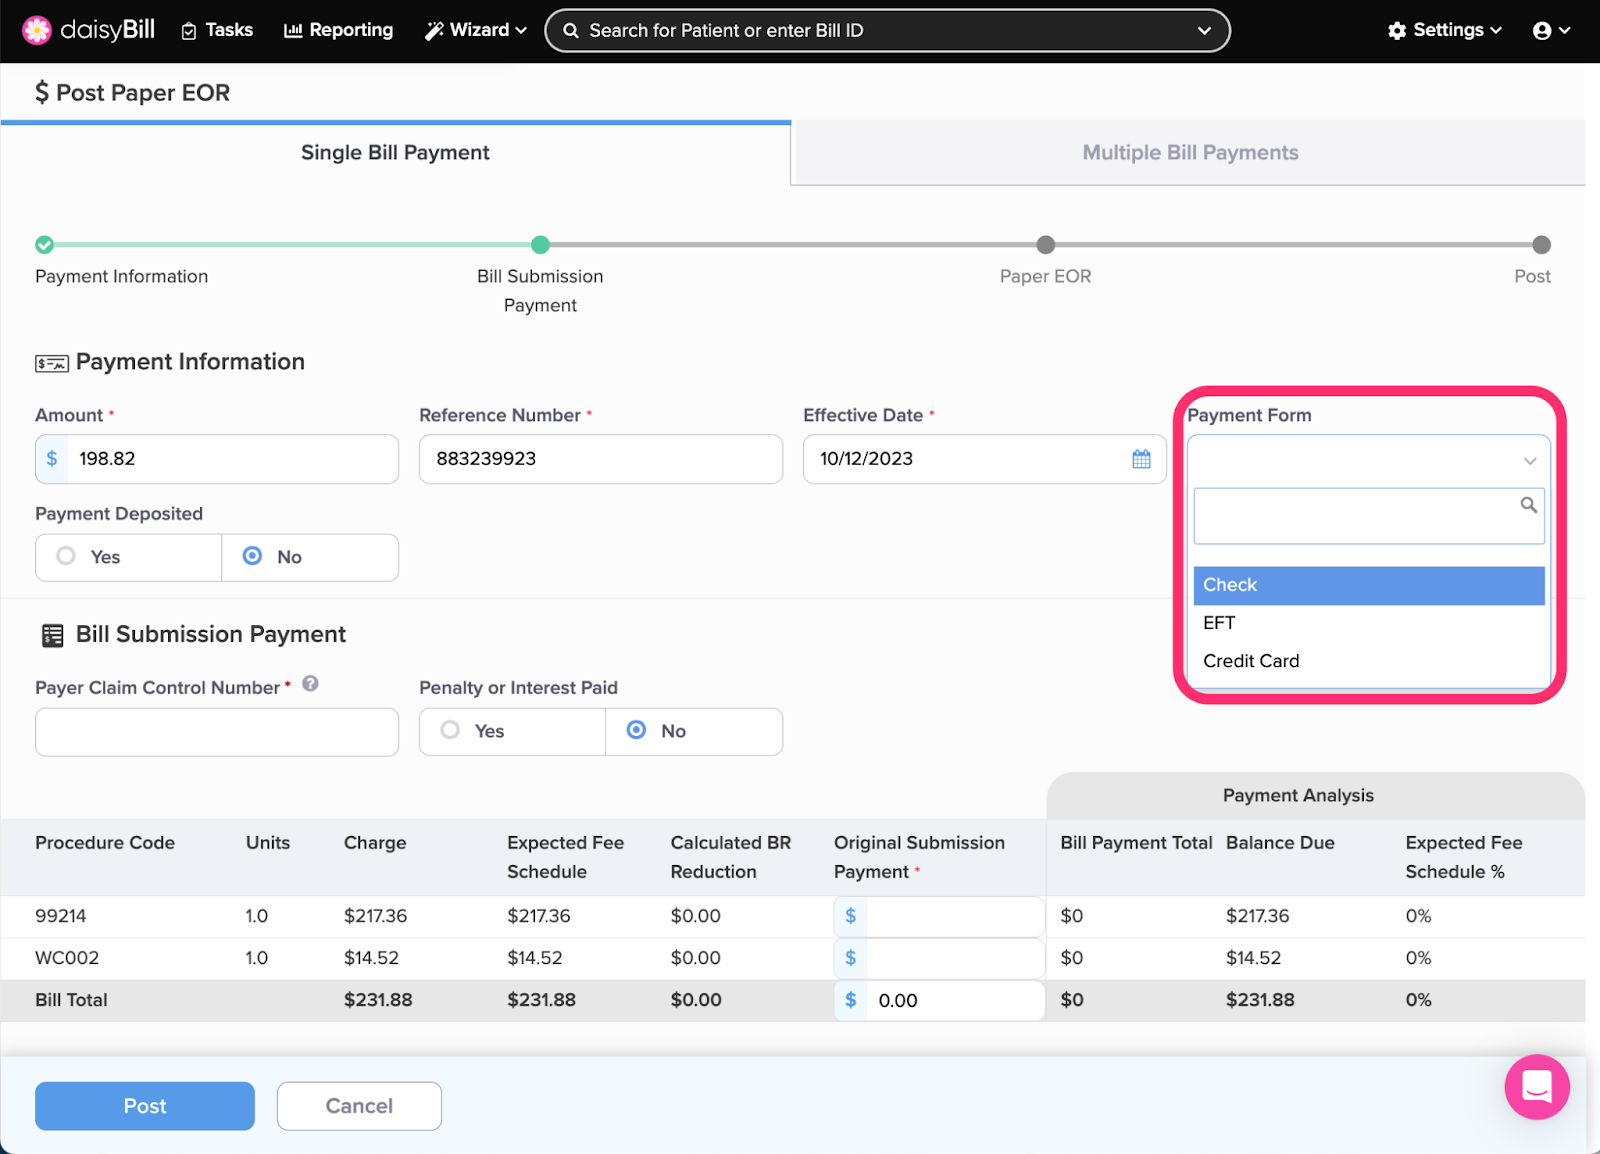
Step 5. Select the ‘Payment Form’
Step 6. Optional: ‘Payment Deposited’
If the payment has been received, check ‘Yes’ next to Payment Deposited and enter the deposit date. This automatically completes the Deposit Payment task. If the payment has not been received, or, you’re not ready to enter a deposit date, leave Payment Deposited as ‘No’. You can enter a deposit date later from the Bill page or wait until the Deposit Payment task generates.
Step 7. Enter ‘Payer Claim Control Number’
This number is required for a compliant Second Bill Review and is found on the EOR. For more help, see Payer Claim Control Number.
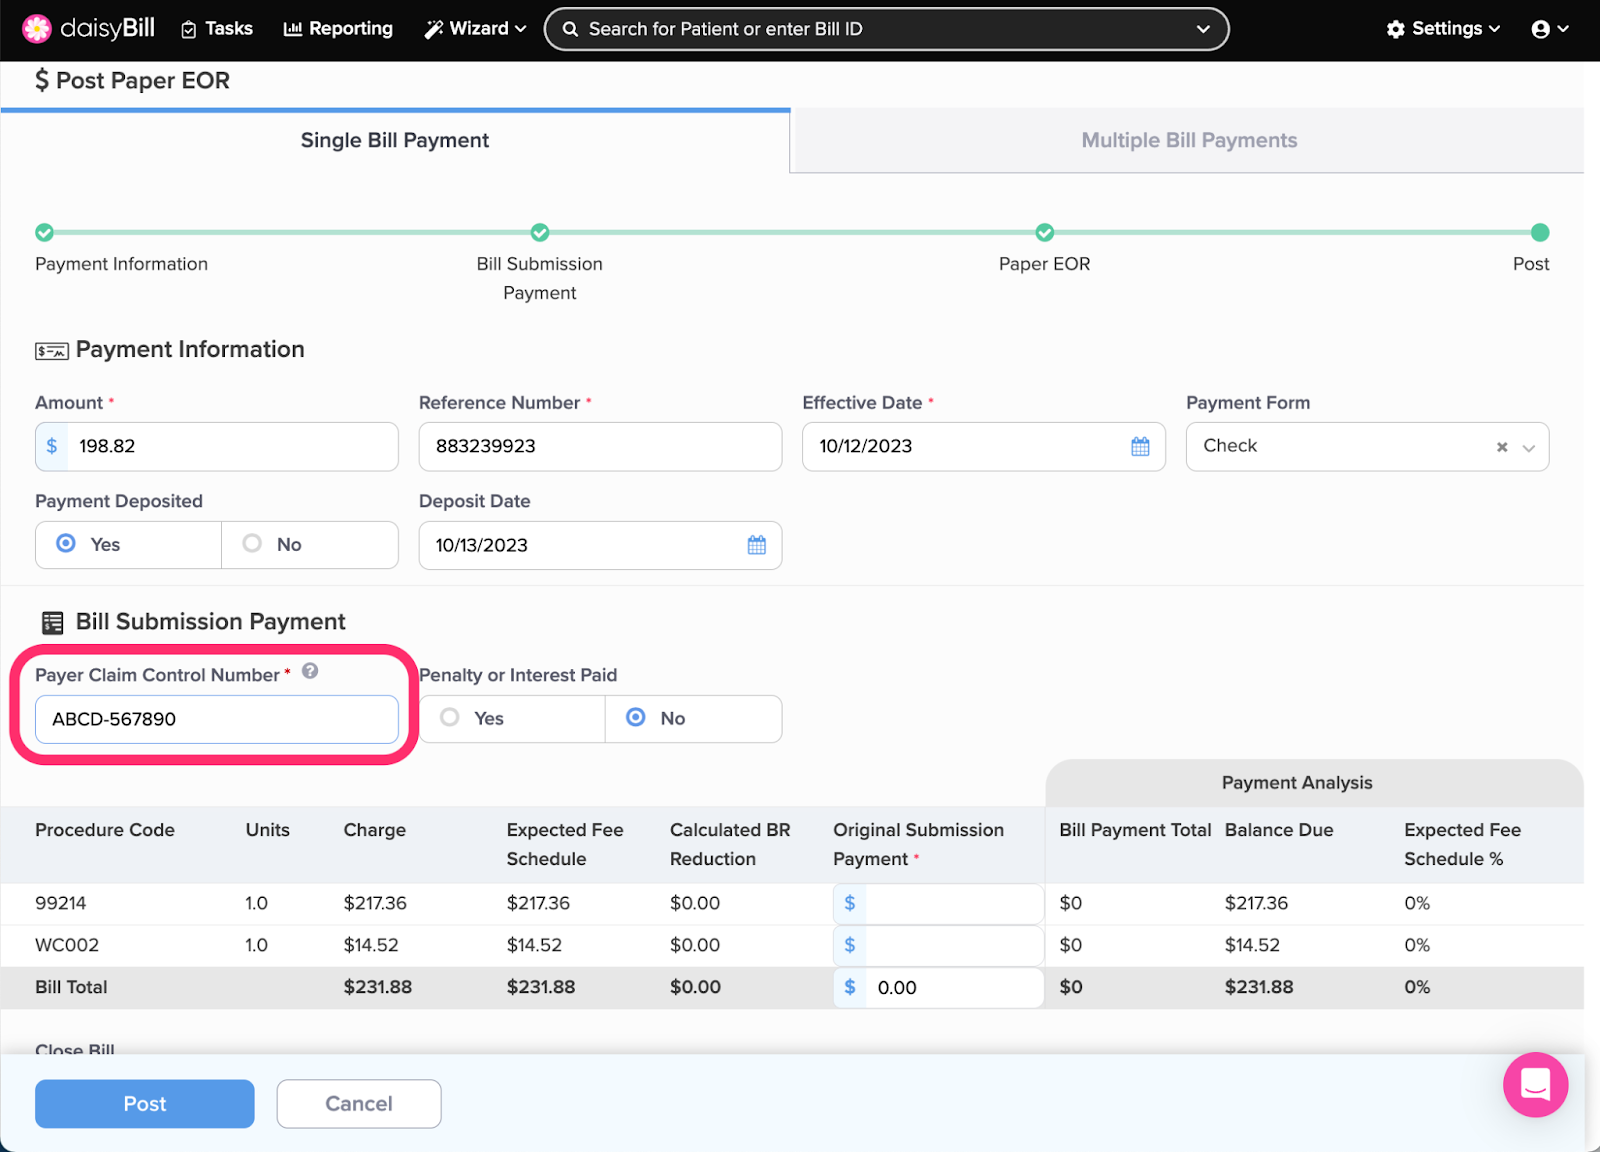
Step 8. Enter the ‘EOR Allowance’ as they appear on the EOR
The EOR Allowance represents the reimbursement amount the claims administrator is paying for each Procedure Code. If no payment was made for a Procedure Code, be sure to enter ‘0’ in the field.

Step 9. Optional: enter Penalty or Interest
If the claims administrator issued Penalty or Interest, select Yes under Penalty or Interest Paid, then enter the amounts.
Step 10. Optional: Close Bill
Select Yes if no additional reimbursement is due and the bill does not require a Second Review / Appeal. Checking this box completes the Payment Received or Denial Received task and writes off the Balance Due.
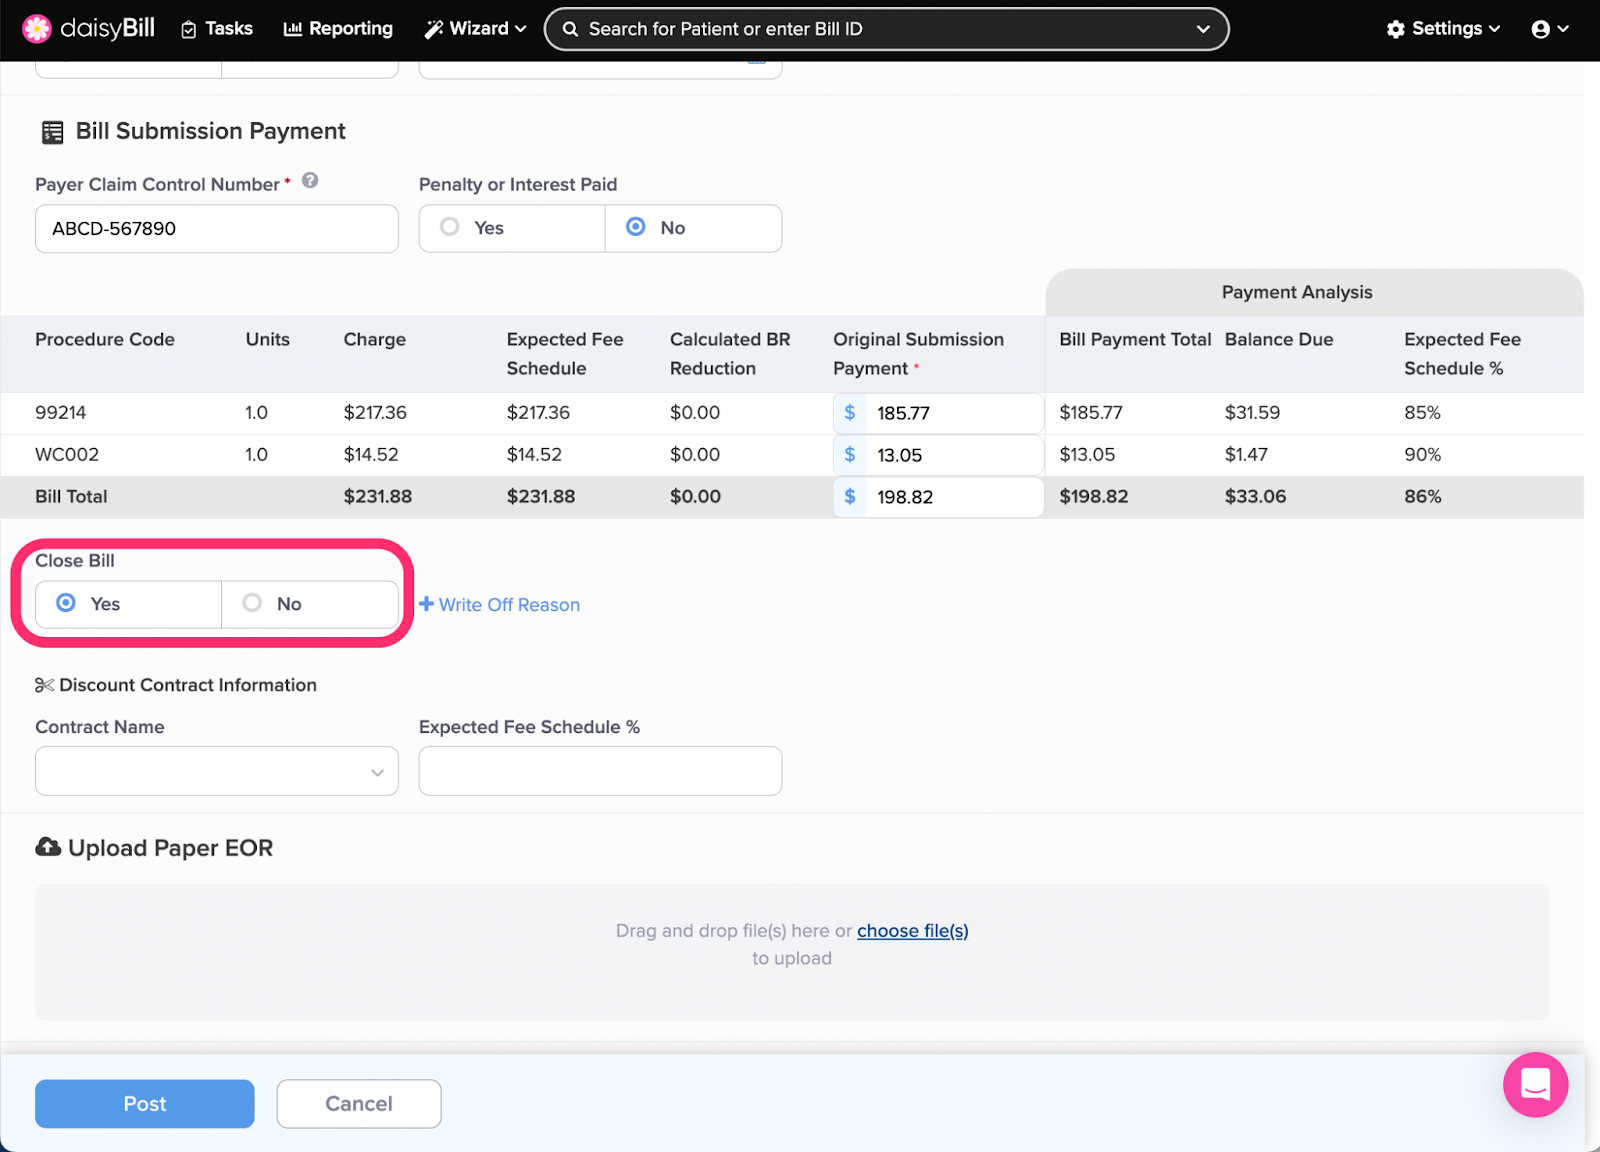
Step 11. Optional: apply ‘Write Off Reason’
If Yes is selected in Step 9, apply an optional Write Off Reason to add additional information about why the Balance Due, if any, was written off. For more information, see the Help Article: Apply Write Off Reasons.

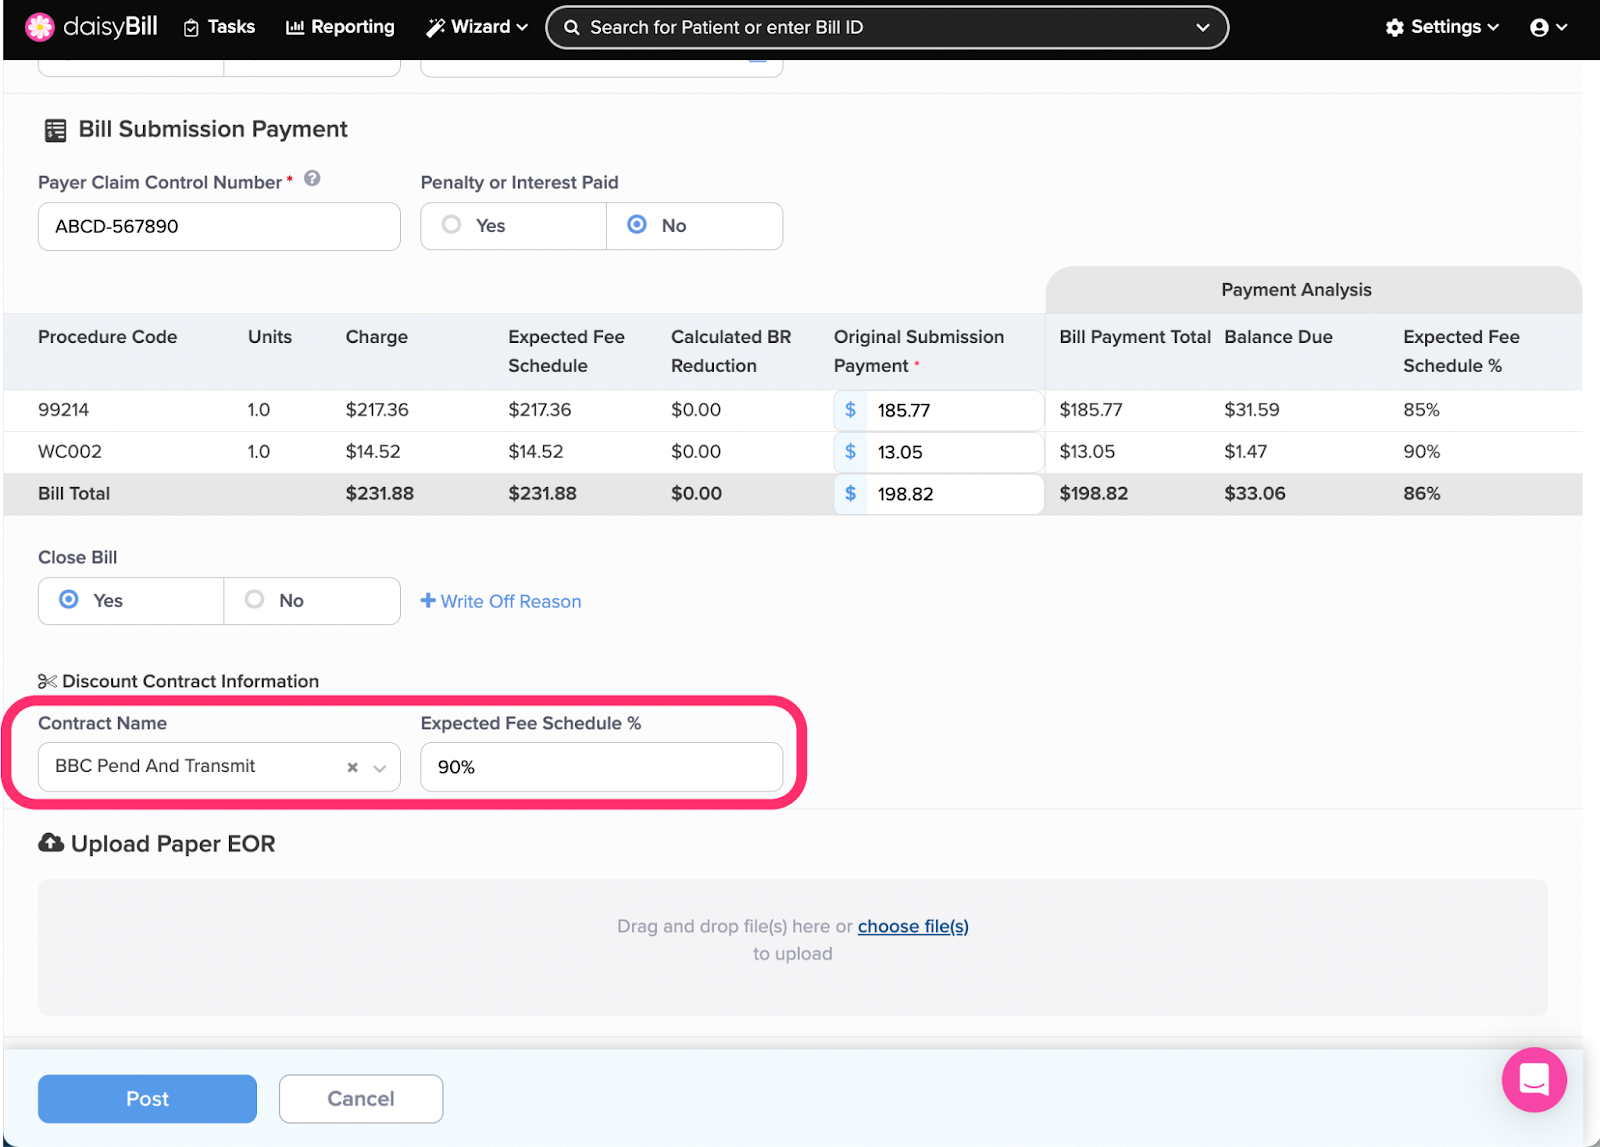
Step 12. Optional: report ‘Discount Contract Information’
Enter the percentage the bill was allowed at, and the name of the Contract as it appears on the EOR. For more information on this feature, see the Help Article: Report / Edit / Delete Discount Contract.
For more information on identifying PPO contracts, see the Help Article: Identifying PPO and Discount Contracts on EORs
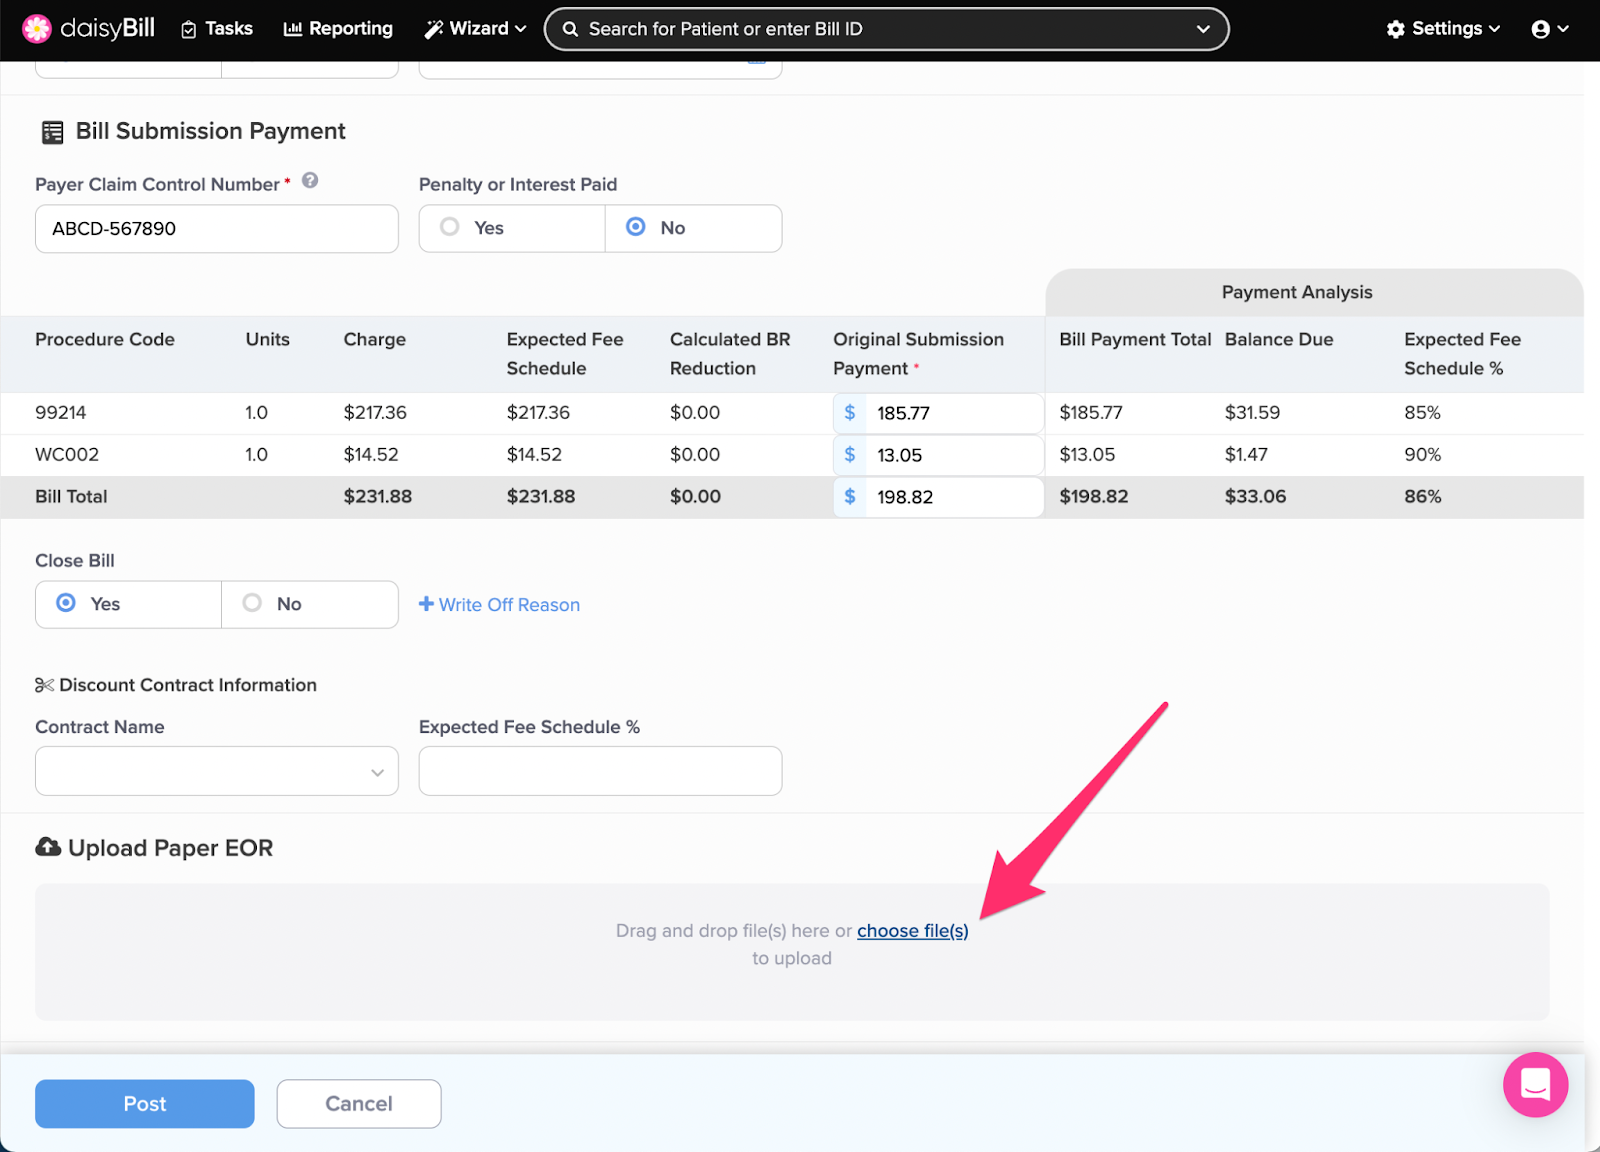
Step 13. Optional: Drag and drop, or select ‘Choose Files’ to upload a Paper EOR
Best practice is to always upload the paper EOR. daisyBill will attach the uploaded EOR directly to the bill for easy reference in the future.
Step 14. Click ‘Post’
If all non-optional steps are not complete, an error message will appear.
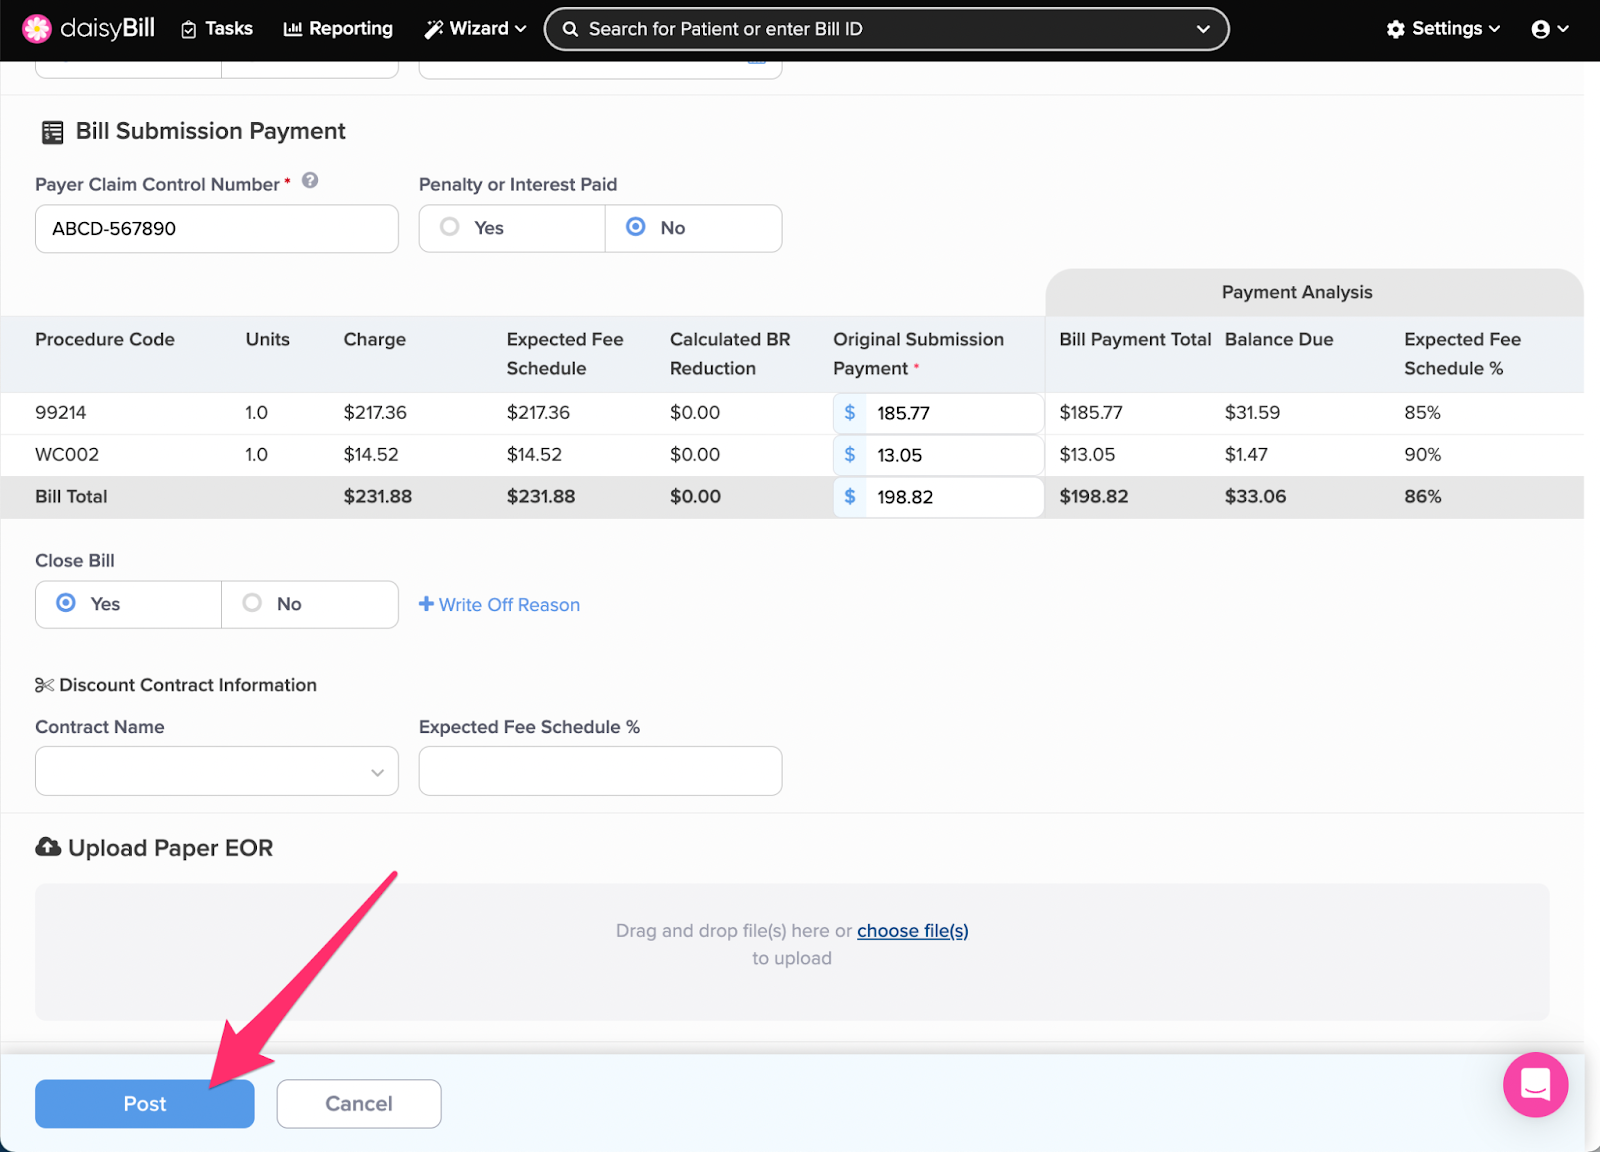
You’re all set!