Bulk Attachments is an optional Integration feature that allows for automatic matching of documents to bills for clients that import Bills into daisyBill. No more uploading and attaching individually!
Read on for directions on how to review unmatched documents in Bulk Attachments.
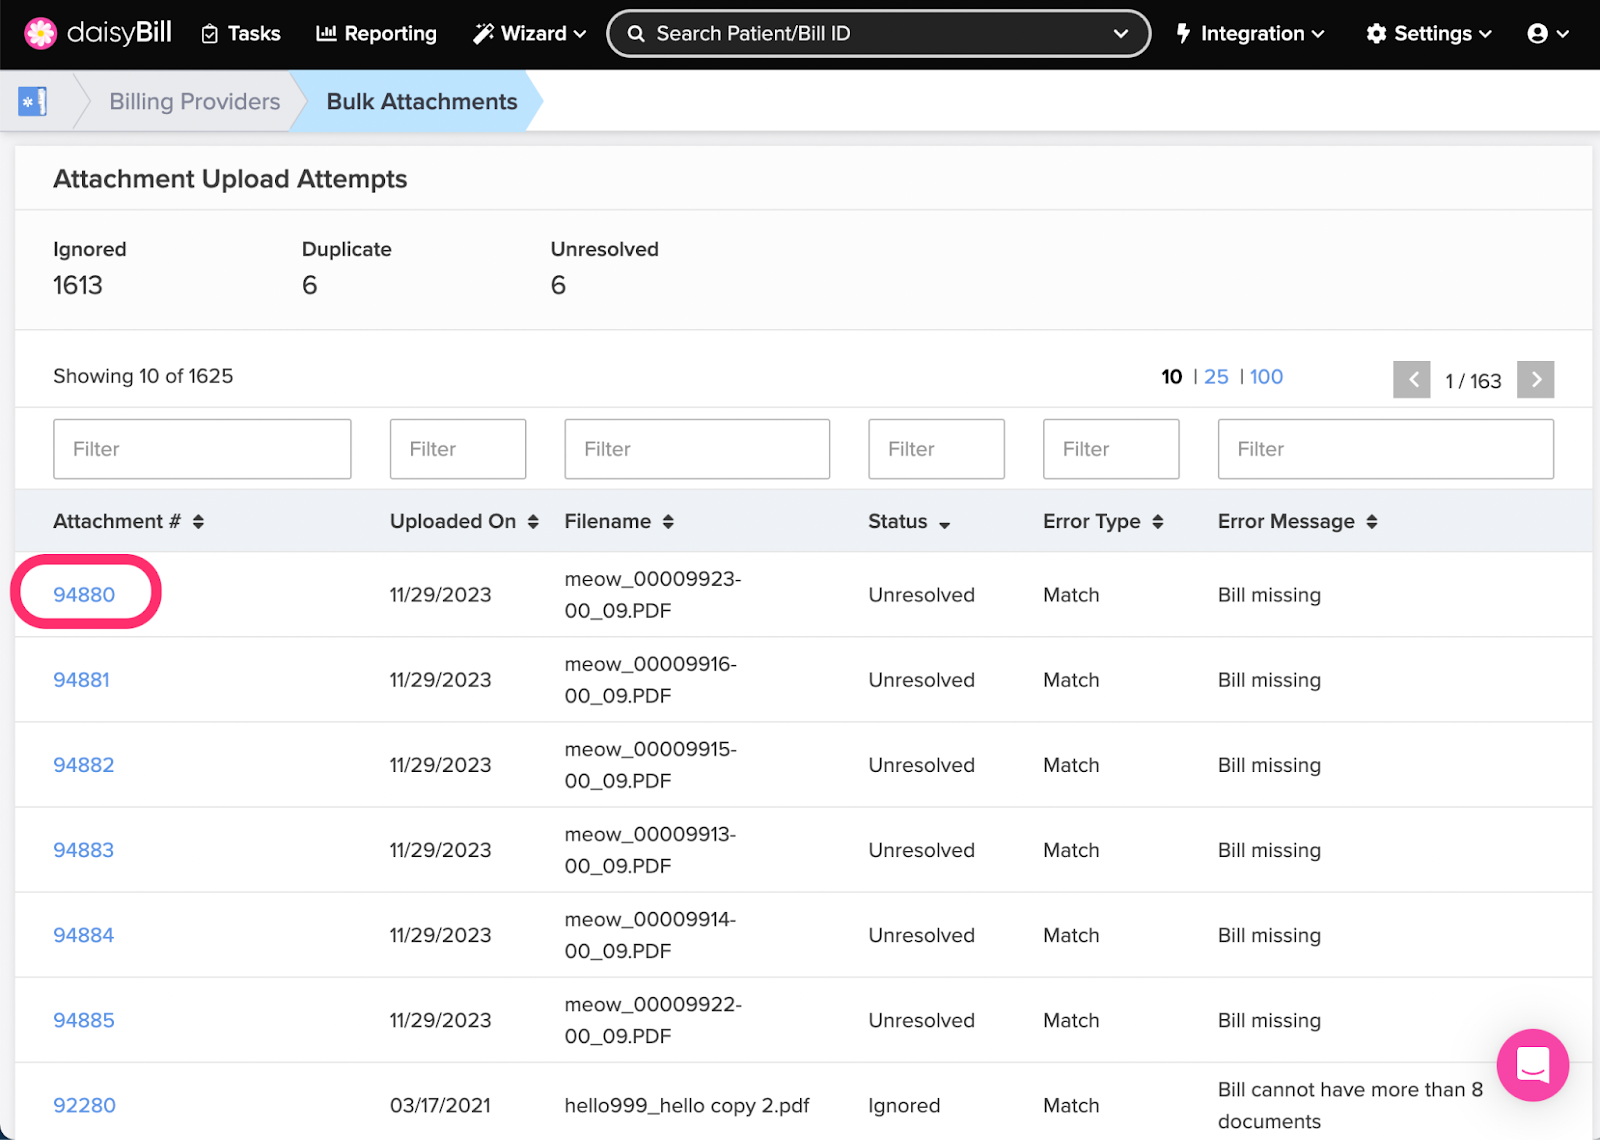
Step 1. From the Homescreen, click the ‘Integration’ icon, then select ‘Bulk Attachments’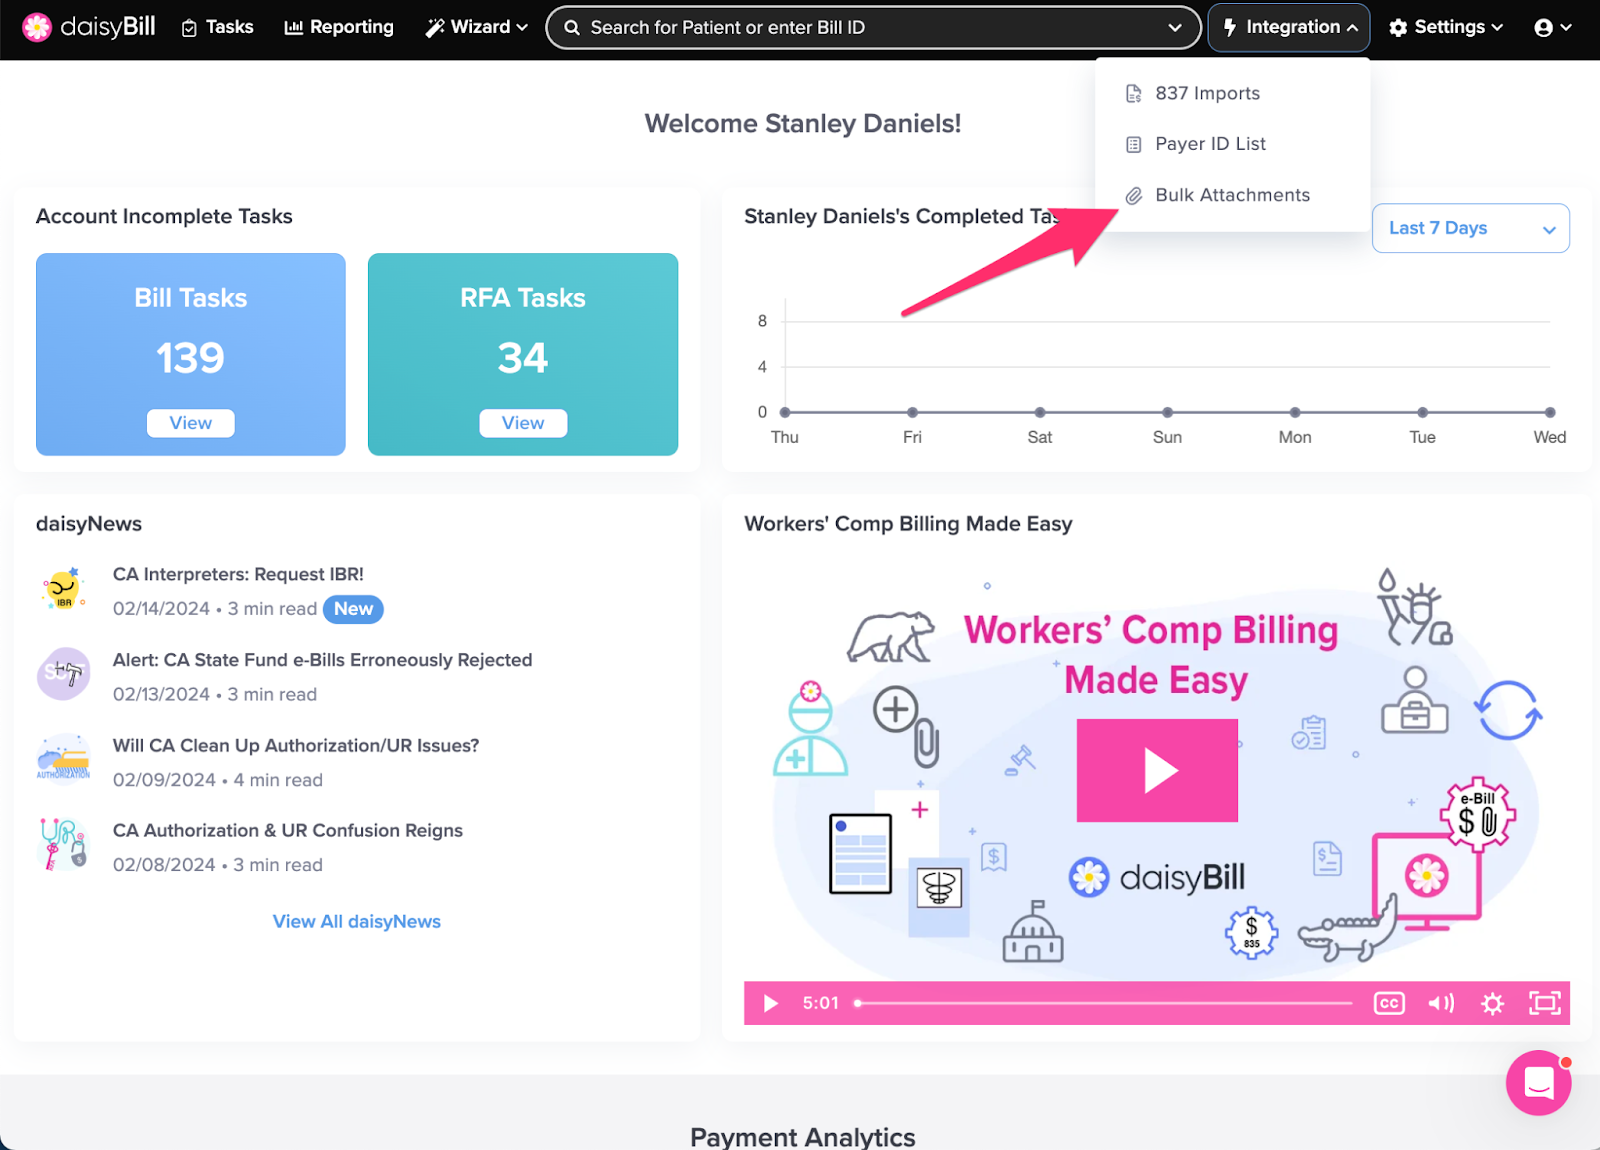
Step 2. Click the ‘Attachment #’
This will open the Attachment in a new tab in your browser.
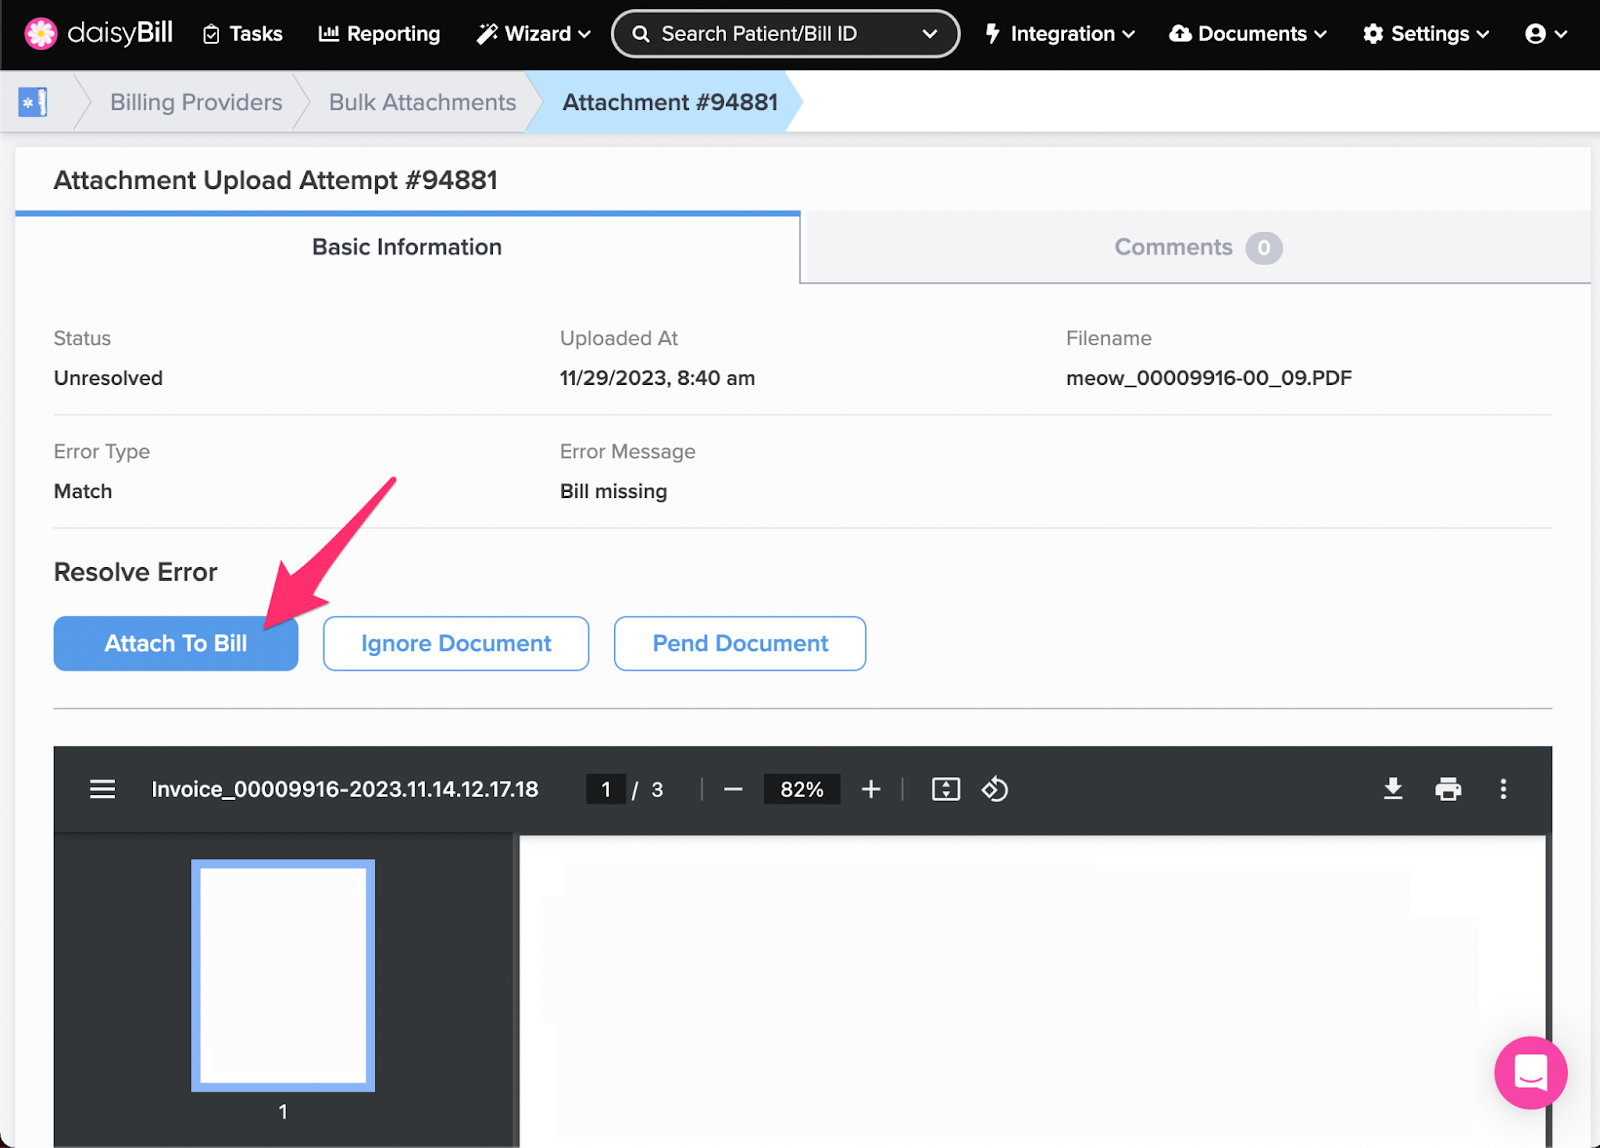
Step 3. Resolve Error
There are three options to resolve the error on the Attachment.
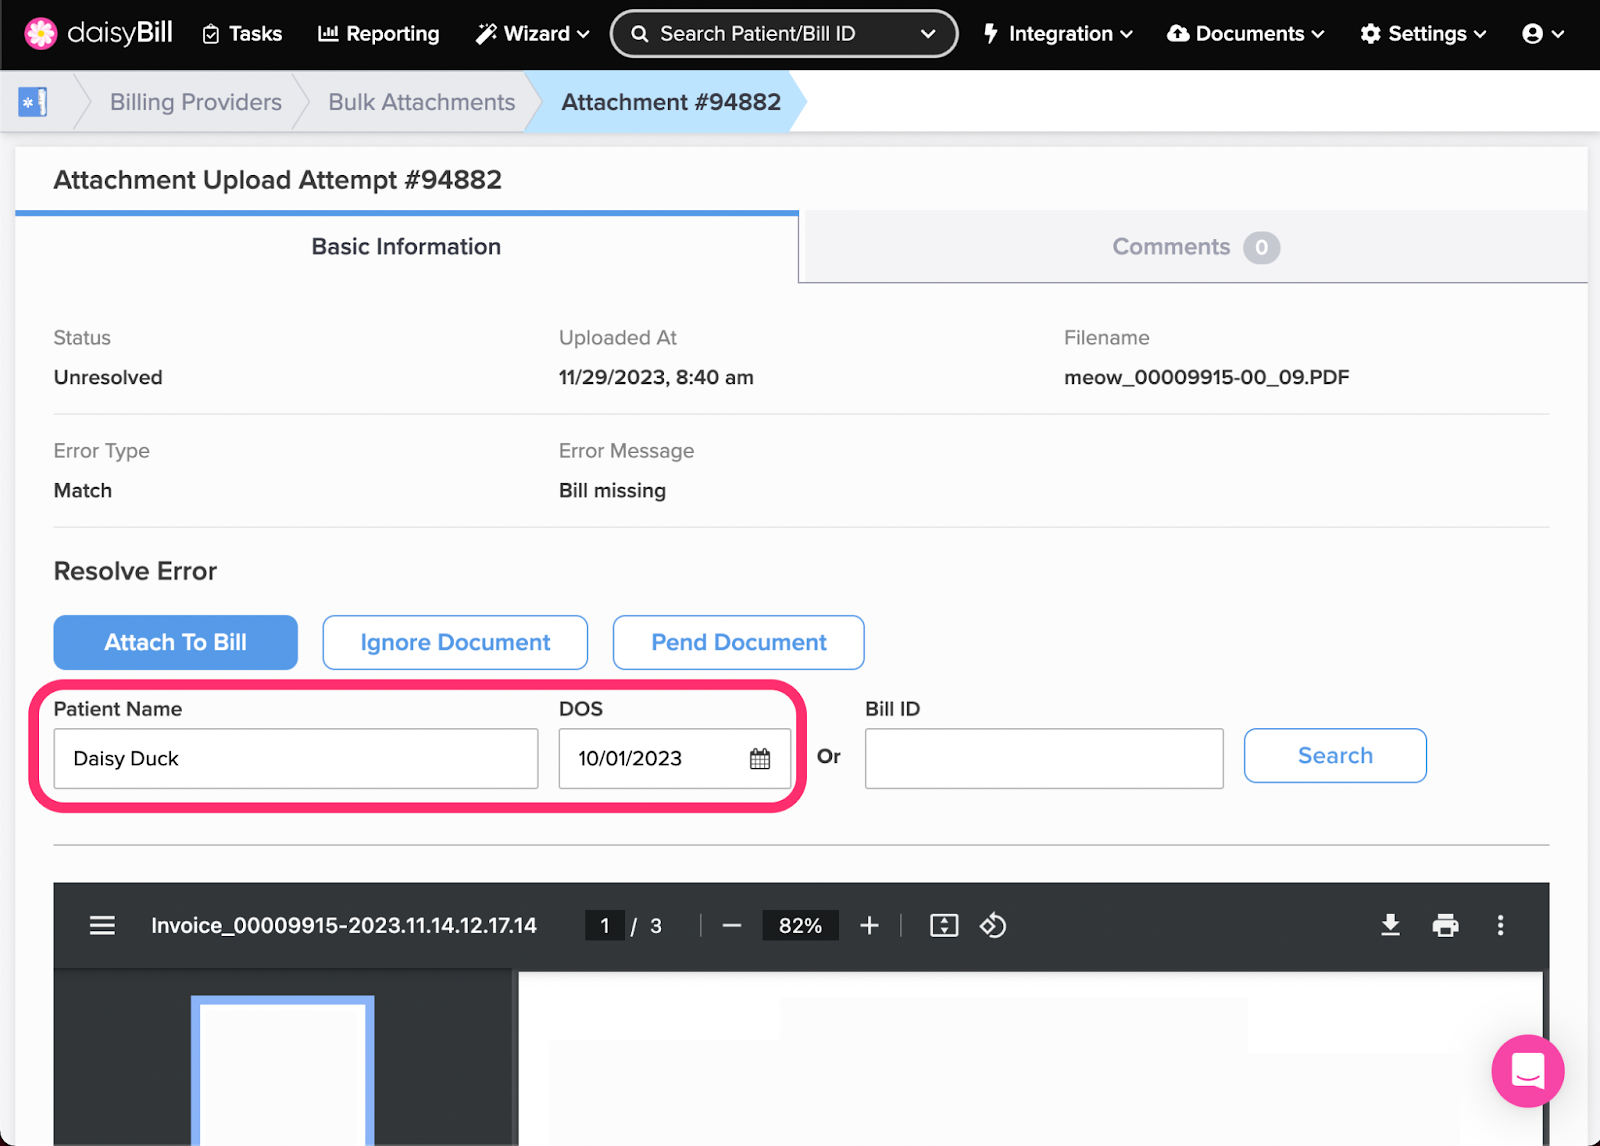
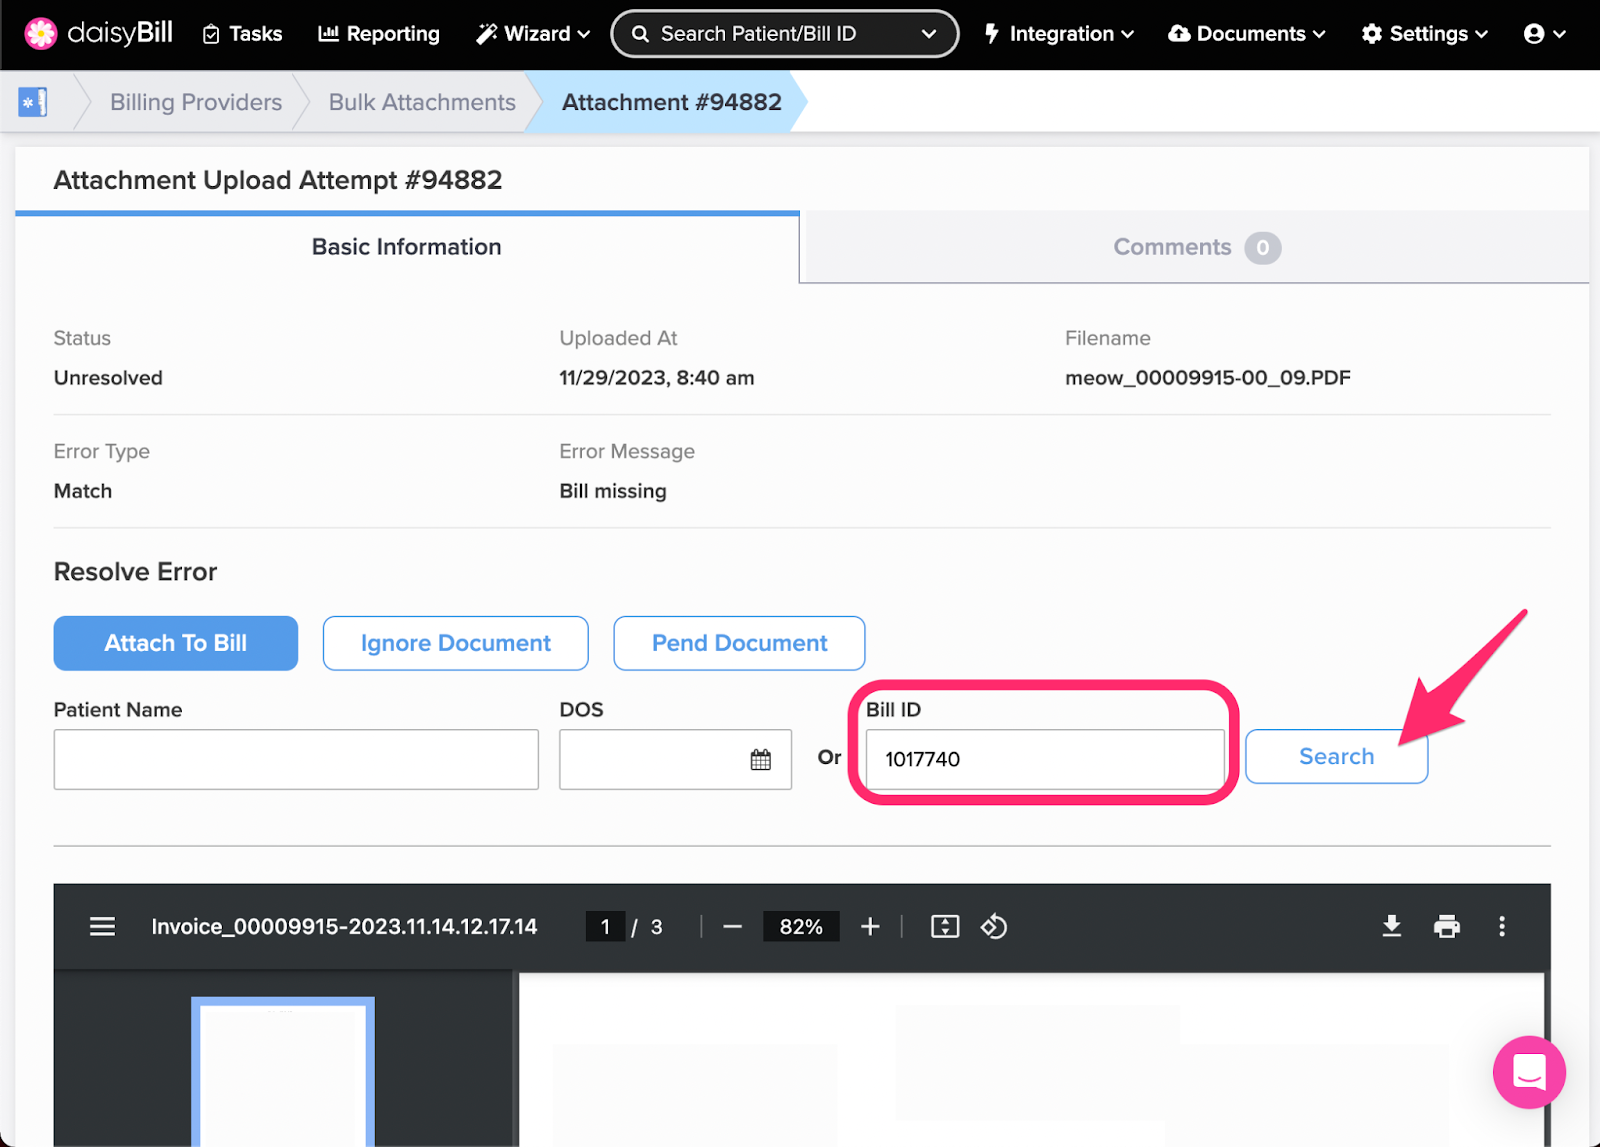
Attach To Bill - You can search by the patient’s name and DOS or the Bill ID.
- By Patient Name: Enter the patient’s name and optional DOS, then click ‘Search’. Find the corresponding bill and click ‘Attach’.
- By Bill ID: Enter the Bill ID, then click ‘Search’. Find the corresponding bill and click ‘Attach’.
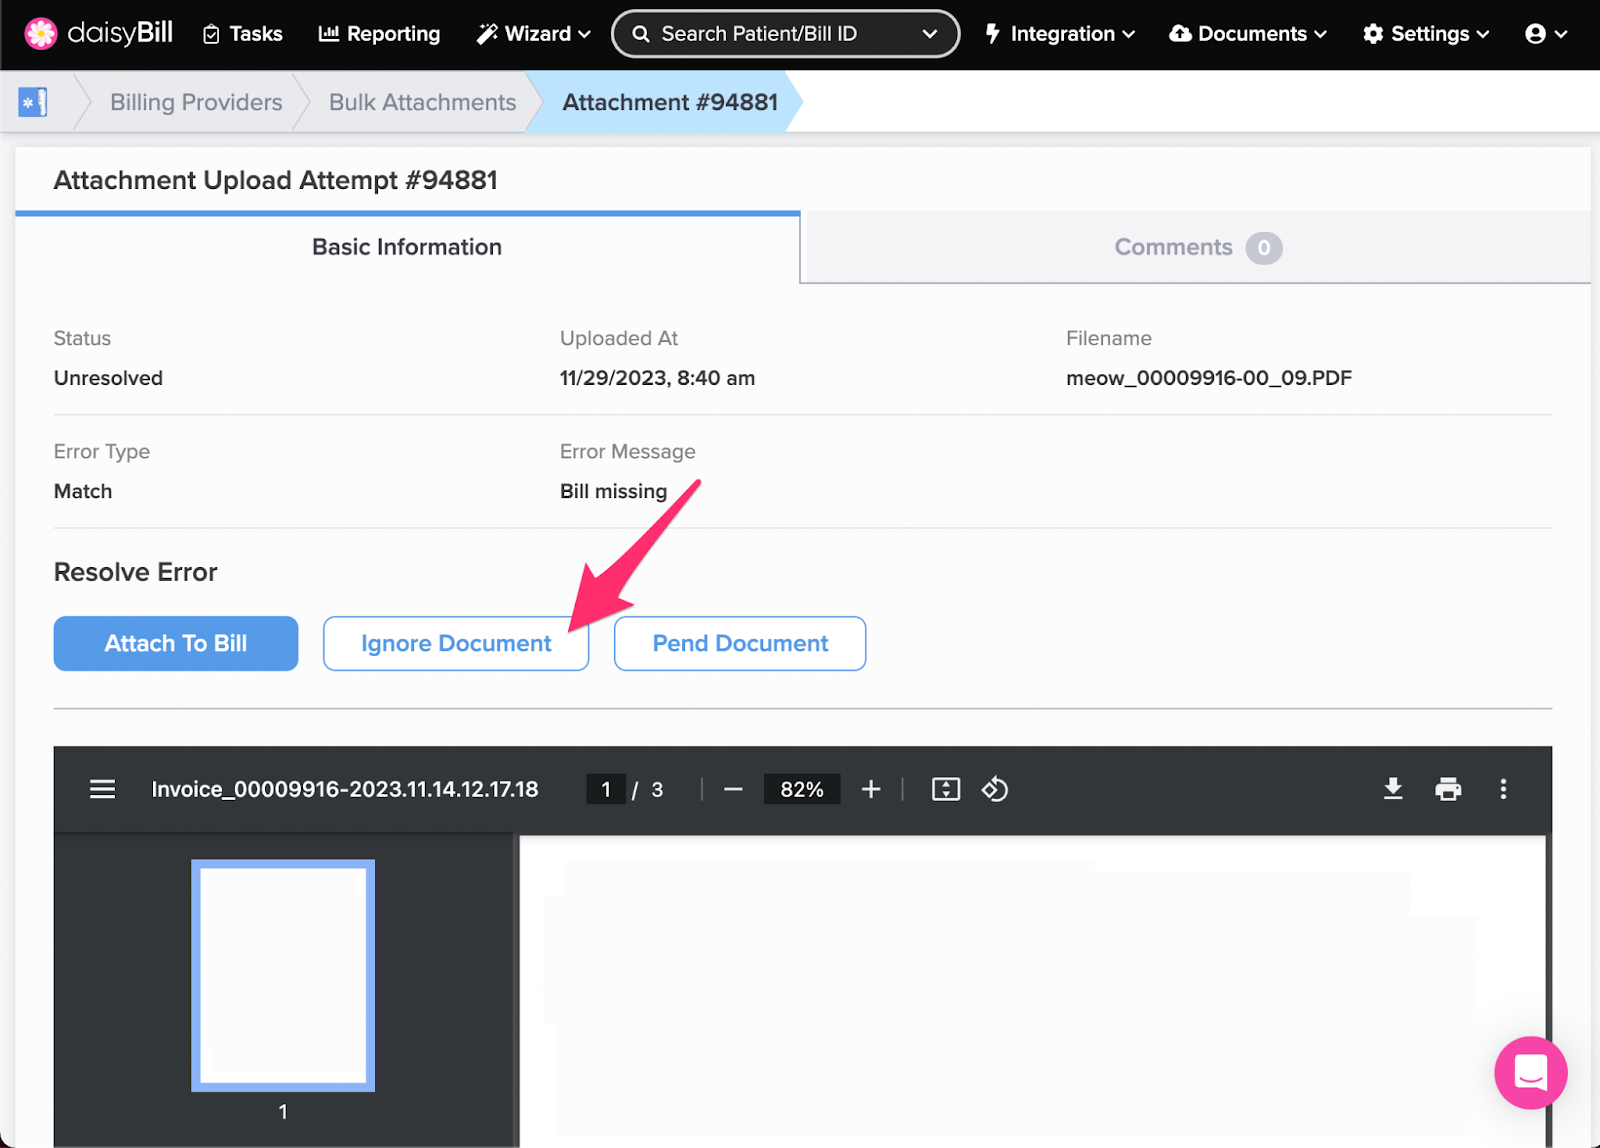
Ignore Document - Ignore the document permanently. The document will remain on in Bulk Attachments, but will not attempt to automatically attach to any future bills. This should be used if the document was imported in error.
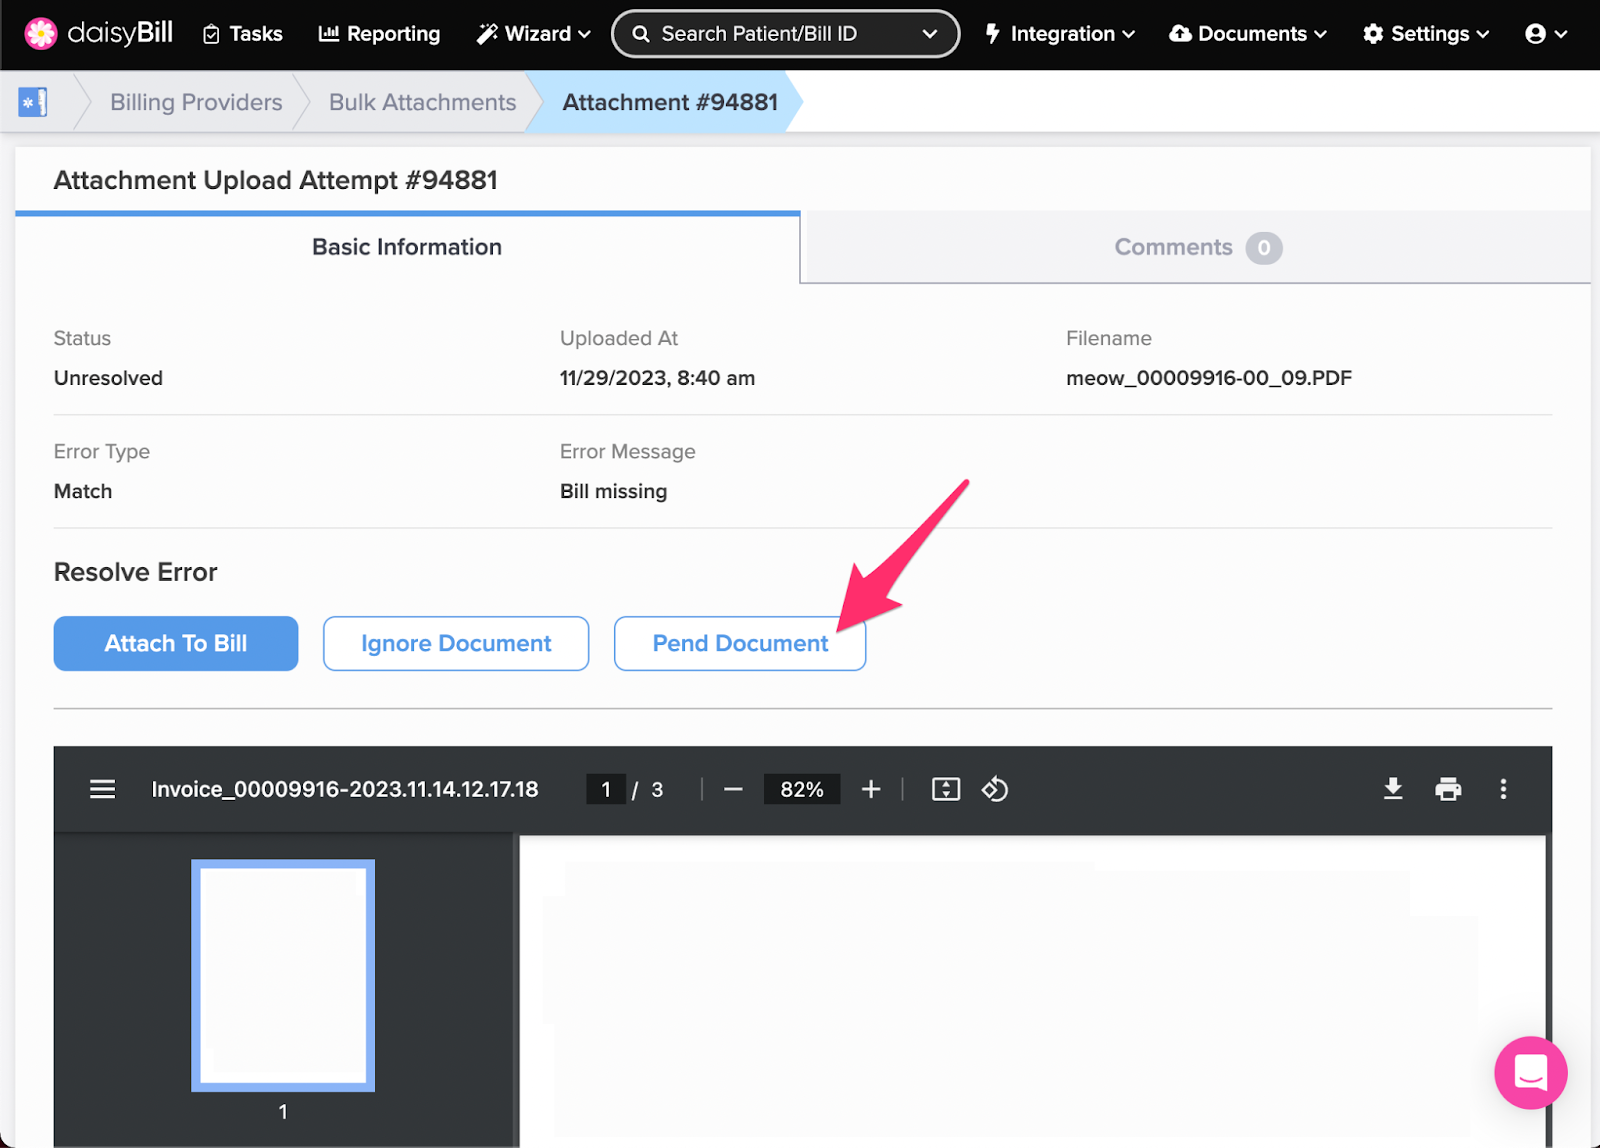
Pend Document - Sends the document back into the queue for a future bill matching. daisyBill will automatically continue to attempt to match this document to bills imported in the future.
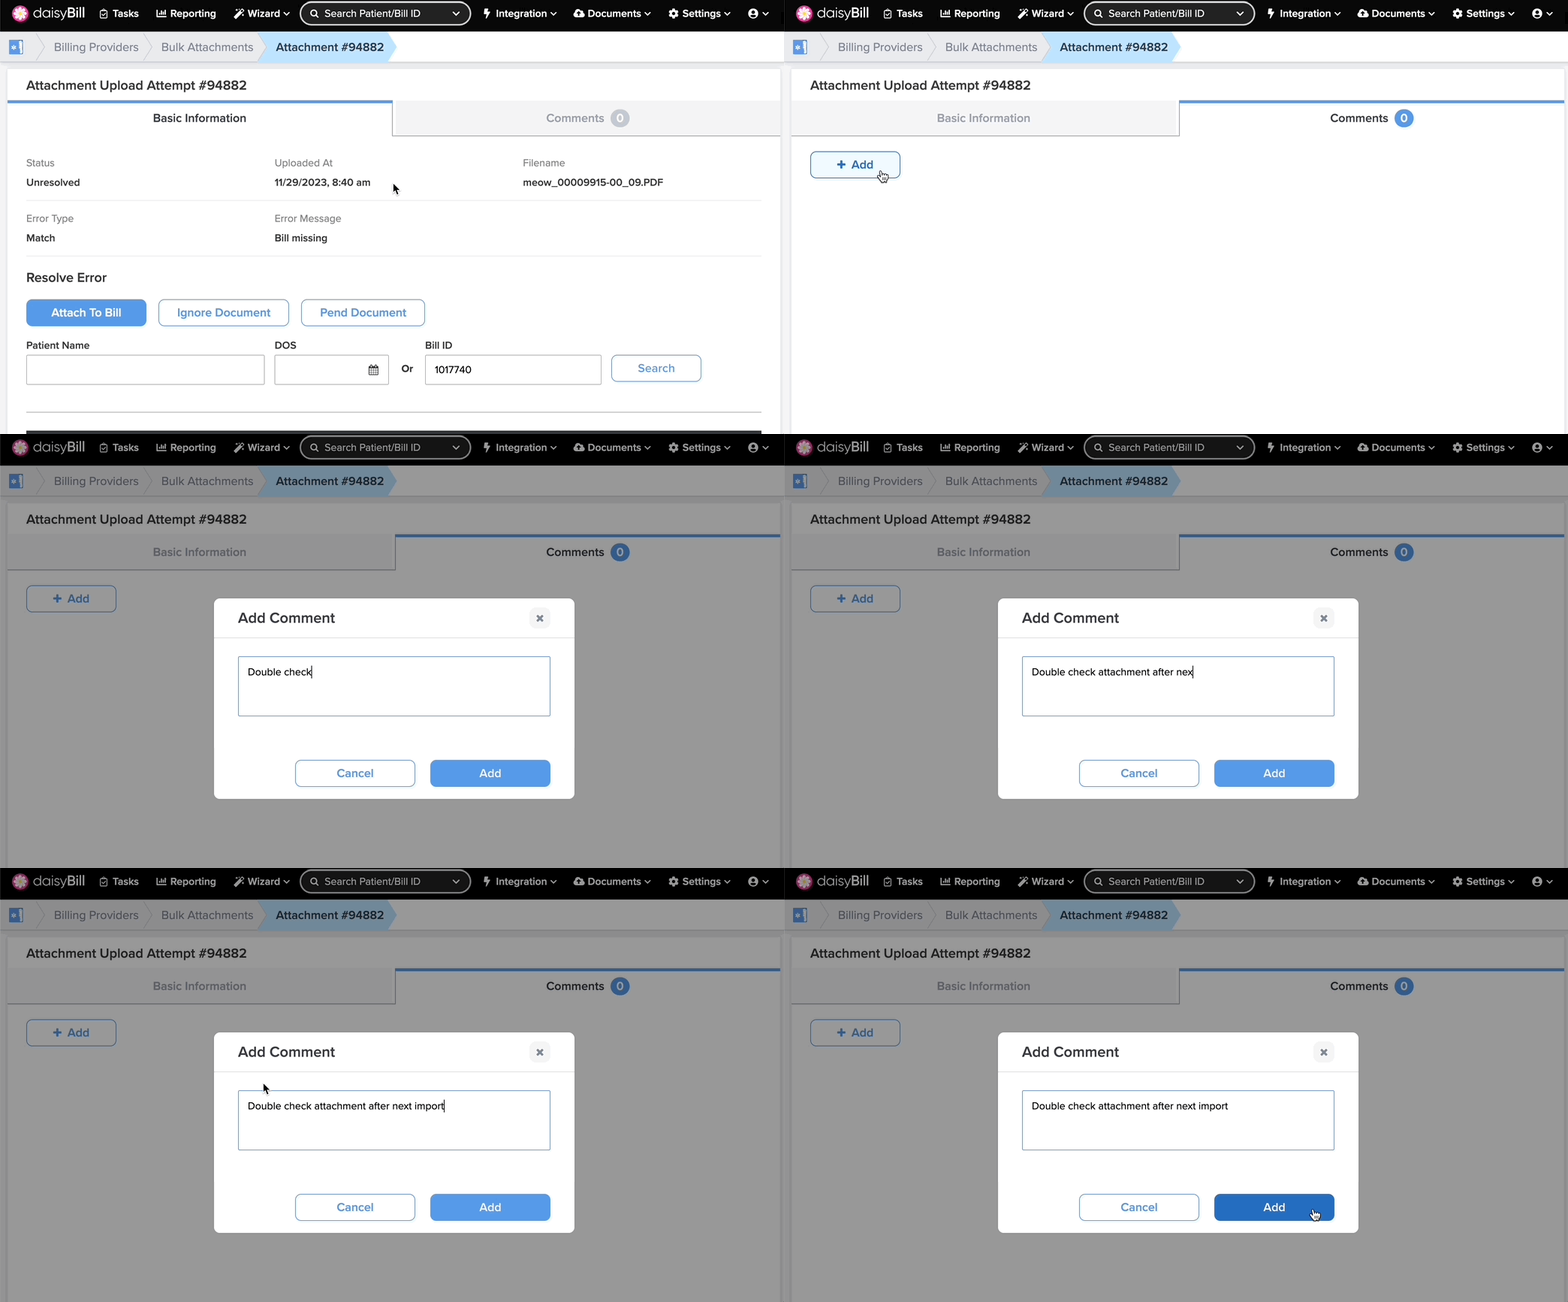
Step 4. Optional: Add Comments
Simple, right?
