View Other Articles
Update your Billing Provider Information, including your Pay-to address, phone number, and fax number
Step 1. On the navigation bar, click ‘Settings’, then click the name of the Billing Provider
This will navigate directly to the specified Billing Provider. By default, you will be taken to the ‘Billing Settings - Required’ section.

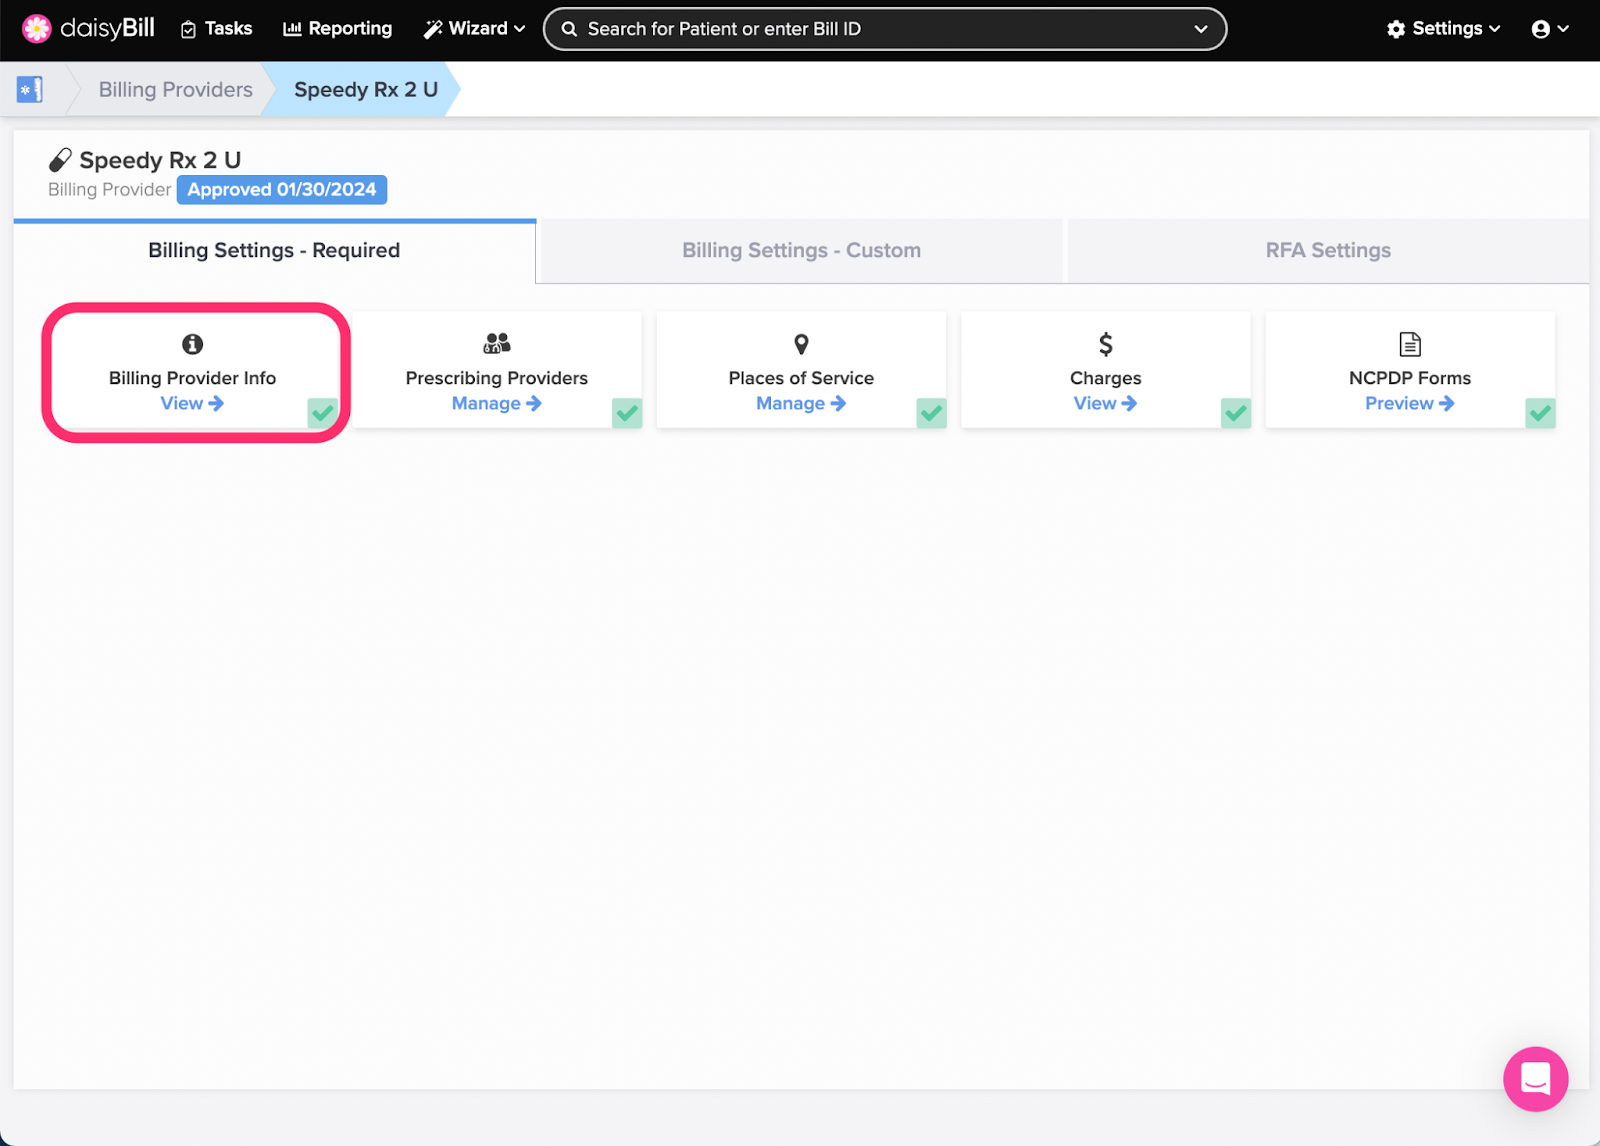
Step 2. Click the ‘Billing Provider Info’ card
A green ‘Checkmark’ icon in the lower right corner of the card indicates Billing Provider Information has been completed for the Billing Provider. A red ‘X’ icon indicates Billing Provider Information has not been completed.
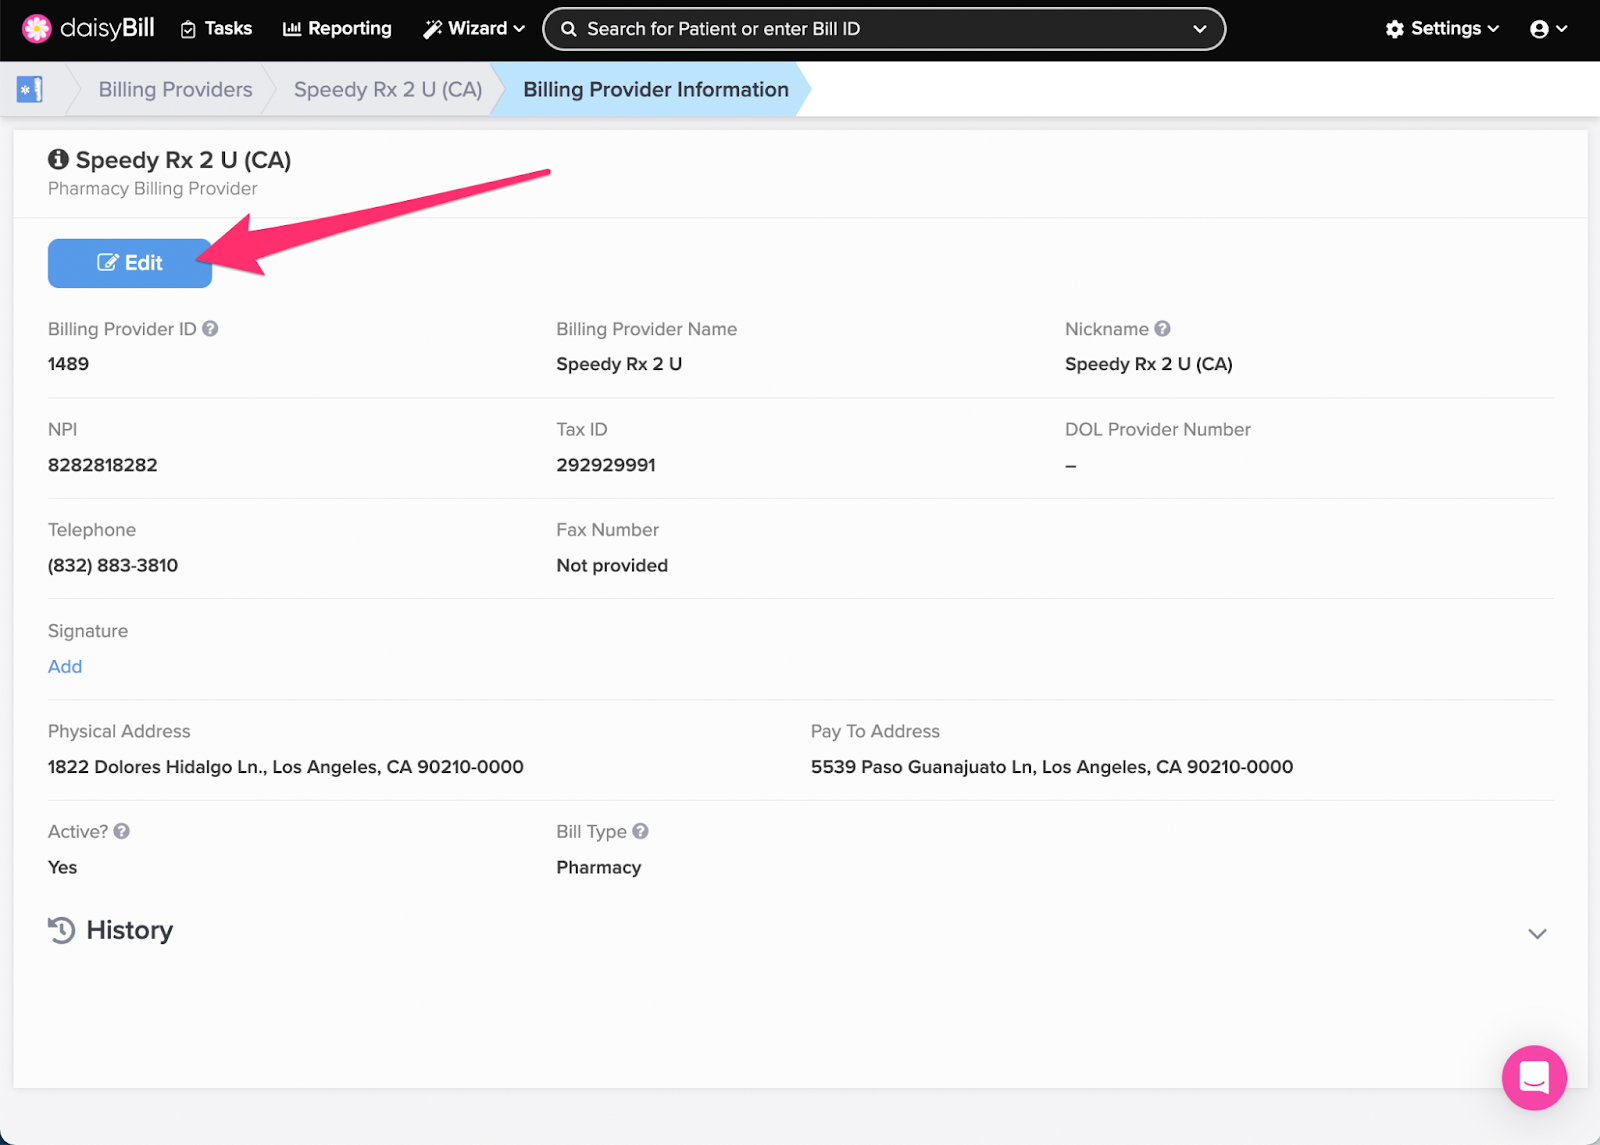
Step 3. To edit ‘Billing Provider Info,’ click the ‘Edit’ button
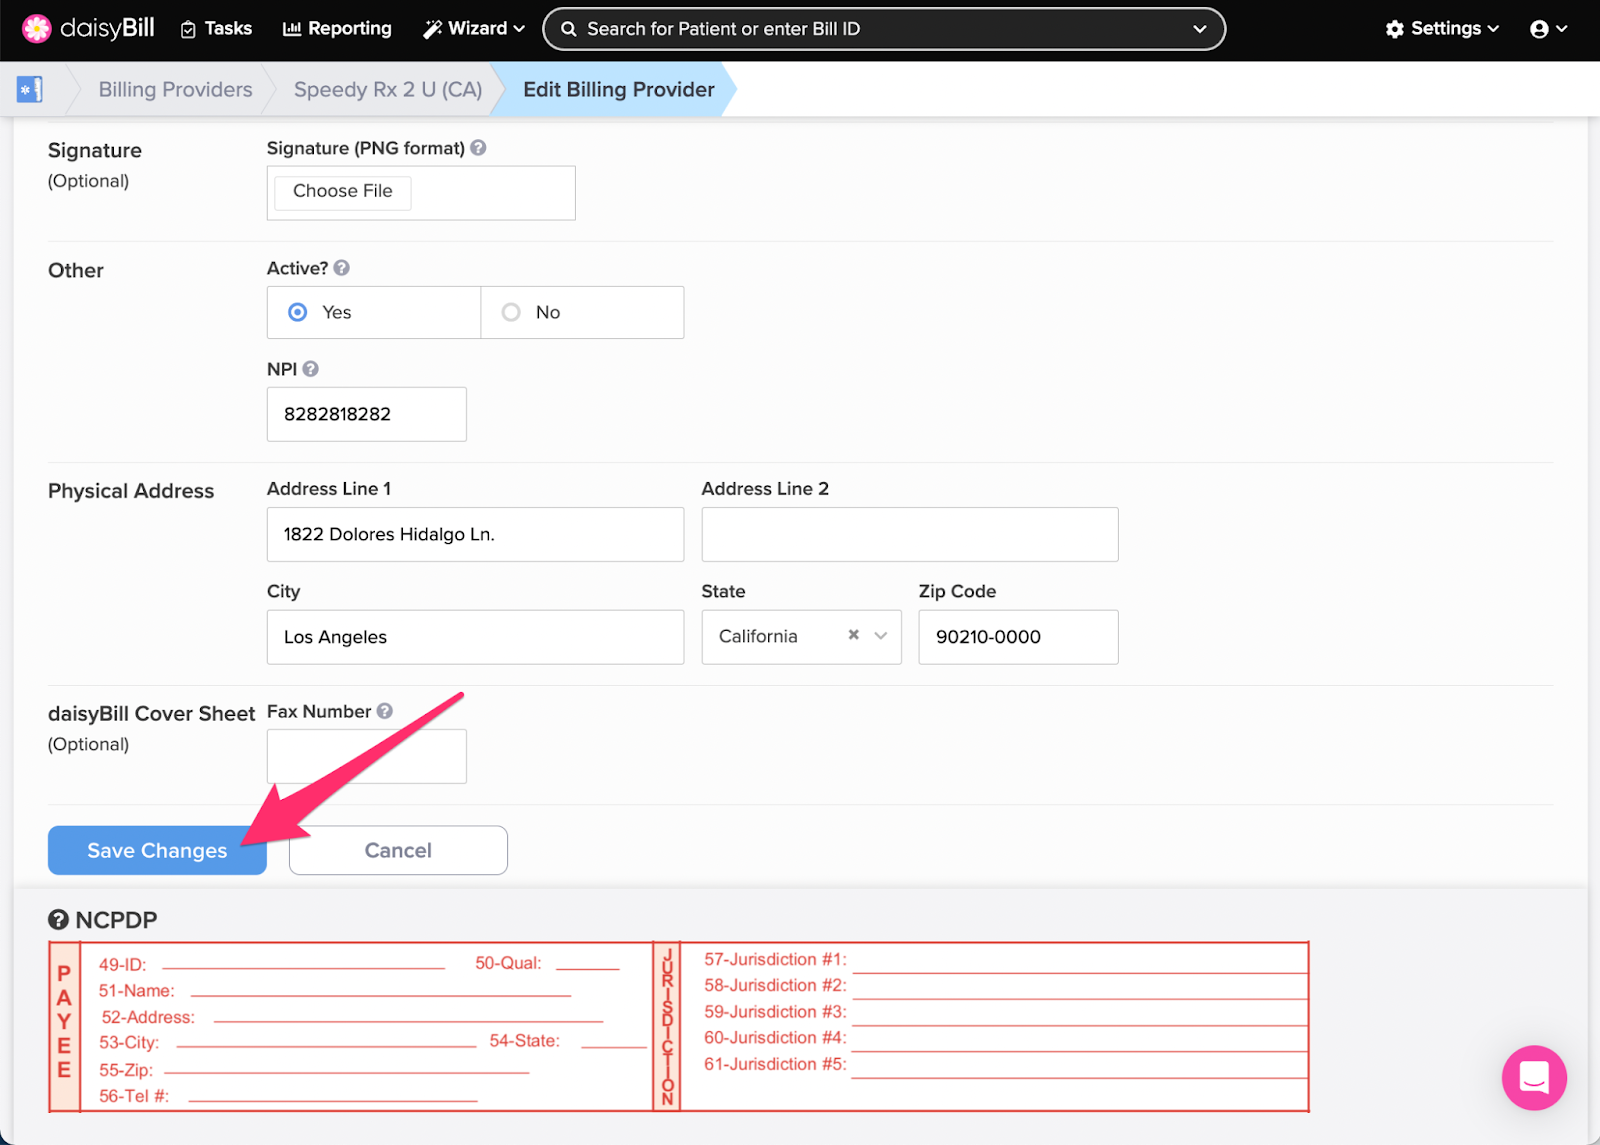
When adding a new Billing Provider they are automatically marked as Active. To deactivate a Billing Provider and prevent it from displaying in your Billing Provider Menu, click ‘No.’
Step 4. Once you have finished making changes, click the ‘Save Changes’ button
You’re all set!