View Other Articles
When an RFA fails to transmit by email or fax, daisyBill assigns a Fax/Email Failed task to the designated user and sends an email to the designated user.
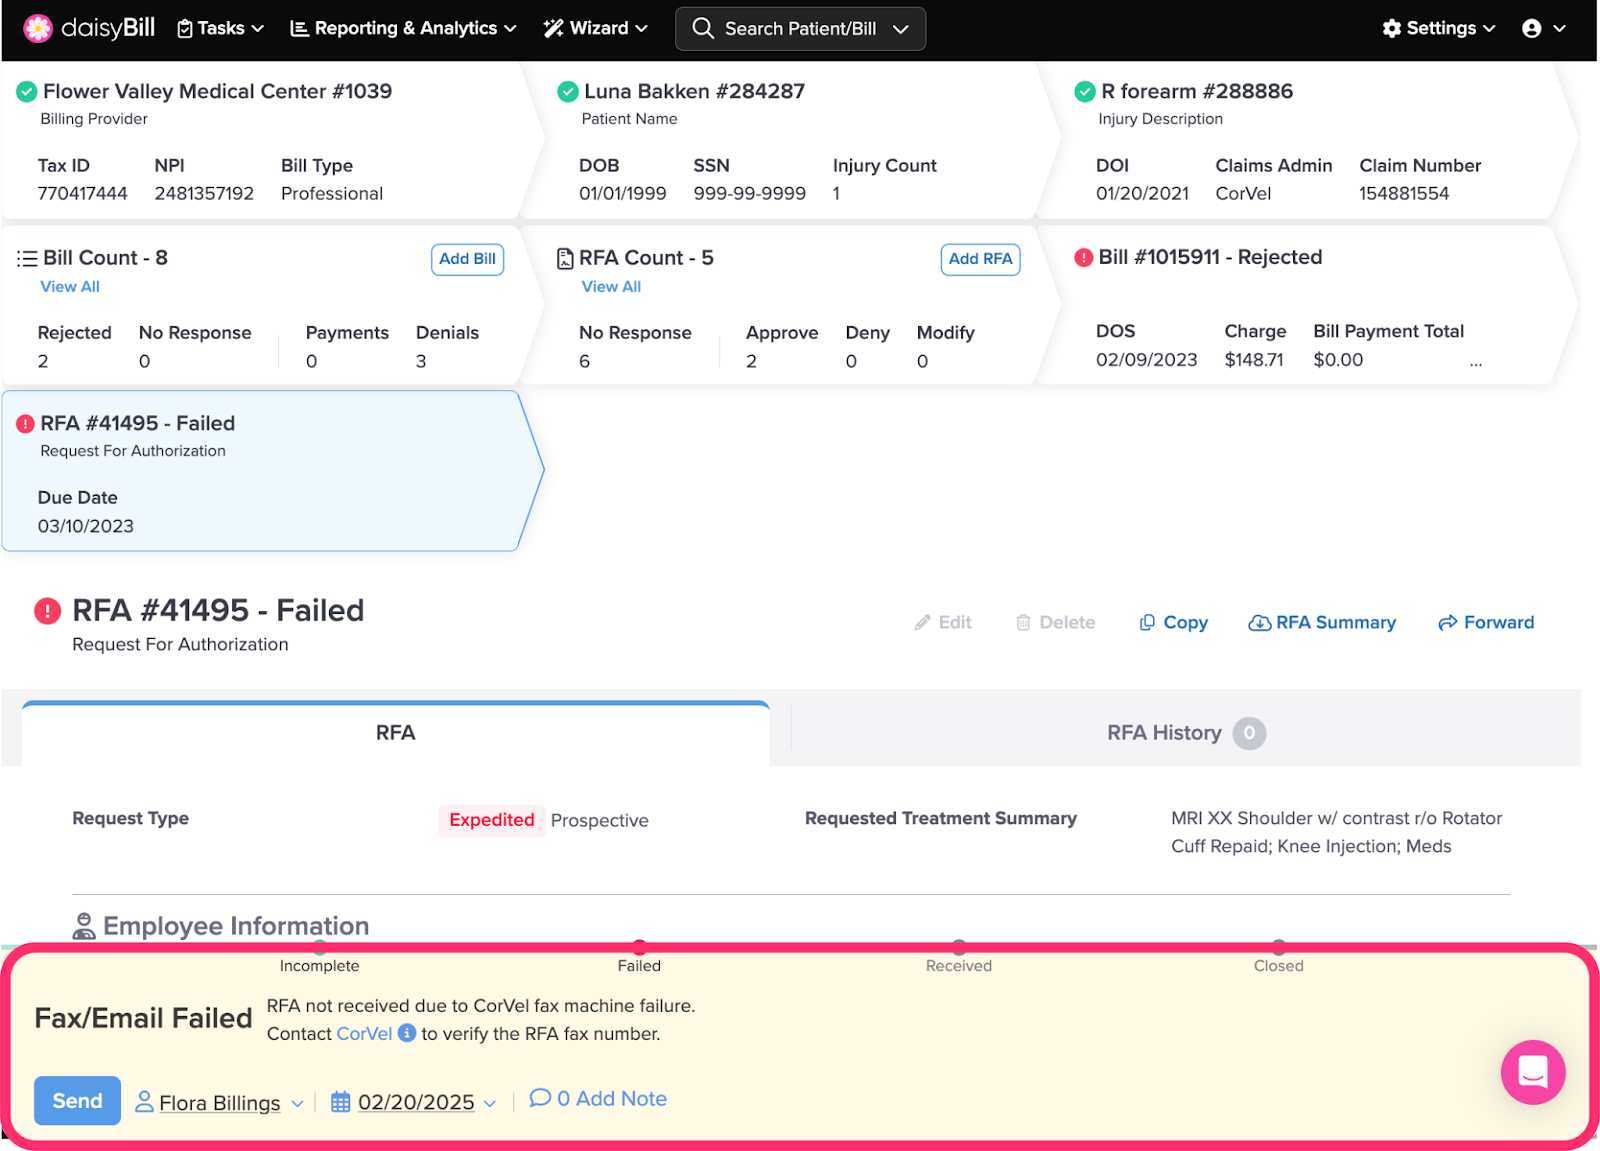
Step 1. Review the fax number/email used and ensure it is correct
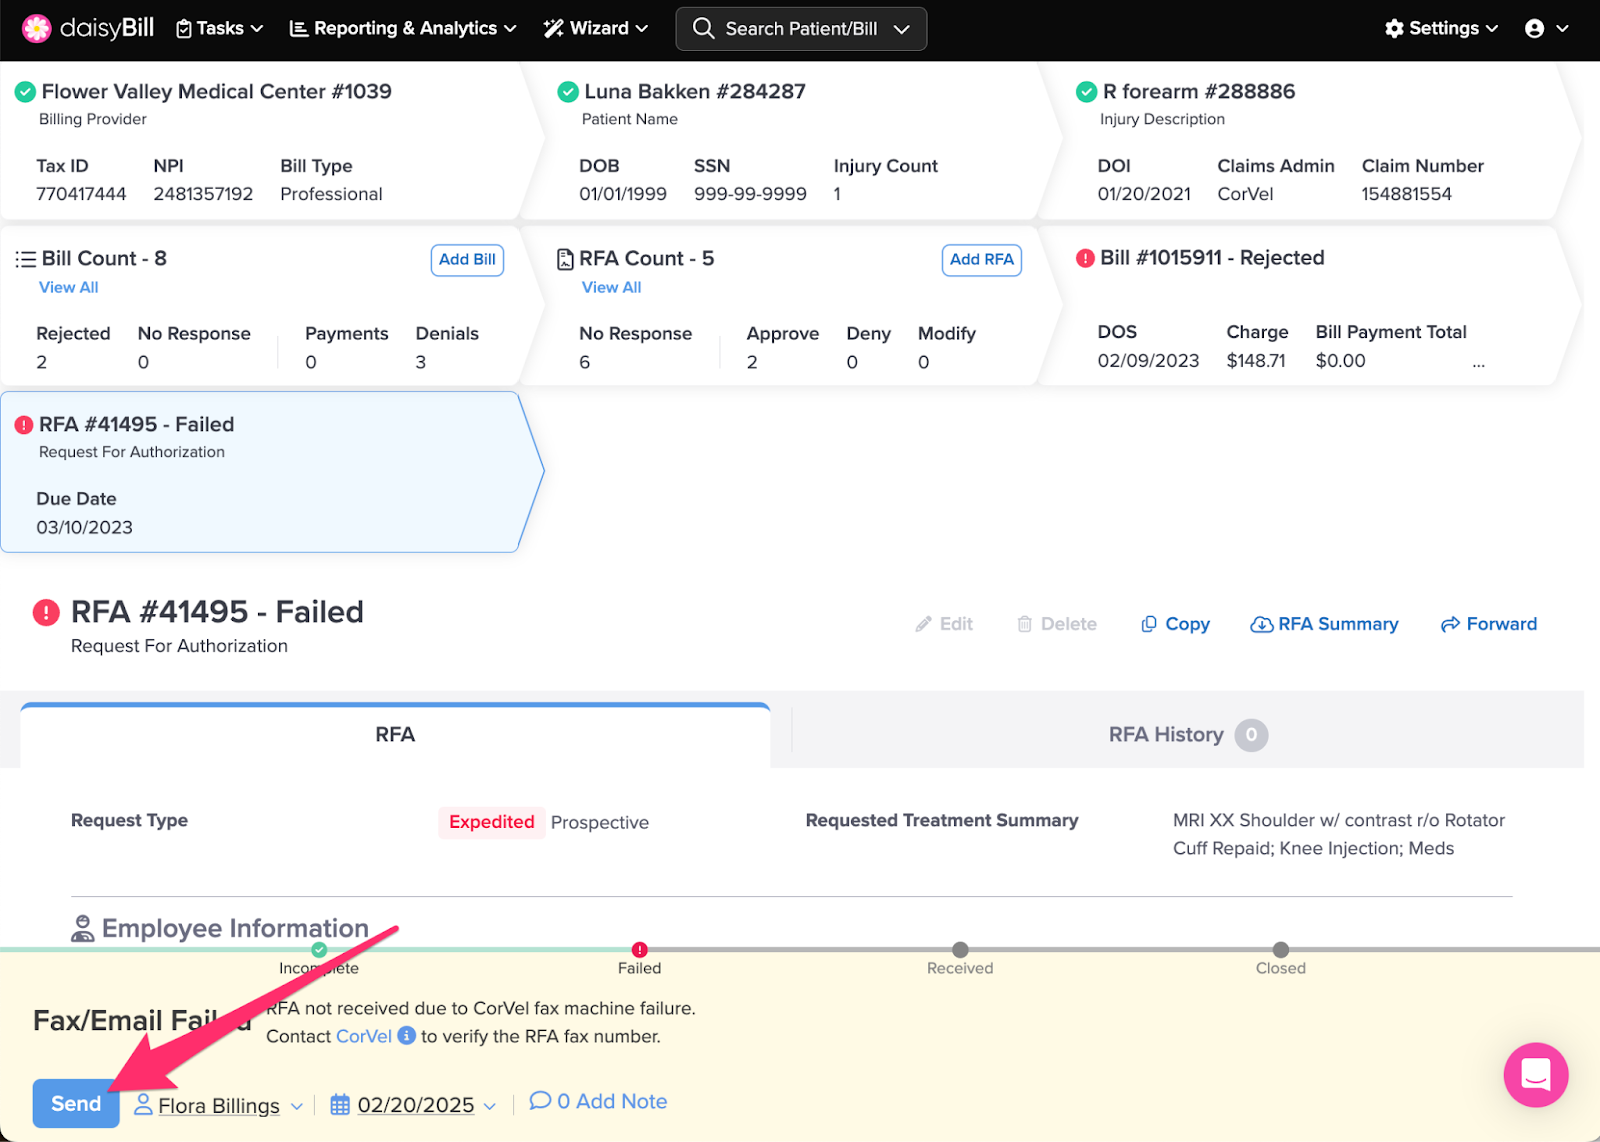
Step 2. Click the ‘Send’ button
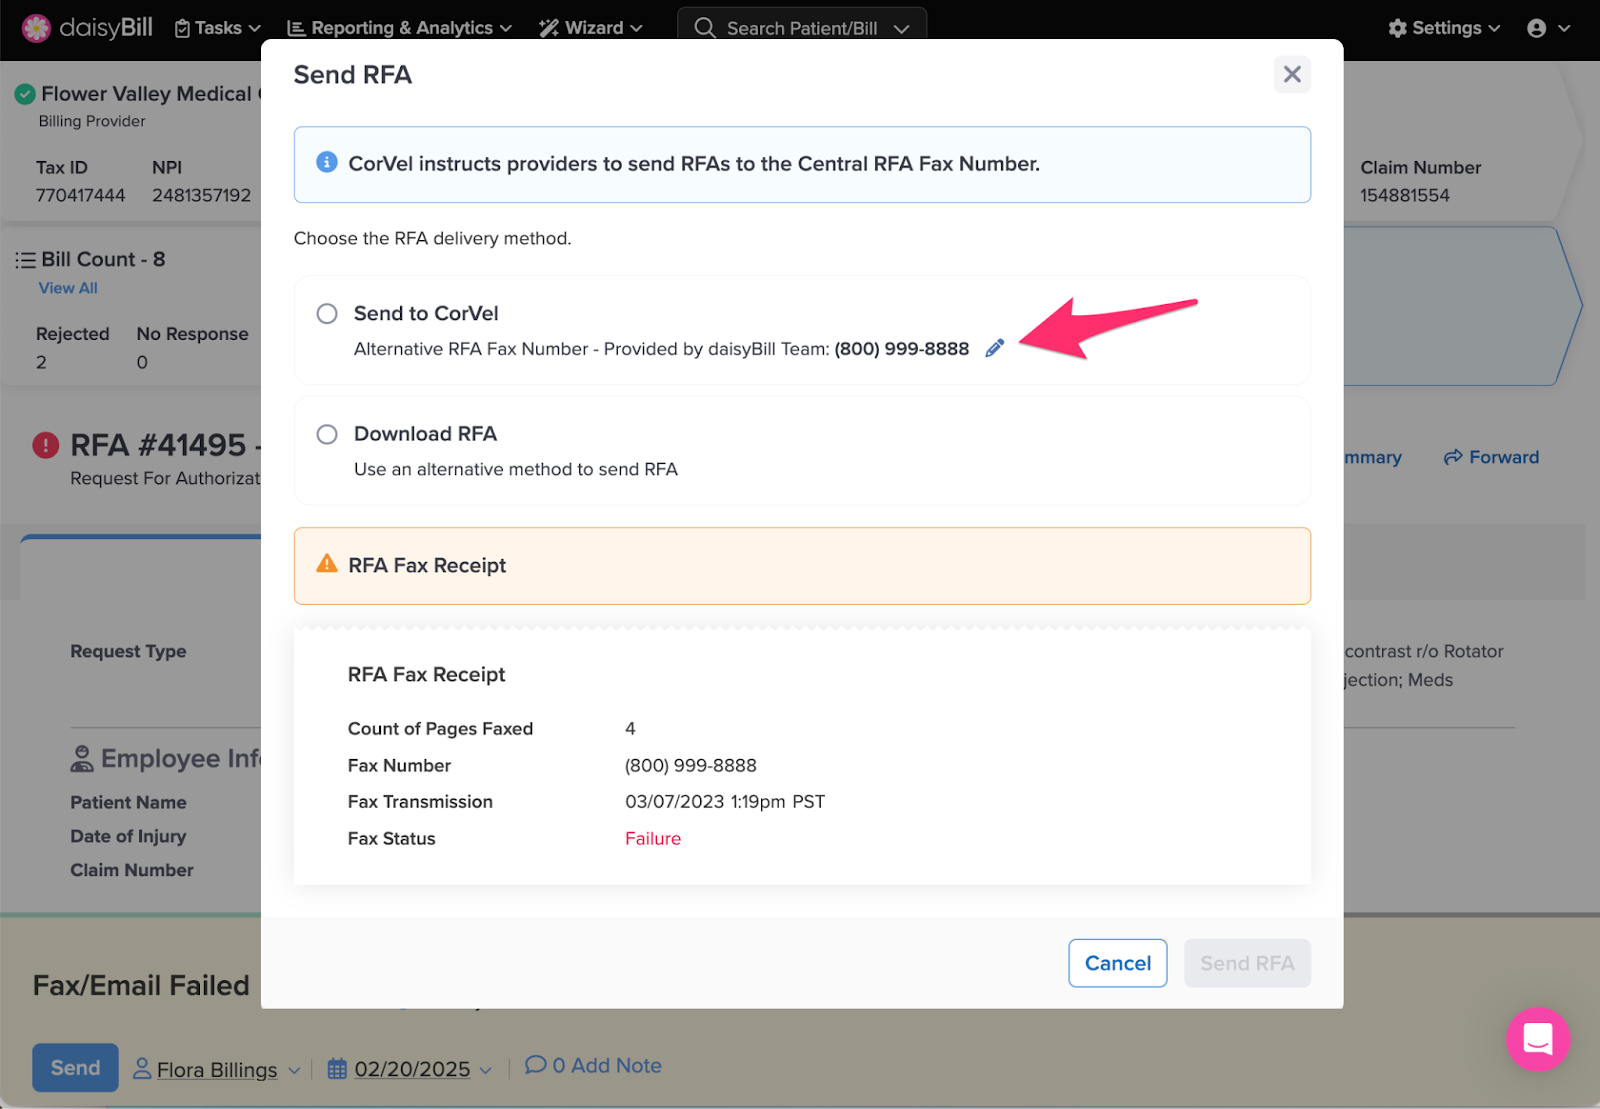
Step 3. Select your RFA Delivery Method
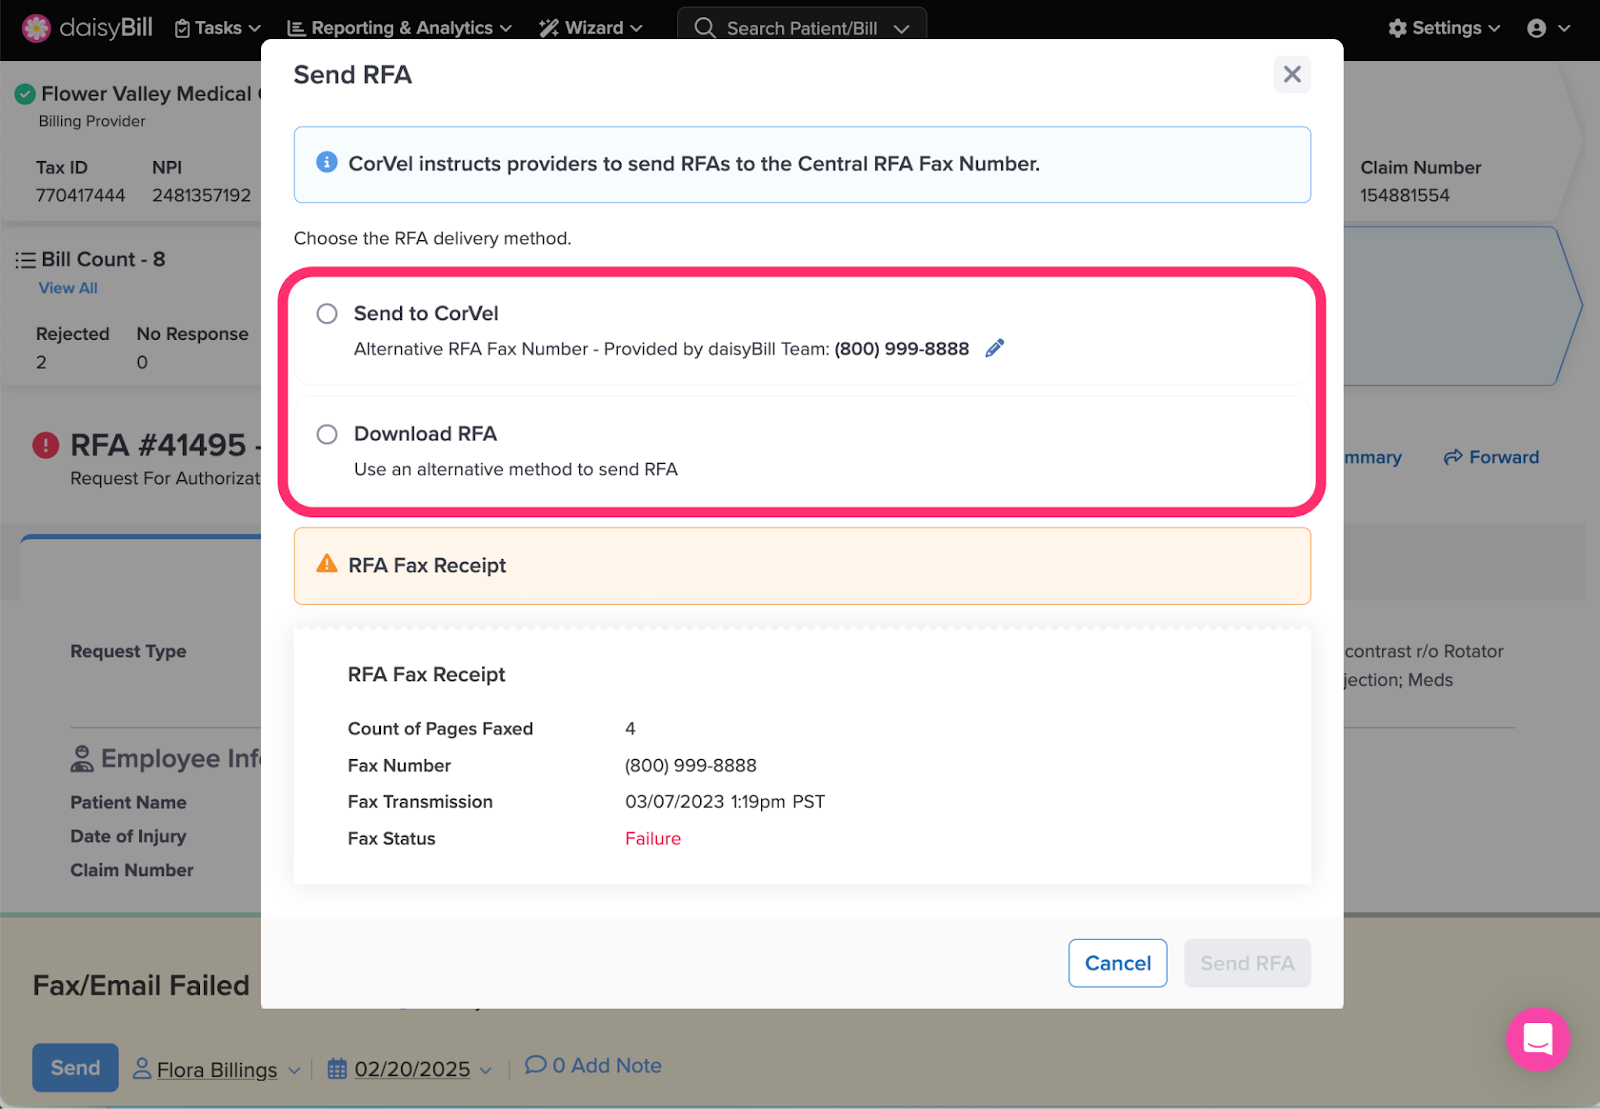
Step 4. Review the submission method previously used
The method most recently used will appear in the RFA Receipt box. Ensure there are no mistakes or errant numbers. Click the pencil icon to make edits to the RFA Fax number.
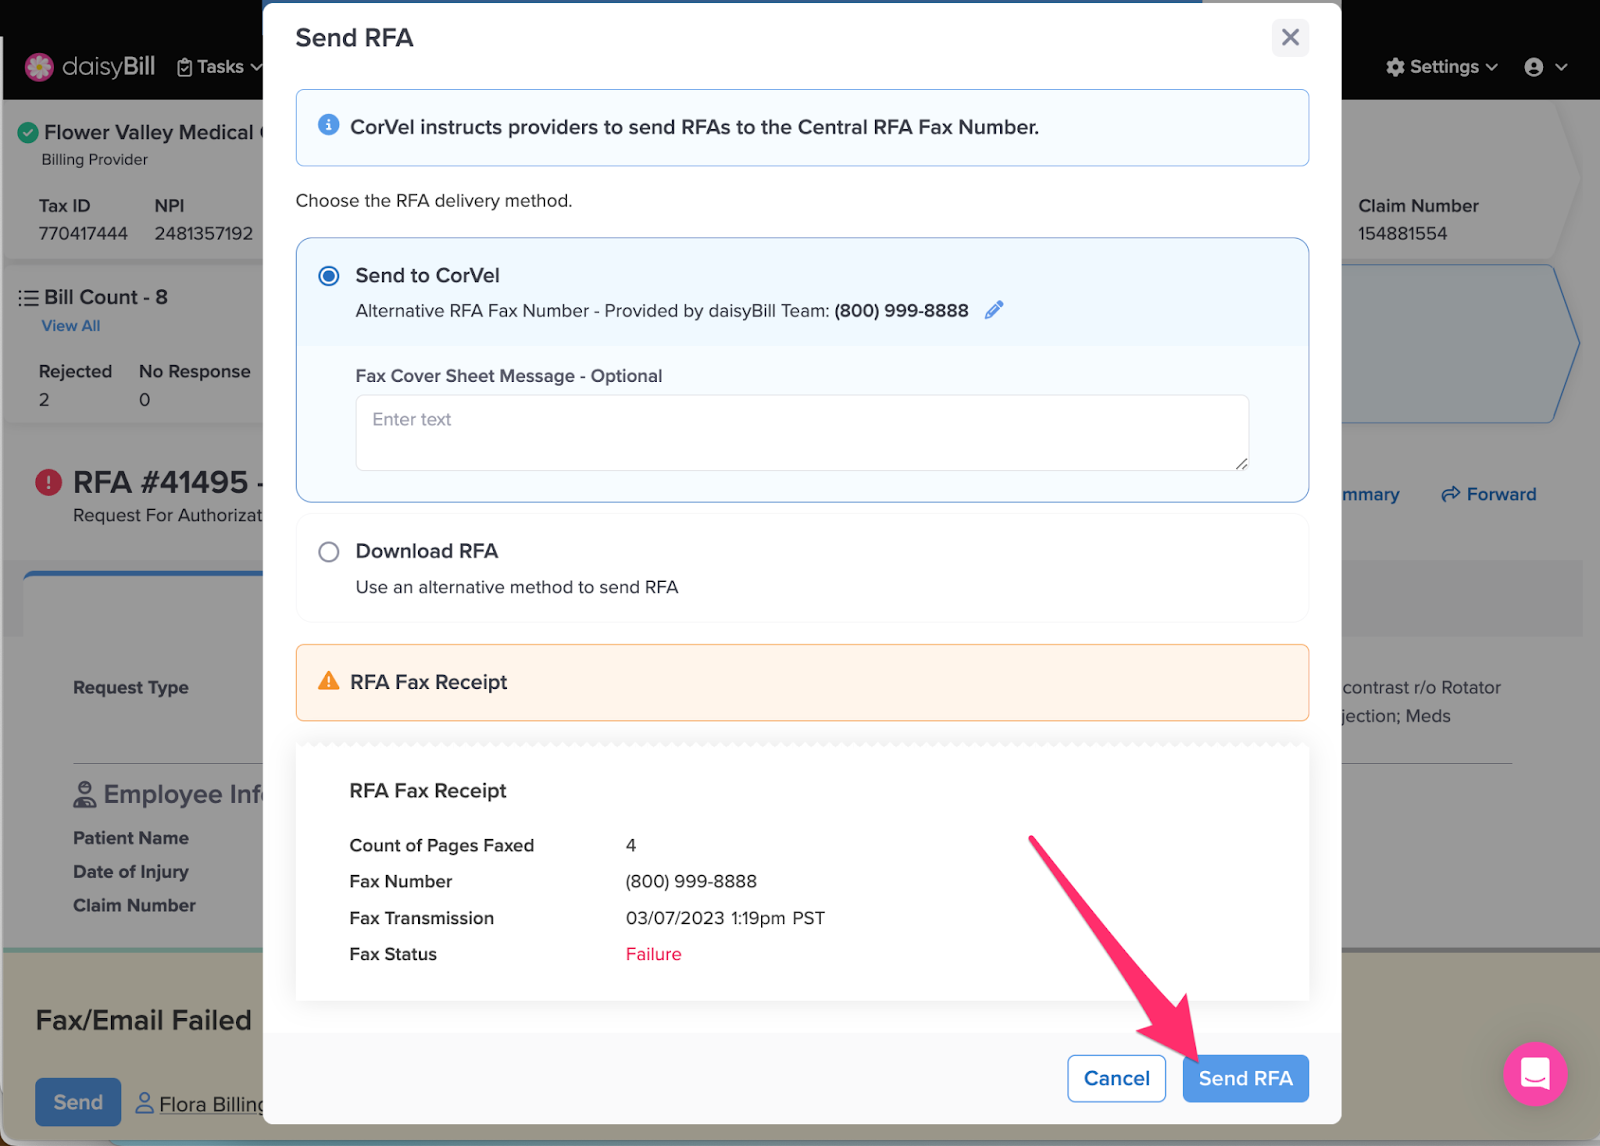
Step 5. Click ‘Send RFA’
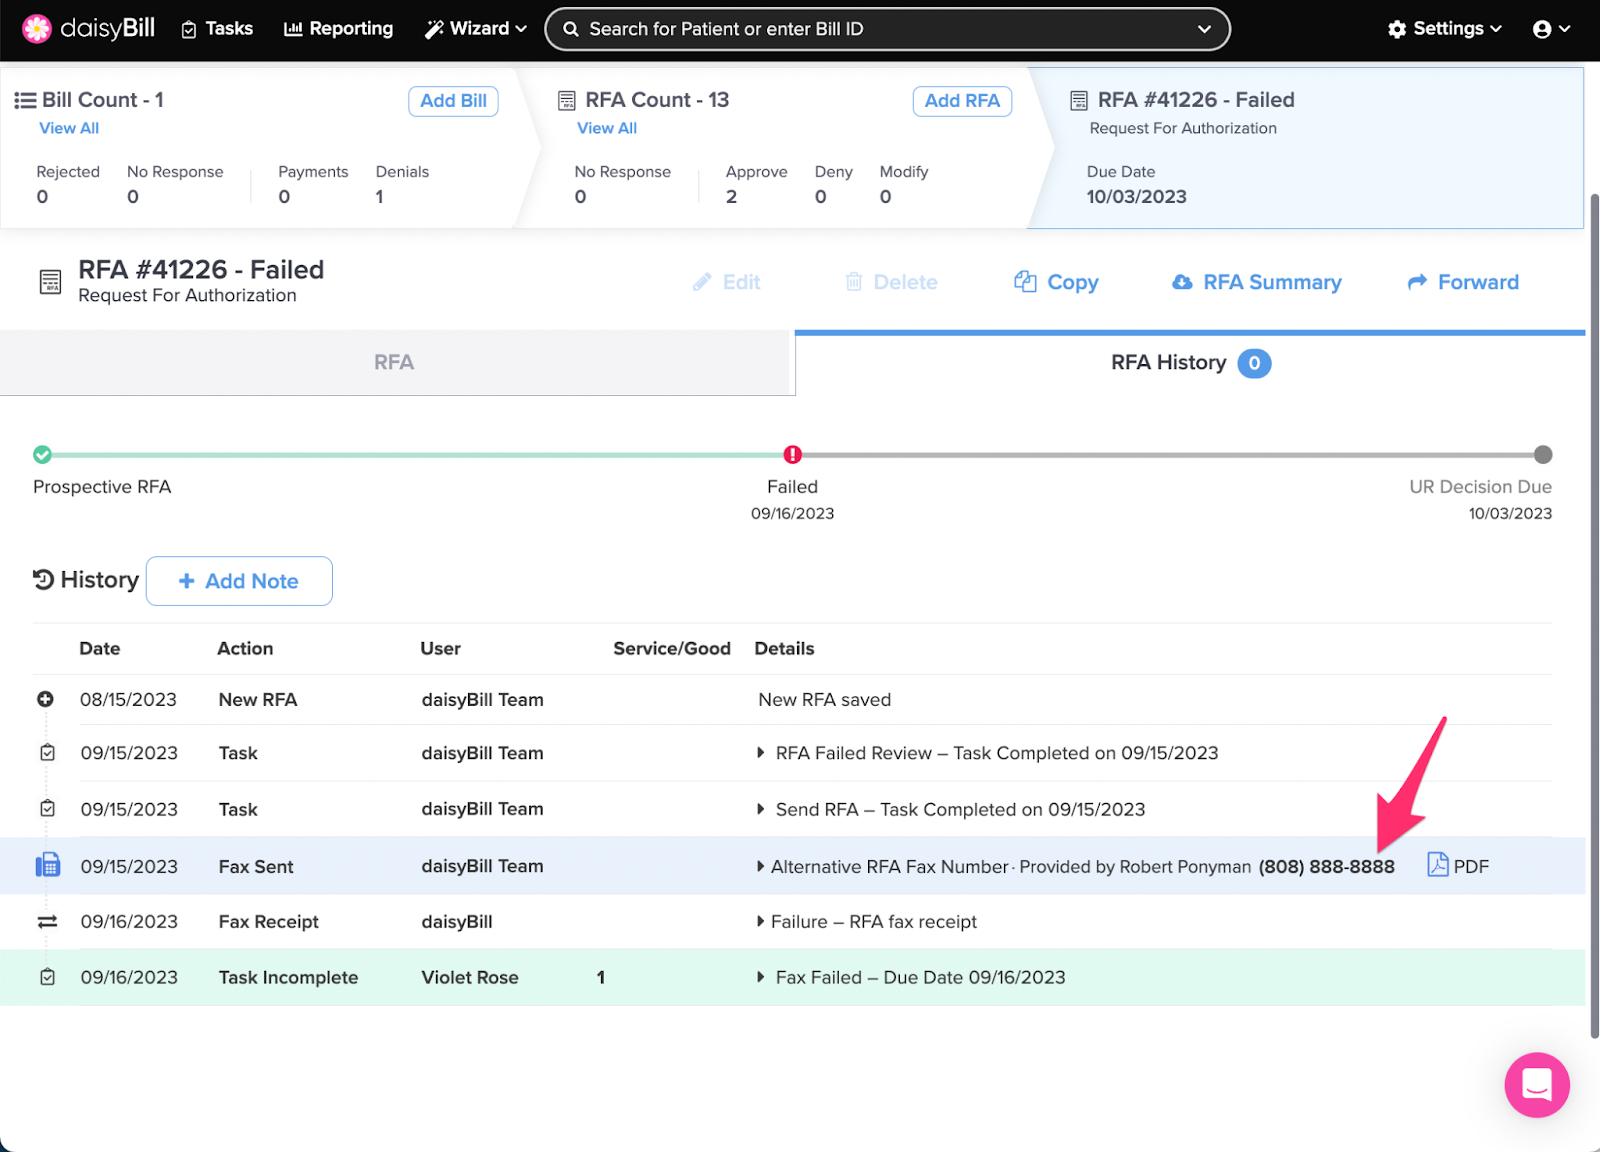
If your fax continues to fail, contact the adjuster and request a different fax number.
On to the next!