In Charges, set the percentage of the state fee schedule (if available), or create your own Charges for all or some of the services you bill.
There are three ways to set your Charges:
- Charges as Percentage of State Fee Schedule (not available for all states)
- Import ‘Custom Charges’
- Manually enter ‘Custom Charges’
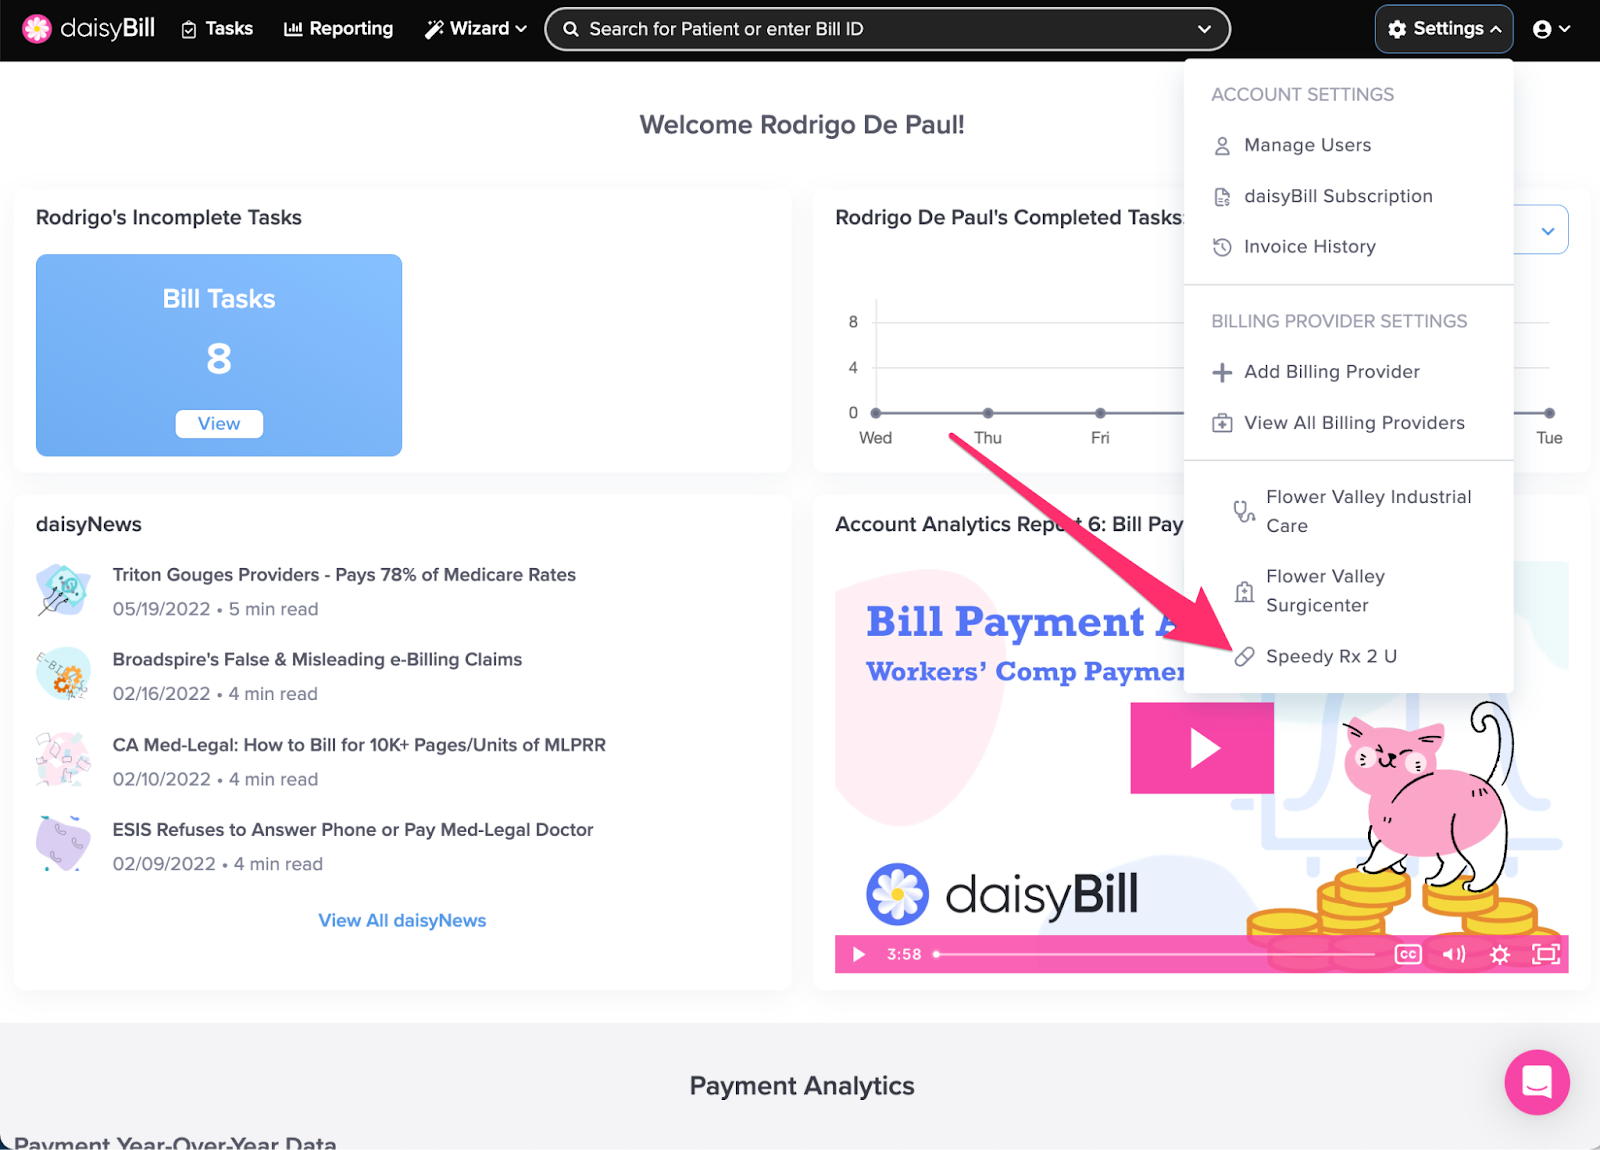
Step 1. On the navigation bar, click ‘Settings’, then click the name of the Billing Provider
This will navigate directly to the specified Billing Provider.
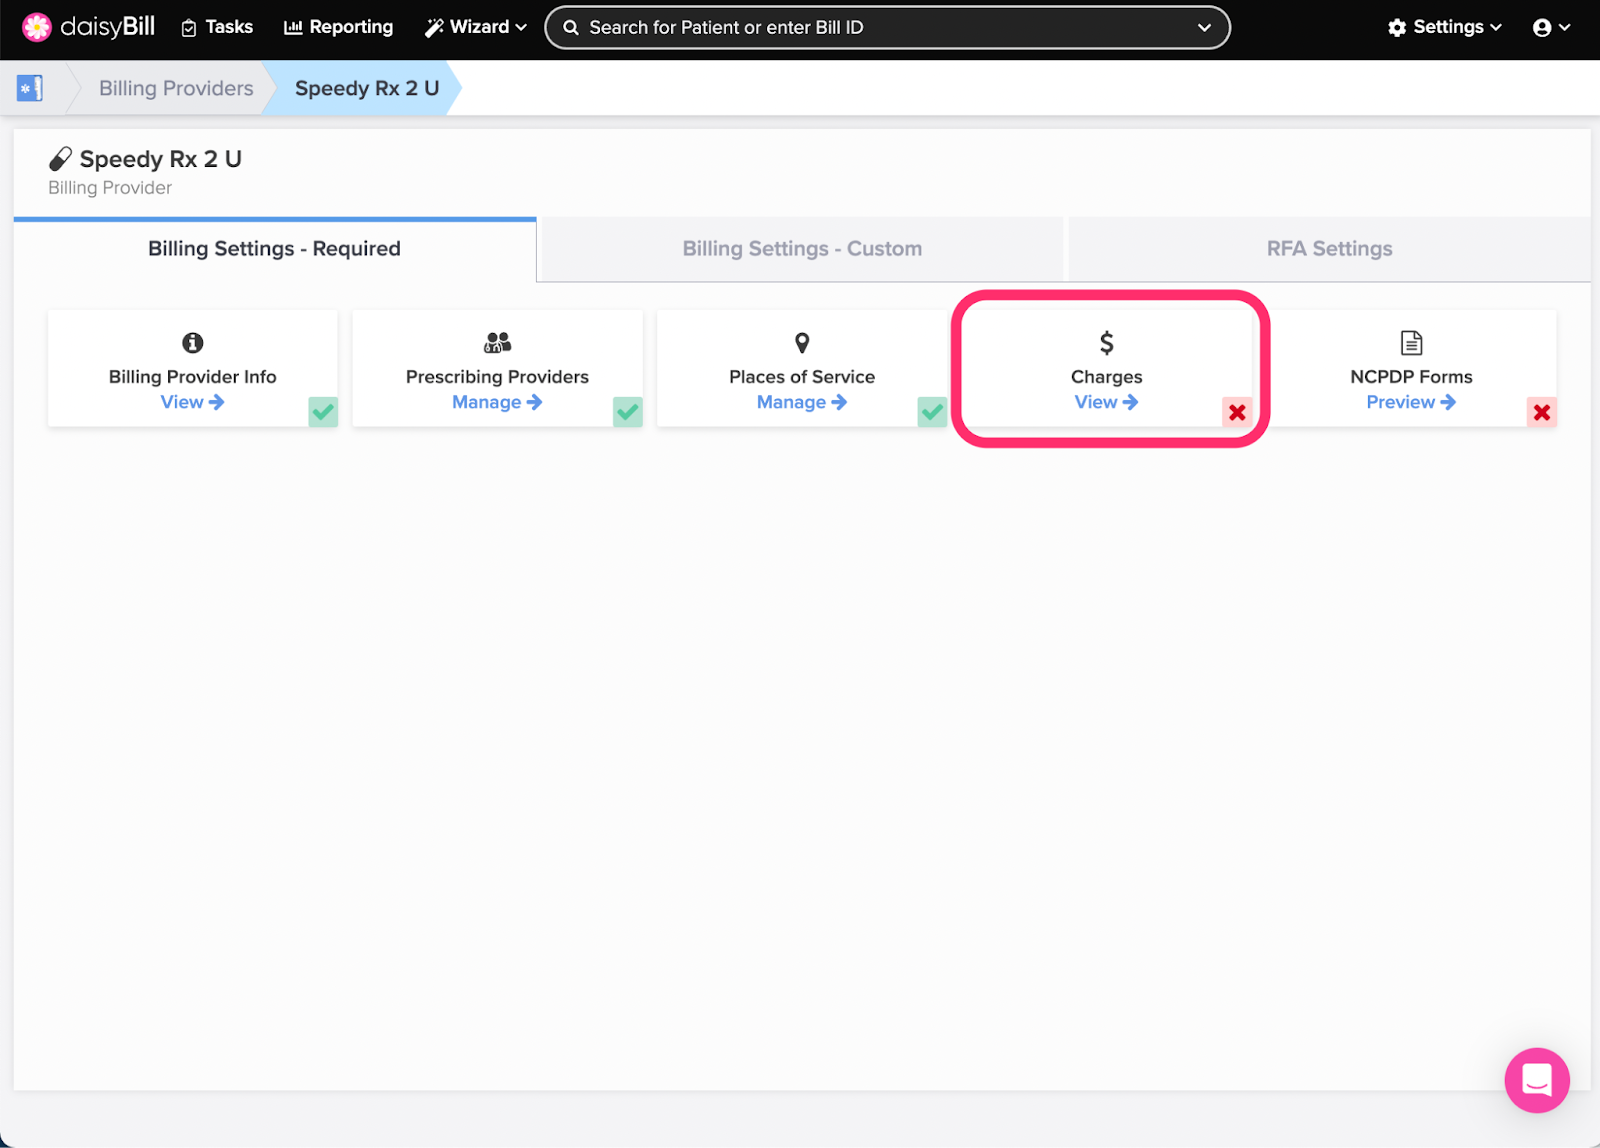
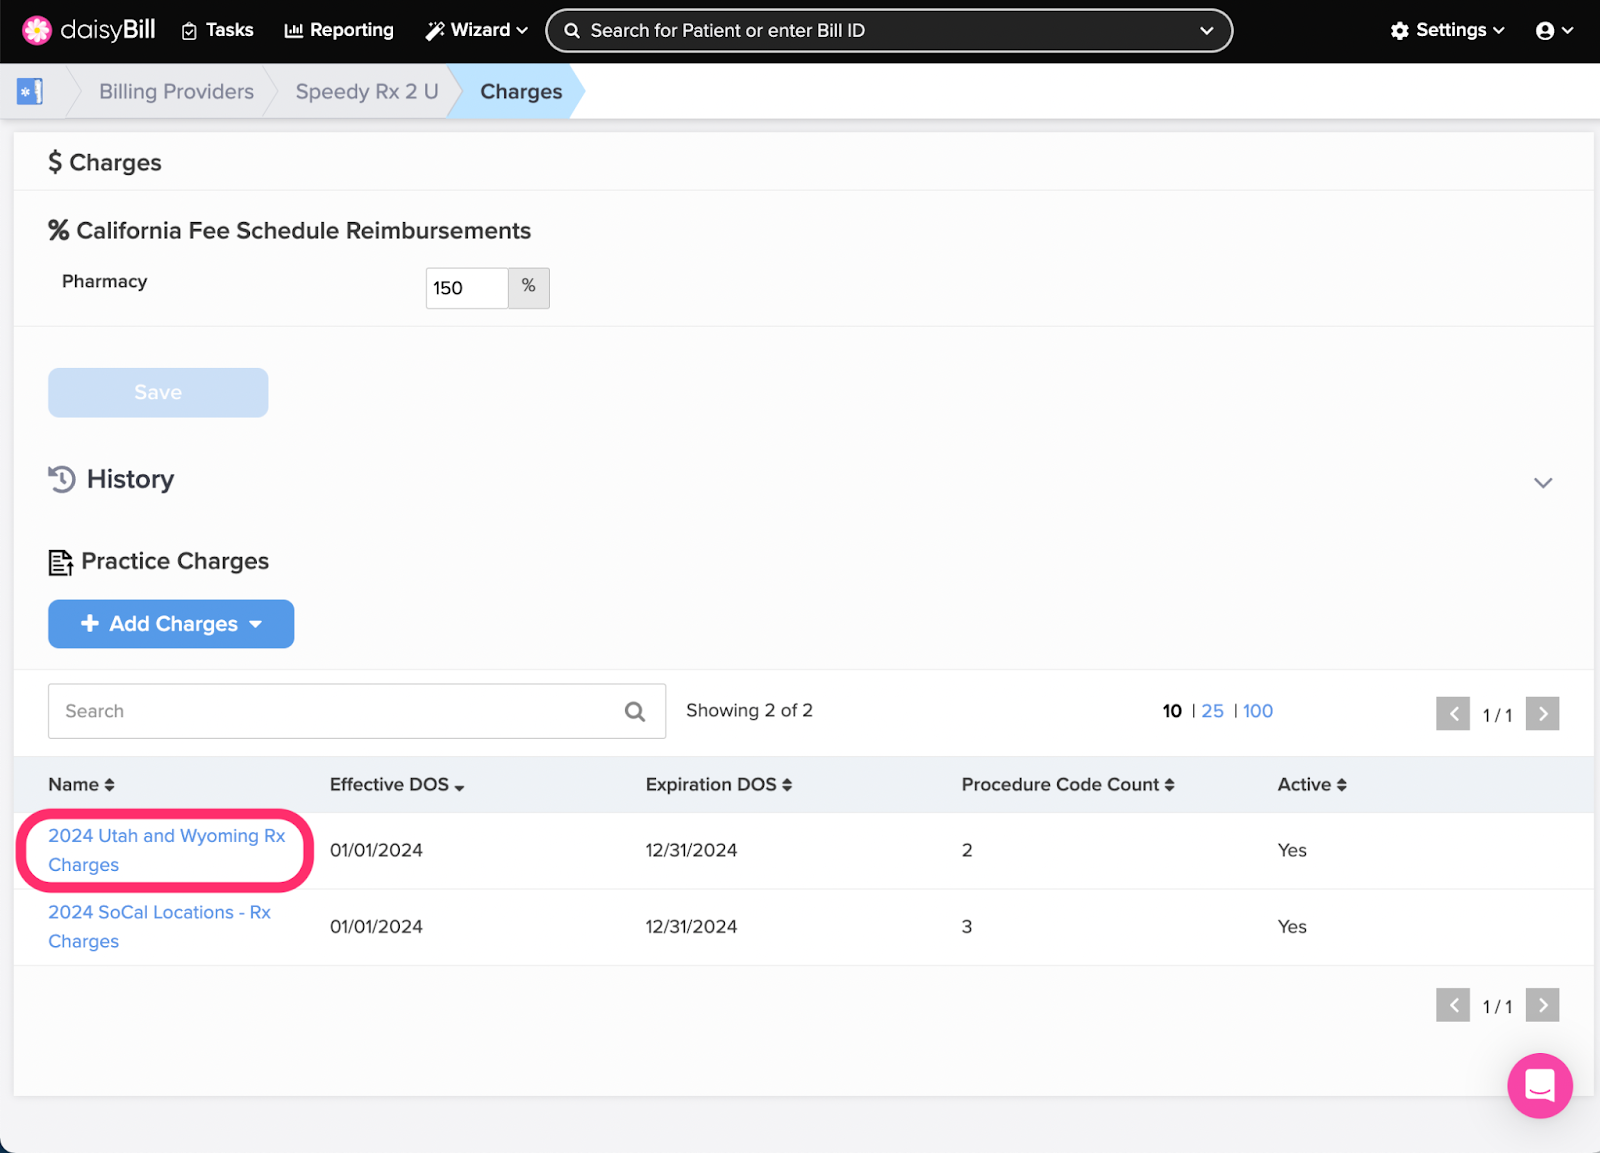
Step 2. Click the ‘Charges’ card
A green ‘Checkmark’ icon in the lower right corner of the card indicates Charges have been set for the Billing Provider. A red ‘X’ icon indicates no Charges have been set.
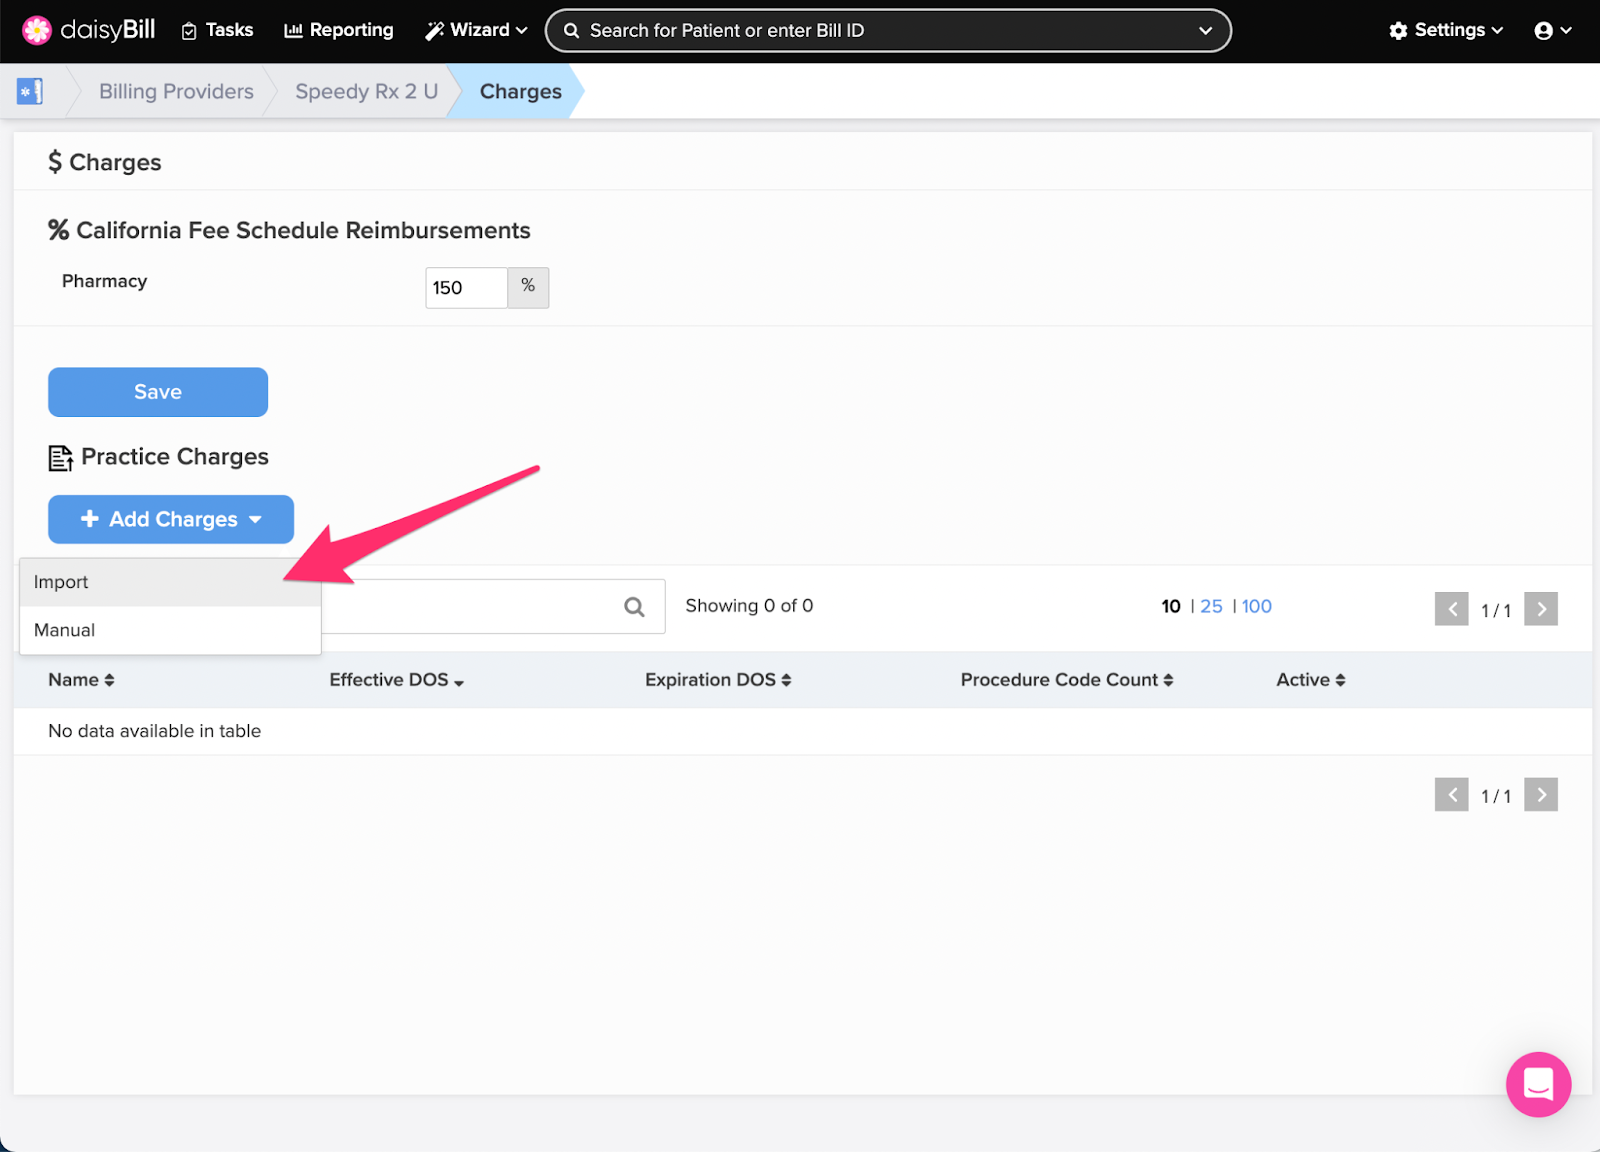
Step 3. Optional (when available): Adjust your ‘Charges’, then click the ‘Save’ button
Set percentages for each type of service you bill. Changes to your Charges are effective as soon as you click the Save button.
If you don’t see this option, it’s because daisyBill is still working on your state’s fee schedule! Follow the steps below to import or create your own Custom Charges.
Note: Charges do NOT apply to Procedure Codes associated with a Custom Charge.
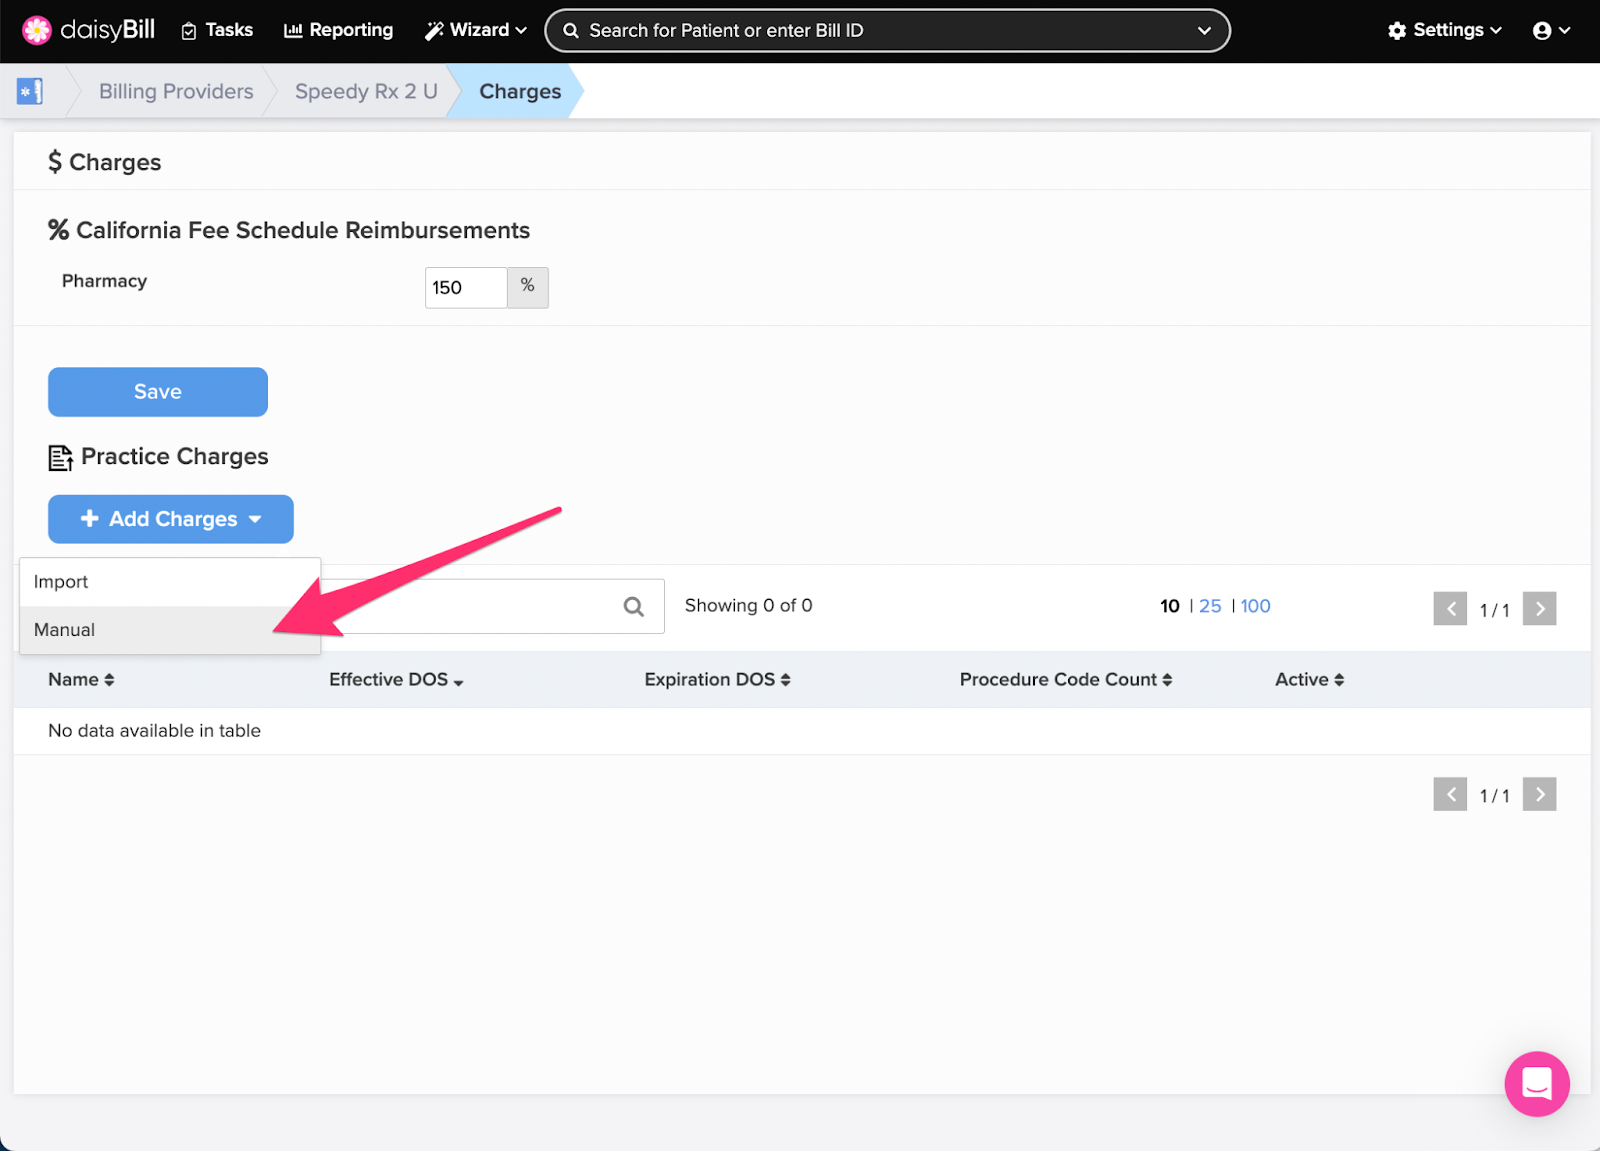
Step 4. To import ‘Custom Charges’ from a spreadsheet, click ‘Add Charges’, then select ‘Import’
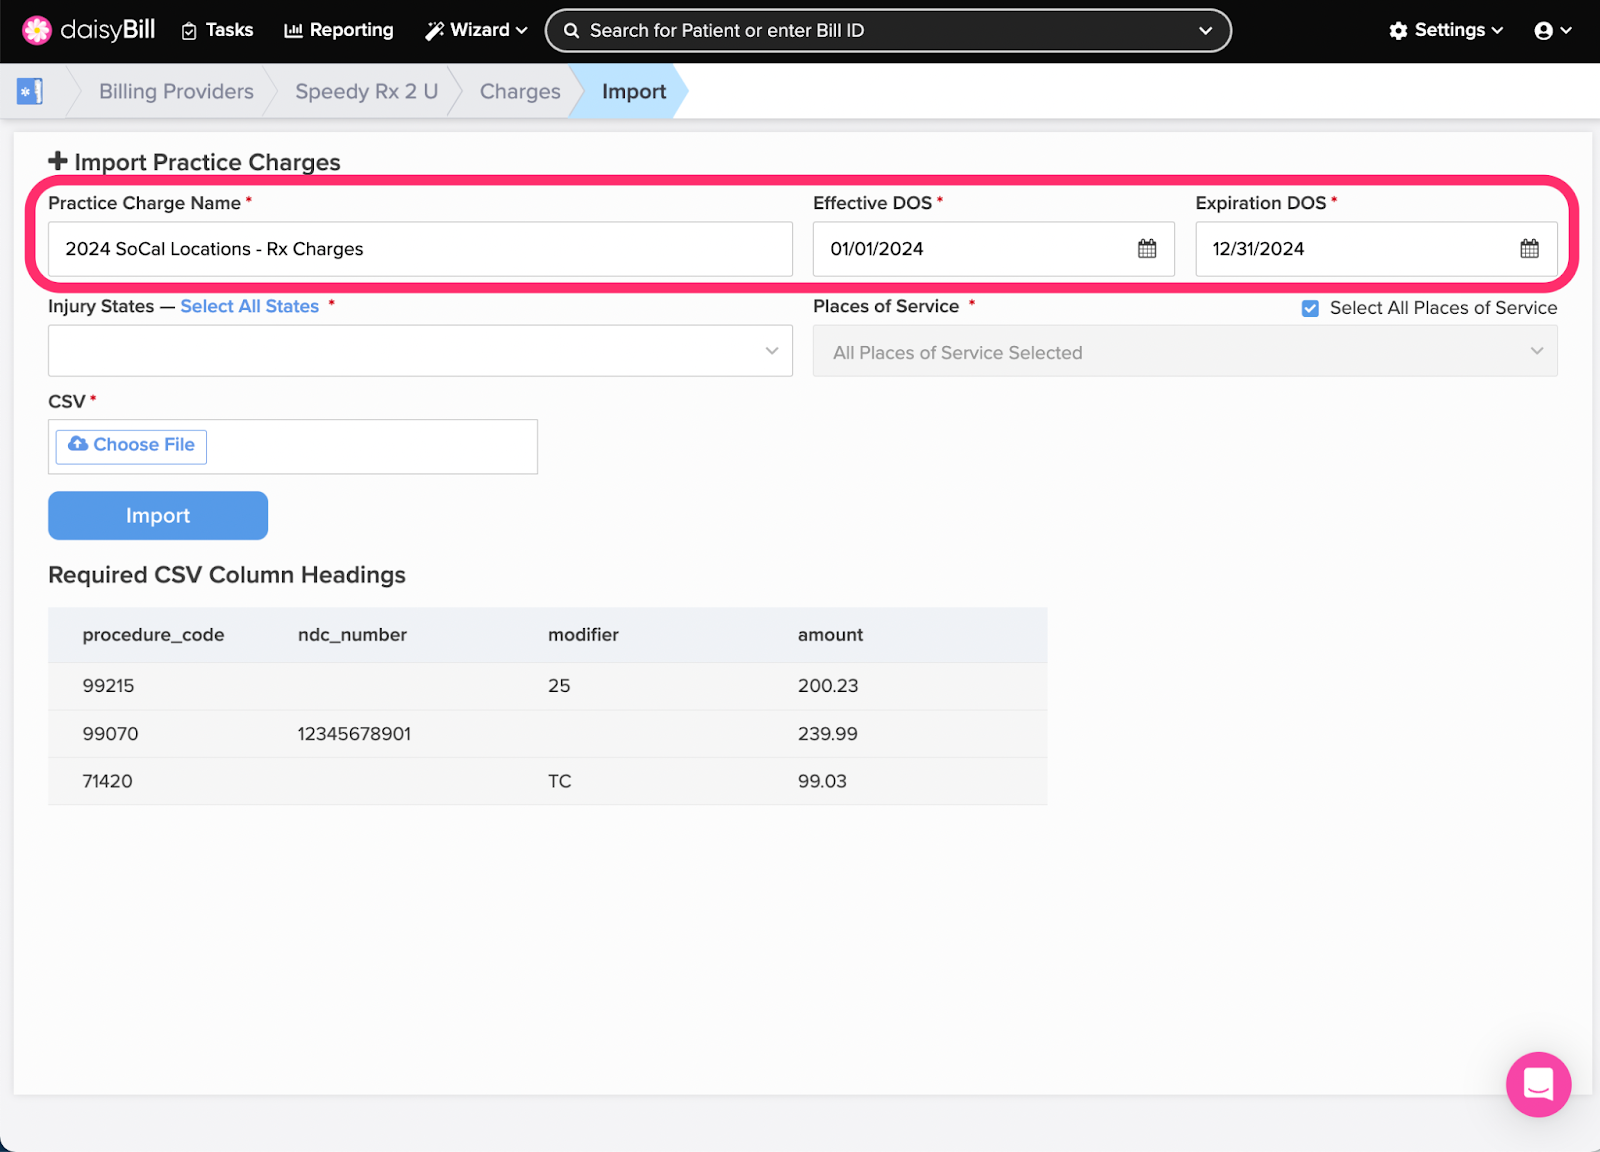
Step 5. Enter the ‘Custom Charge Name’, ‘Effective DOS’, and ‘Expiration DOS’,
Effective DOS and Expiration DOS correspond to the DOS of the bill where the Custom Charge is applicable.
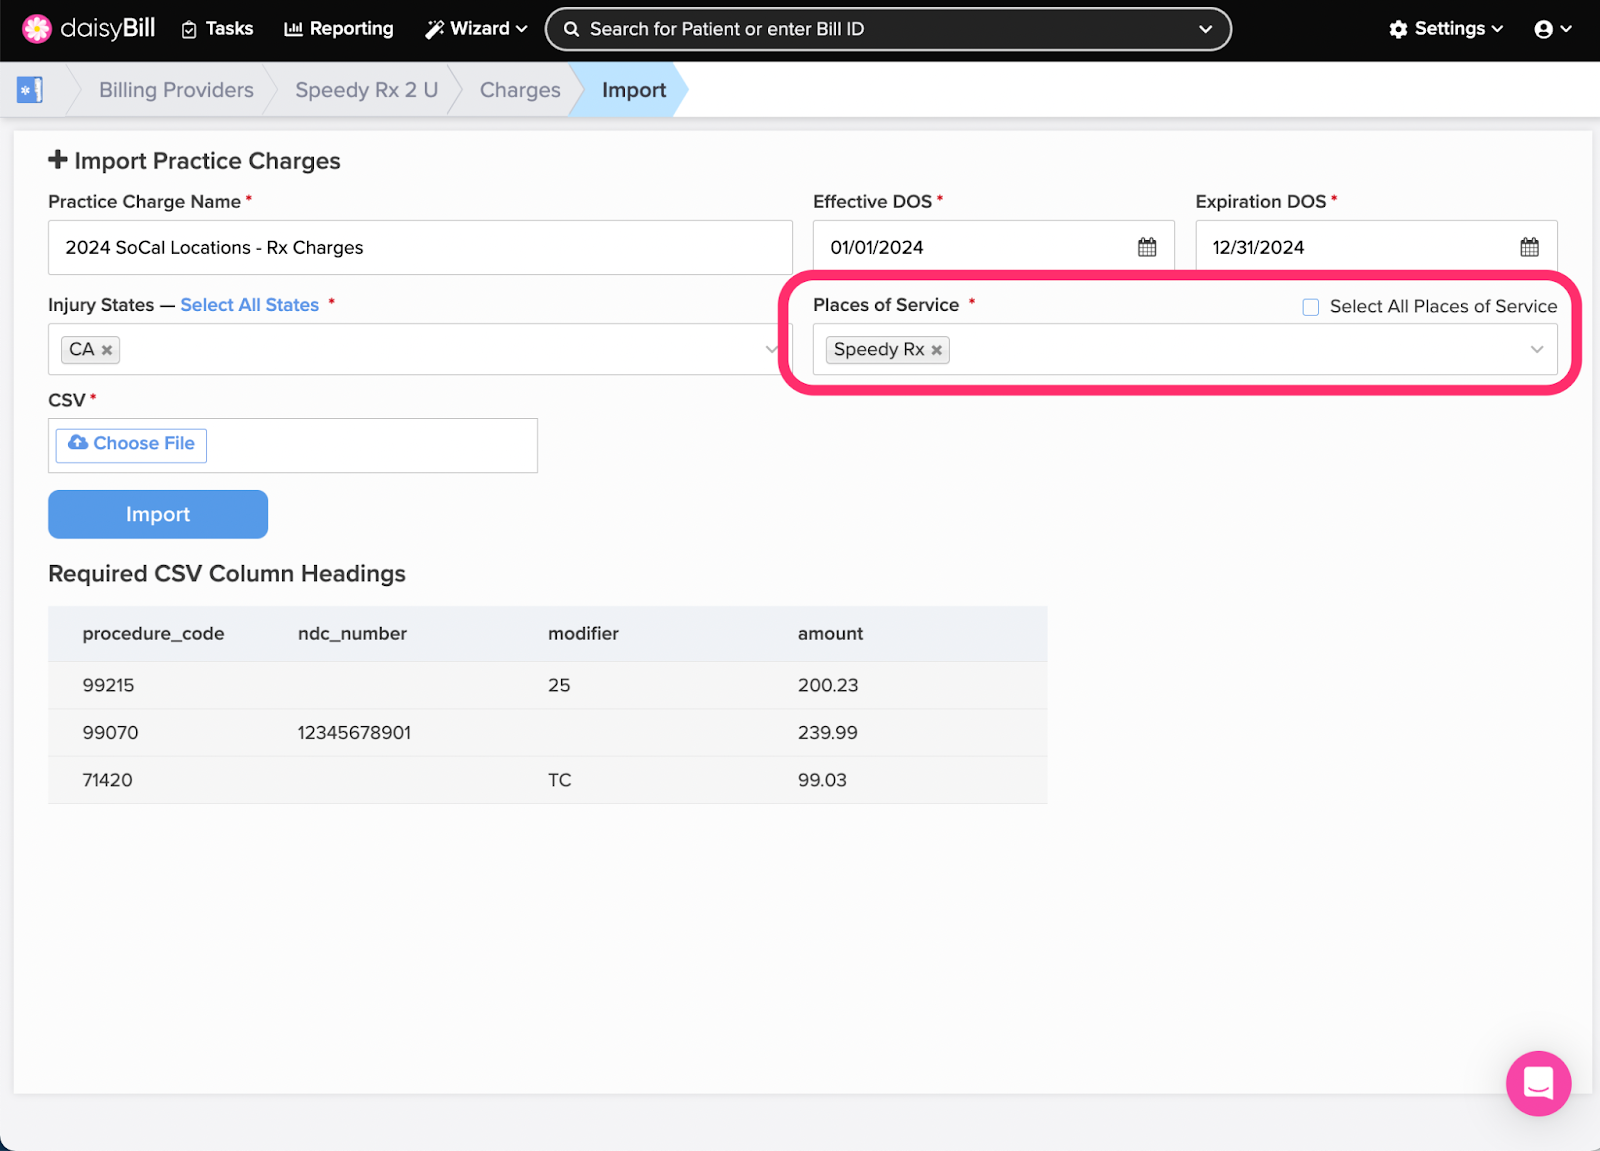
Step 6. Enter the Injury States
From the Injury States dropdown menu, select the States where the Custom Charge will be effective.

Step 7. Enter the Places of Service
From the Places of Service dropdown menu, select the Places of Service where the Custom Charges will be effective. Toggle the ‘Select All Places of Service’ box to quickly select all Places of Service.
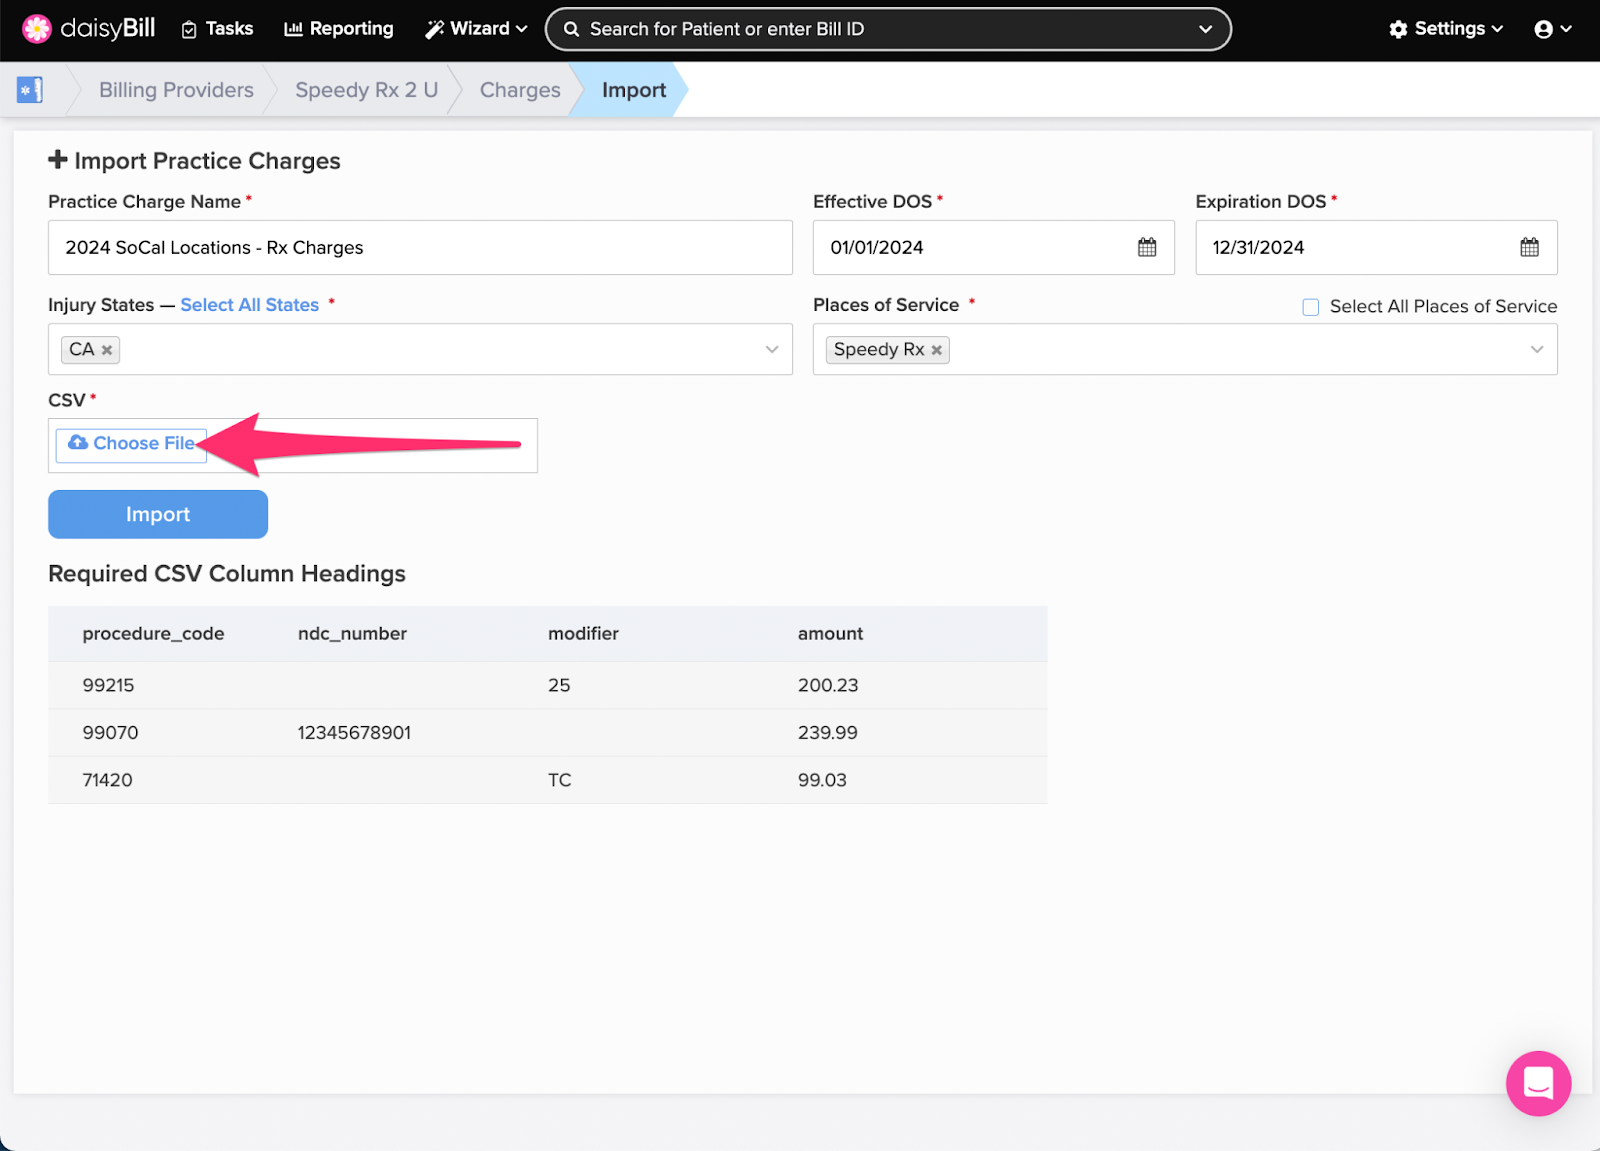
Step 8. Attach your .csv file
Note: The CSV file MUST use the column headings ‘procedure_code’, ‘supplemental_data’, ‘modifier’, and ‘amount’.
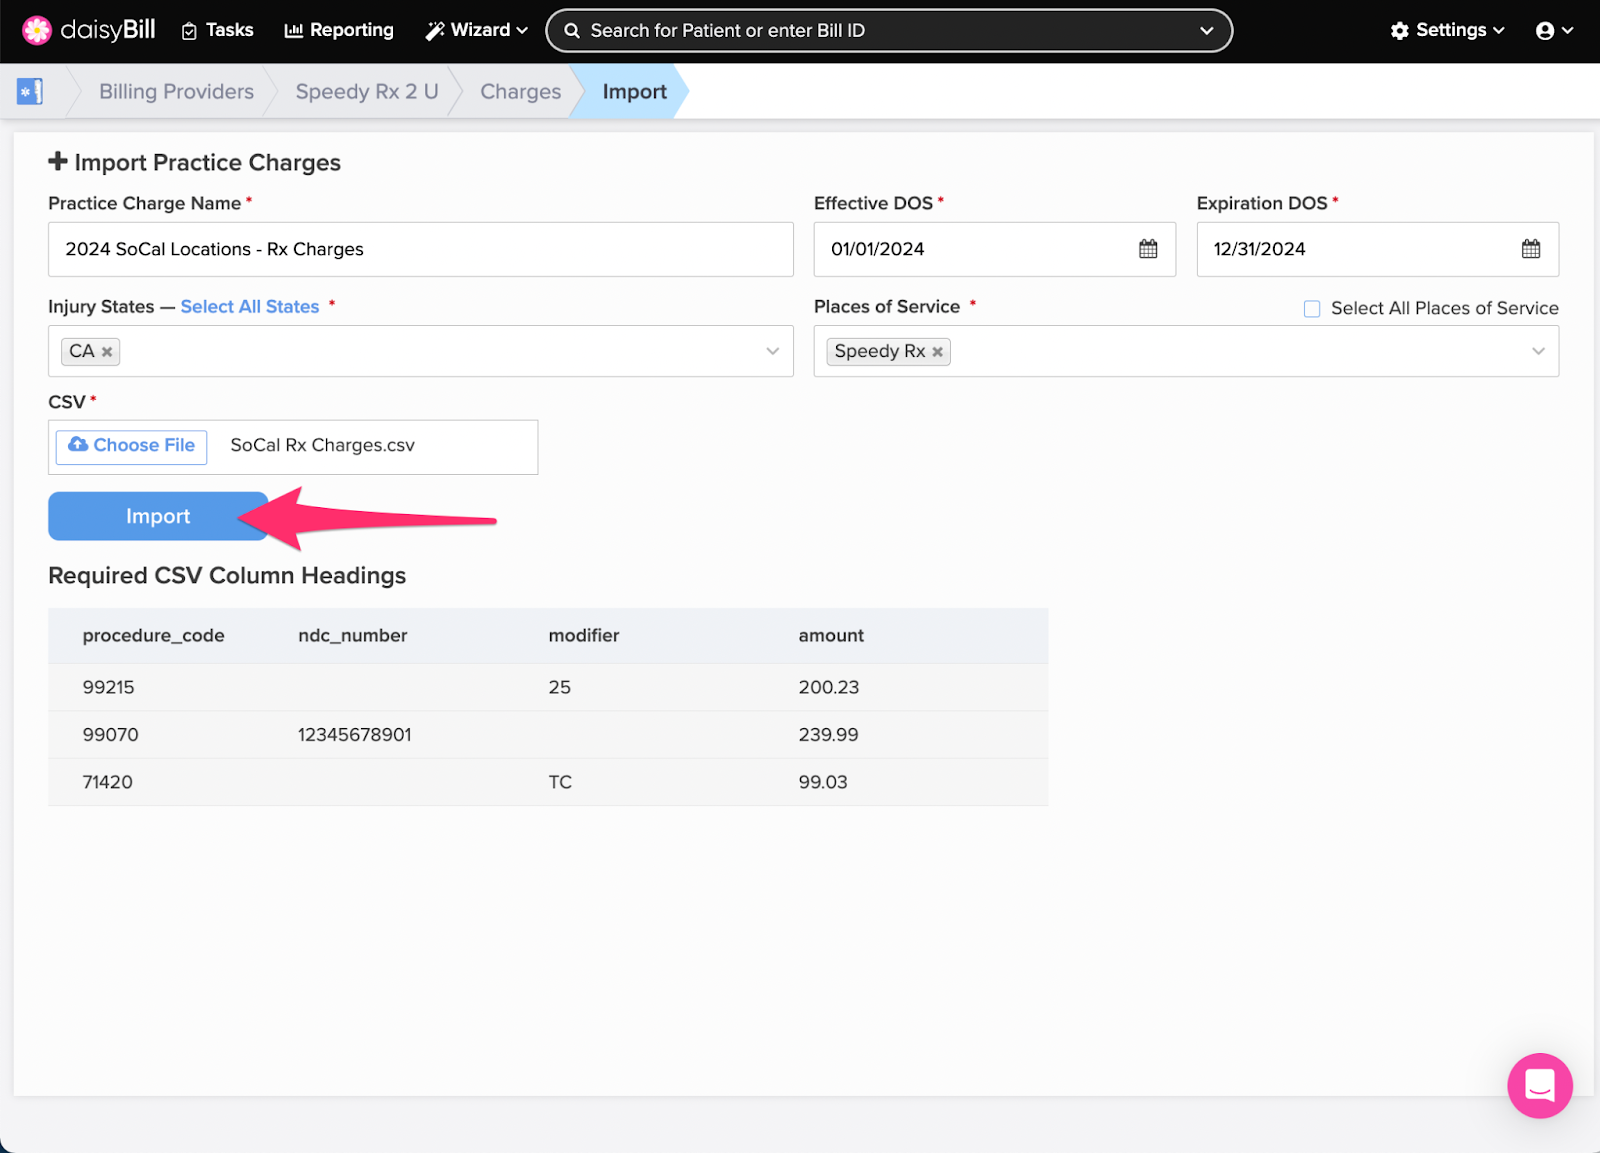
Step 9. Click ‘Import’
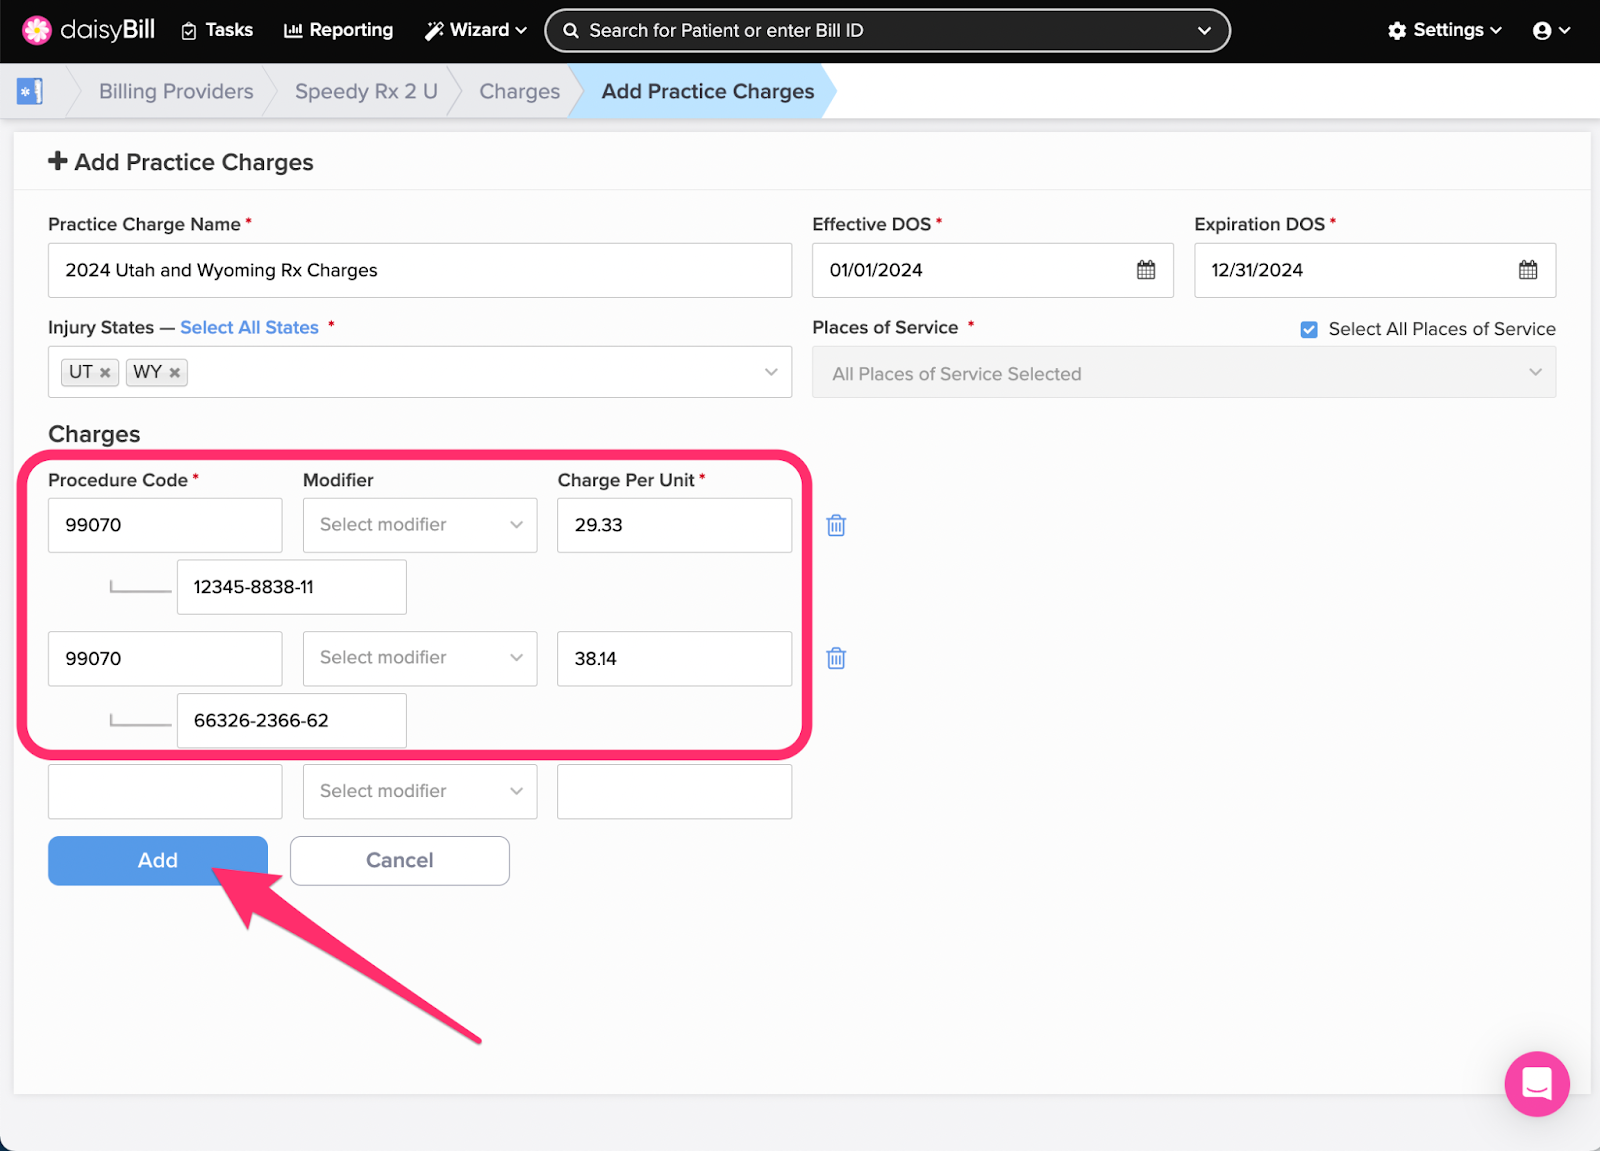
Step 10. To manually enter ‘Custom Charges’, click ‘Add Charges’, then select ‘Manual’
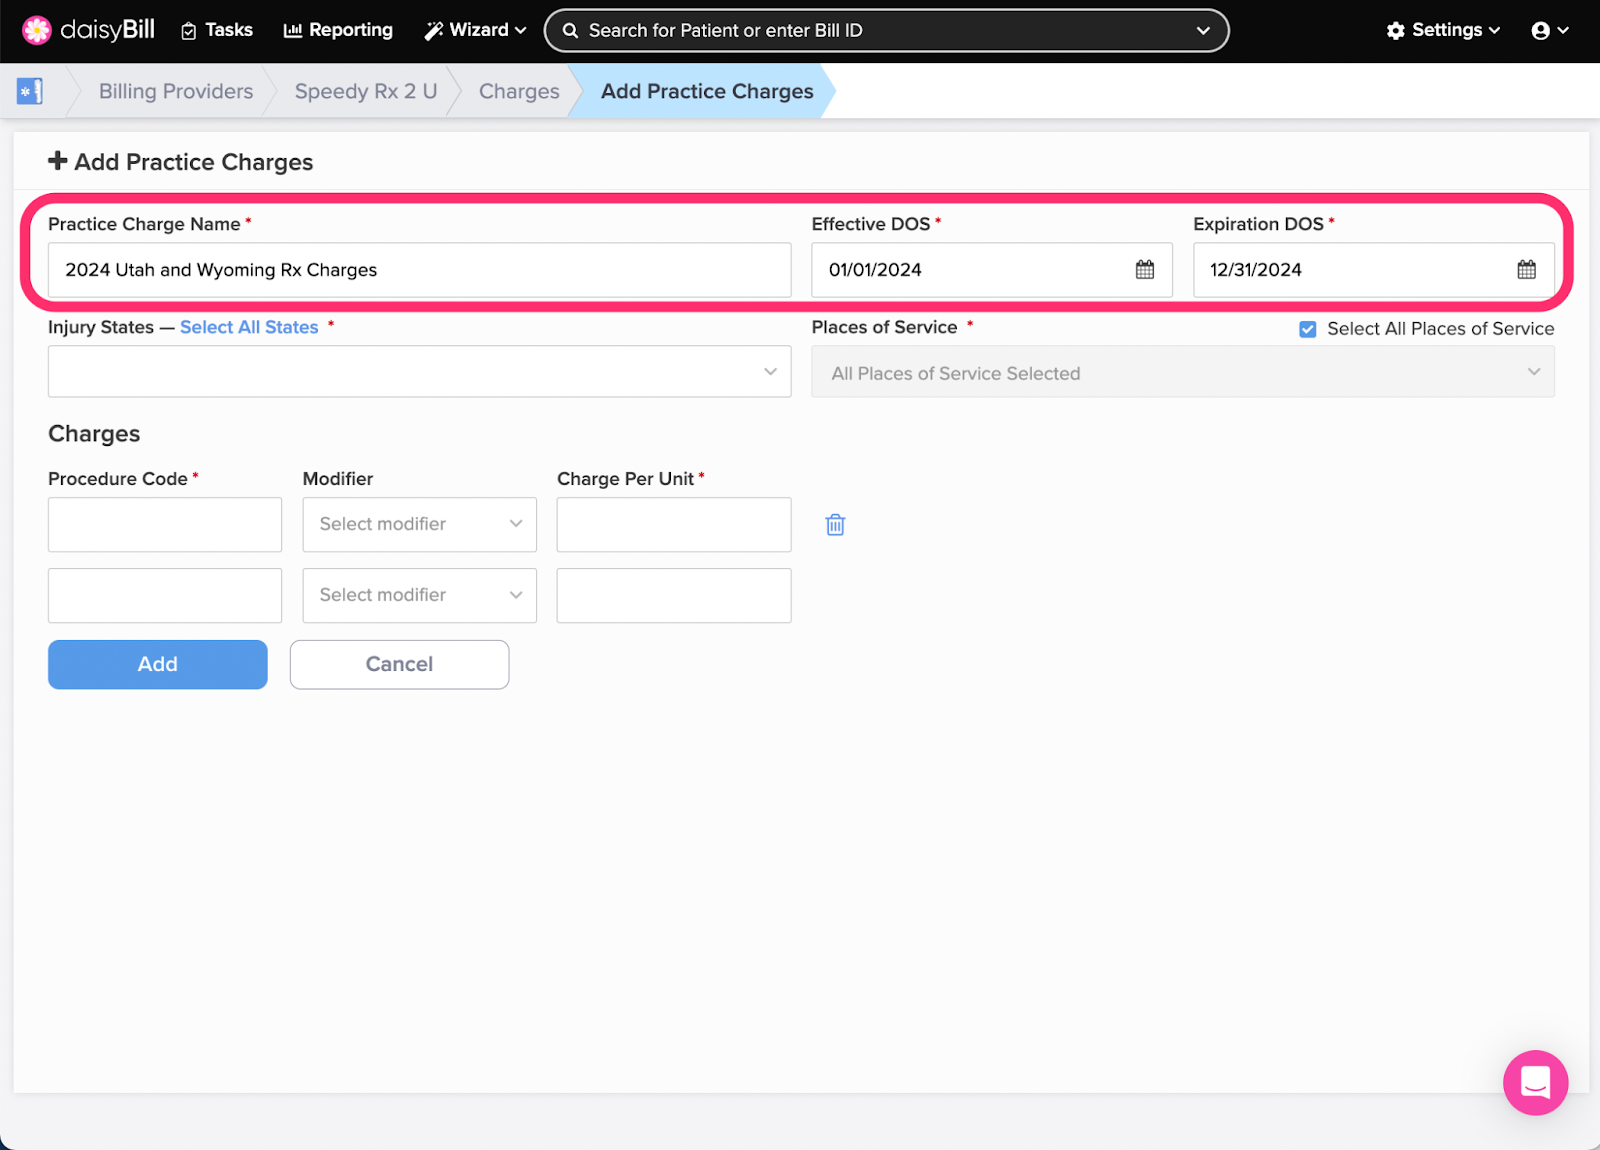
Step 11. Enter the ‘Custom Charge Name’, ‘Effective DOS’, and ‘Expiration DOS’
Effective DOS and Expiration DOS correspond to the DOS of the bill where the Custom Charge is applicable. Multiple Custom Charges can be created with the same Effective DOS and Expiration DOS.
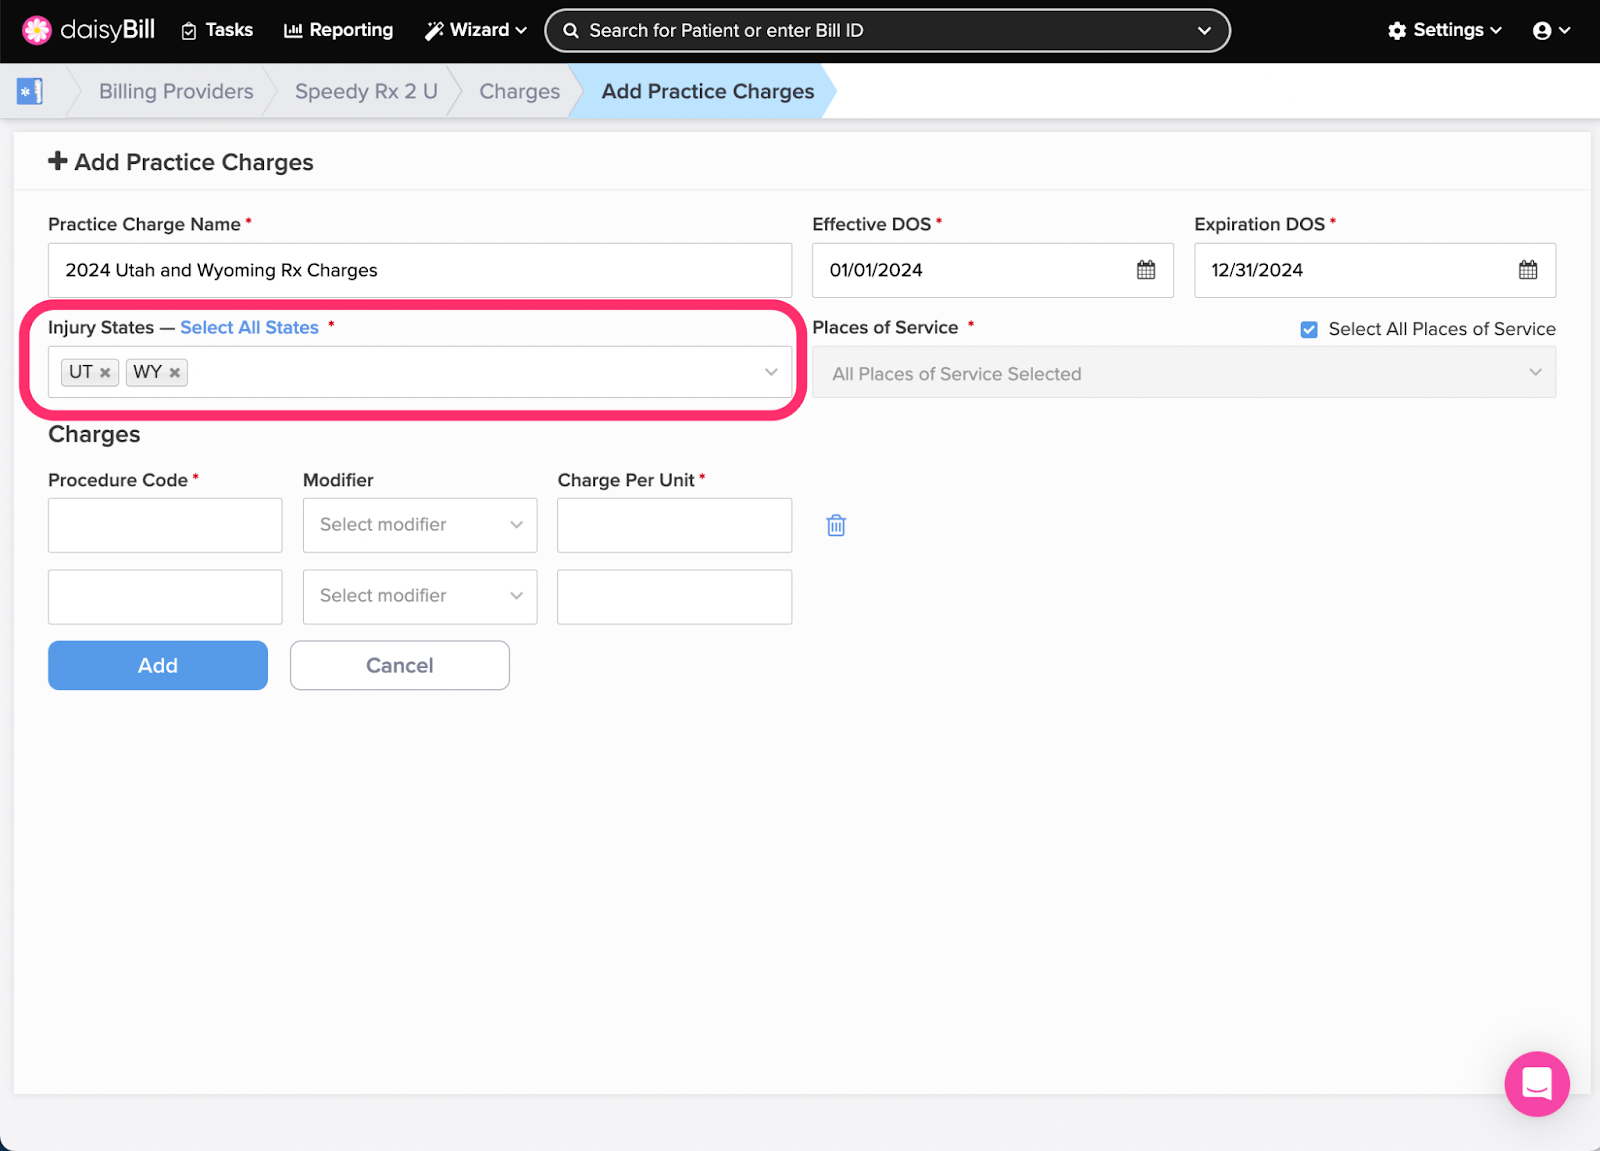
Step 12. Enter the Injury States
From the Injury States dropdown menu, select the States where the Custom Charge will be effective.
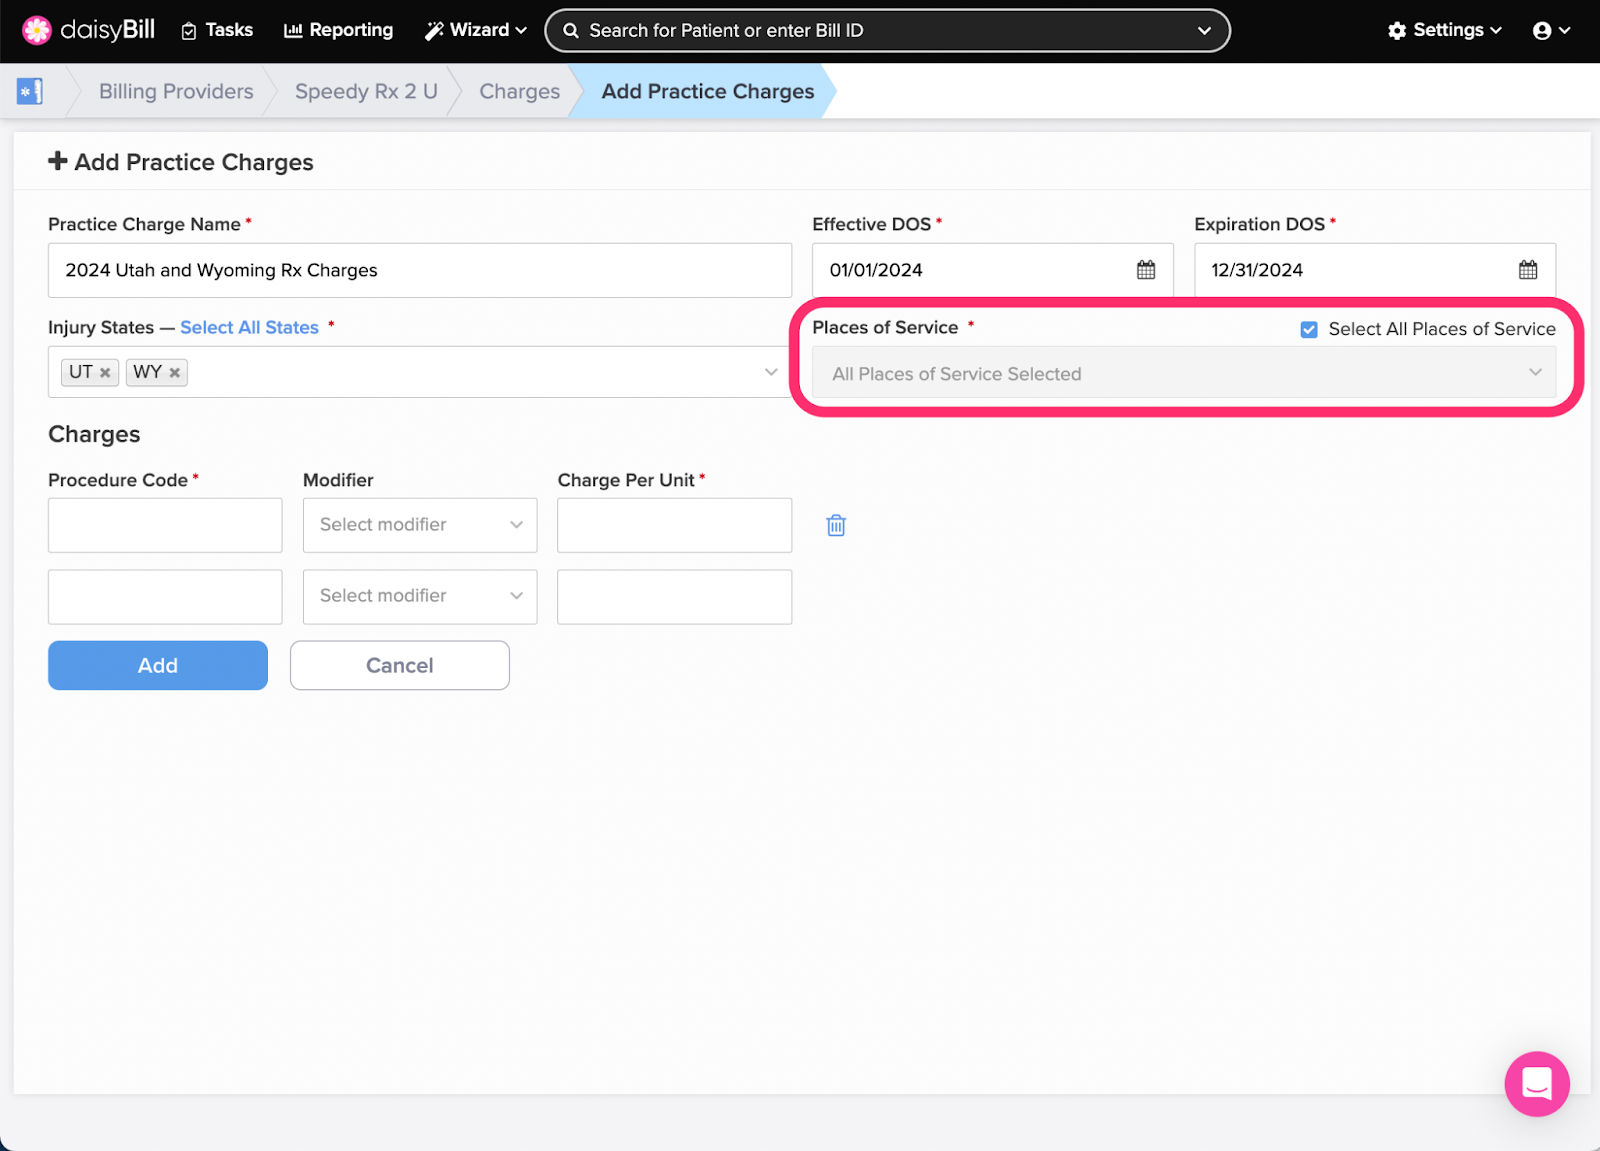
Step 13. Enter the Places of Service
From the Places of Service dropdown menu, select the Places of Service where the Custom Charge will be effective.
Step 14. Enter the ‘Procedure Code’, ‘Modifier’ (if applicable), and ‘Charge Per Unit’, then click ‘Add’
A single Procedure Code (or Procedure Code and Modifier/Supplemental Data combination) can only exist on one Effective Custom Charge at a time. Note: Entering 99070 as your procedure code will generate an NDC box.
Step 15. To view a ‘Custom Charge’, click its name
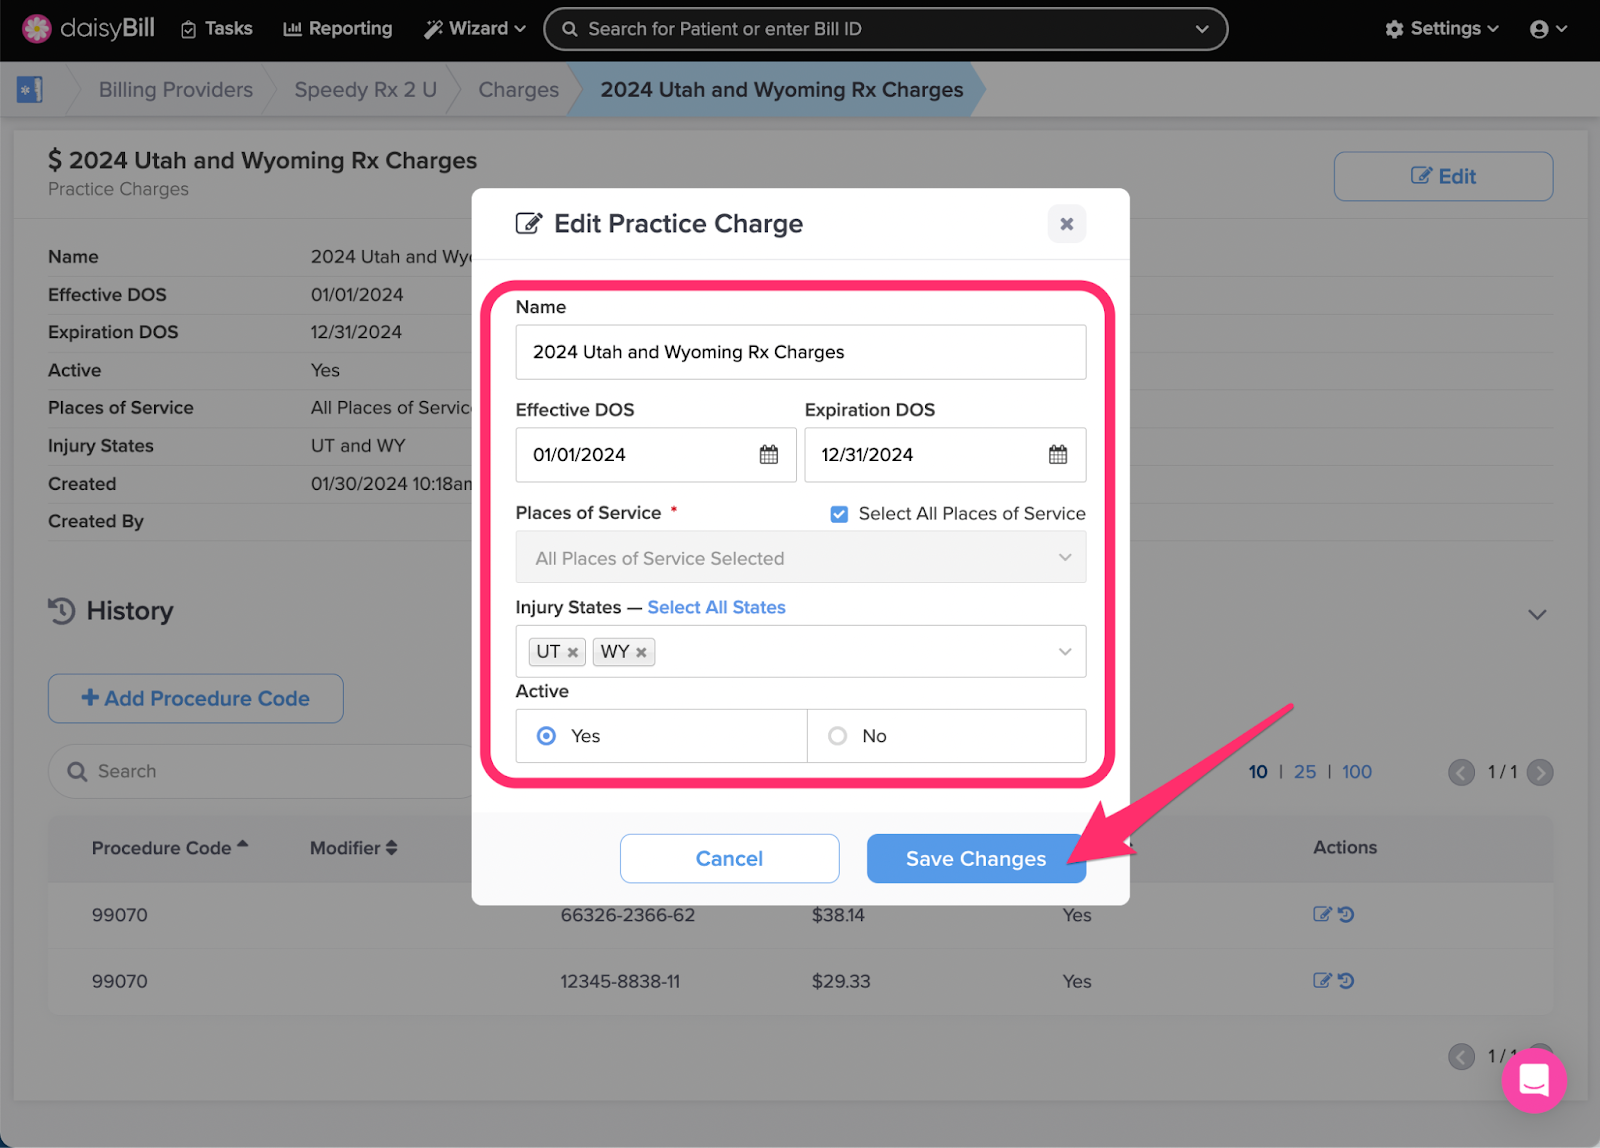
Step 16. To edit a ‘Custom Charge’, click ‘Edit’

Step 17. Enter the changes, then click ‘Save Changes’
To disable a Custom Charge, select No under Active. The entire Custom Charge will no longer be used.
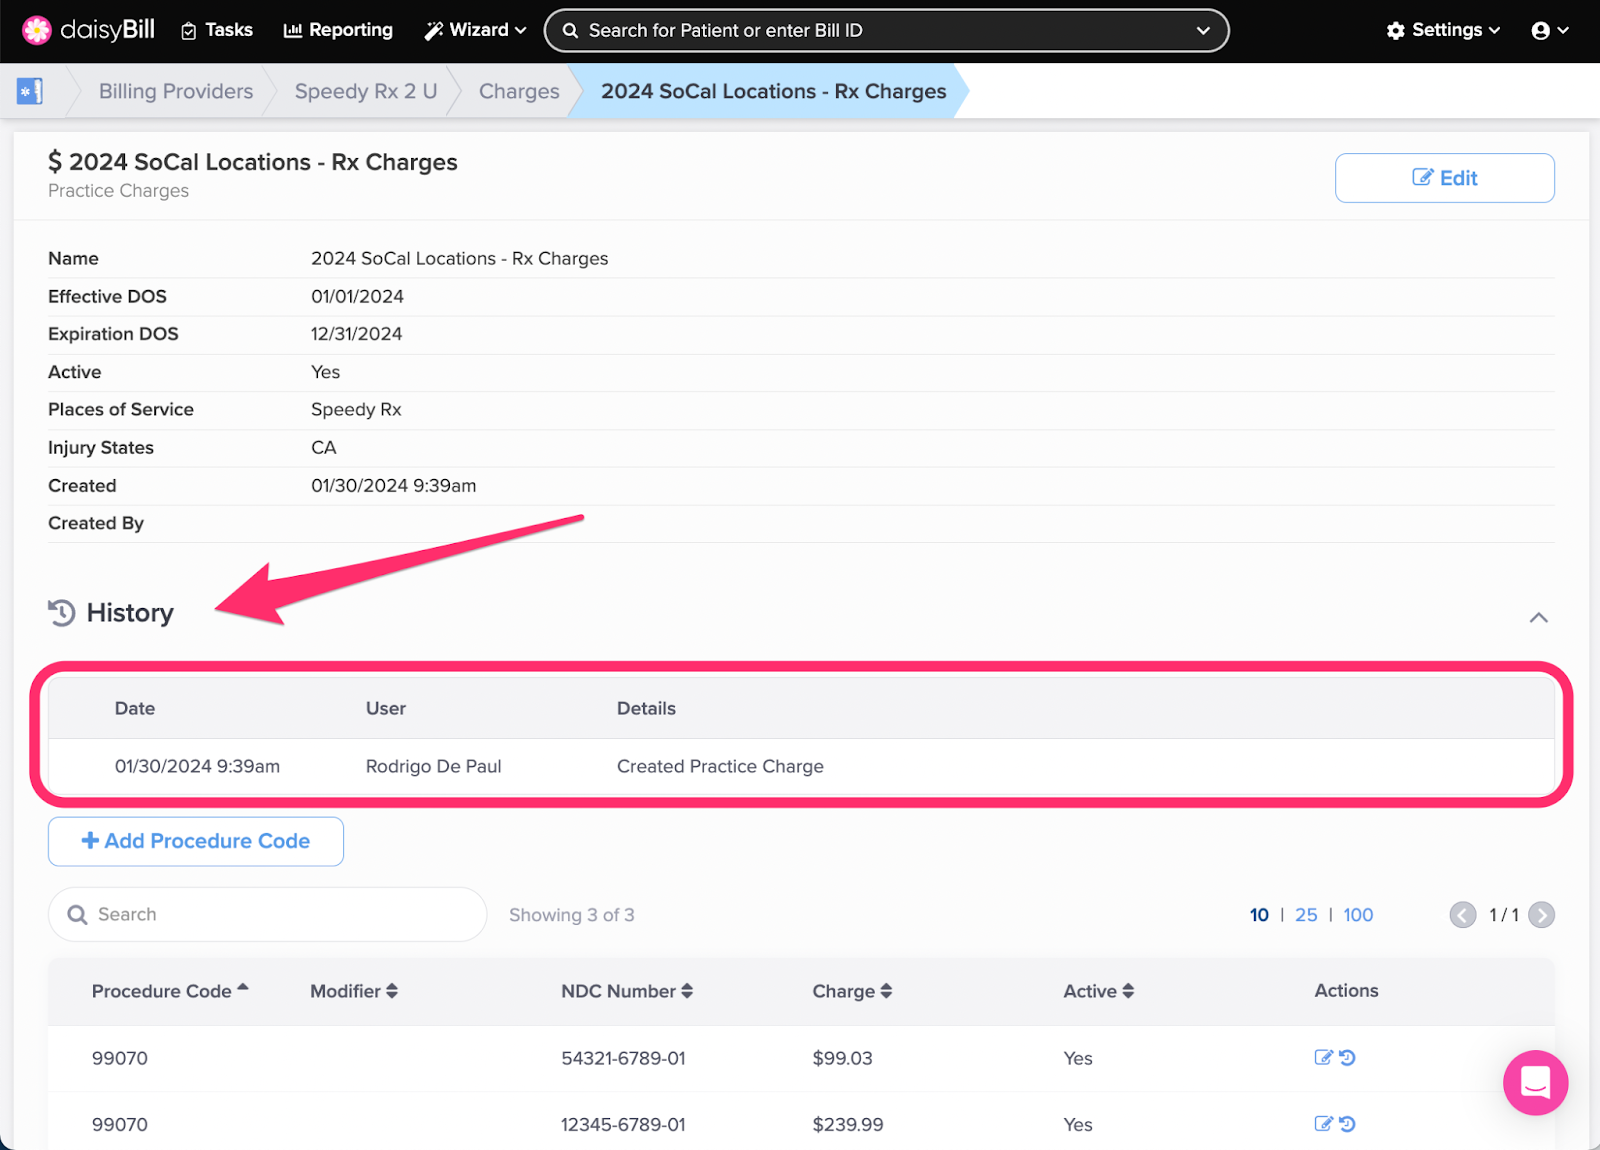
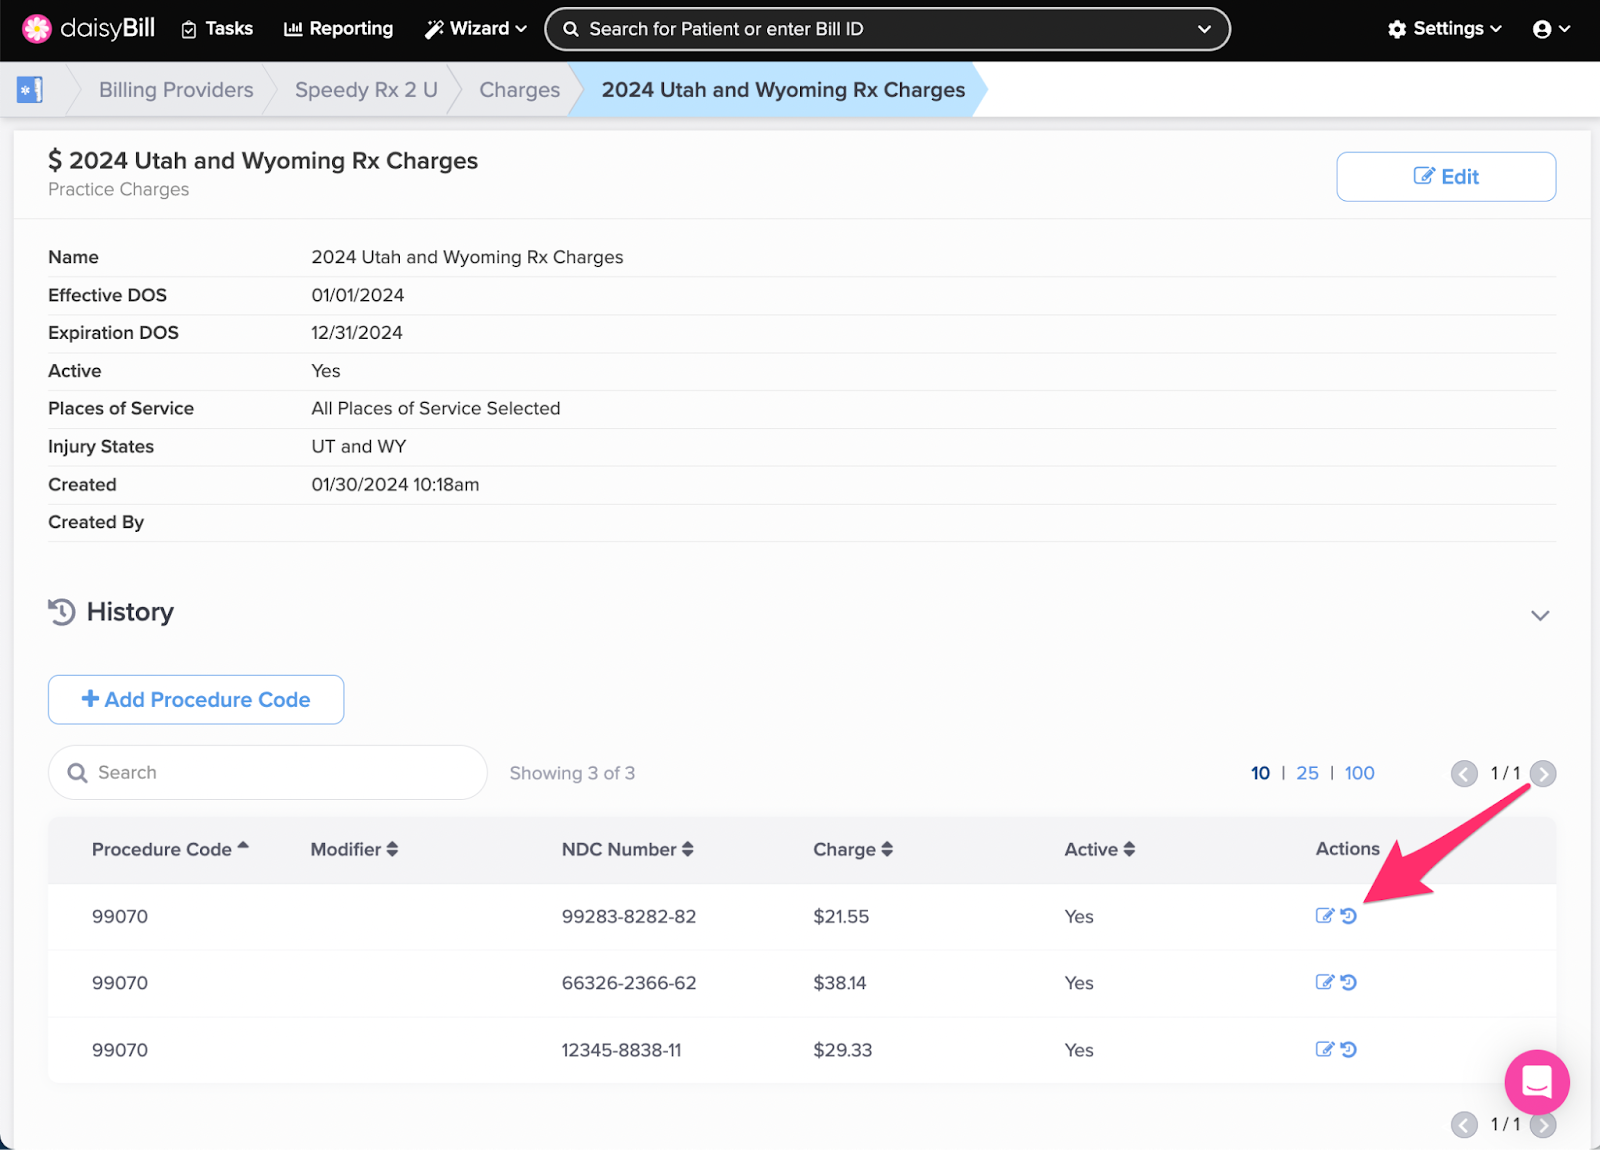
Step 18. To view the Custom Charges History, click ‘History’
History displays the complete history of the creation and edits to the Custom Charges.
Step 19. To add a ‘Procedure Code’, click ‘Add Procedure Code’

Step 20. Enter the information, then click ‘Add’

Step 21. To edit a ‘Procedure Code’, click the ‘Pencil’ icon
You can edit the Charge Per Unit, or deactivate the Procedure Code from your Charges.
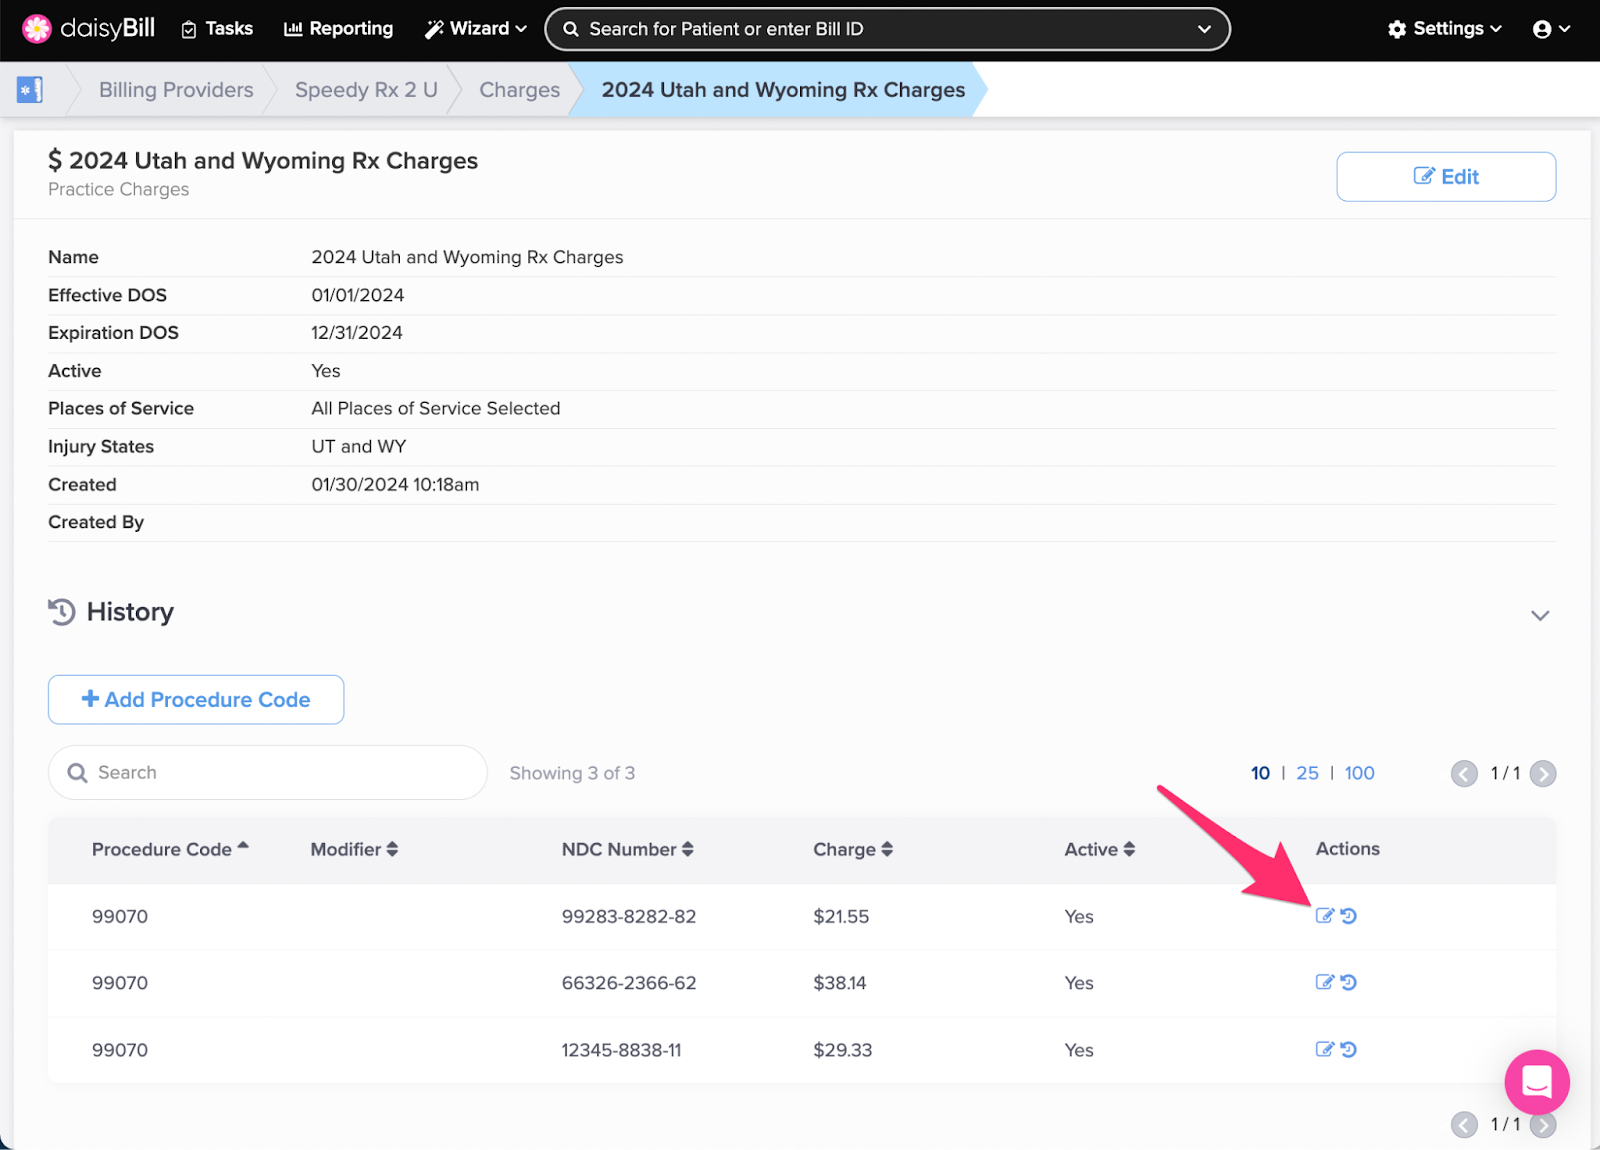
Step 22. To view the changes made to a ‘Procedure Code’, click the ‘History’ icon
That was easy, wasn’t it?