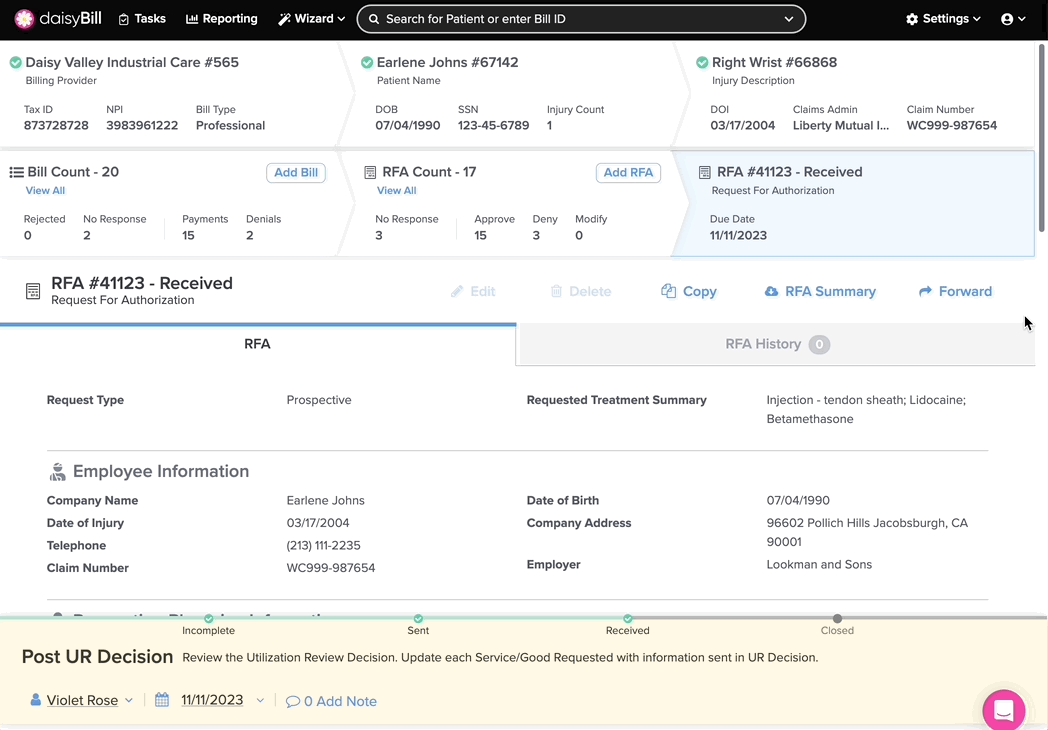
Once a UR Decision is associated with an RFA, a Post UR Decision task automatically generates. To complete this task, enter the details of the UR Decision you received to the appropriate Requested Treatments.
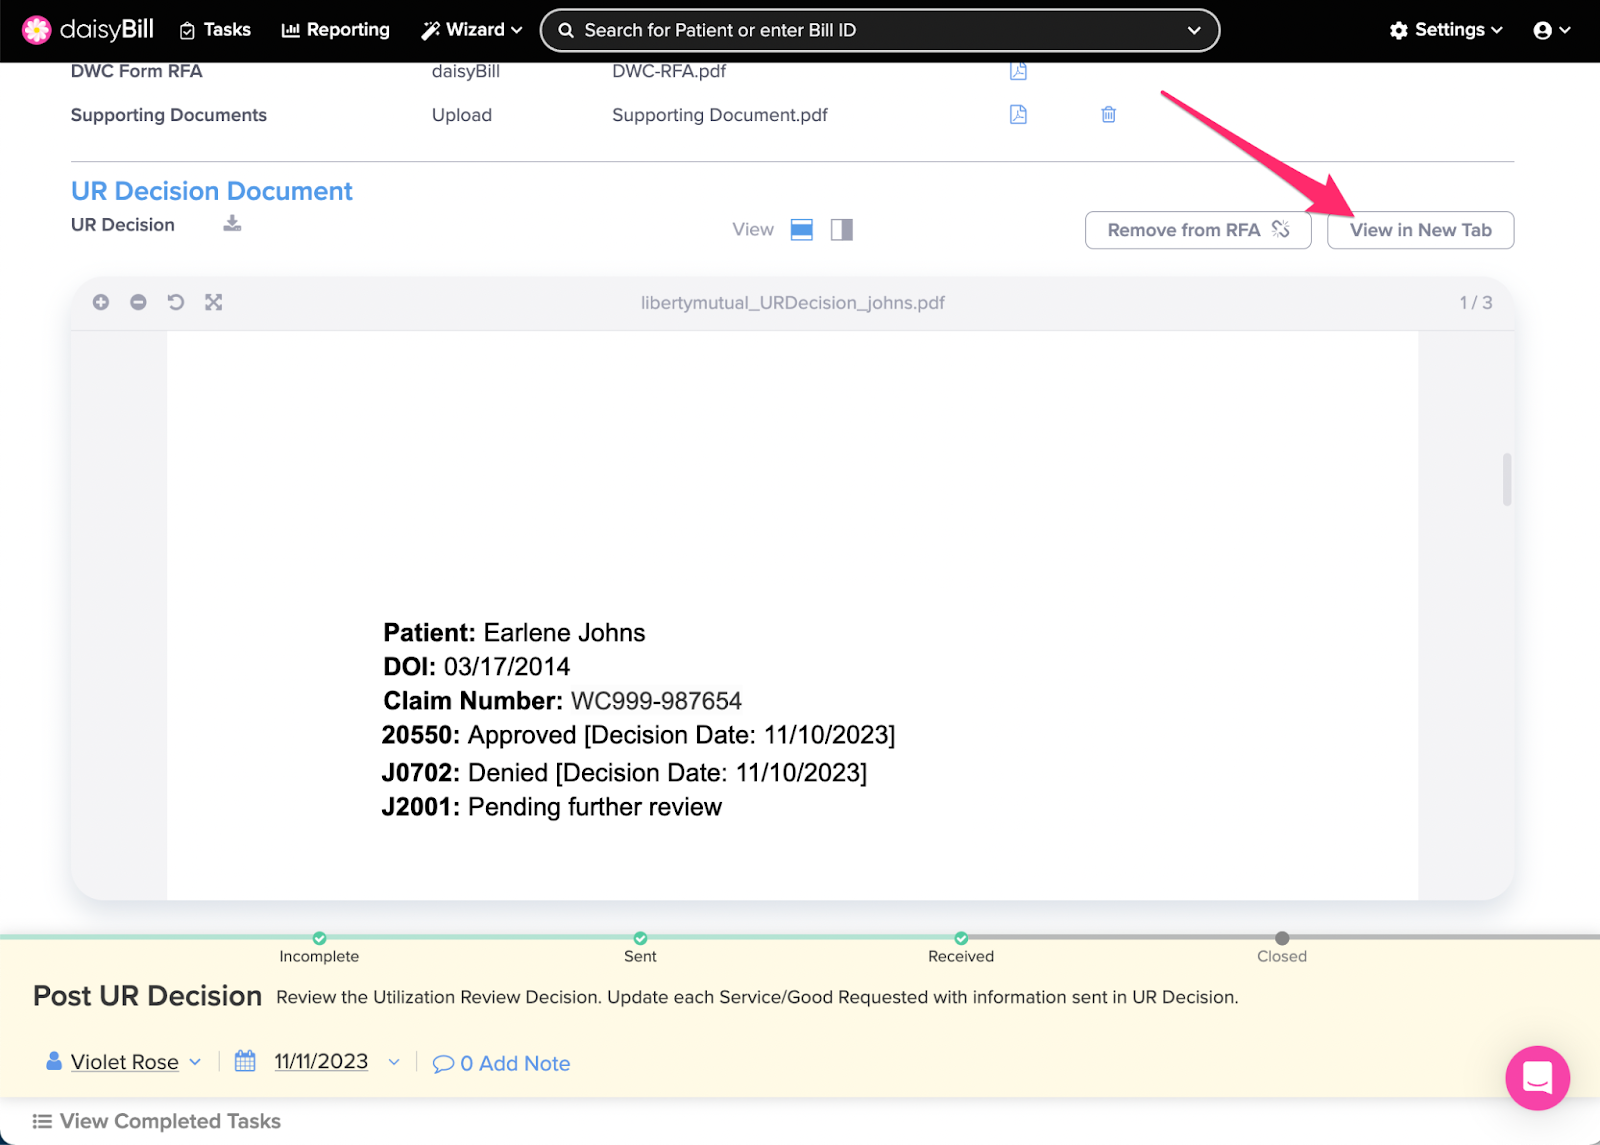
Step 1. Scroll to the UR Decision document received
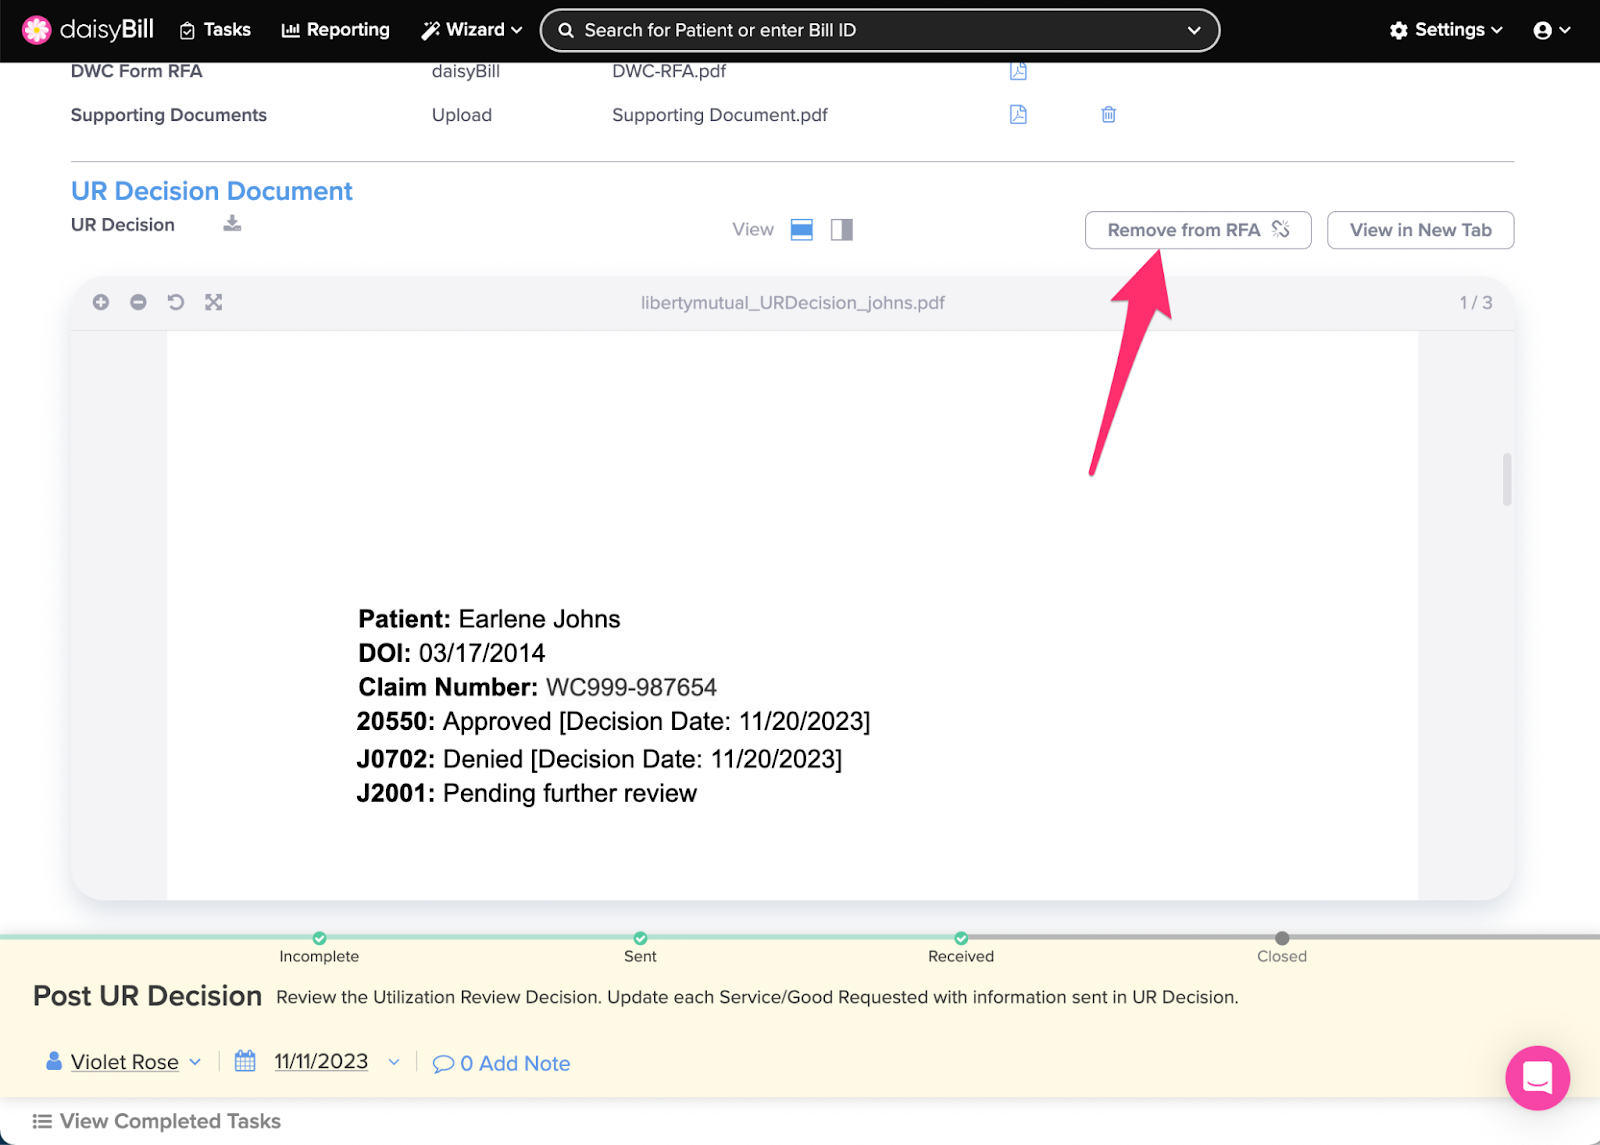
The UR Decision document is automatically oriented to fit the center of your screen, but you can also orient the document to the right side of your screen by clicking the icon to the right of the center orientation button.

The document can also be opened in a new tab by clicking the ‘View in New Tab’ button
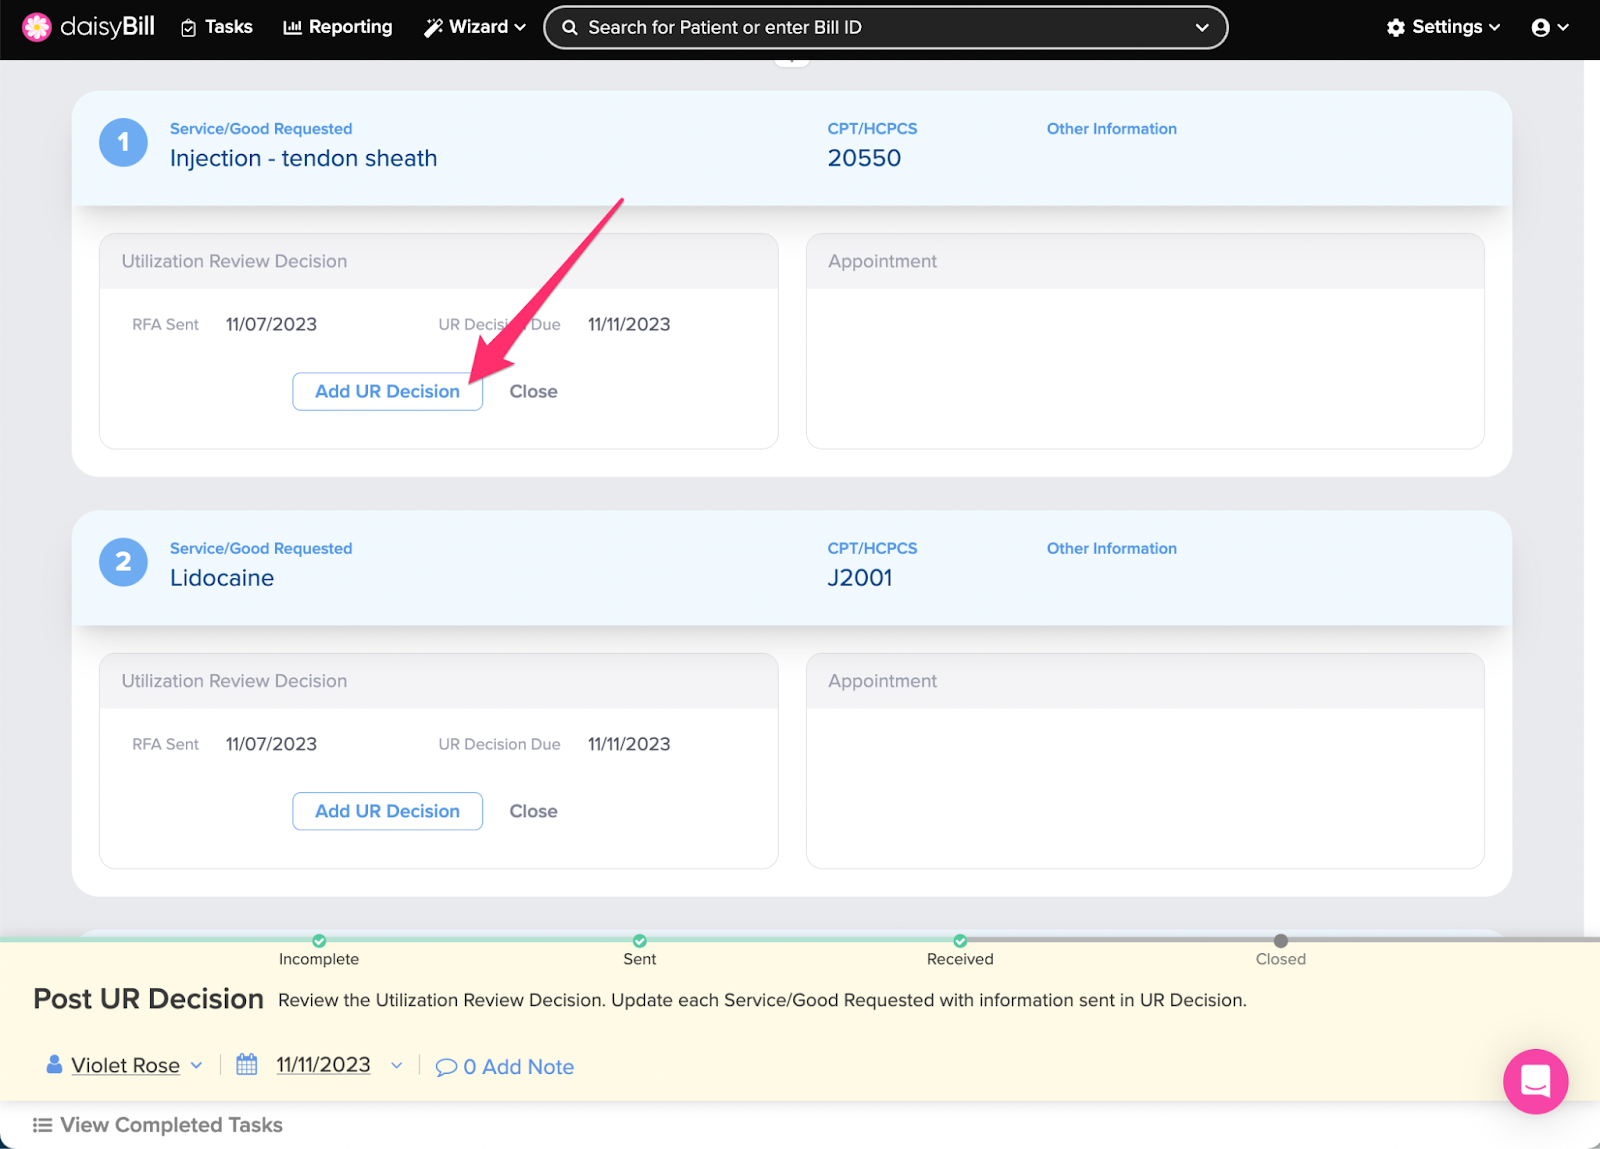
Step 2. Click ‘Add UR Decision’ next to a Requested Treatment
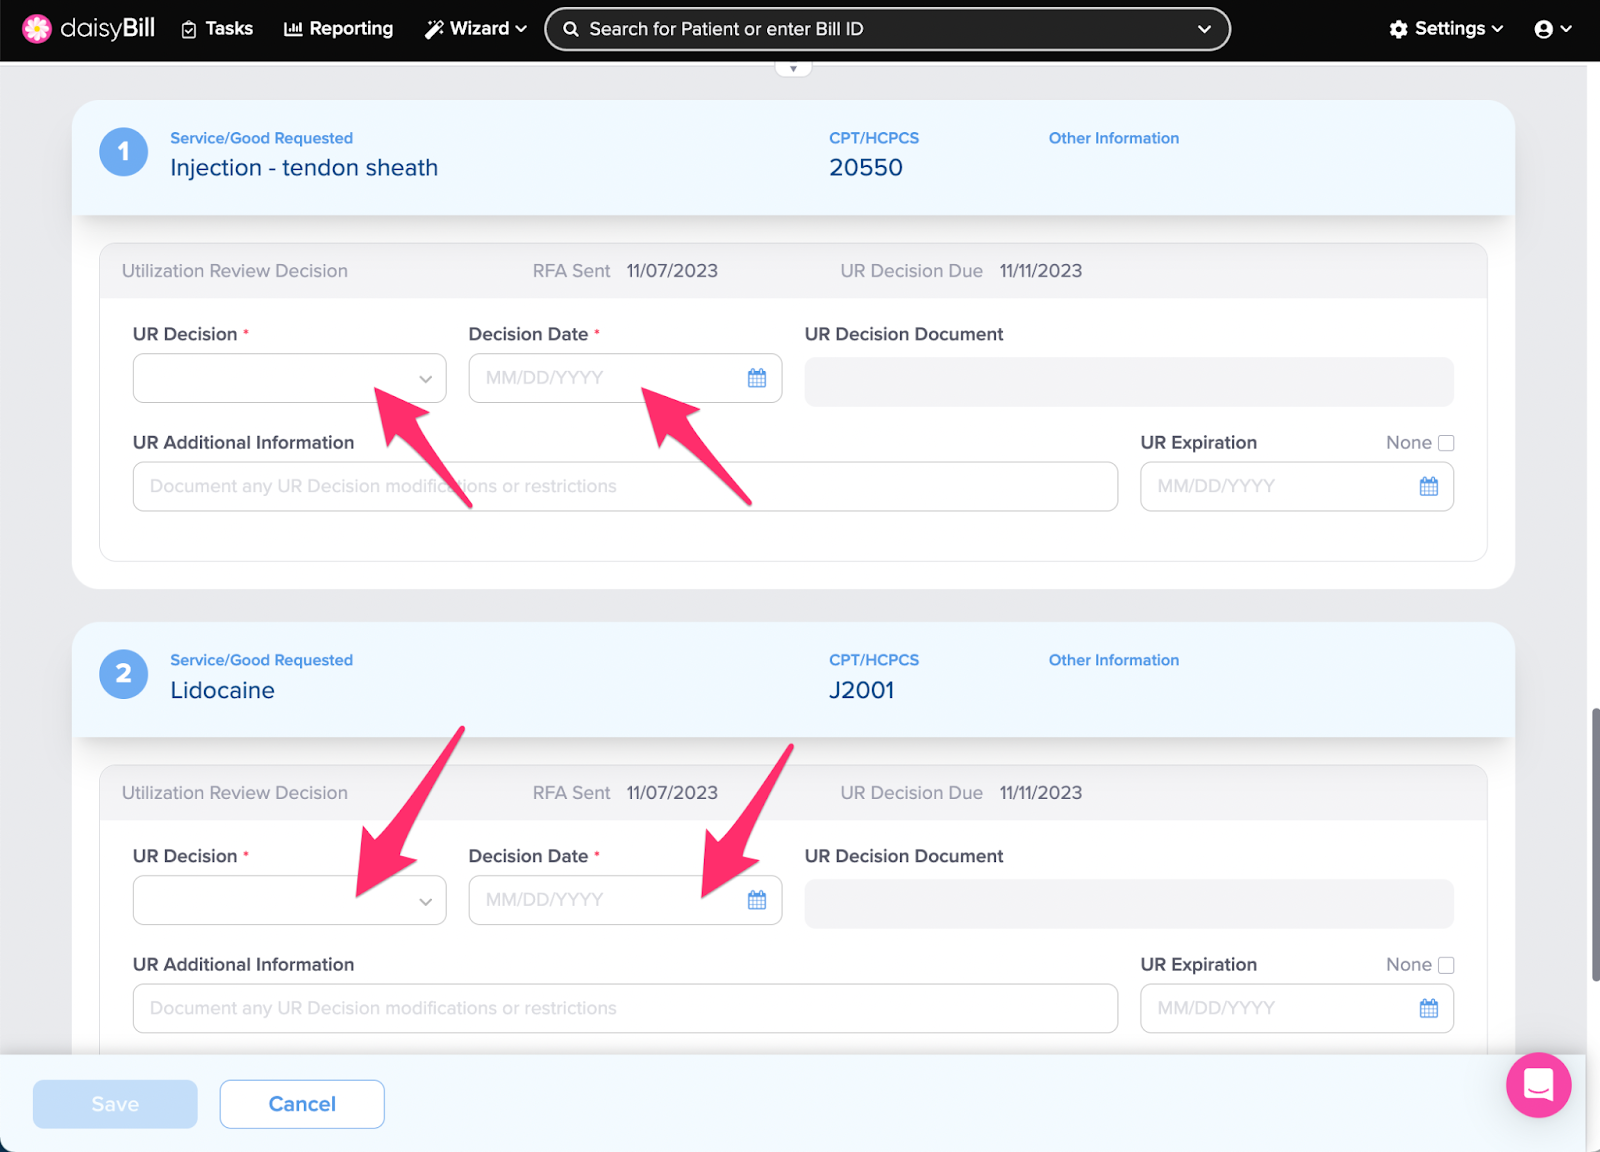
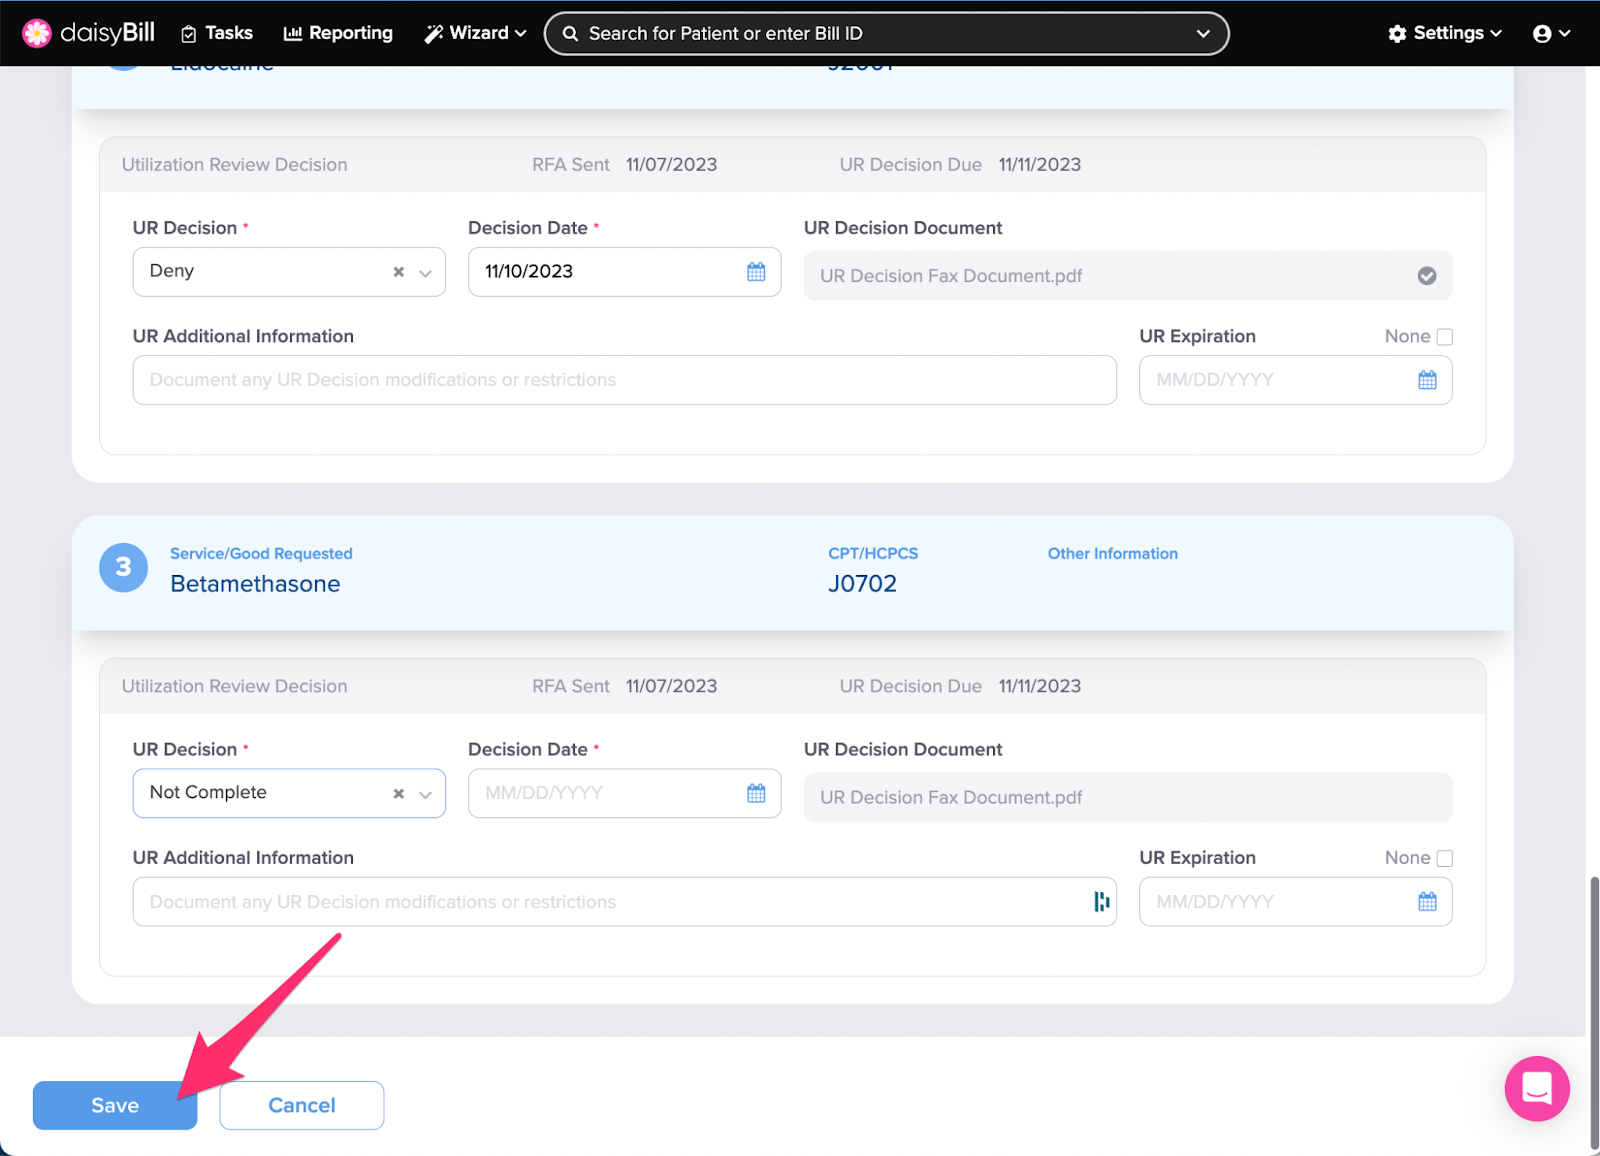
Step 3. Enter the details of the UR Decision for each Requested Treatment
Enter the corresponding decisions for each of your requested treatments from the UR Decision document you received into daisyBill.
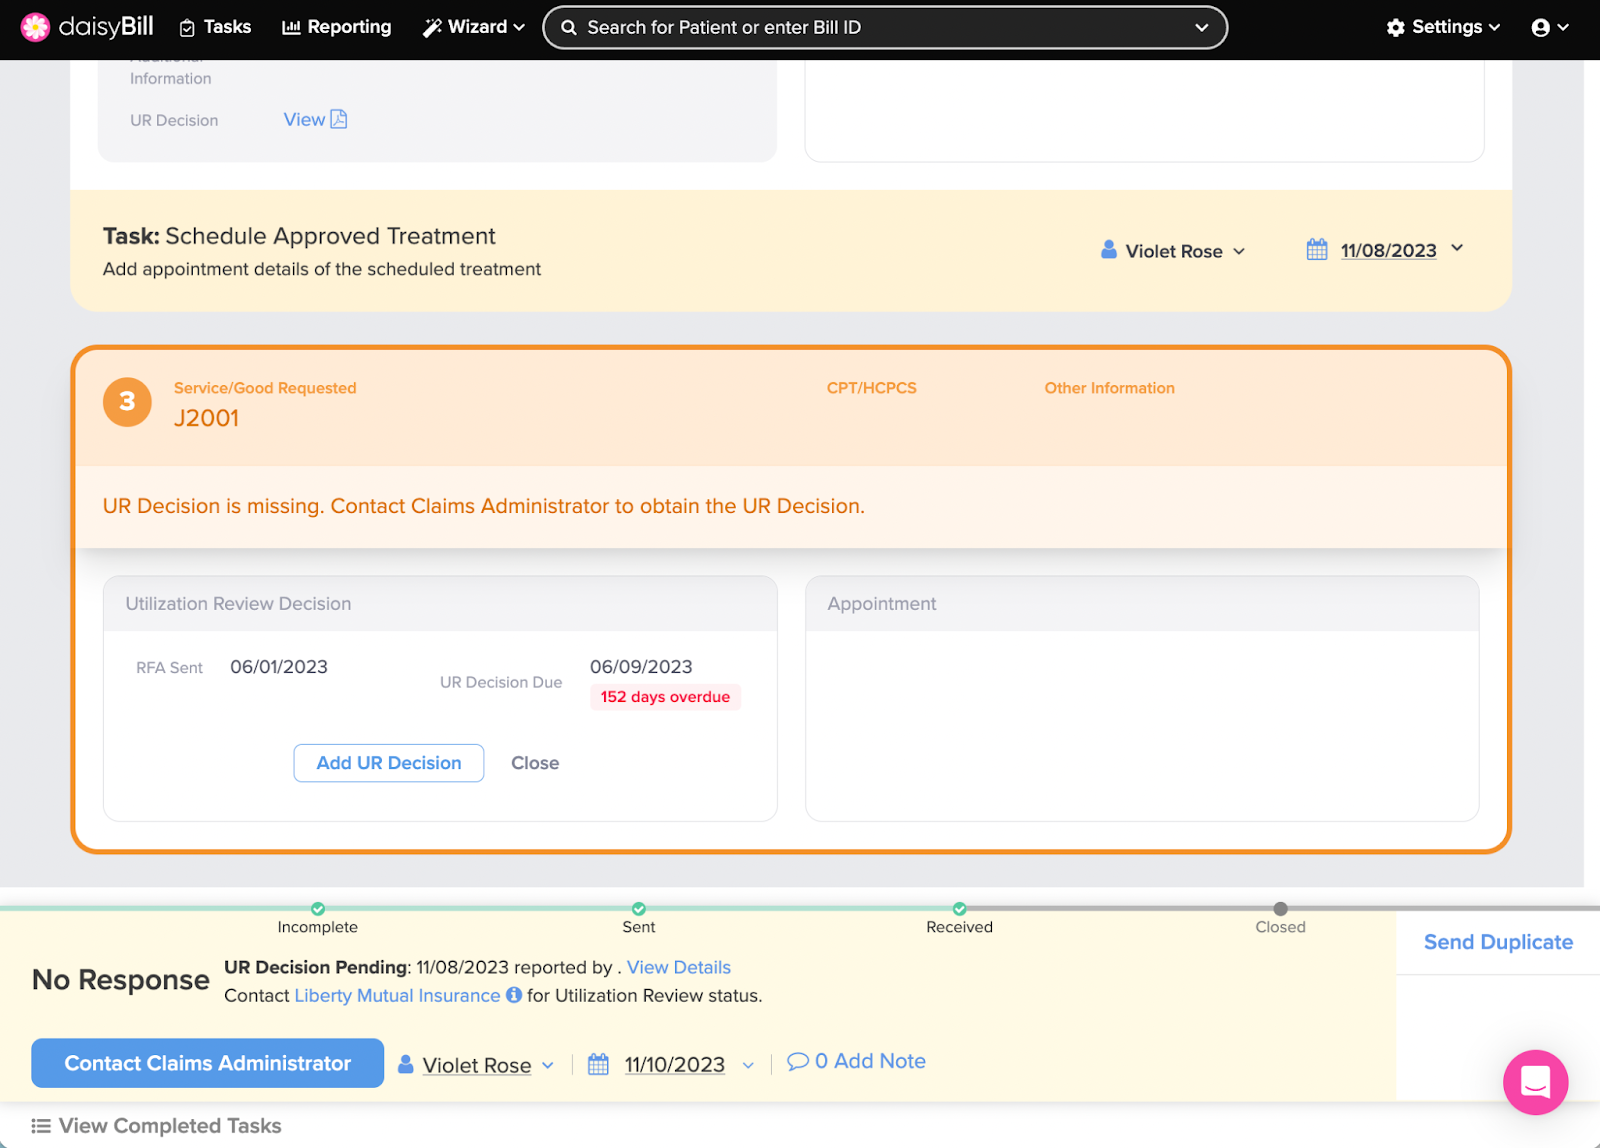
If the UR Decision document does not contain a decision for each Requested Treatment on the RFA, leave the UR Decision failed for the treatment blank. An orange box will surround the Service/Good Requested to indicate a decision still needs to be added. Refer to Step 4 of this Help Article for more information.
Step 4. Click ‘Save’
Note: A decision must be added to at least one requested treatment in order to save. If the save button is not enabled, double-check that both UR Decision and Decision Date are present for all treatments included on the UR Decision document being posted.
Step 5. (Situational) Services that did not receive a decision will be surrounded by an orange box in daisyBill.
A UR Decision can be added to these treatments when received at a later date.
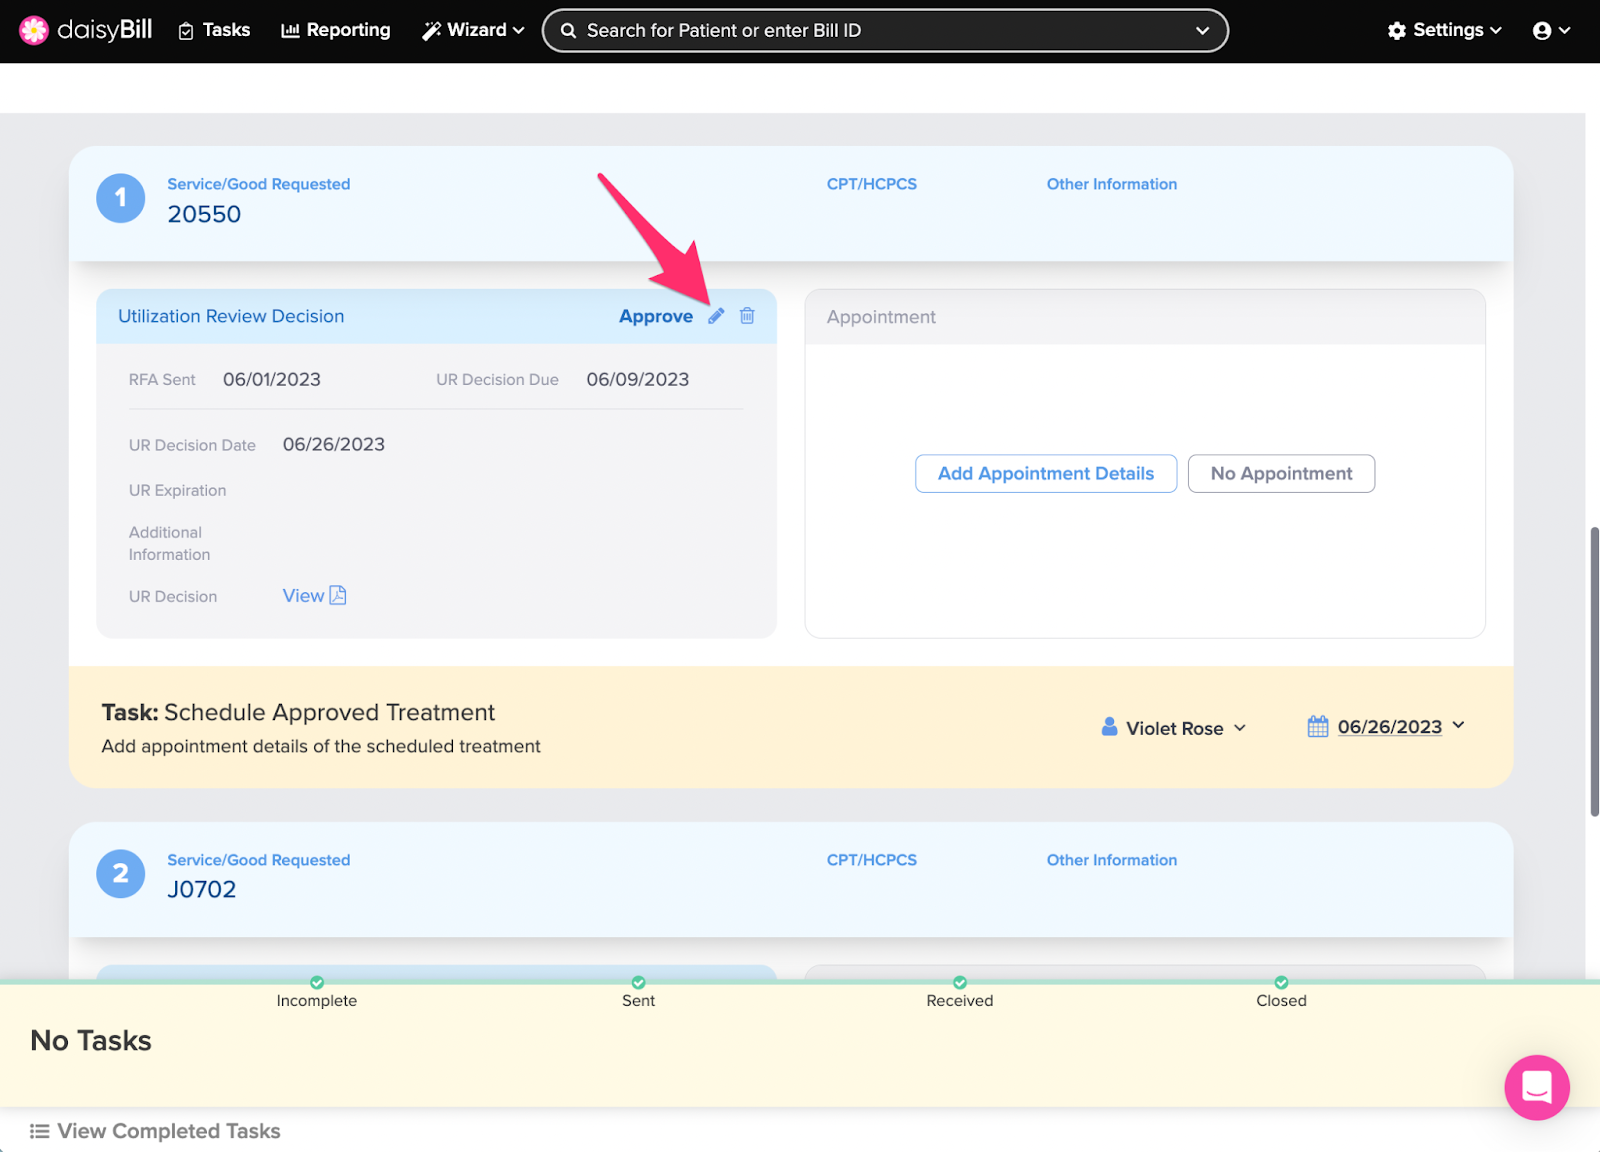
Step 6. (Optional) To edit a decision, click the pencil icon next to a treatment
Editing a UR Decision will allow edit of all Treatments posted with that same UR Decision.
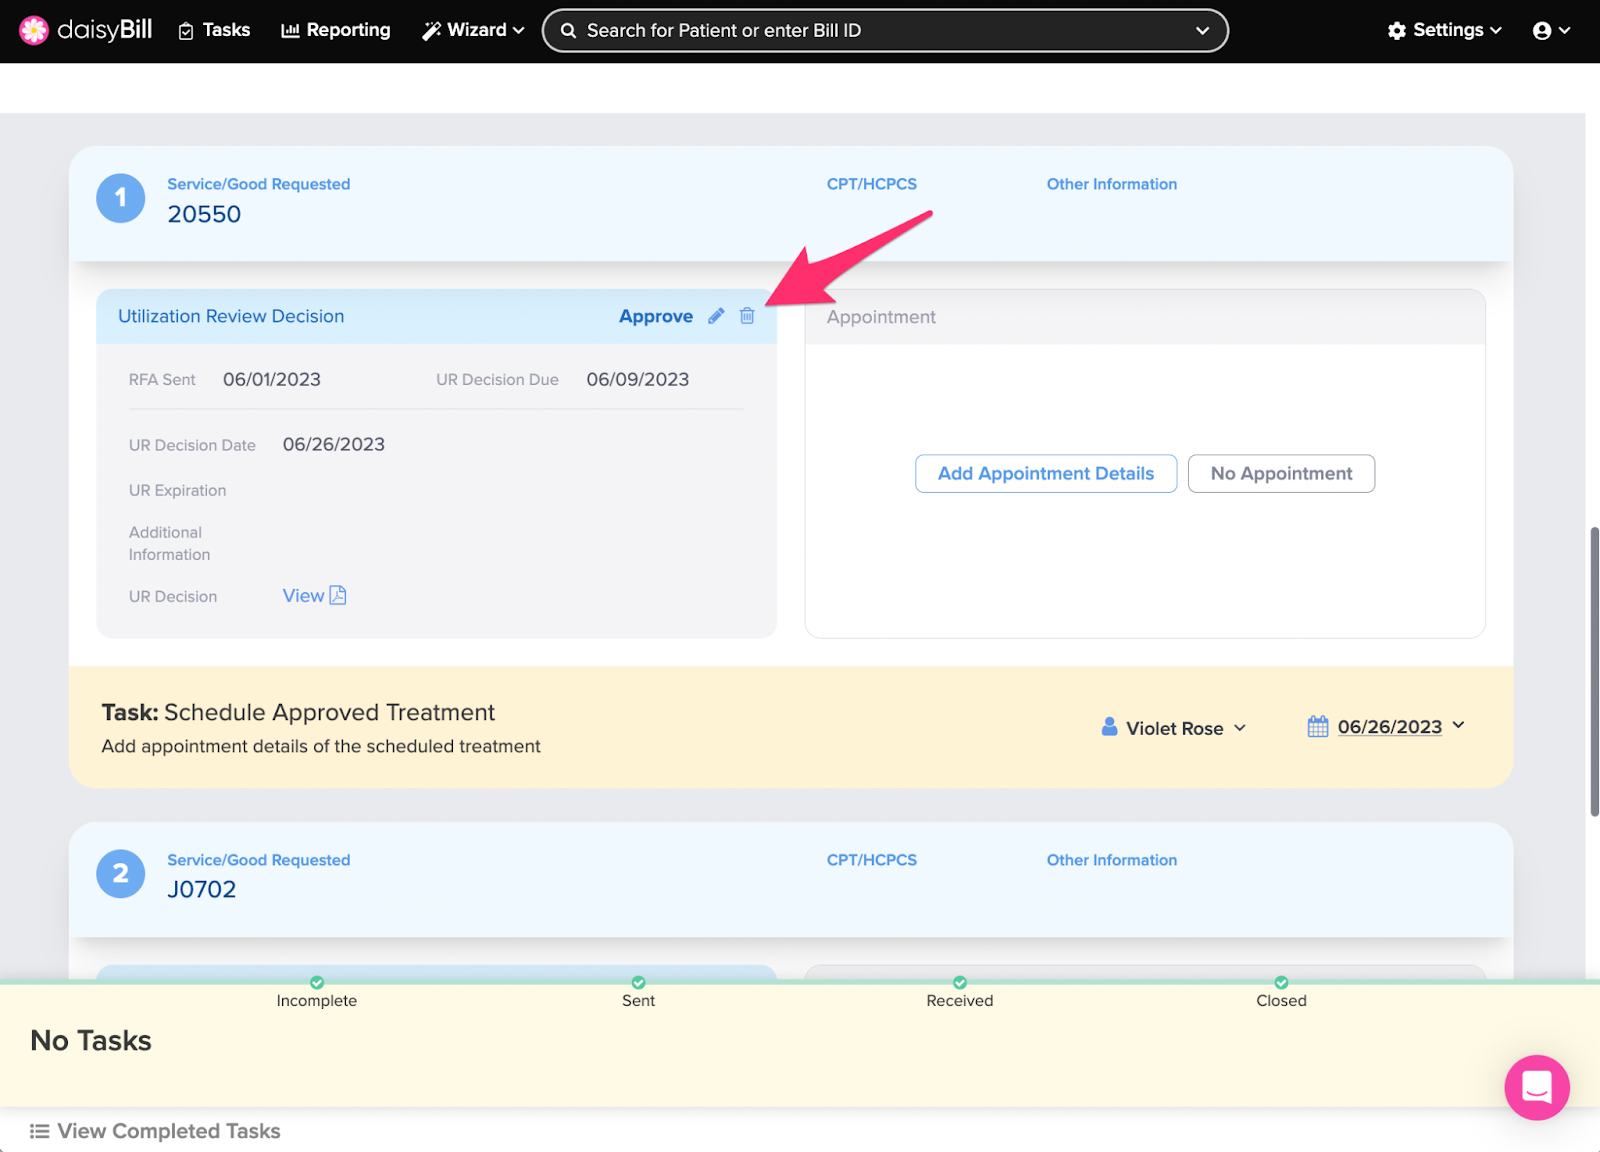
Step 7. (Optional) To delete a UR Decision, click the trash can icon
This deletes the UR Decision from the treatment (and all treatments posted with the same document), but it does not remove the UR Decision Document from the RFA. To delete the UR Decision Document from the RFA, refer to Step 8.
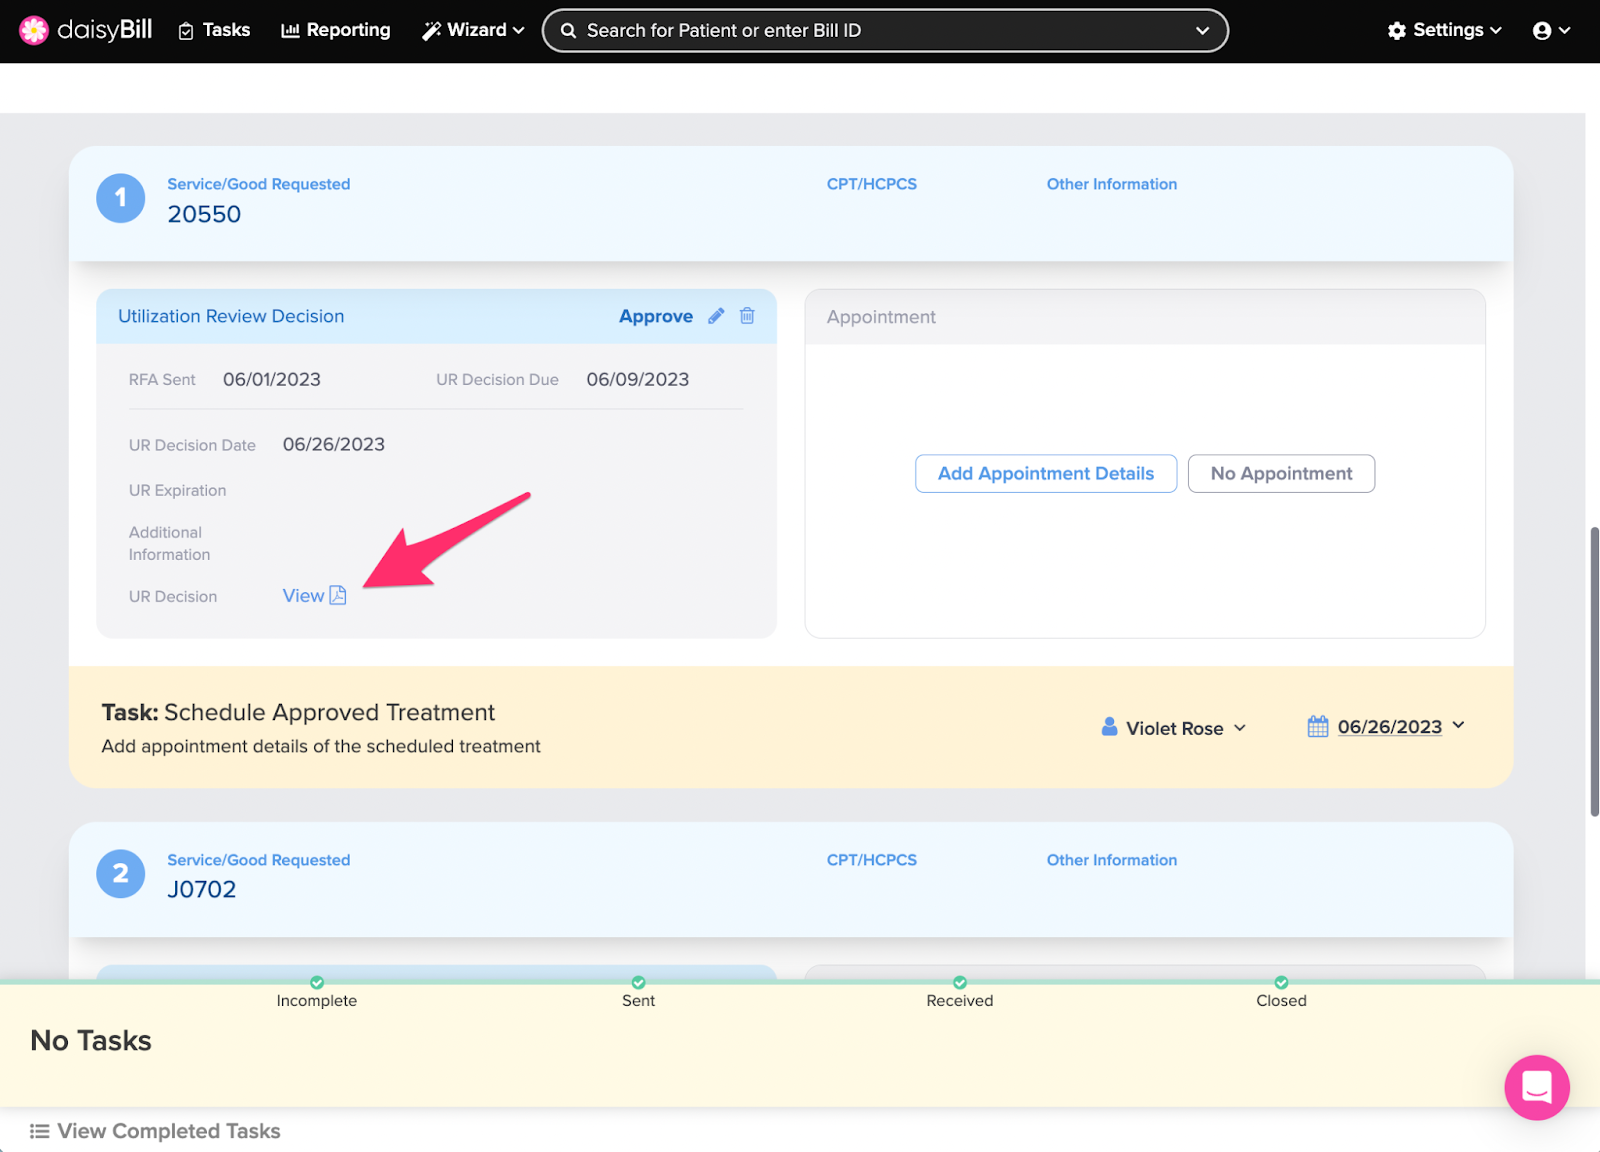
Step 8. (Optional) To view the UR decision pdf file, click ‘View’
Step 9. (Optional) To remove the UR Decision Document from the RFA, click ‘Remove from RFA’
In order to remove the document from the RFA, it must first be deleted from any treatments as described in Step 6 above.
This action "unmatches" the UR Decision document from the RFA and creates a Match UR Decision task for the document from this task, the document can either be matched to another RFA or deleted. For more see the Help Article: Match UR Decision Task.
You’re all set!