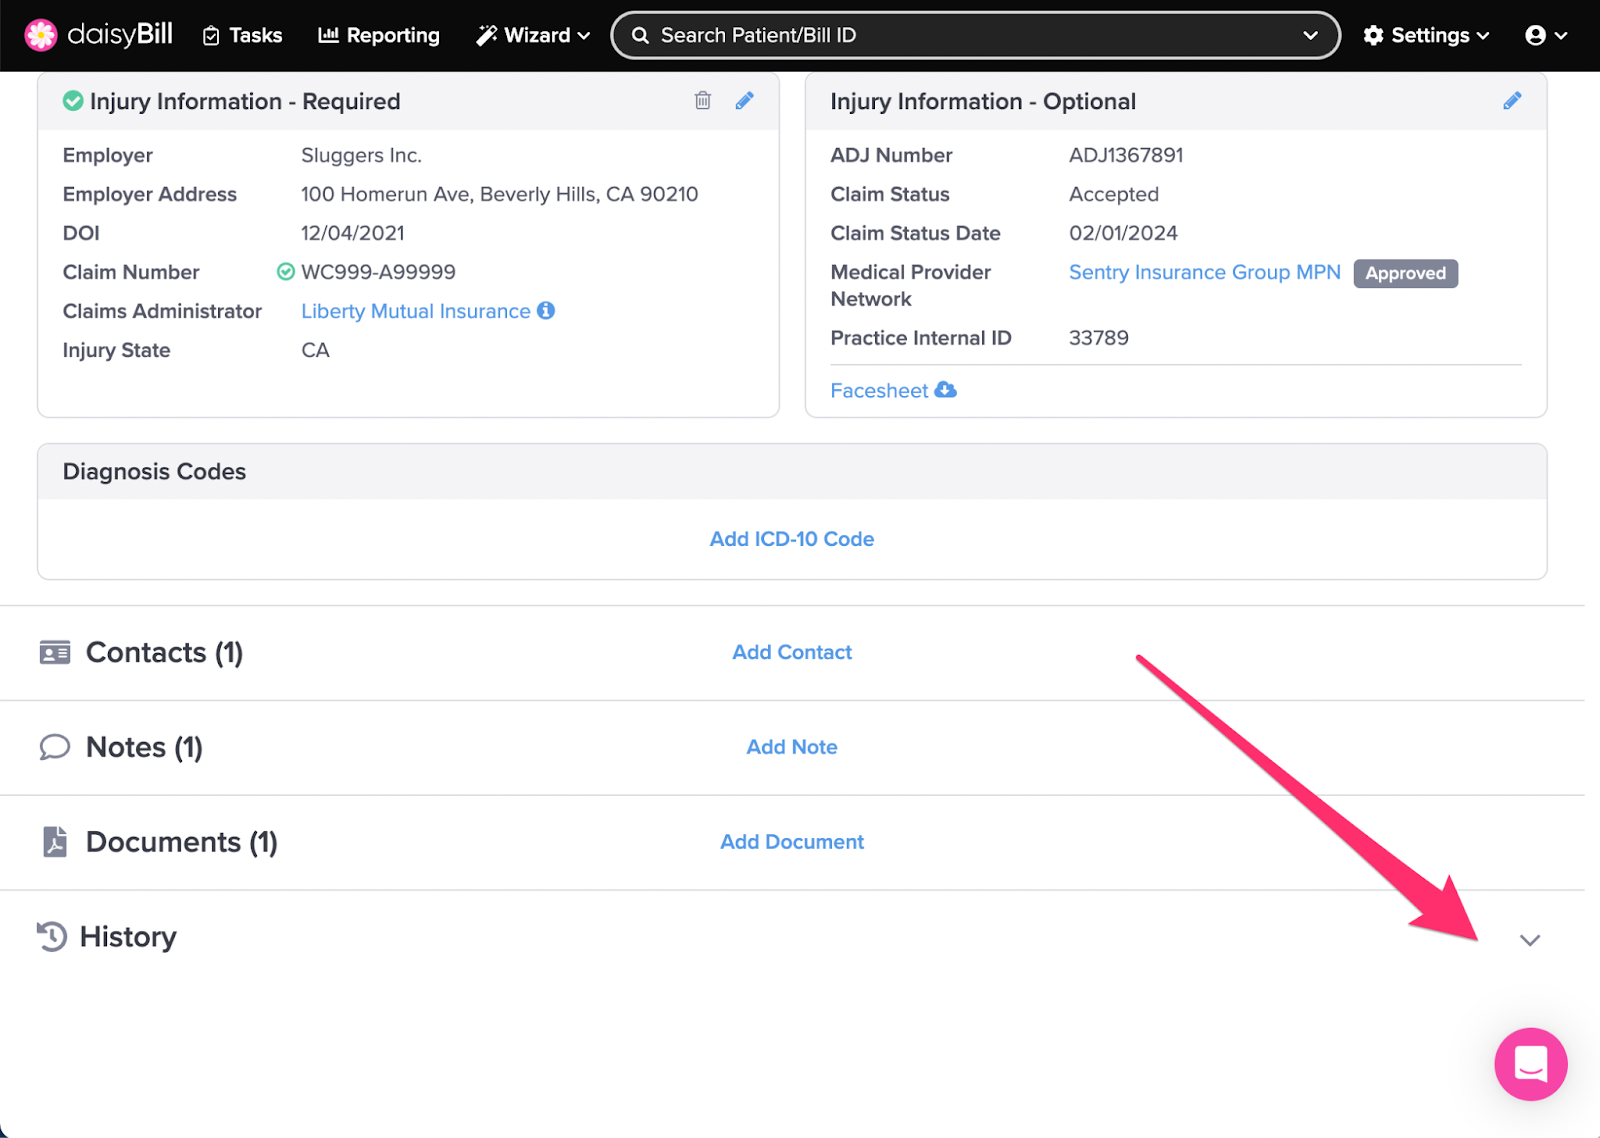
The Injury Page displays information about a patient’s injury, including mandated claim information and associated contacts such as adjustors, attorneys, PTP, etc.
You can manage injury information with these functions:
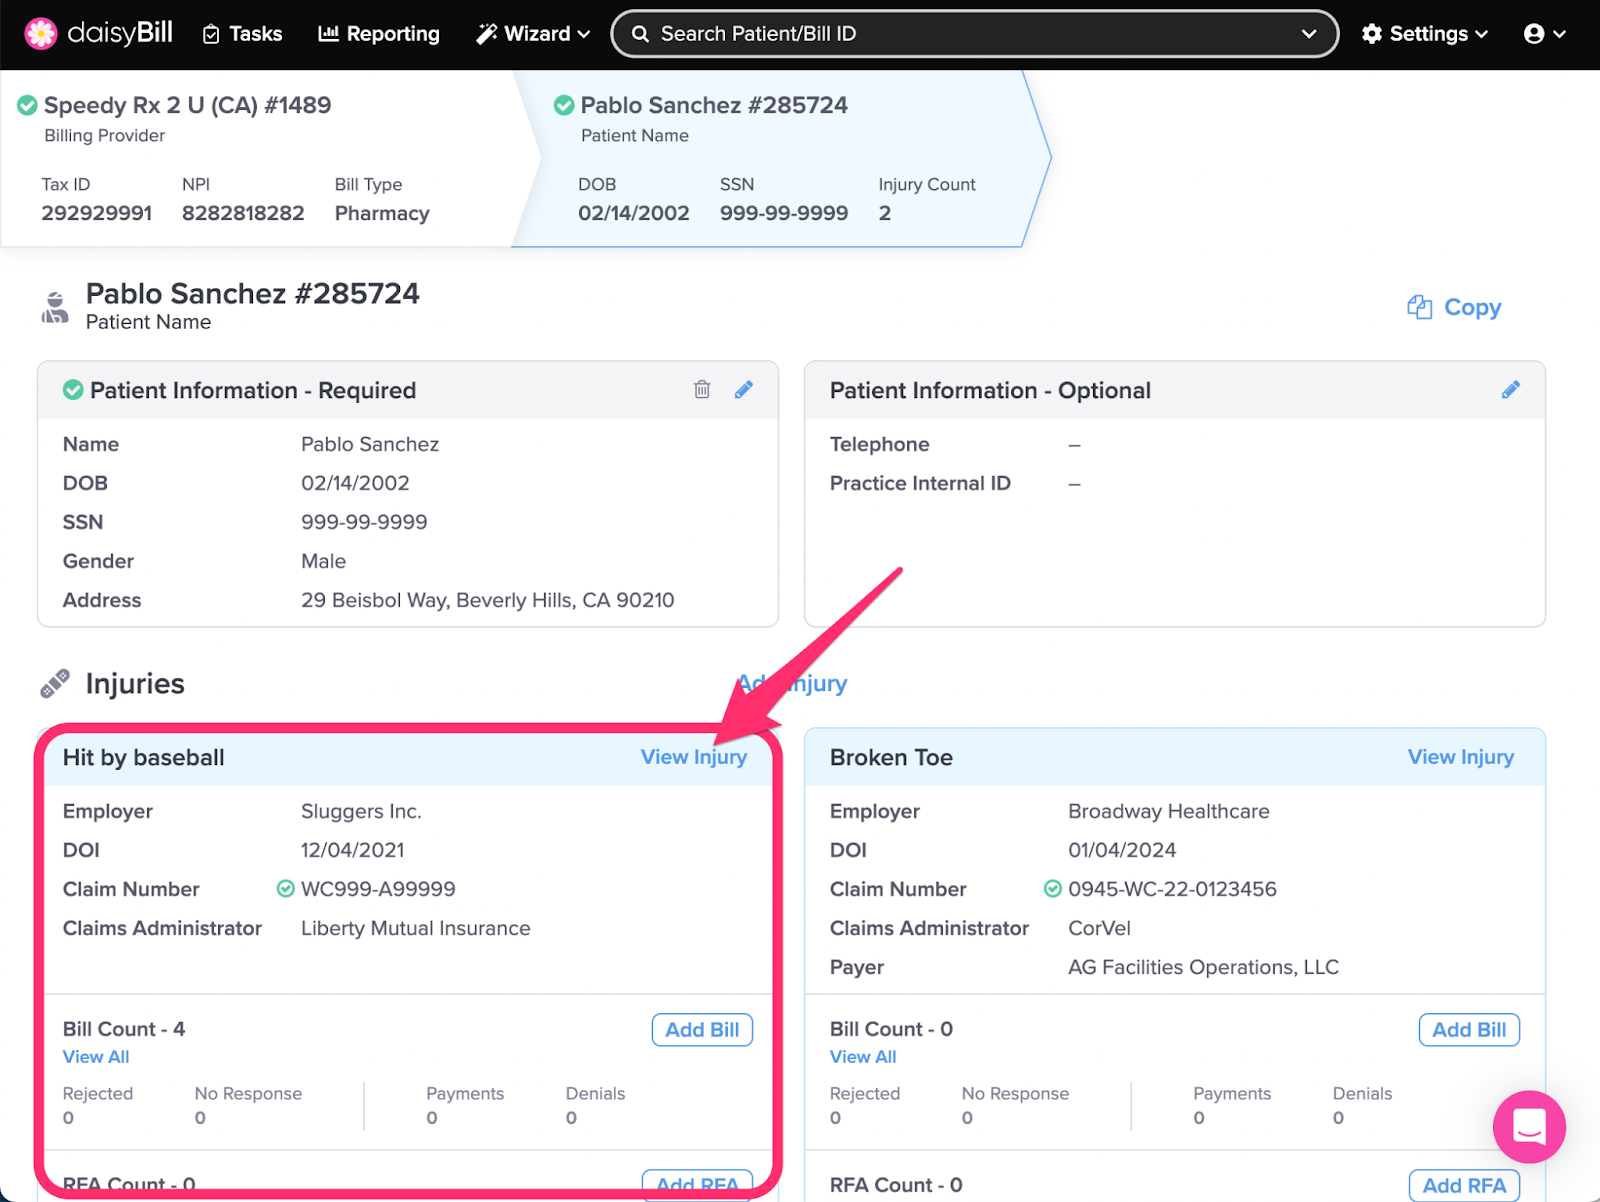
From the ‘Patient Page,’ click on the Patient’s injury
A. To edit injury information, click ‘Edit Injury’
B. To delete an Injury, click ‘Delete’
C. To download a Facesheet, click ‘Facesheet’
D. To add a new Bill for the Injury, click ‘Add’ under ‘Bills’
E. To view existing Bills for the Injury, click ‘View’ under ‘Bills’
F. To create a new RFA, click ‘Add’ under ‘RFAs’
G. To view existing RFAs, click ‘View’ under ‘RFAs’
H. To add an Injury Note, click ‘Add’ under ‘Injury Notes’
I. To view existing ‘Injury Notes’ for the Injury, click ‘View’ under ‘Injury Notes’
J. To upload documents to an Injury, click ‘Add’ under ‘Injury Documents’
K. To view existing ‘Injury Documents’ for the Injury, click ‘View’ under ‘Injury Documents’
L. To create a Paper Second Review, click ‘Add’ under ‘Paper SBRs’
M. To view existing ‘Paper SBRs’ for the Injury, click ‘View’ under ‘Paper SBRs’
N. To view claims administrator information, click ‘Profile’
O. To view Injury History, click ‘History’
P. To add contact information, click ‘Add’
From the ‘Patient Page,’ click on the Patient’s injury
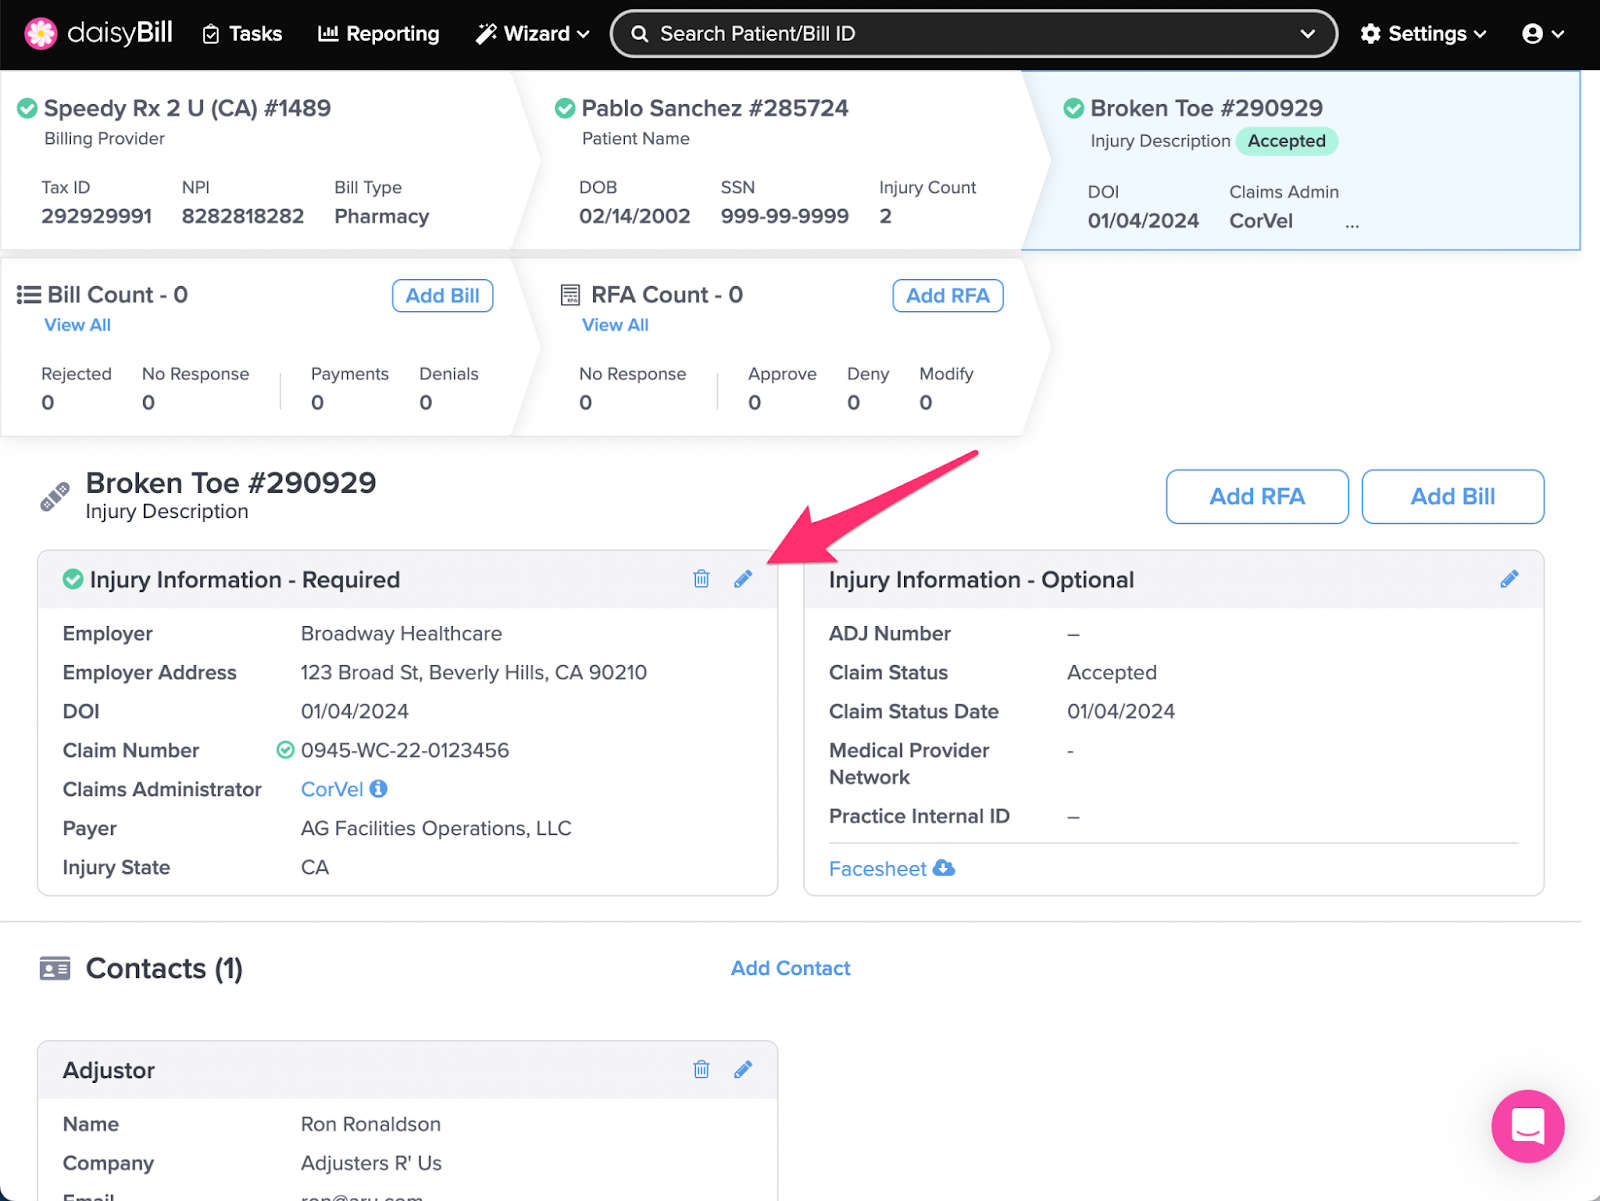
A. To edit injury information, click the pencil icon on the ‘Injury Information - Required’ section
Update, add or change injury information at any time. For more information, see the Help Article: Edit / View Injury.
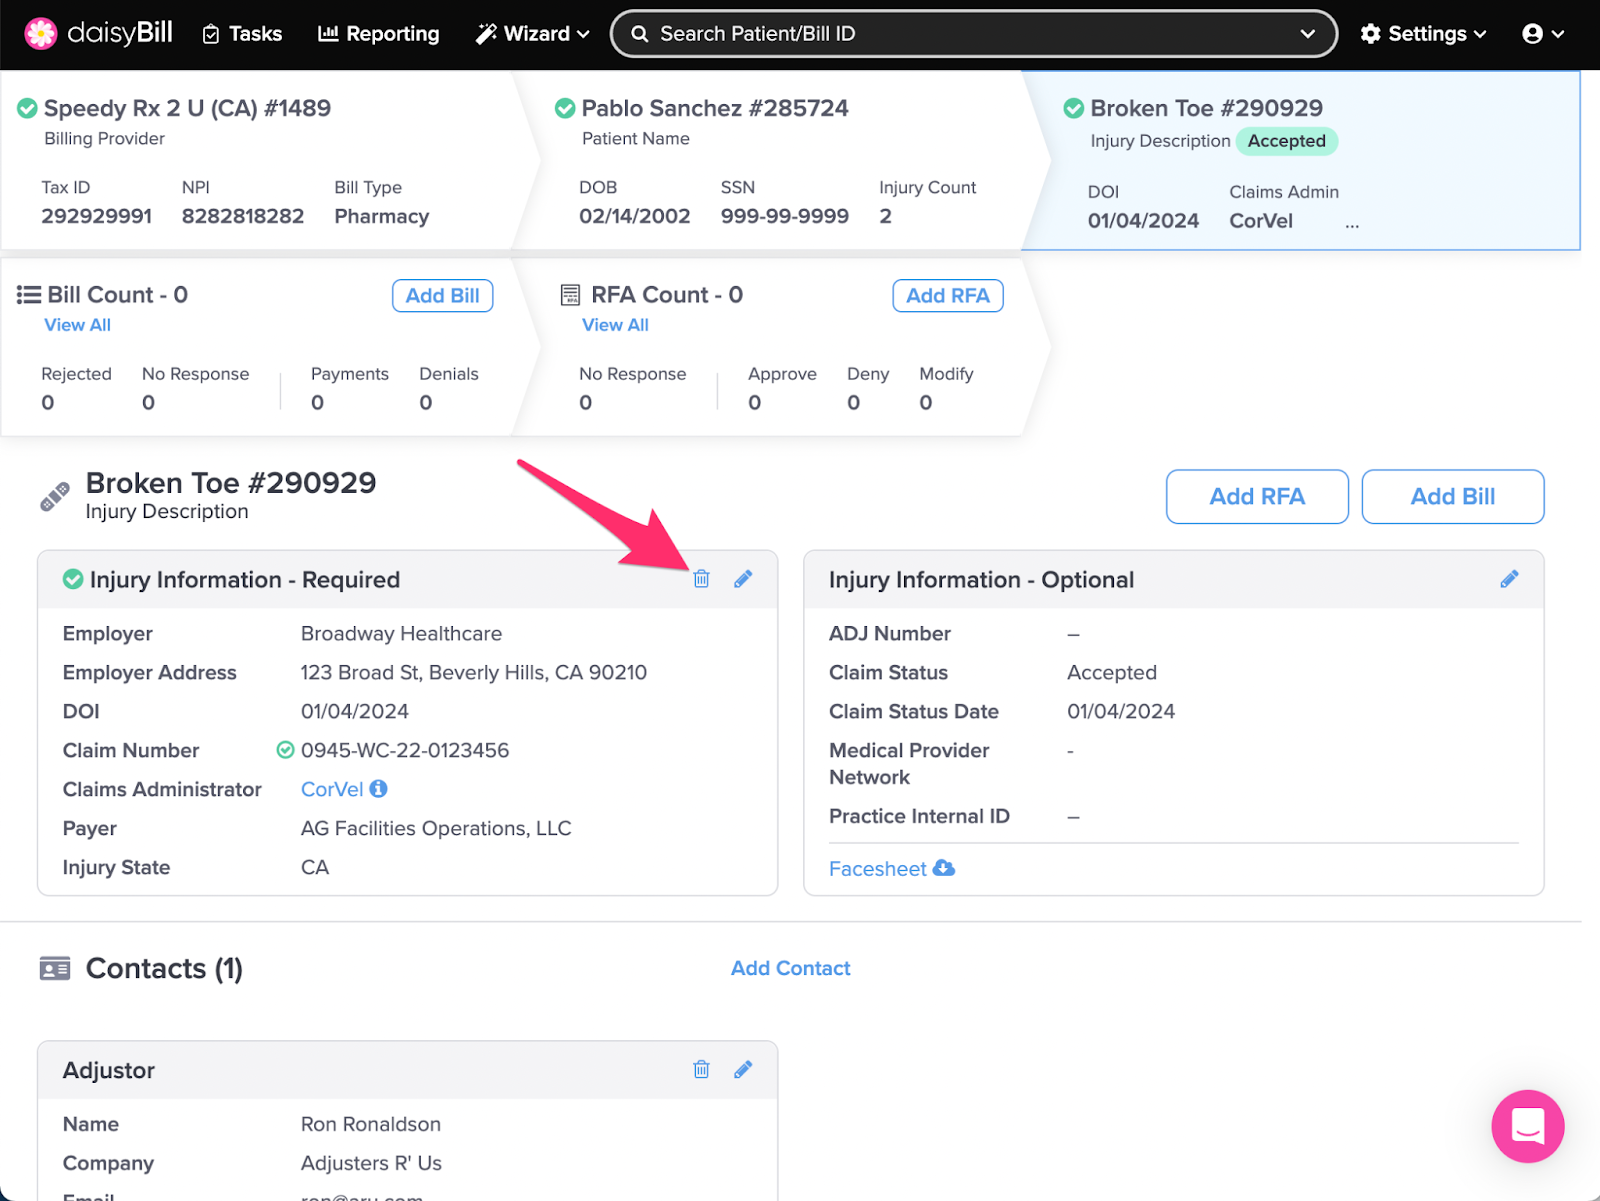
B. To delete an Injury, click the trash can icon on the ‘Injury Information - Required’ section
Injuries with submitted Bills cannot be deleted. For more information, see the Help Article: Delete Injury / Patient.
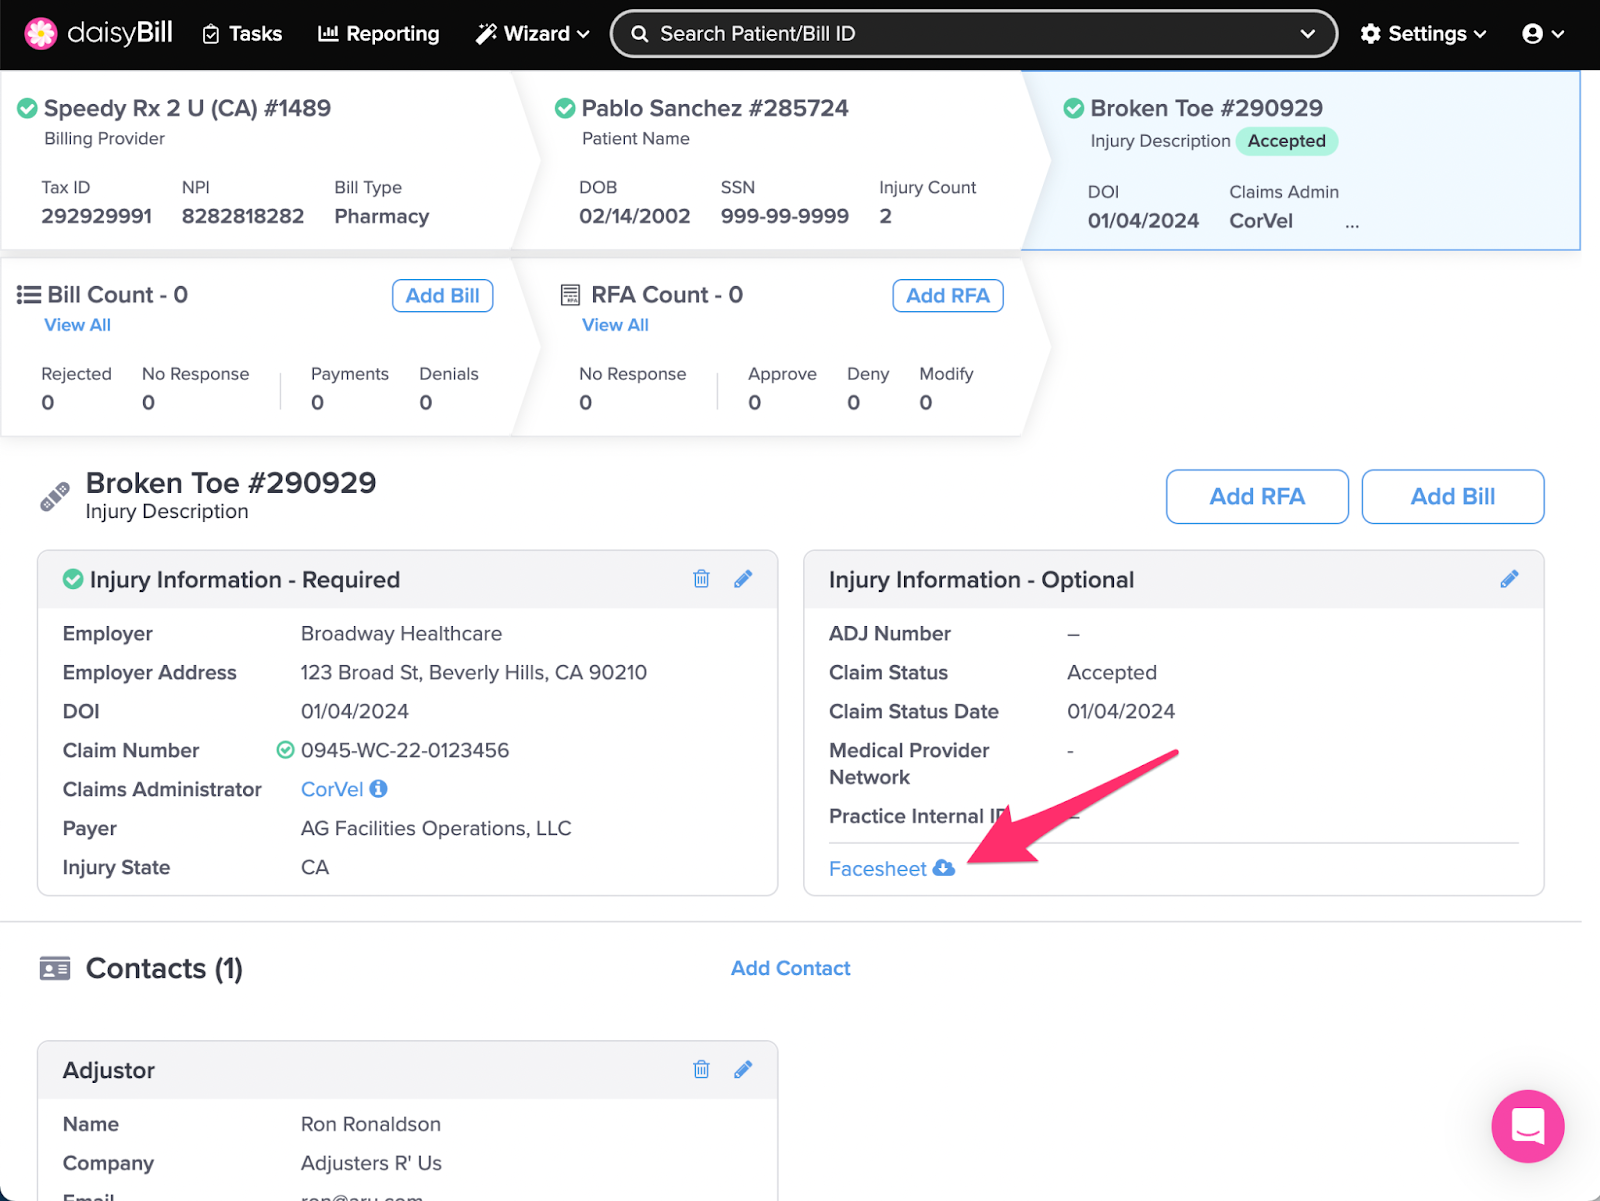
C. To download a facesheet, click ‘Facesheet’ in the ‘Injury Information - Optional’
This will open in a new tab on your browser, where you can download and print a PDF with patient, injury, and contact information.
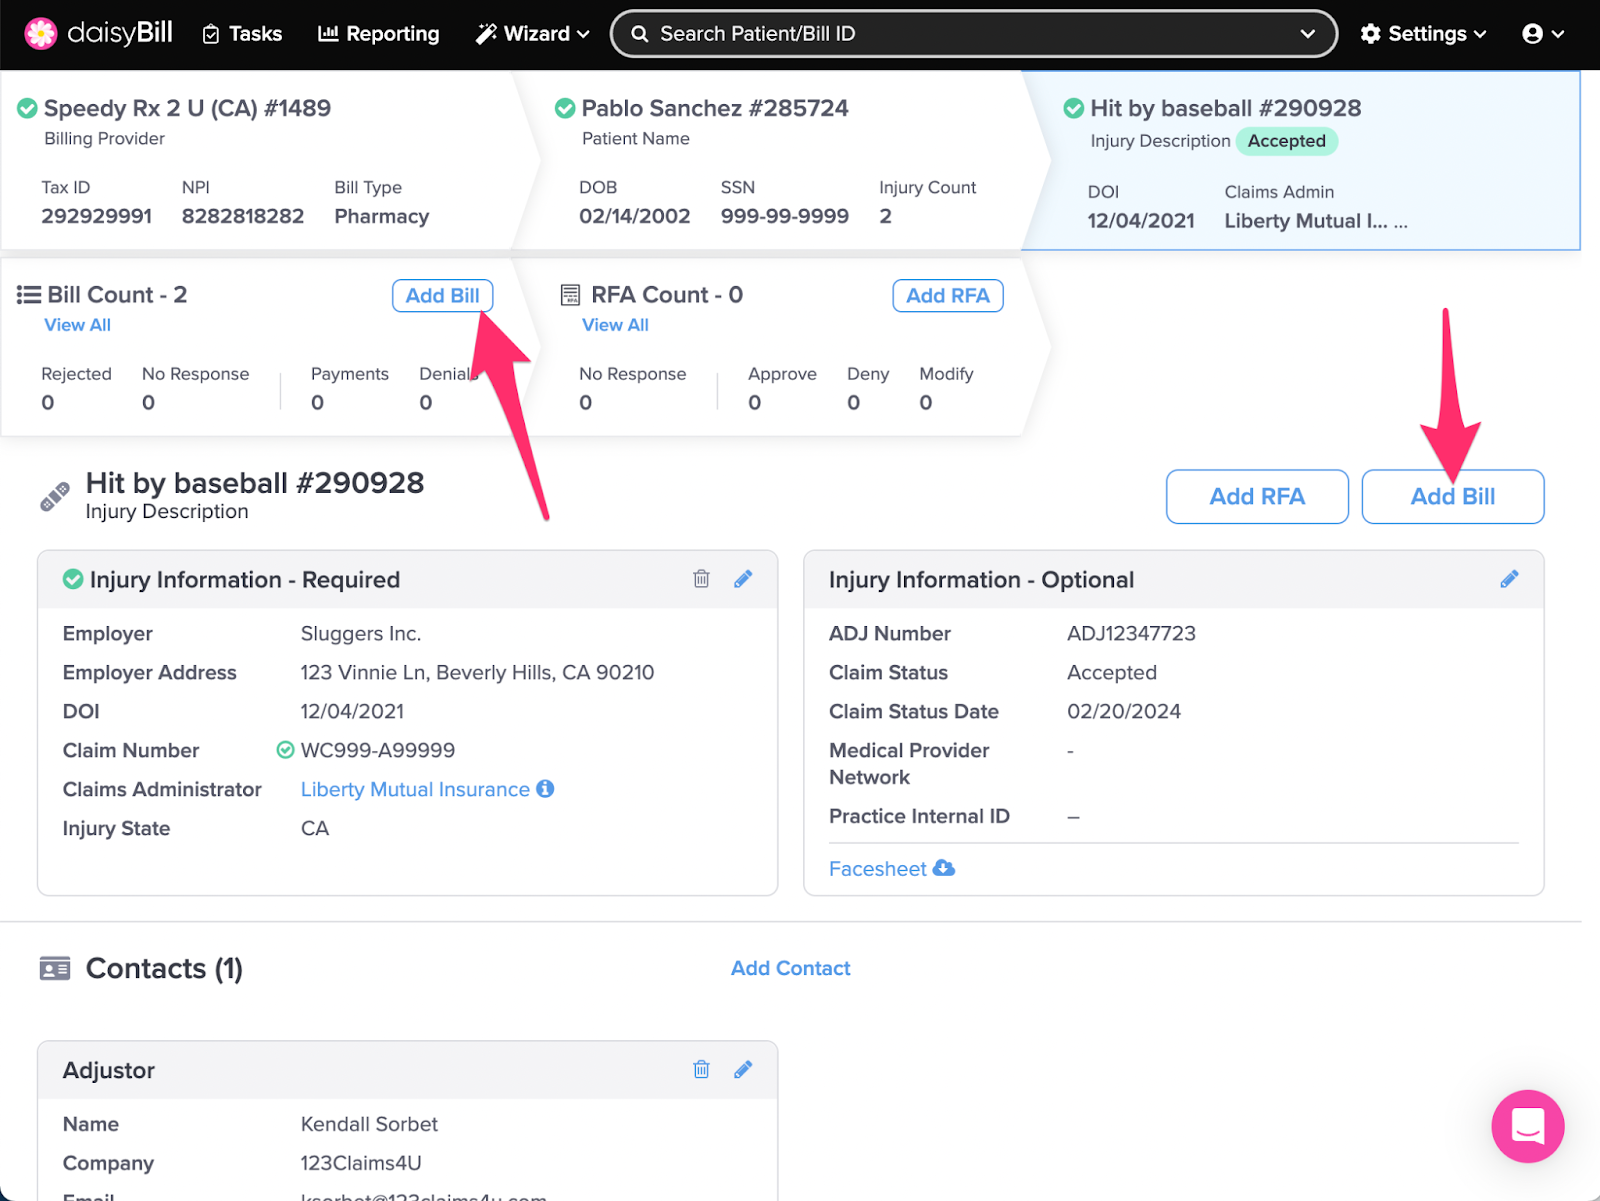
D. To add a new Bill for the Injury, click ‘Add Bill’
For more information, see the Help Articles: NCPDP Add Bill Dispensed Product and NCPDP Add Bill Compound Product.
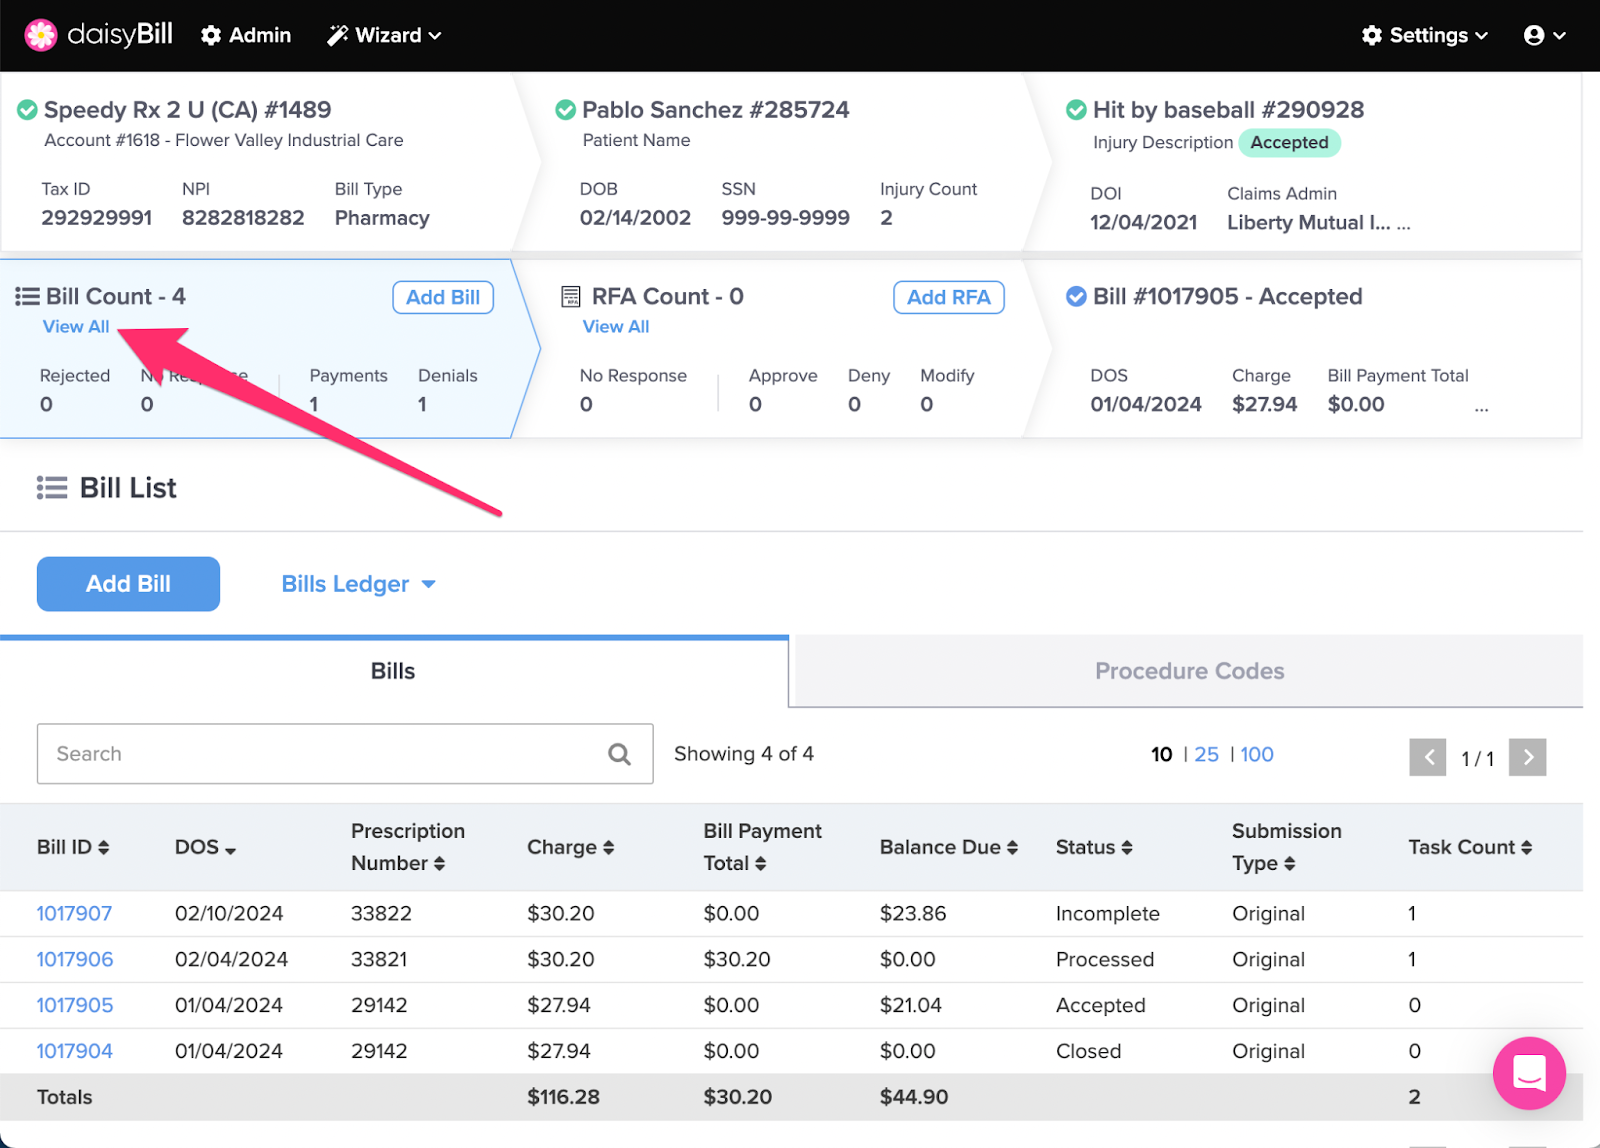
E. To view existing Bills for the Injury, click the ‘Bill Count’ breadcrumb
This takes you to the List of Bills associated with the Injury where you can also add new bills.
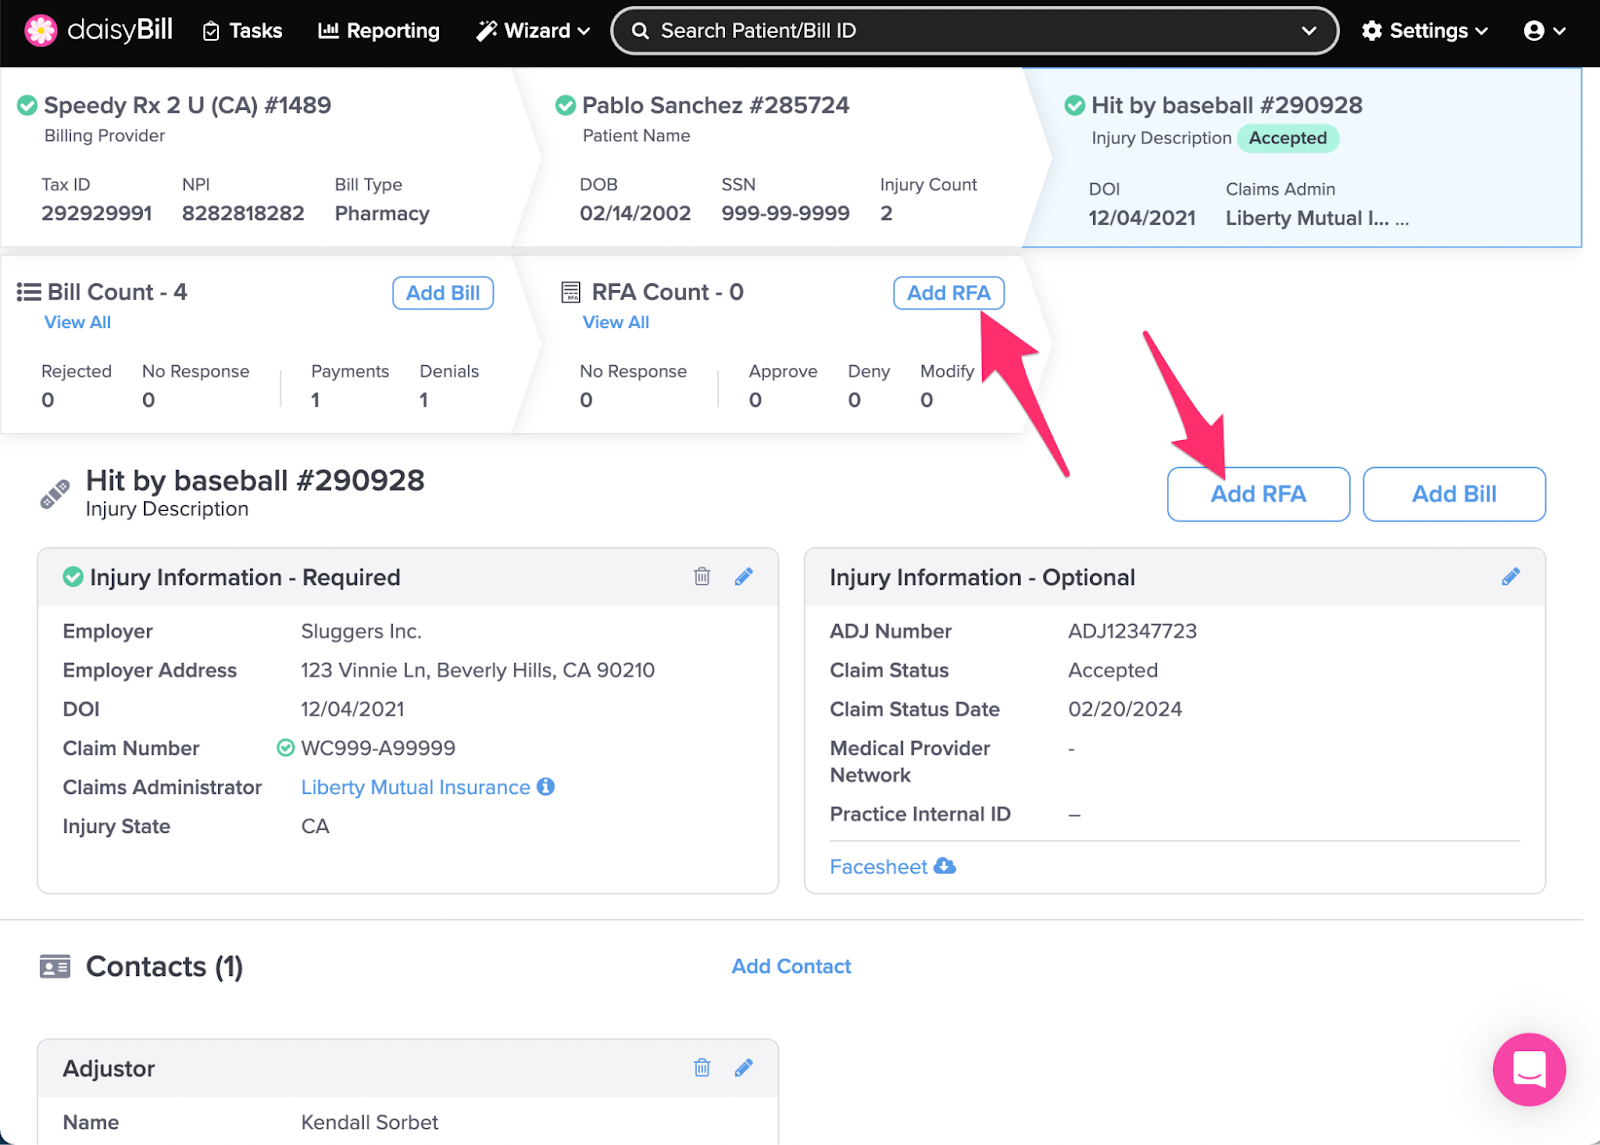
F. To create a new RFA, click ‘Add RFA’
Create and track Requests for Authorization (RFAs) for each Injury. To view existing RFAs for the Injury, click the RFA Count. For more information, see the Help Article: Add / Send RFA.
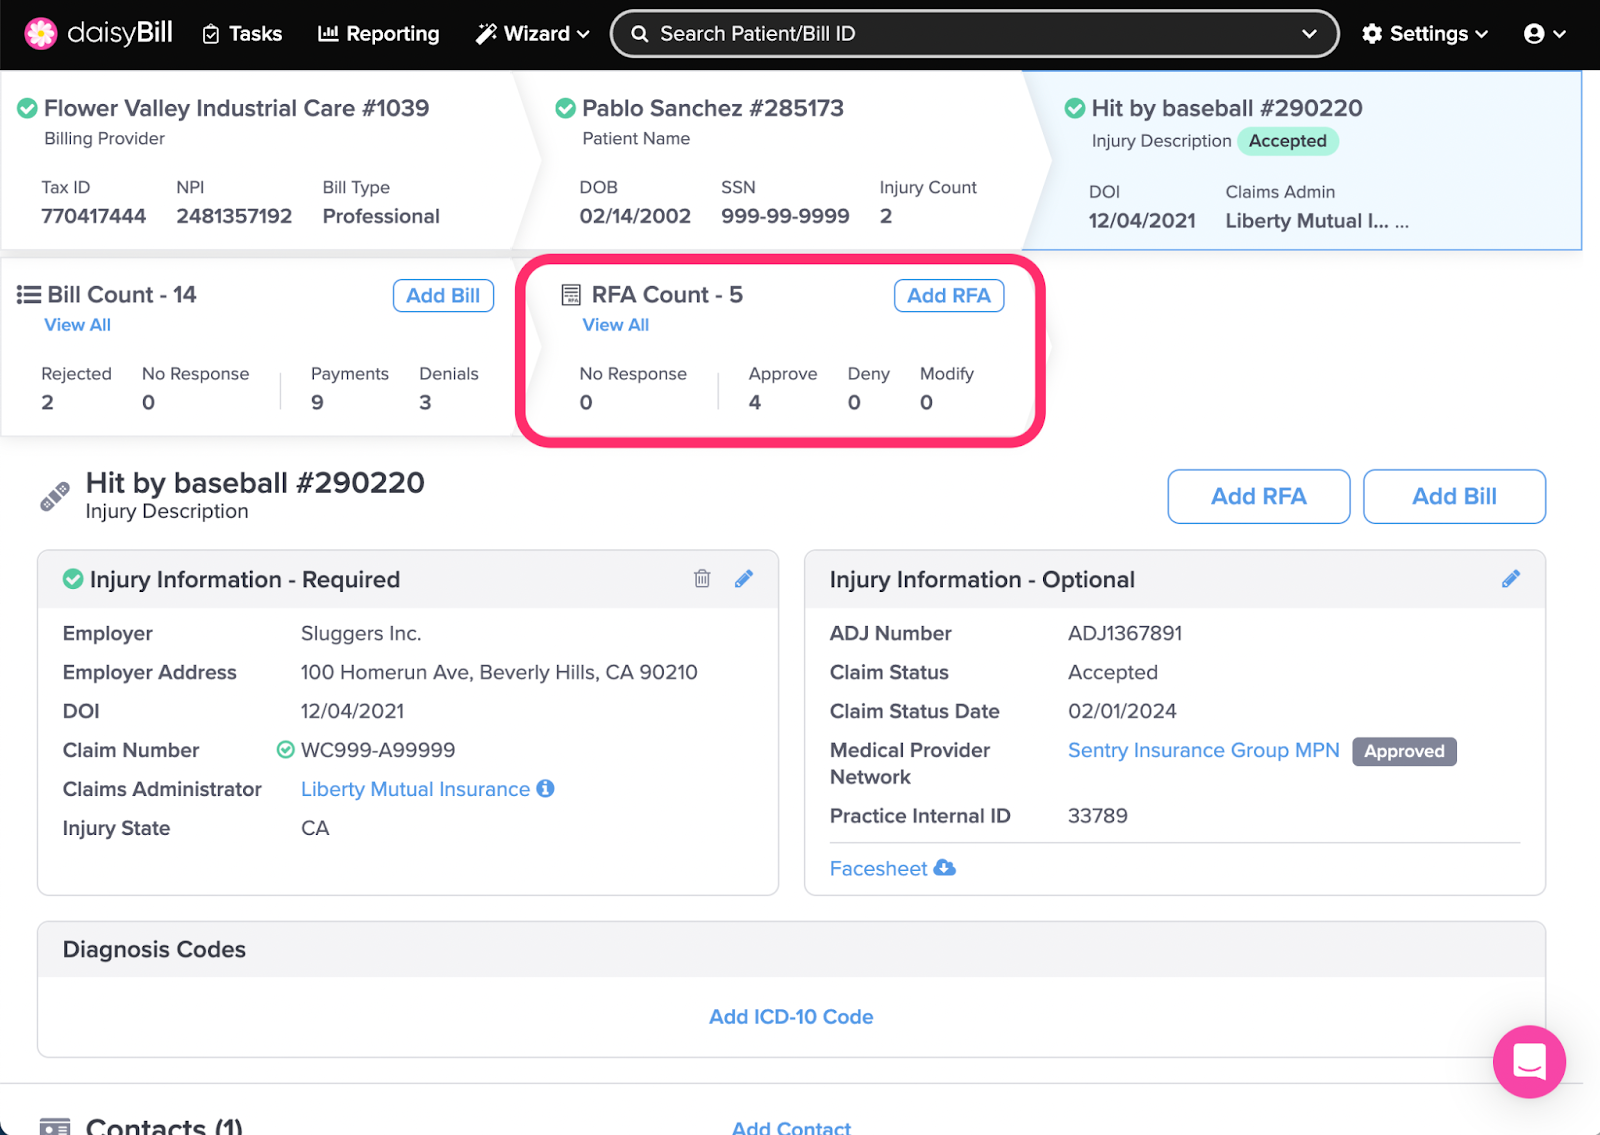
G. To view existing RFAs, click the ‘RFA Count’ breadcrumb
This takes you to the list of RFAs associated with the Injury where you can also add new RFAs.
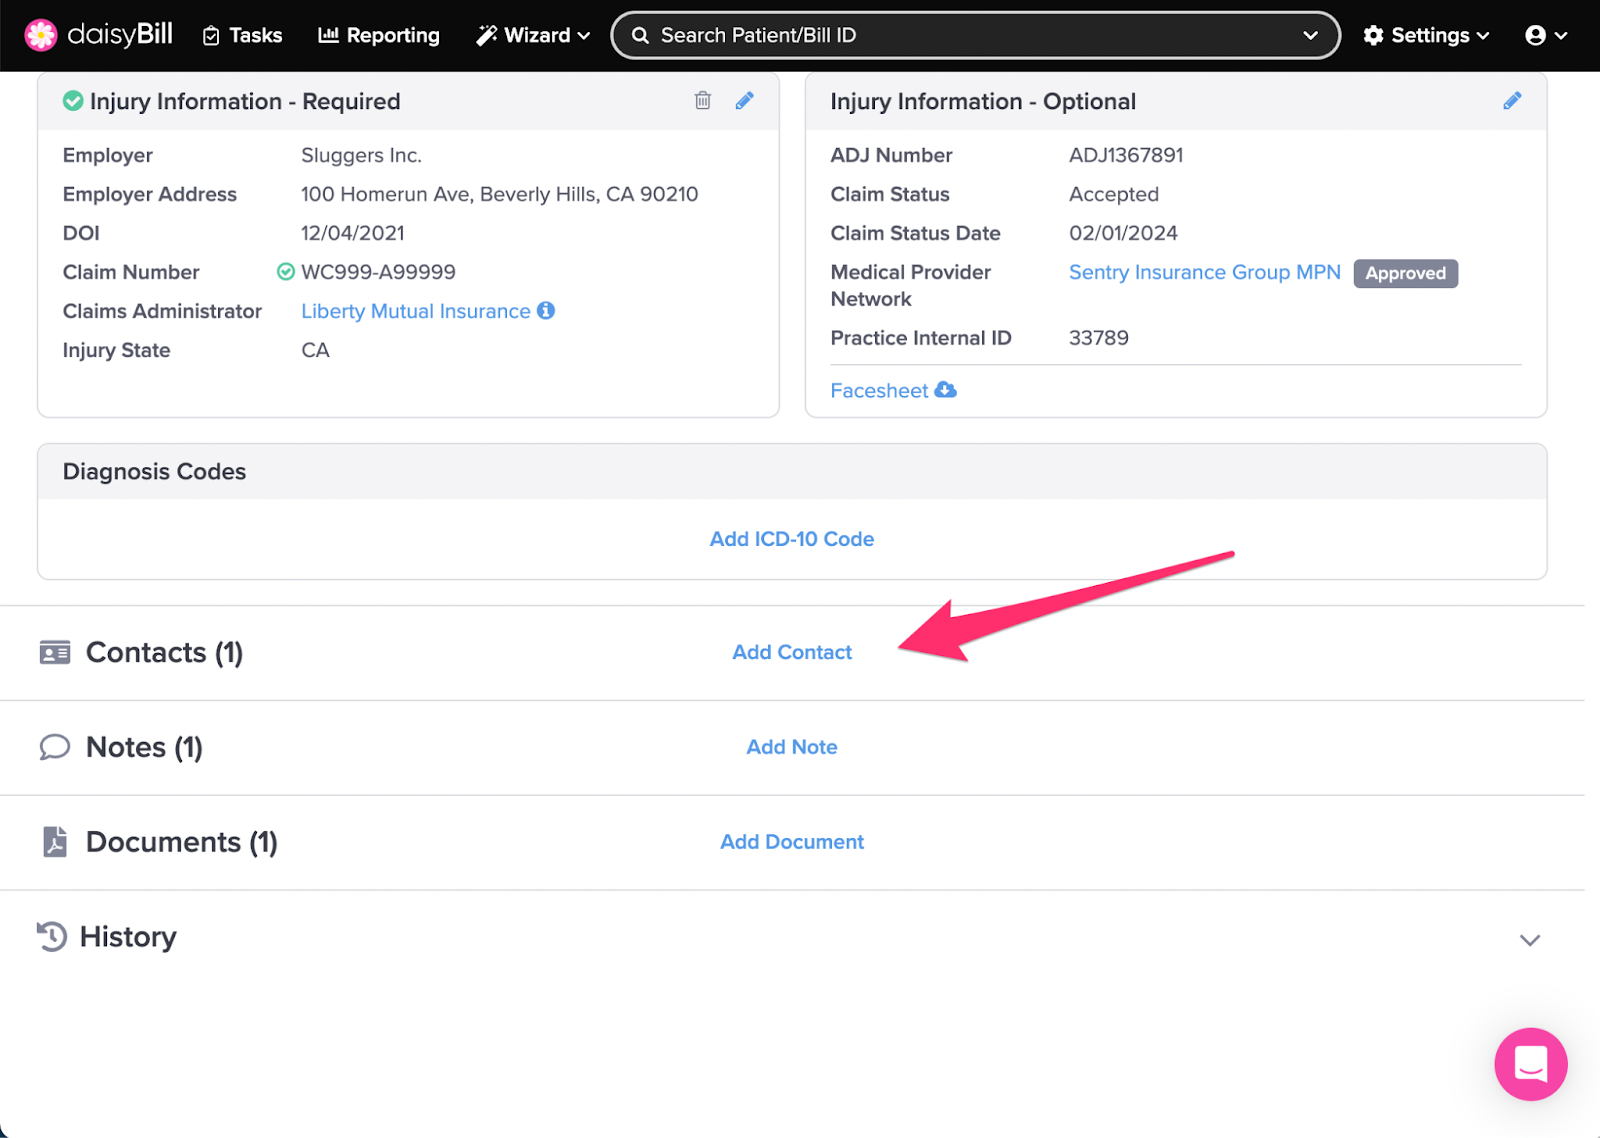
H. To add contact information, click ‘Add Contact’
Contacts are organized by their role for easy reference. For more information, see the Help Article: Add / Edit / Delete Contacts.
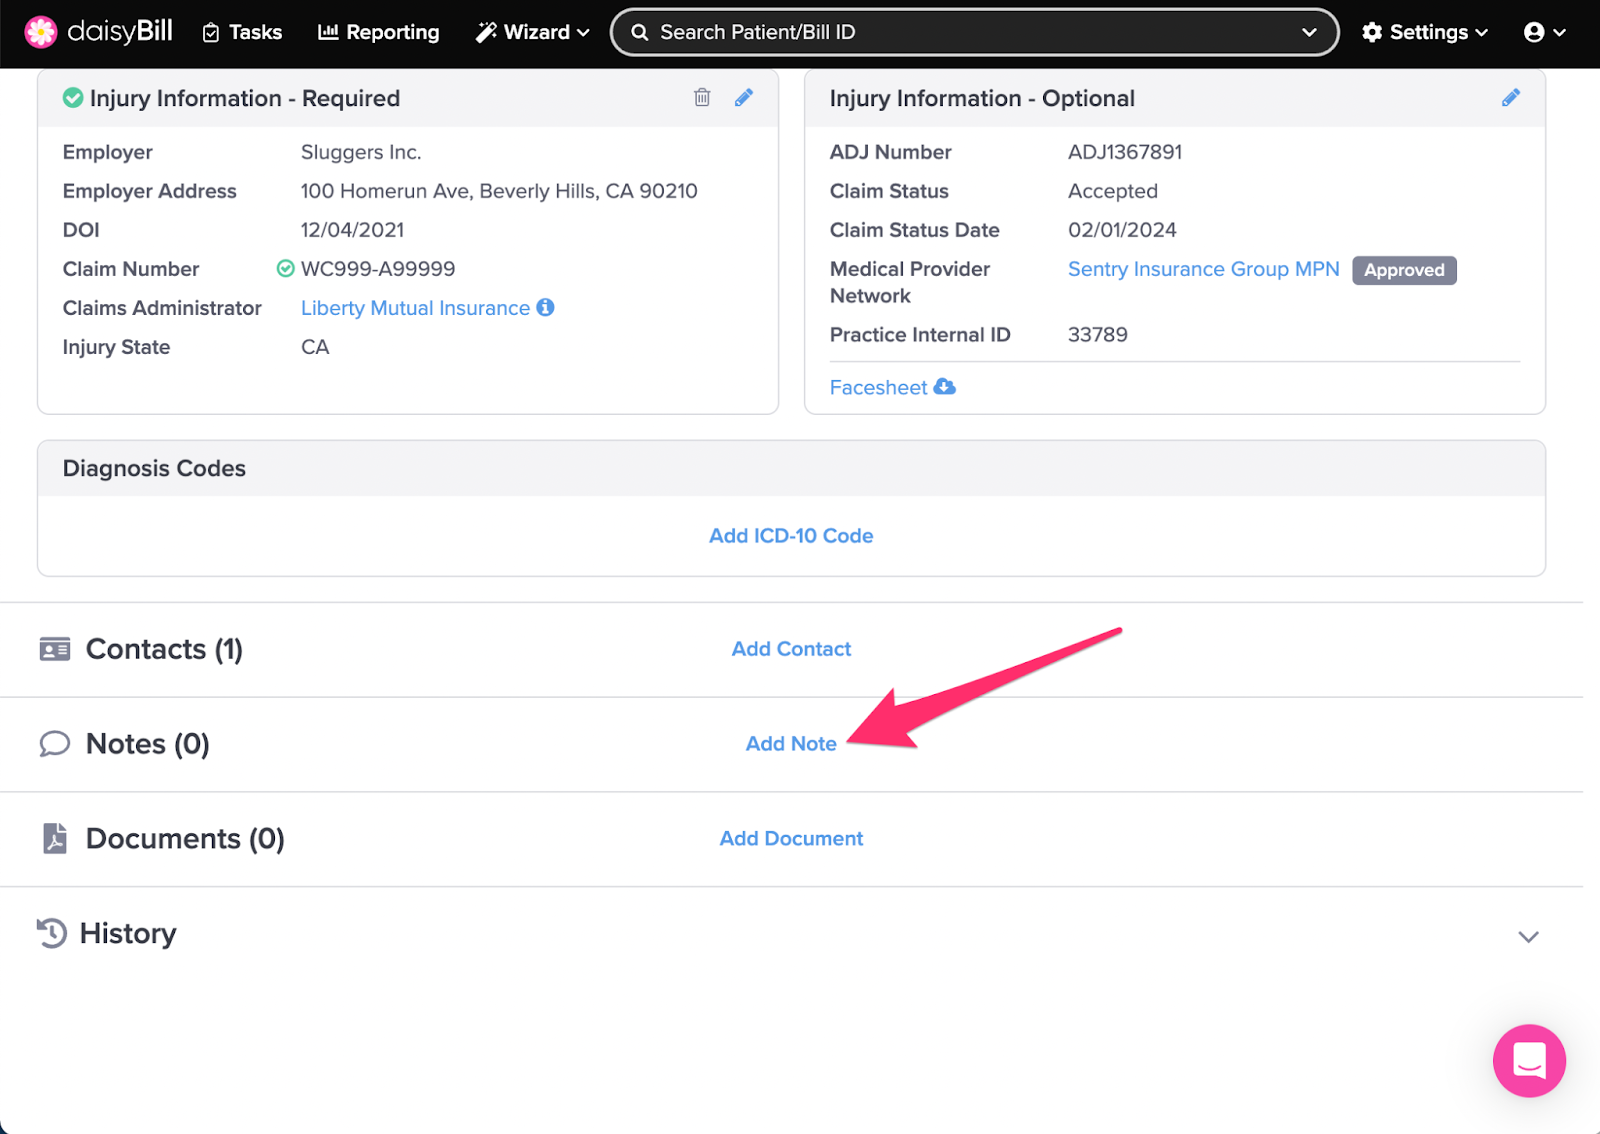
I. To add an Injury Note, click ‘Add Note’ under ‘Notes’
Use Injury Notes to retain important information about the Injury. For more information, see the Help Article: Add / View Injury Notes.
Injury Notes appear on all Bill Histories for all Bills (including future Bills) associated with the Injury.
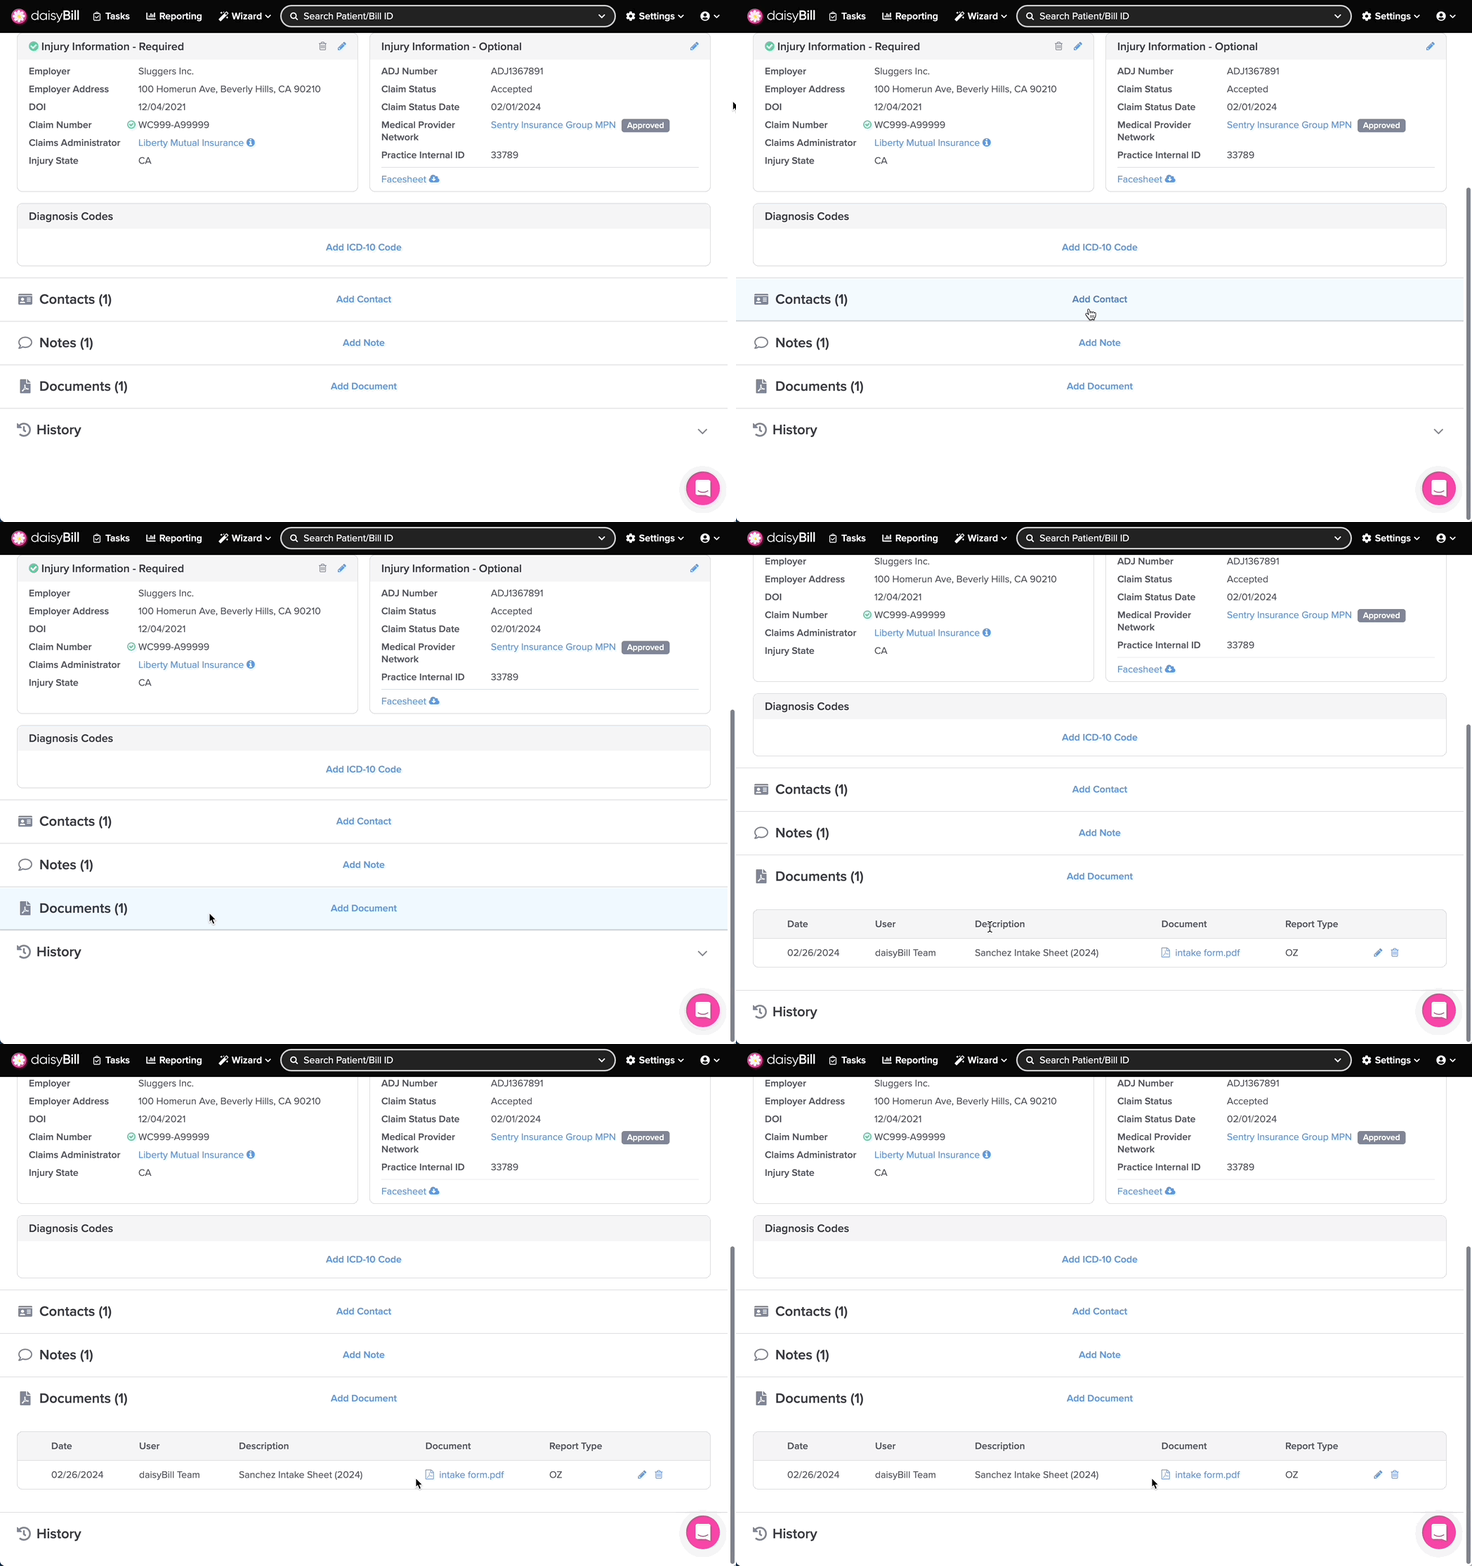
J. To view existing ‘Injury Notes’ for the Injury, click the ‘Notes’ section
This takes you to the list of Injury Notes associated with the Injury where you can also add new Injury Notes.
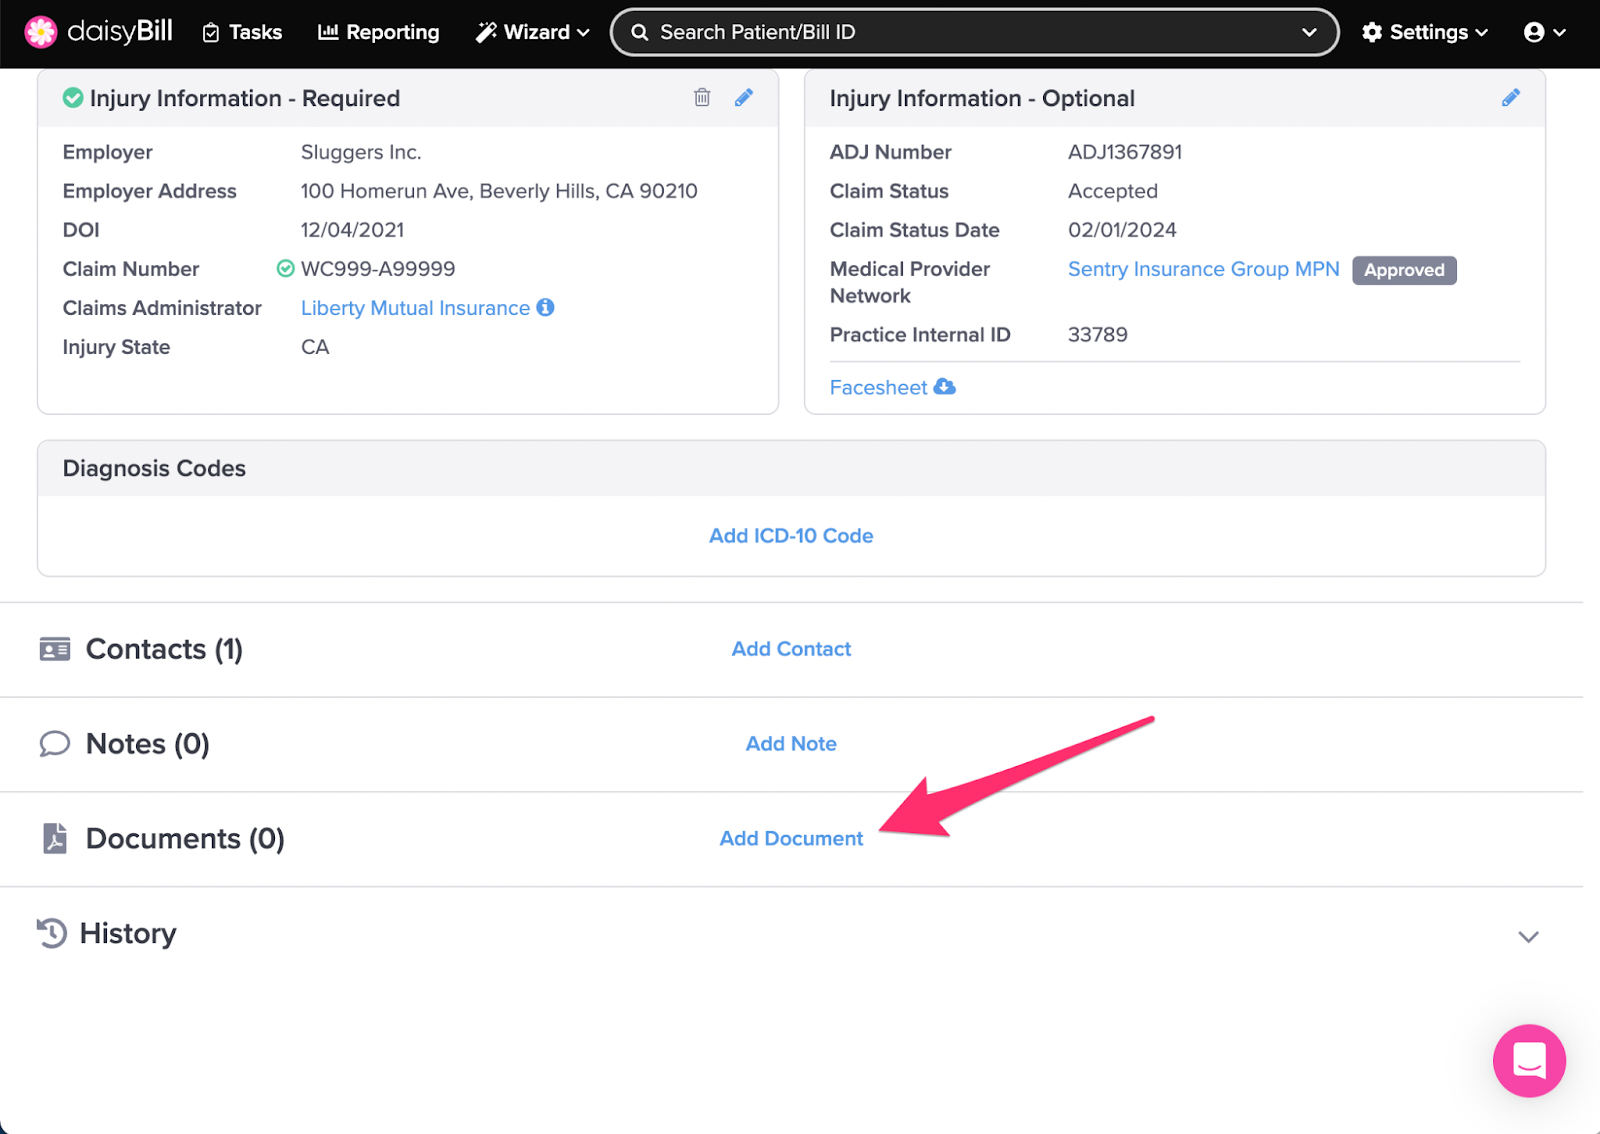
K. To upload documents to an Injury, click ‘Add’ under ‘Documents’
Store Injury Documents such as Settlement Hearing Notifications or Declarations of Readiness for organized, easy access later. For more information, see the Help Article: Add / Edit / Delete Injury Documents.
L. To view existing ‘Injury Documents’ for the Injury, click ‘Documents’
This takes you to the list of Injury Documents associated with the Injury where you can also add new Injury Documents.
M. To view Injury History, click ‘History’
History displays the complete history of the creation and edits to the patient’s Injury.
You’re all set!
