View Other Articles
Places of Service stores required information for each Place of Service associated with a Billing Provider.
Step 1. On the navigation bar, click ‘Settings’, then click the name of the Billing Provider you want to view or edit
This will navigate directly to Billing Settings - Required for that Billing Provider.
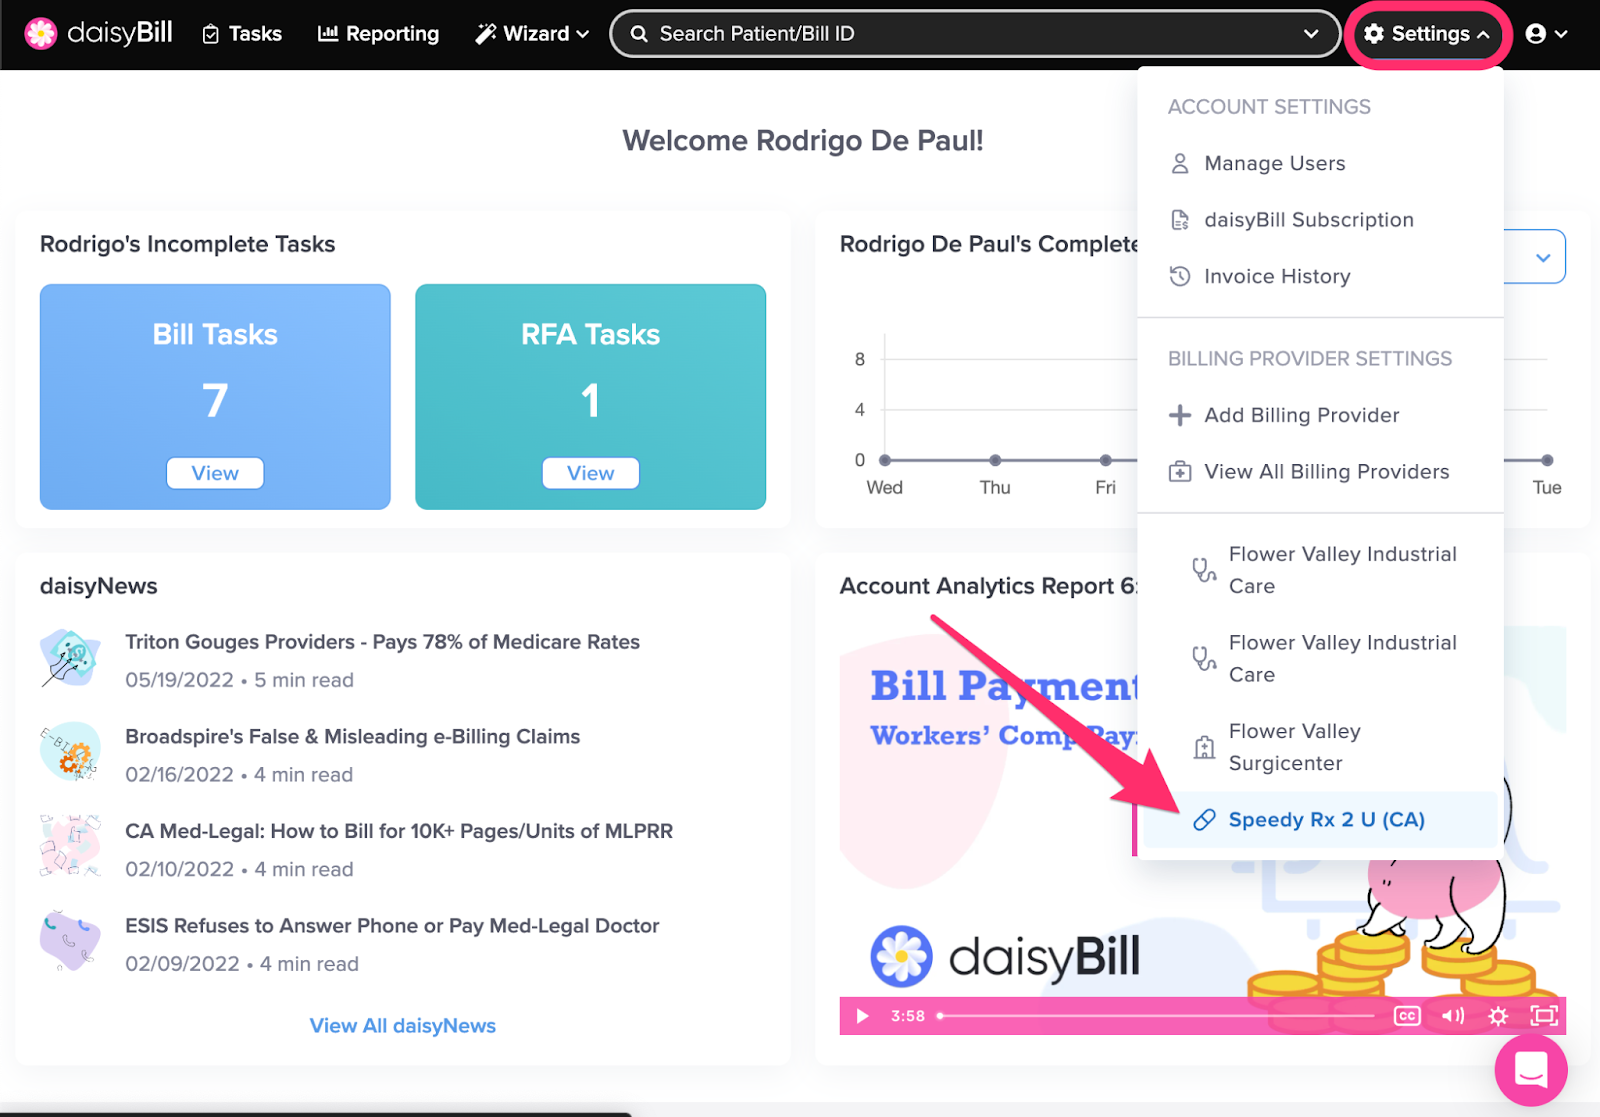
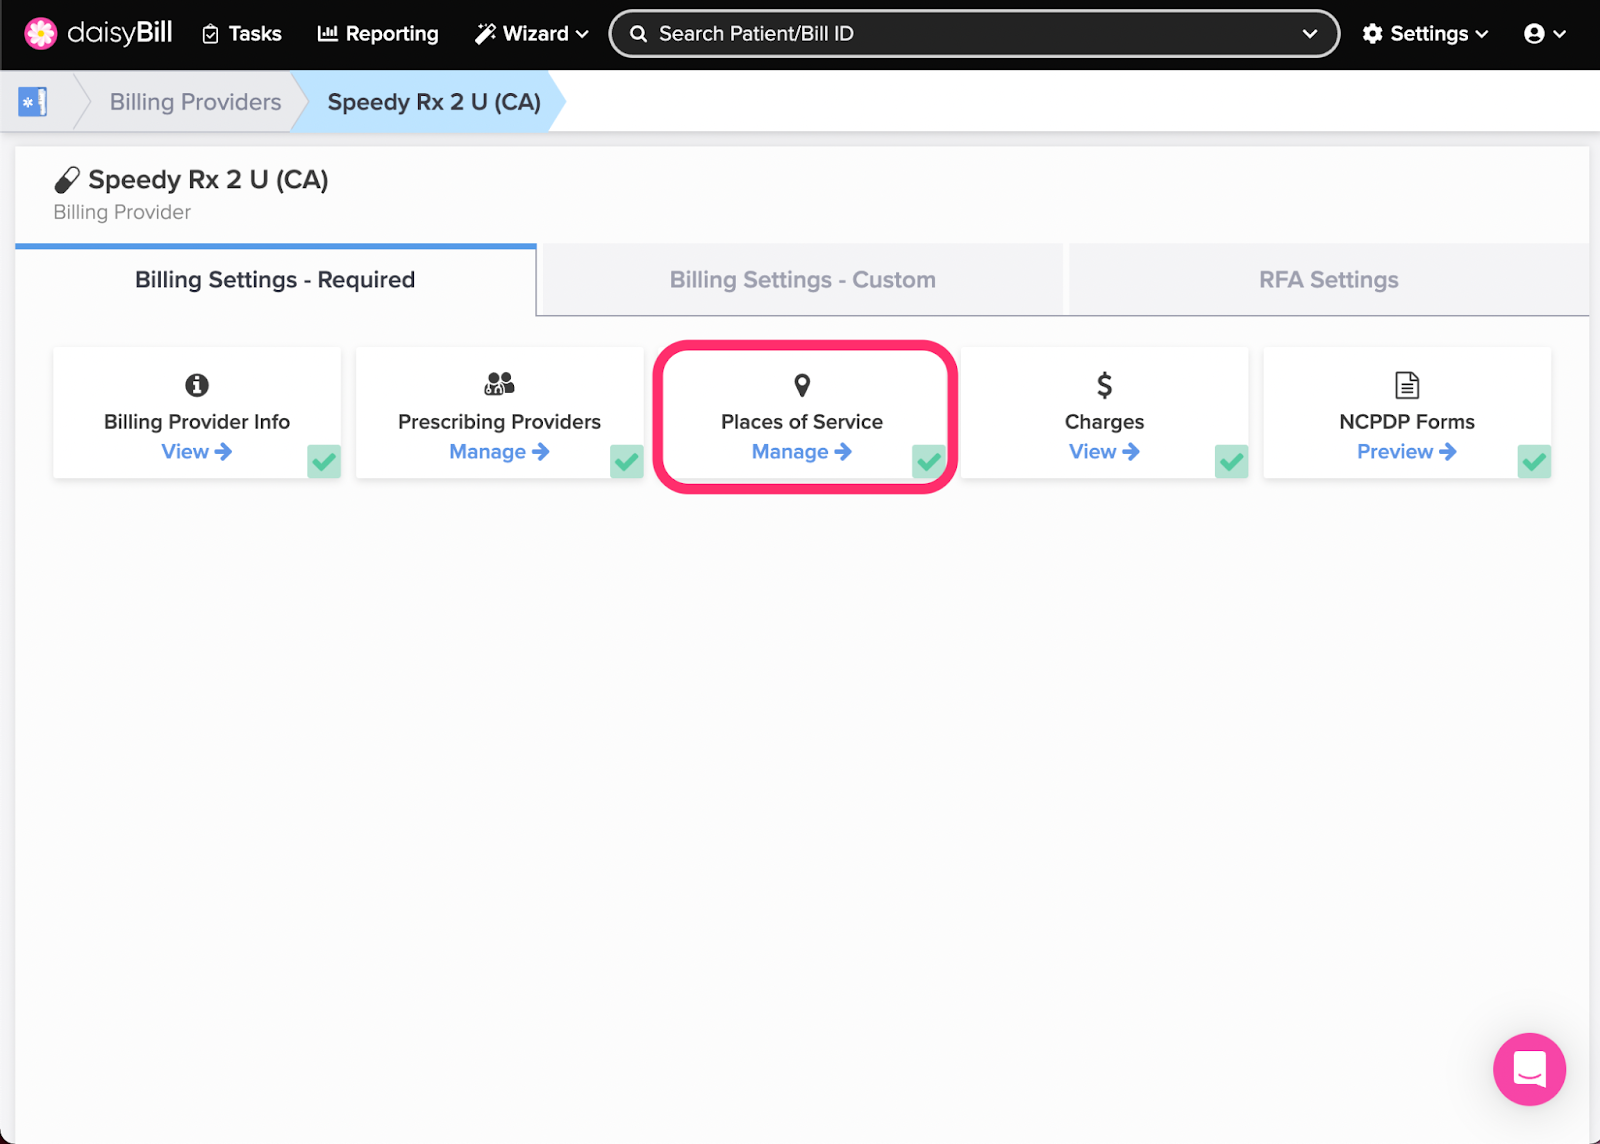
Step 2. Click the ‘Places of Service’ card
A green ‘Checkmark’ icon in the lower right corner of the card indicates Places of Service have been added for the Billing Provider. A red ‘X’ icon indicates no Places of Service have been added.
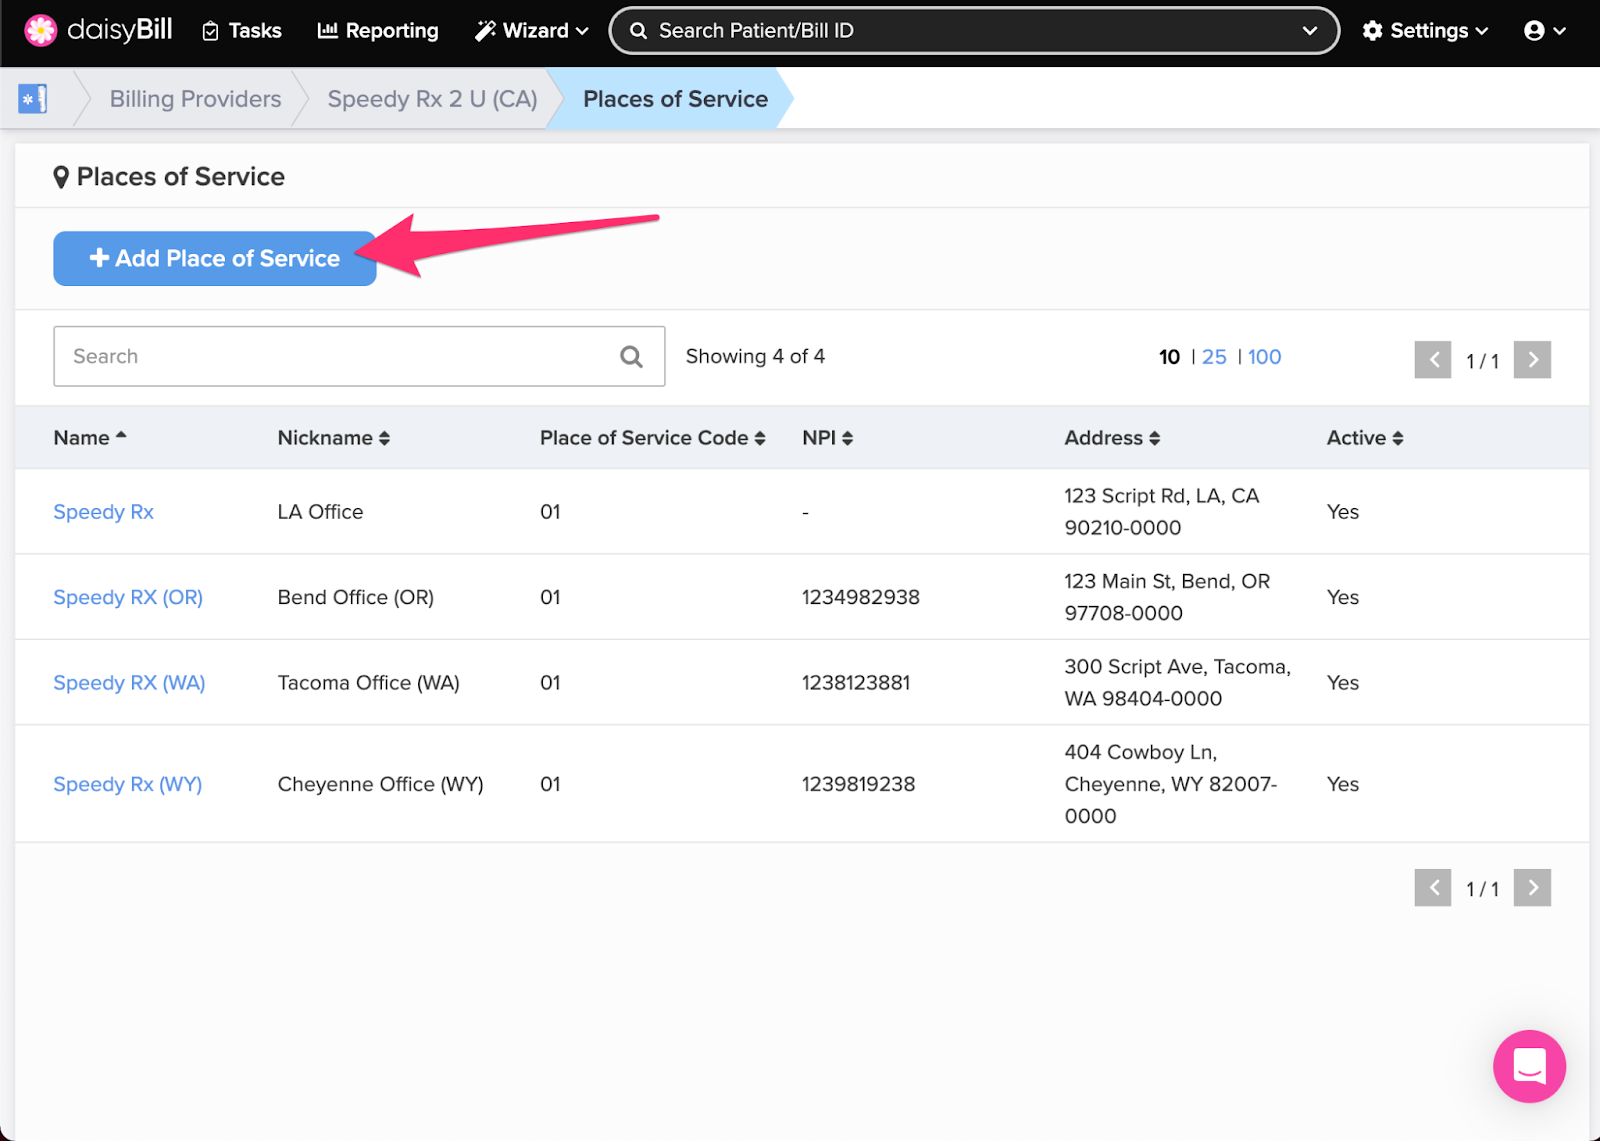
Step 3. To add a ‘Place of Service,’ click the ‘Add Place of Service’ button
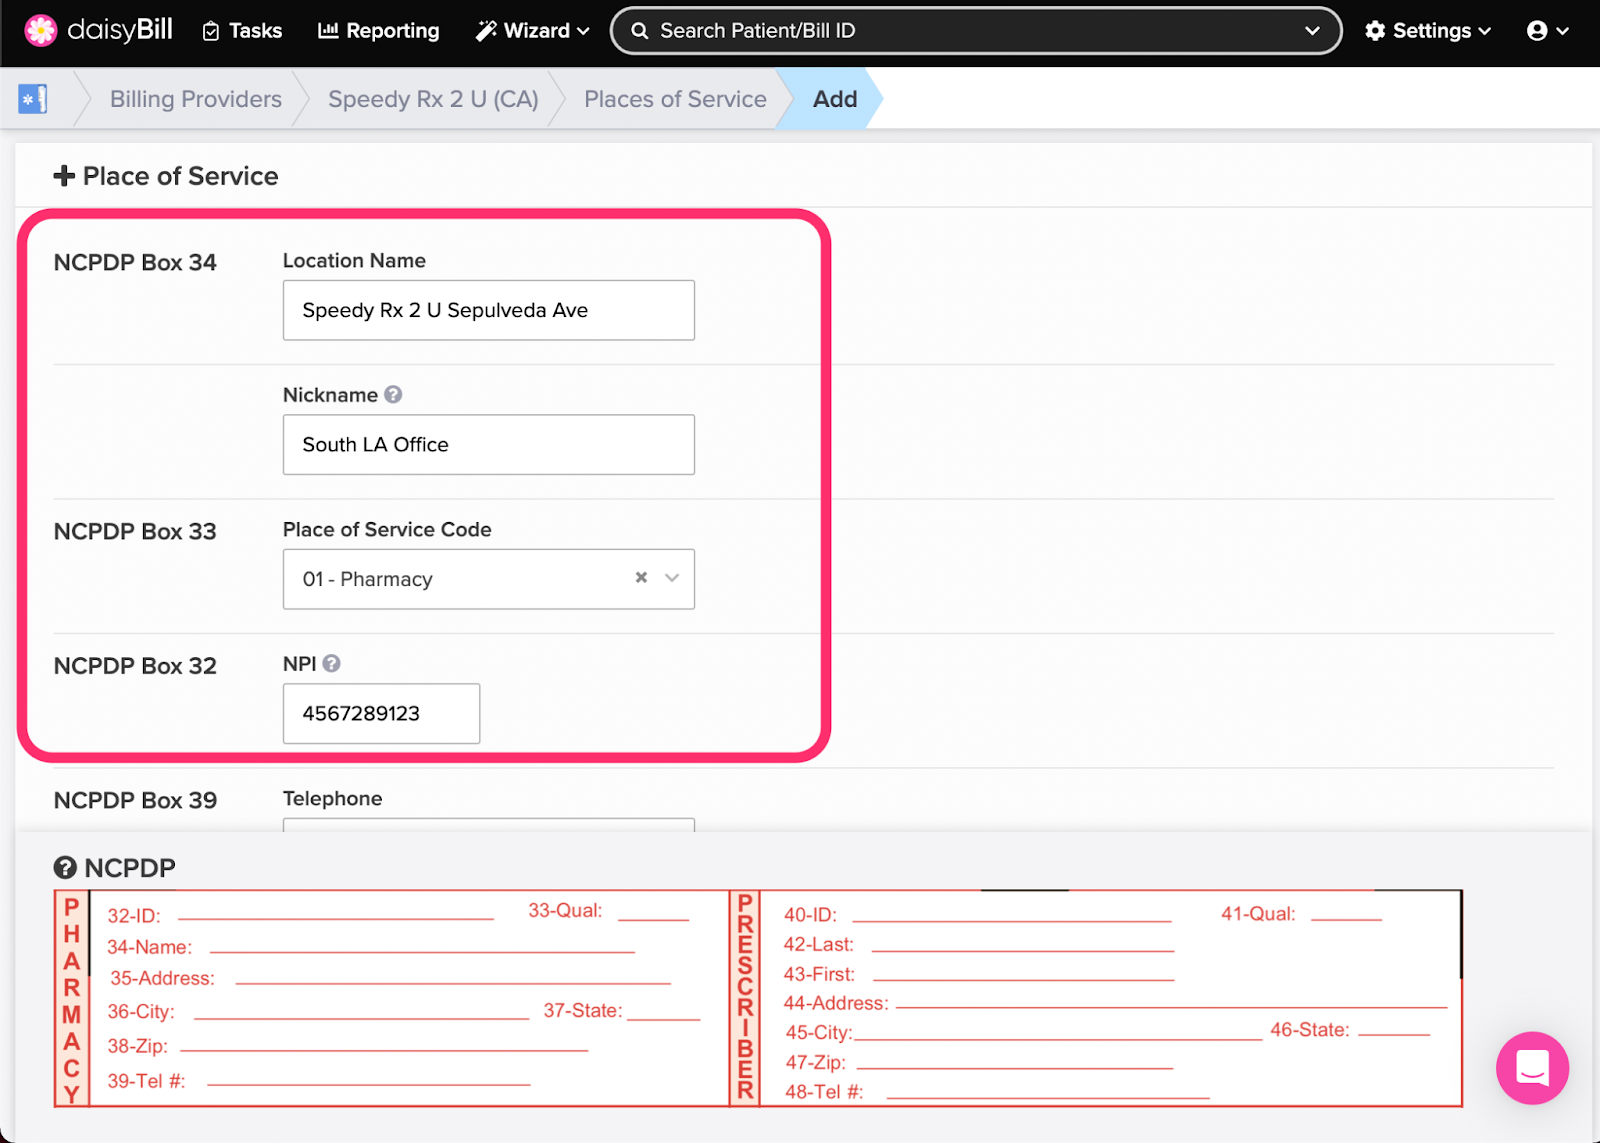
Step 4a. Enter the information for the ‘Place of Service’
Create Nicknames that will be easy for staff to easily identify when viewed in a list. The Nickname field does not populate on Bills.
 Step 4b. Enter the Telephone and Address
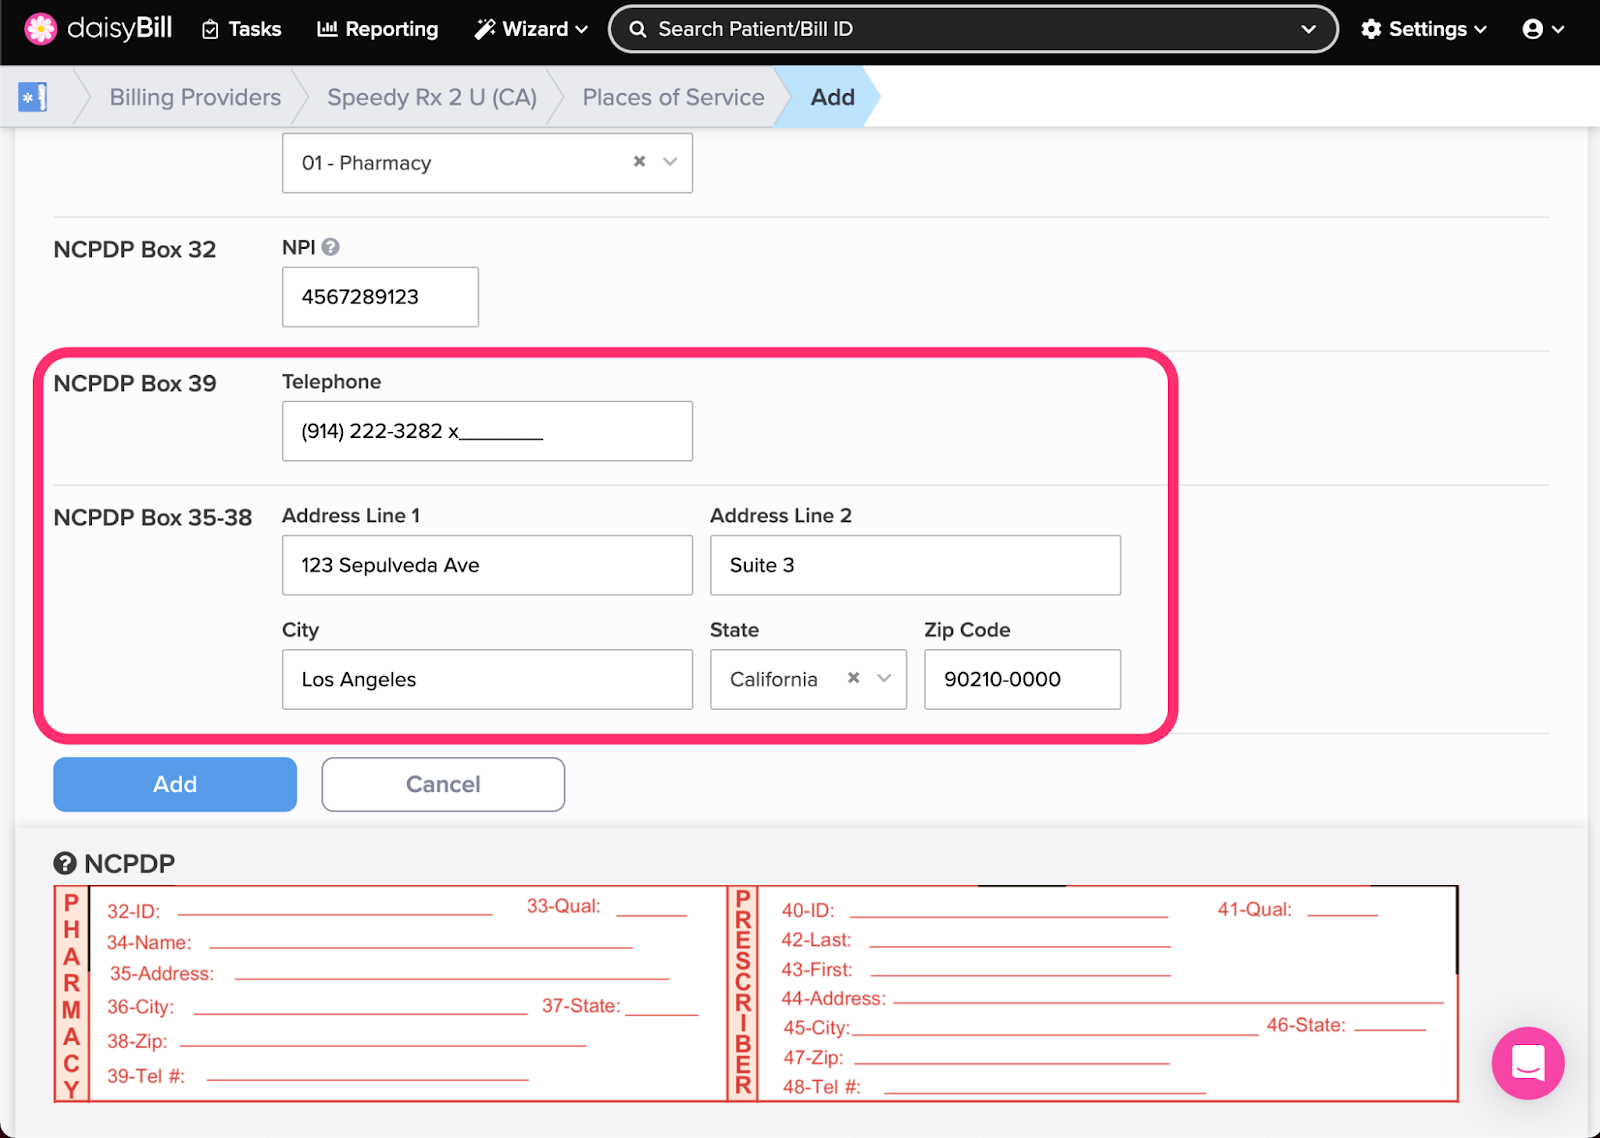
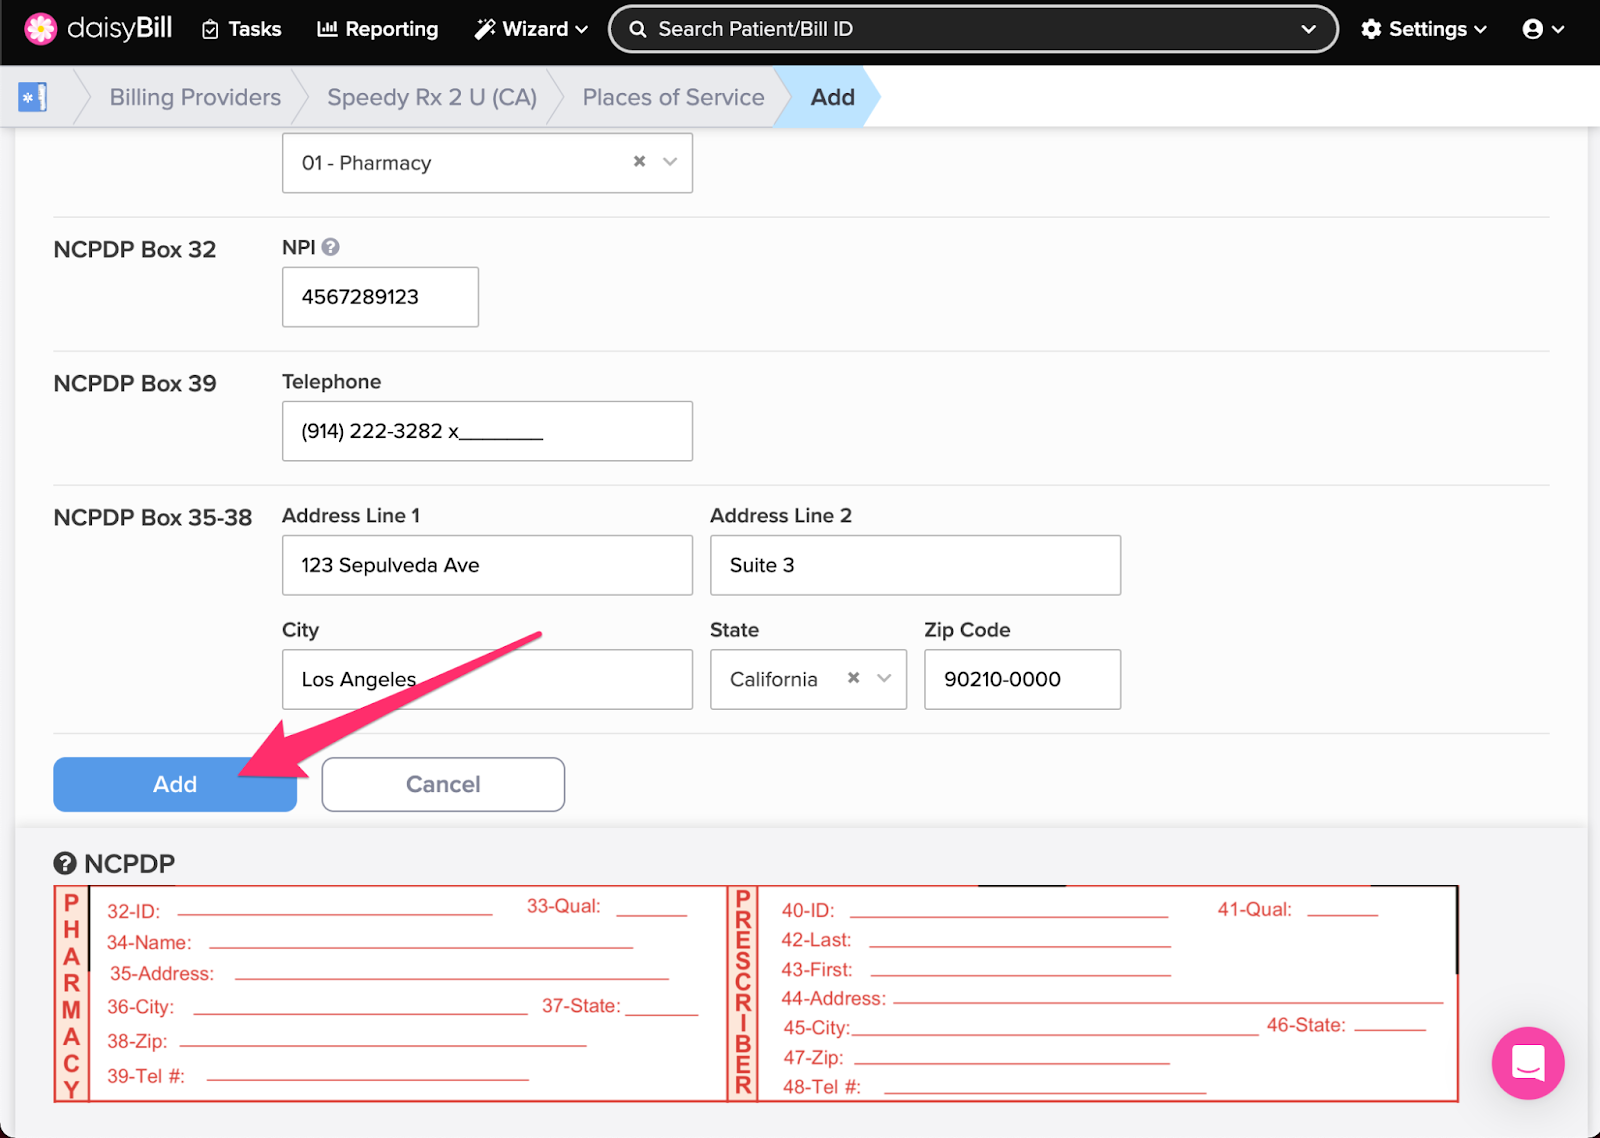
Step 5. When finished, click the ‘Add’ button
Step 6. To edit a ‘Place of Service,’ click its ‘Name’, then click the ‘Edit’ button
When adding a new Place of Service it is automatically marked as Active. To deactivate a Place of Service and prevent it from being selected on new bills, click ‘No.’

You’re all set!