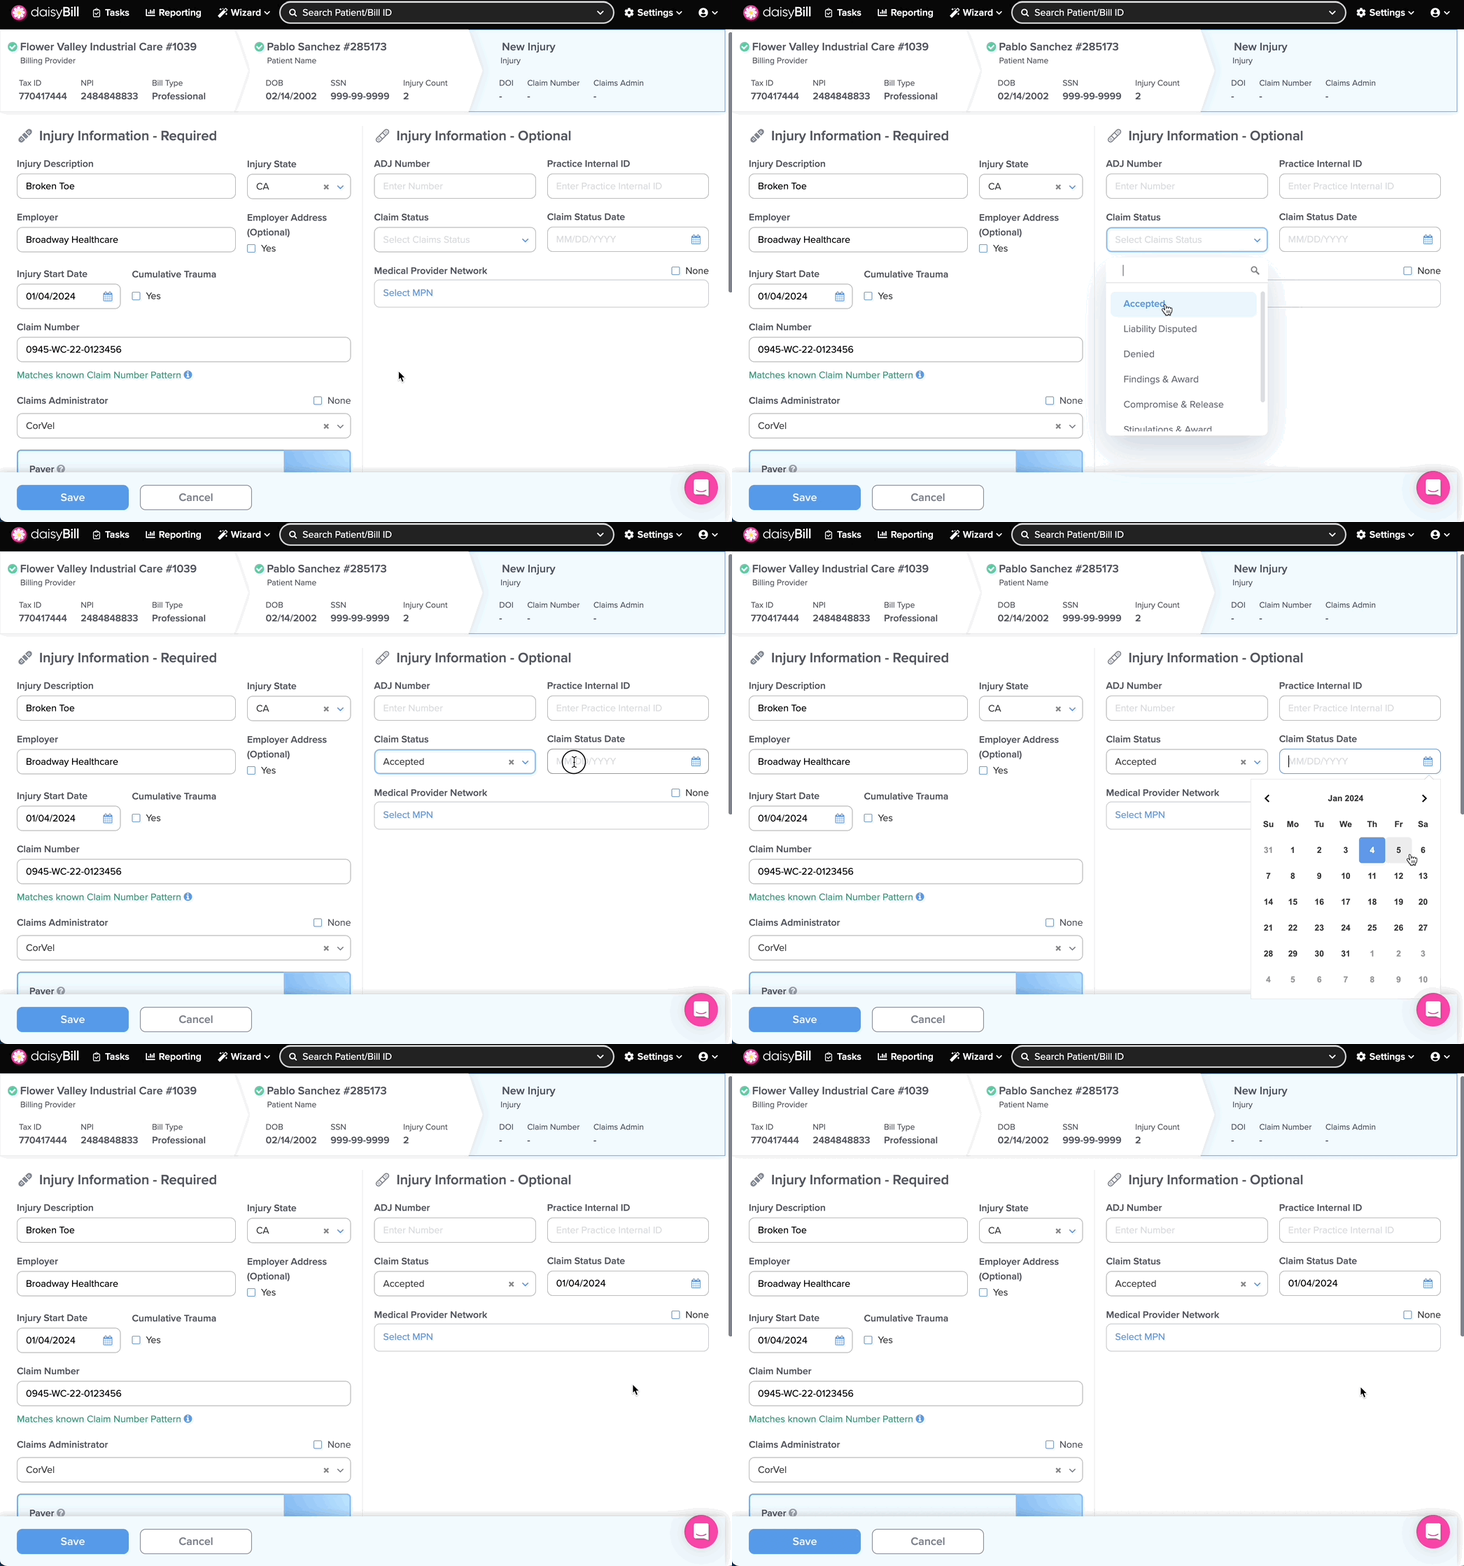
Explanation: ‘Injury Information - Required’
Regulations allow workers’ comp payers to deny payment if a bill fails to include the mandated injury information. When adding a new injury to a patient in your account, daisyBill requires injury information that reflects the state or federal billing requirements.
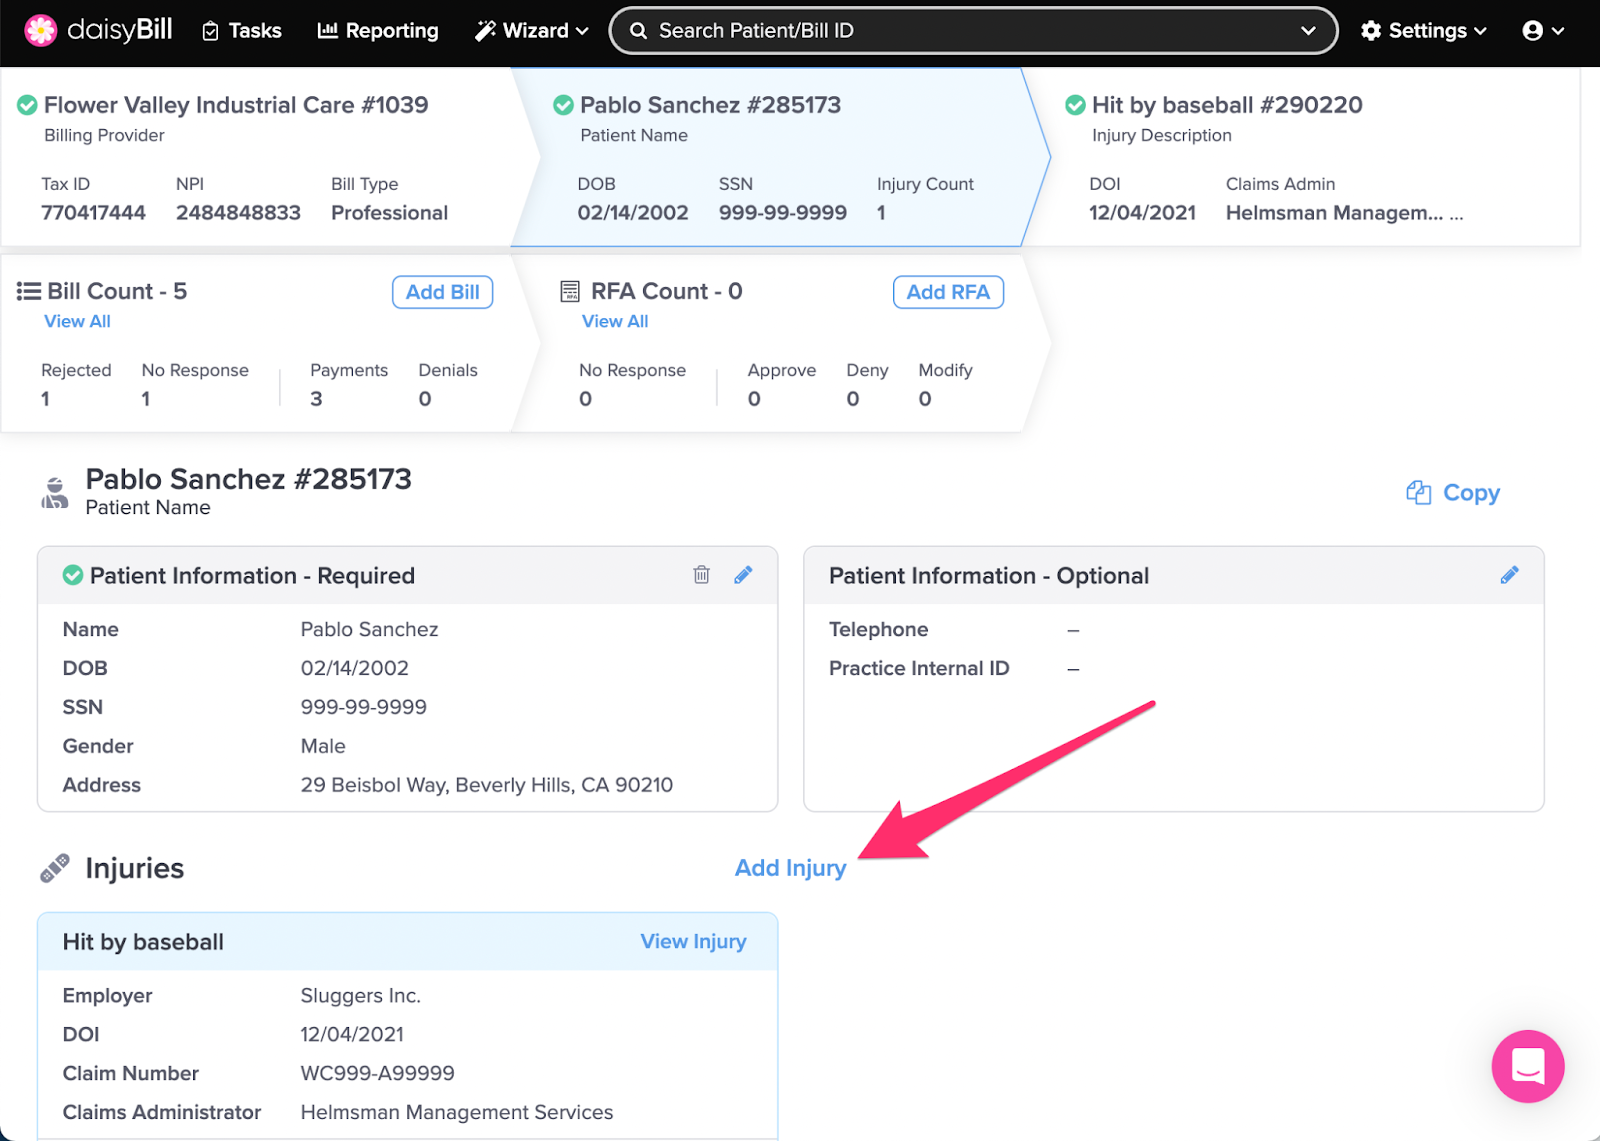
Step 1. From the Patient Page, click ‘Add Injury’
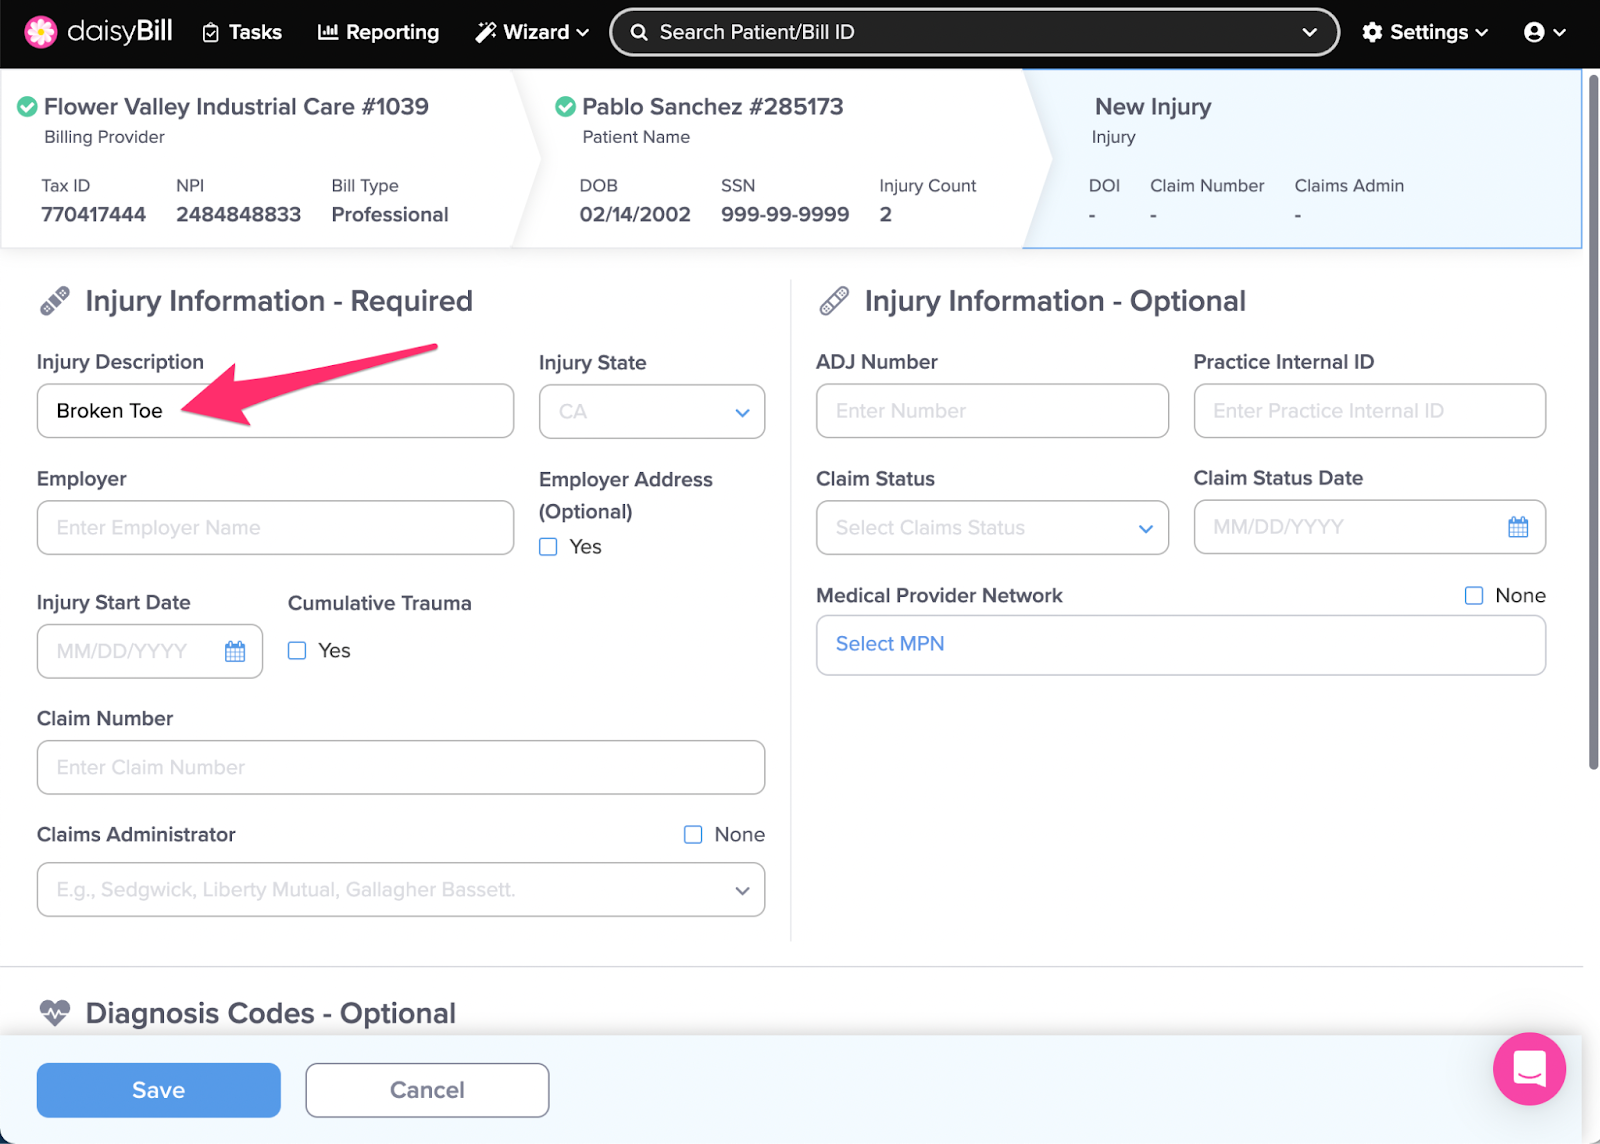
Step 2. Enter ‘Injury Description’
Since a patient can have multiple work injuries, daisyBill requires an injury description. The Injury Description does NOT populate on the bill; the description is only for internal reference.
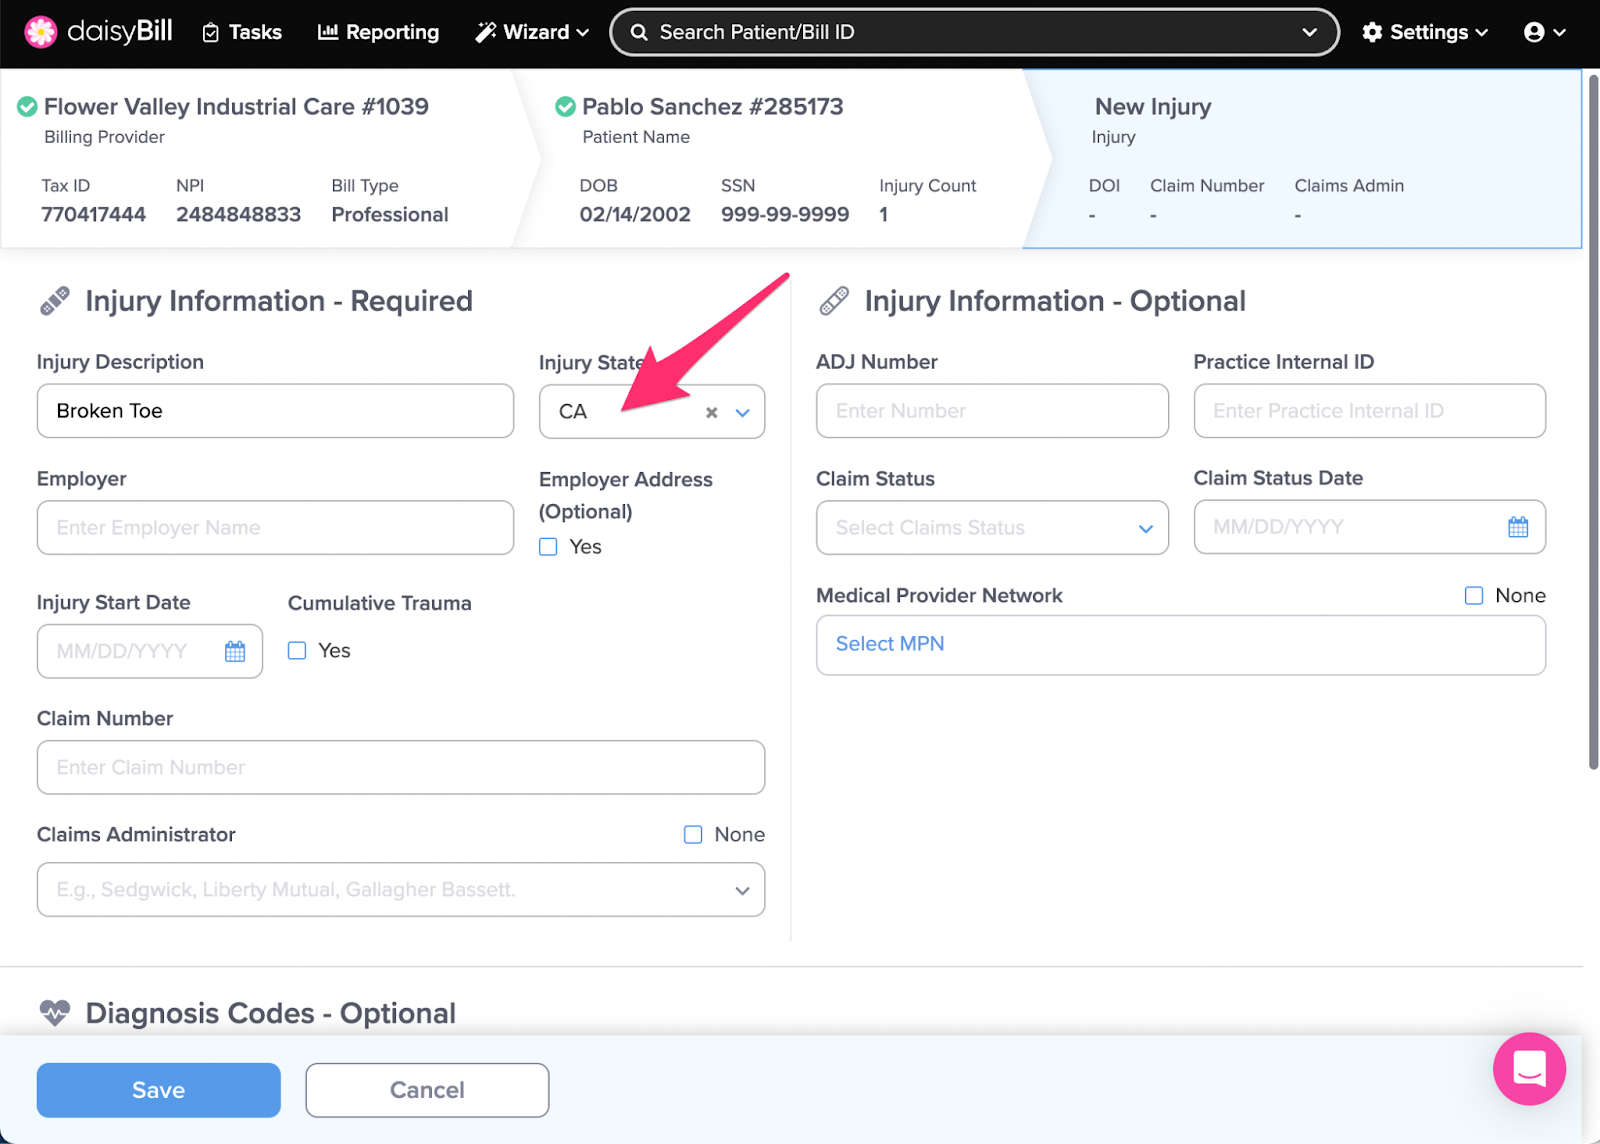
Step 3. Enter ‘Injury State’
Choose the jurisdictional state of the Injury. For the Injury, daisyBill will require the information that reflects the applicable state or federal billing requirements.
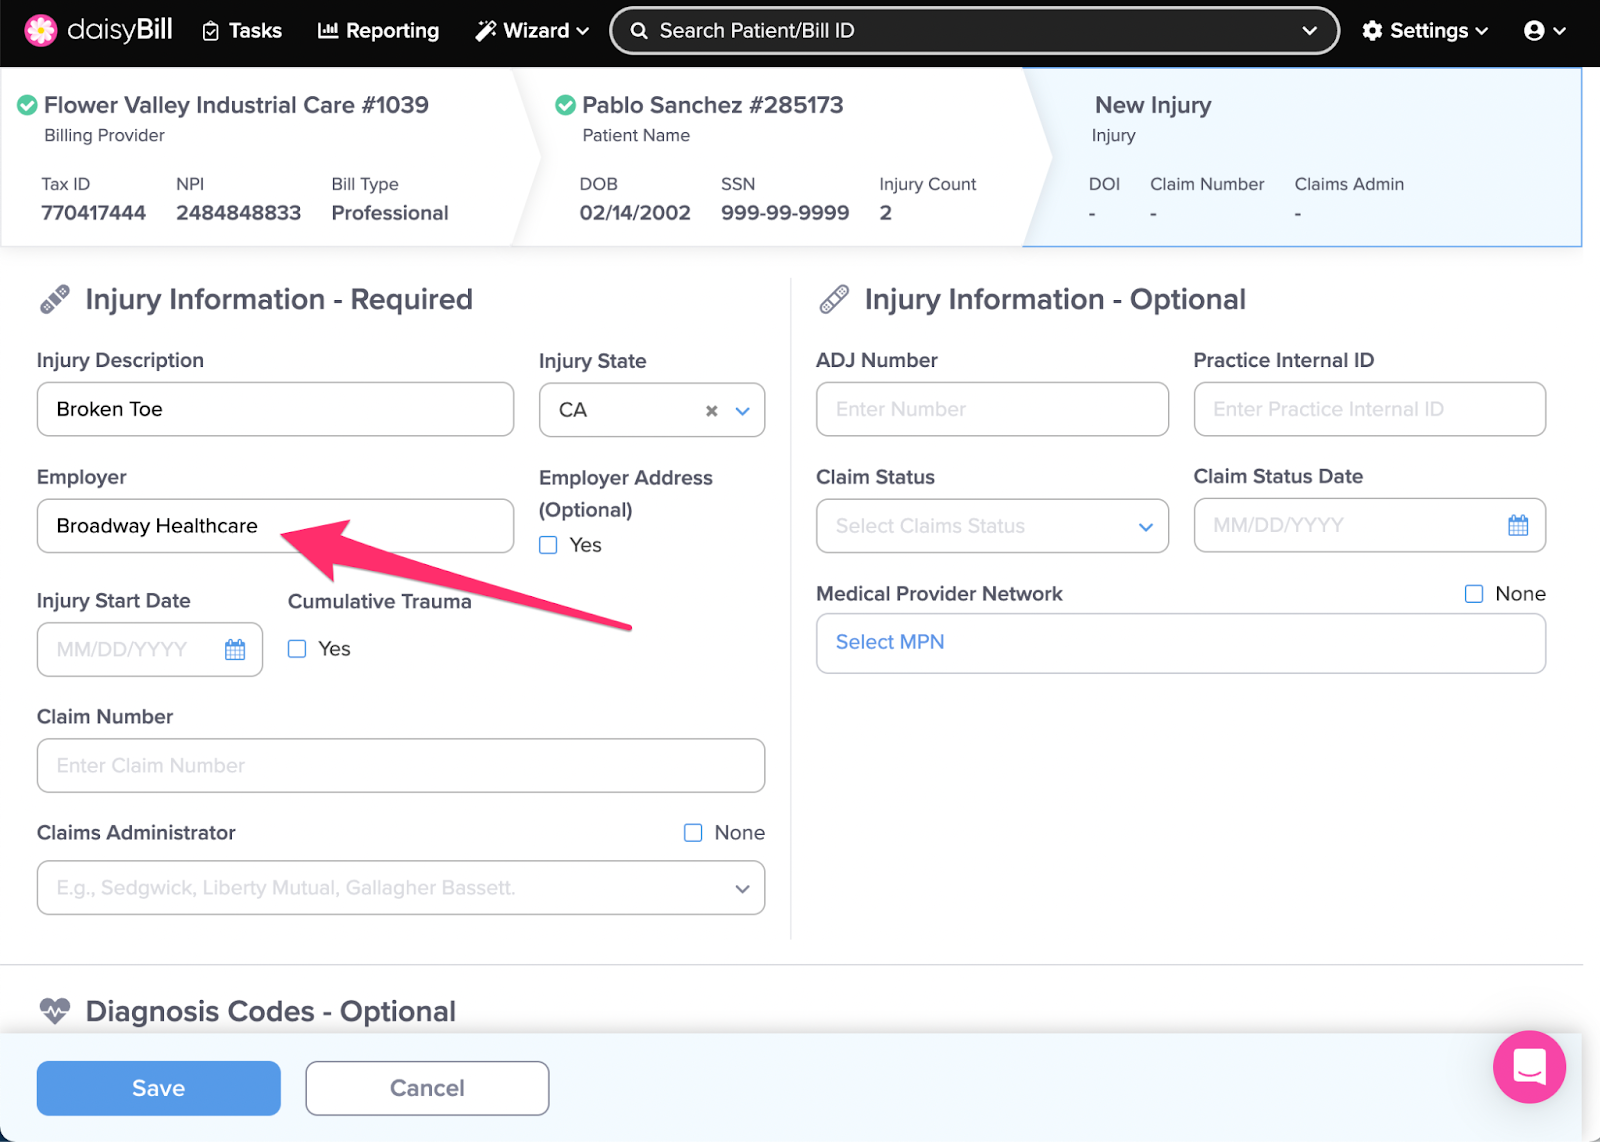
Step 4. Enter ‘Employer Name’
Enter the injured worker’s employer’s name.
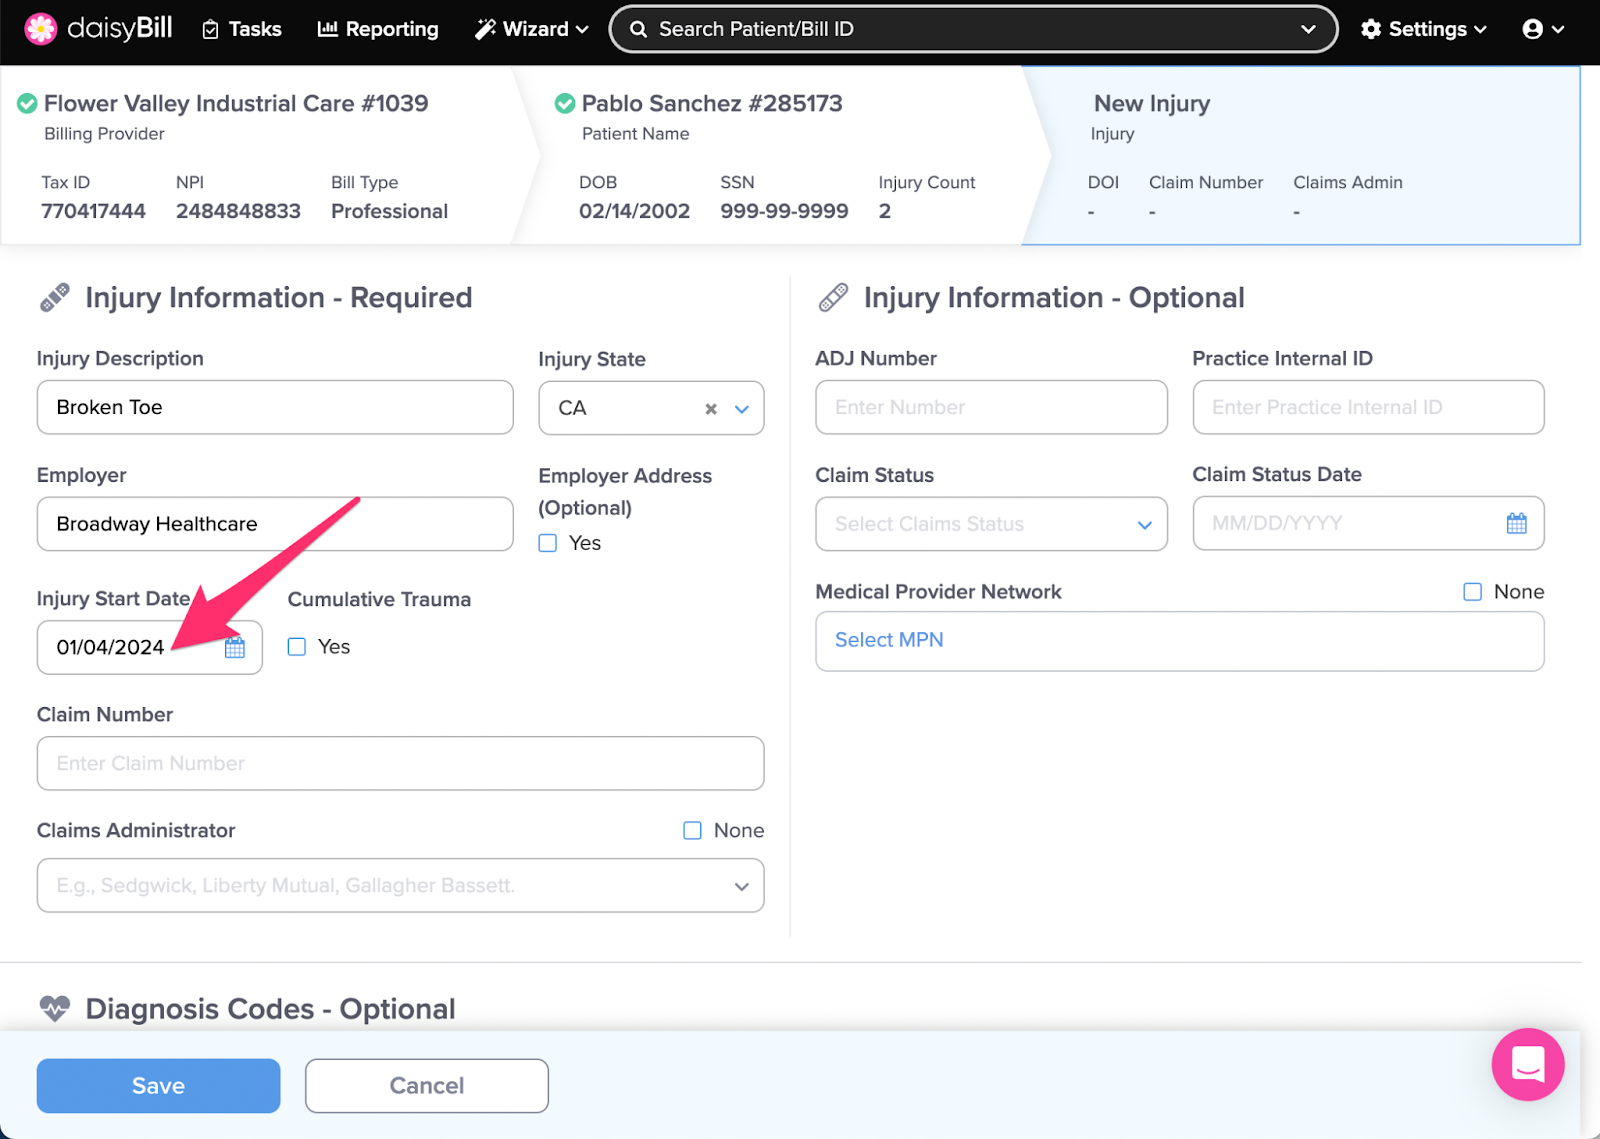
Step 5. Enter ‘Injury Start Date’
If you do not know the Injury Start Date, contact the claims administrator to find out the Injury Start Date the claims administrator has on file.
Situational: Cumulative trauma injuries
For cumulative trauma injuries, enter the Injury Start Date, select Yes under Cumulative Trauma, and then enter the Injury End Date.
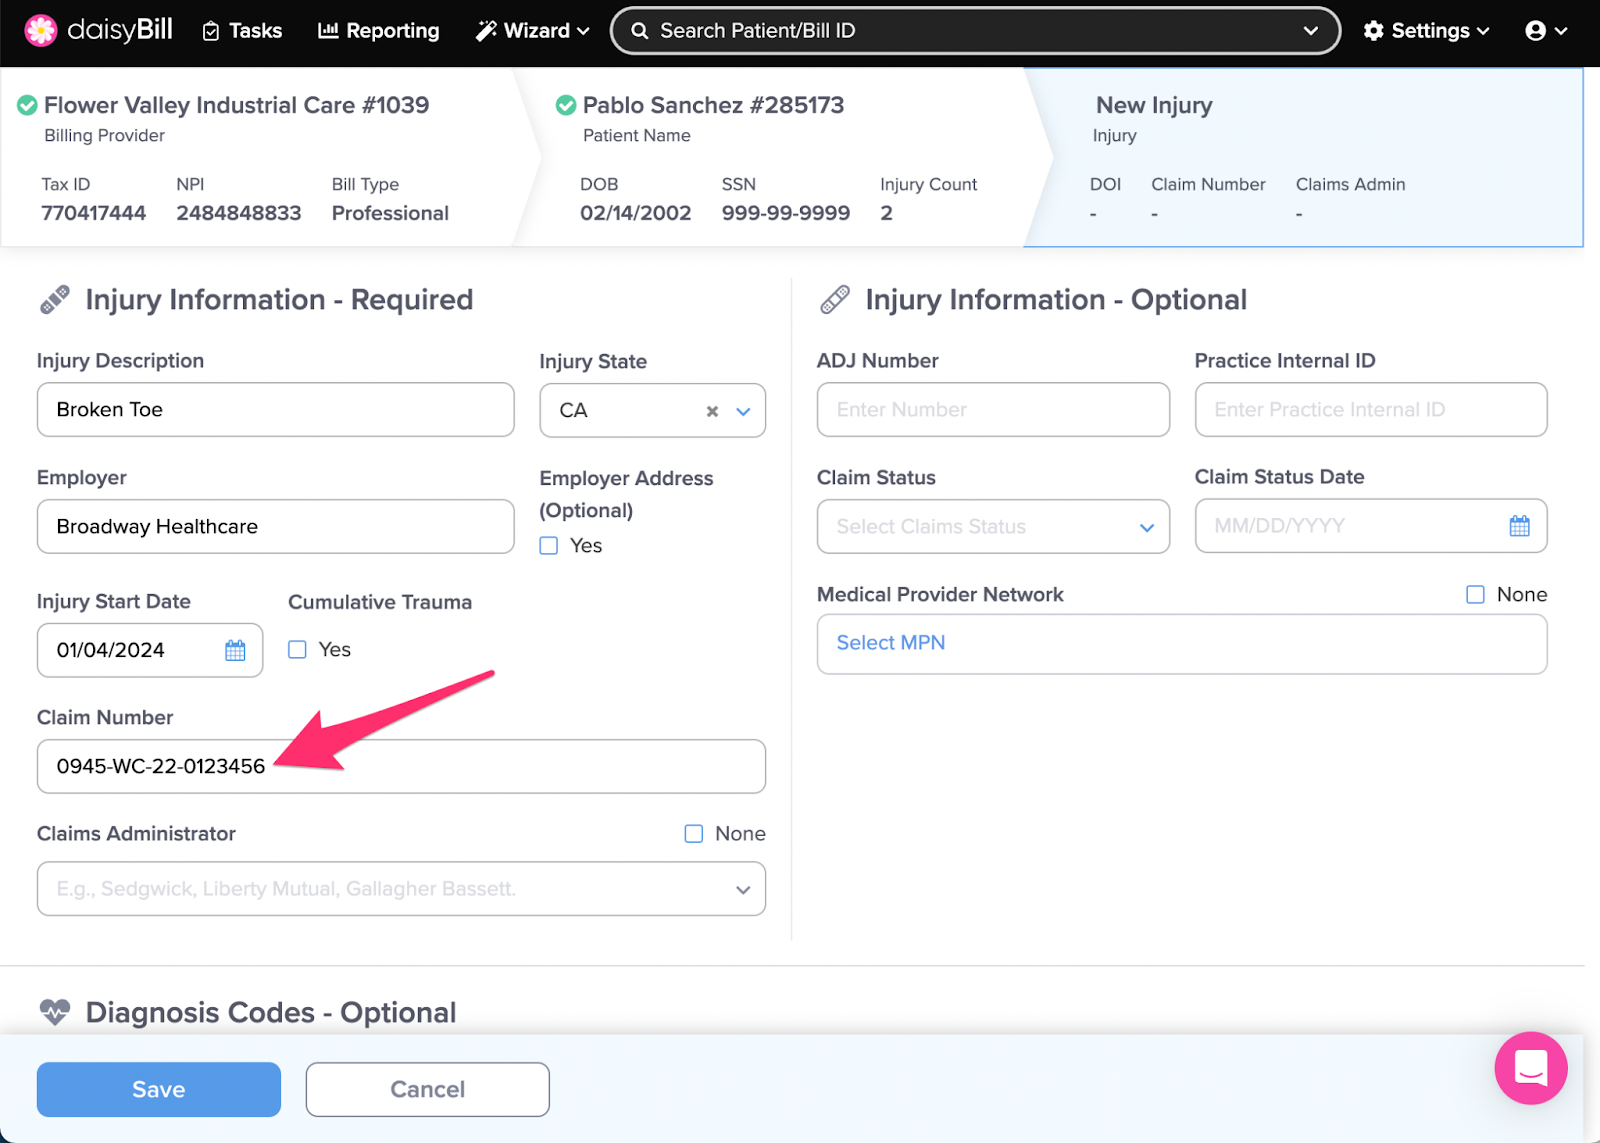
Step 6. Enter ‘Claim Number’
Only one Claim Number should be entered. If no claim number has been assigned, enter “UNKNOWN” as the Claim Number.
Situational: Multiple claim numbers
For an Injury with multiple claim numbers, contact the adjuster to determine the correct claim number for billing purposes.
For a patient who is being treated for multiple Claim Numbers, add a new injury (Step 1) for each claim number.
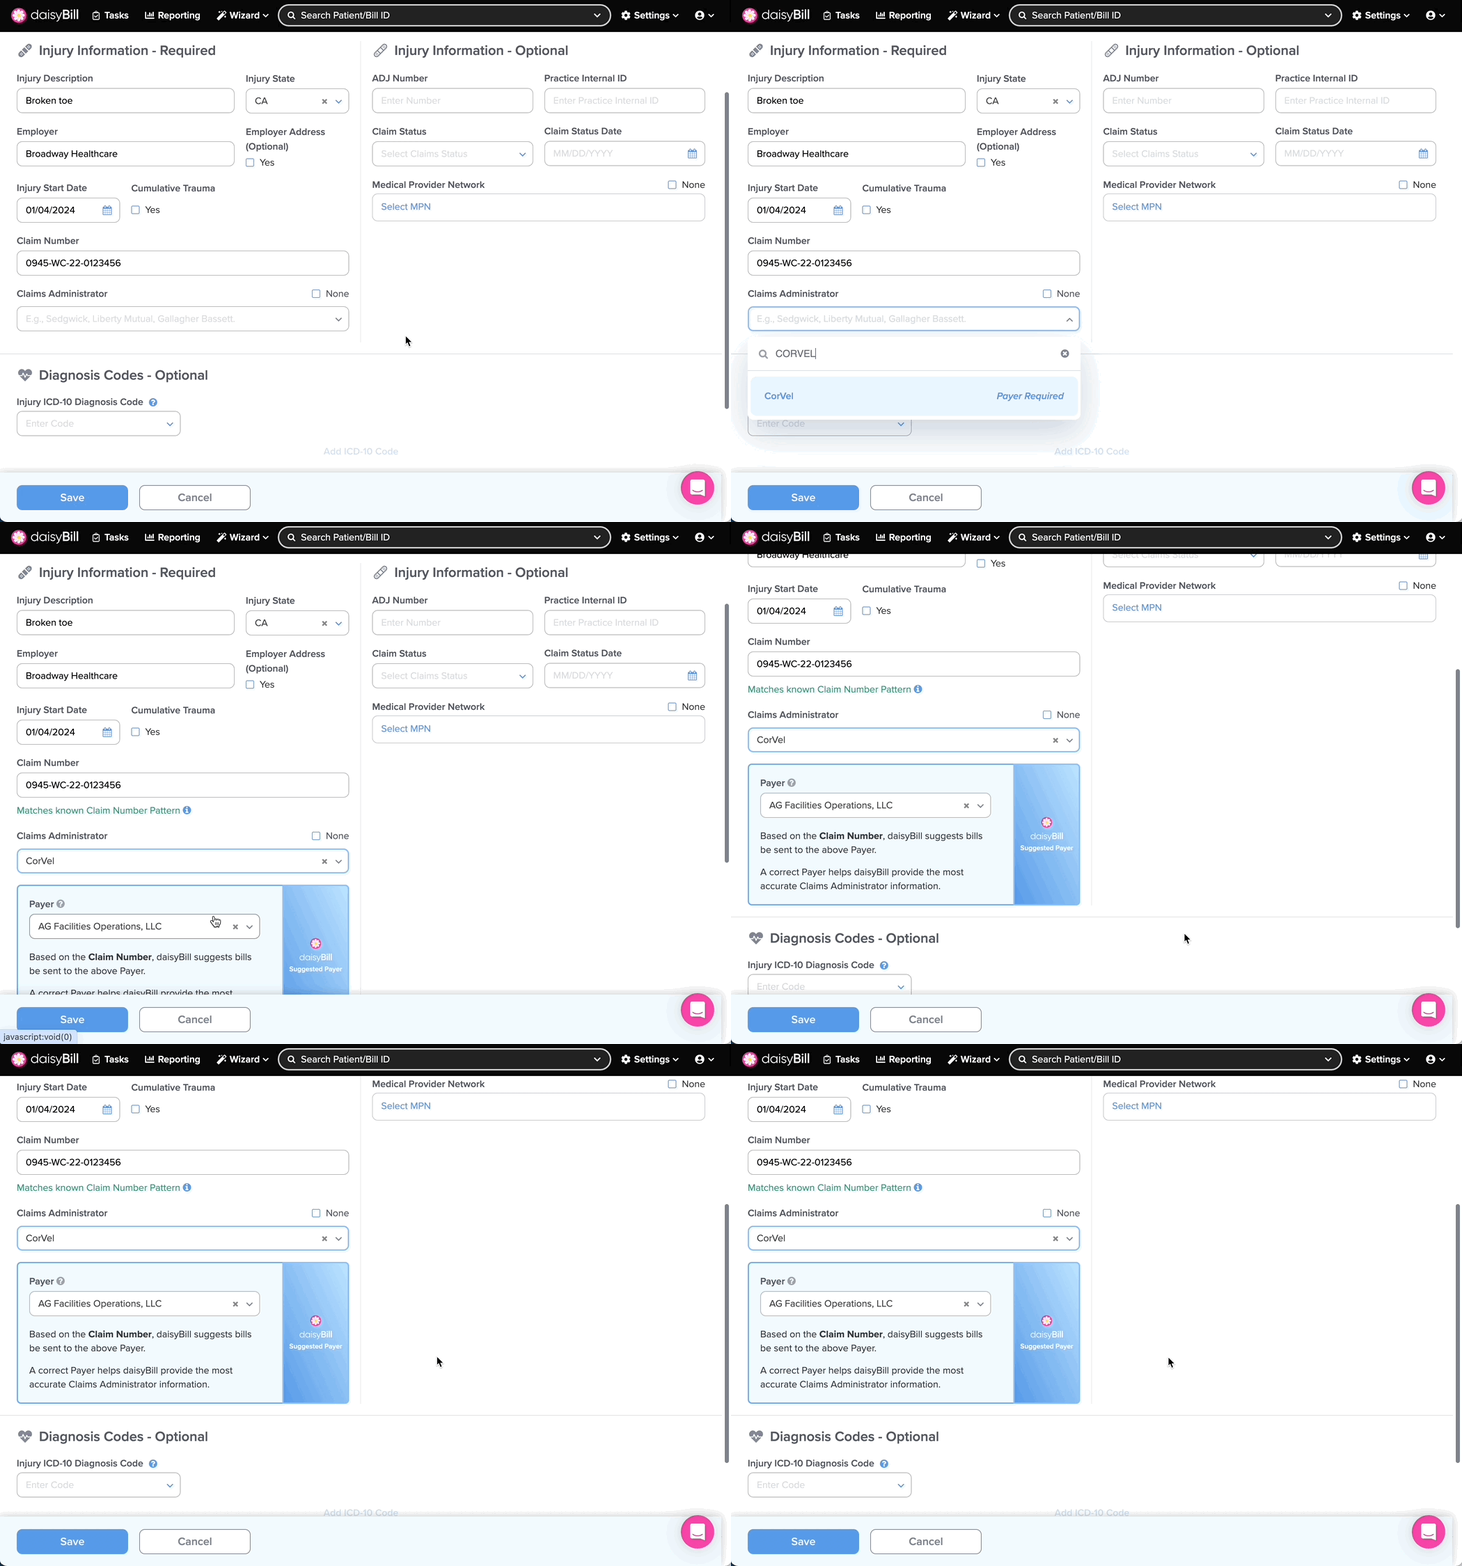
For some Claims Administrators, daisyBill provides information on Claim Number Patterns. Claim Number Patterns are informational only. A Claim Number that does not match a known Claim Number Pattern will not prevent bill submission.
Step 7. Search for and Select ‘Claims Administrator’
Type a partial claims administrator name, and select from the dropdown menu. Some Claims Administrators require additional routing information in the form of a Payer. For most claims administrators, daisyBill’s smart technology can help determine the correct payer. For more information, see the Help Article: Payer.
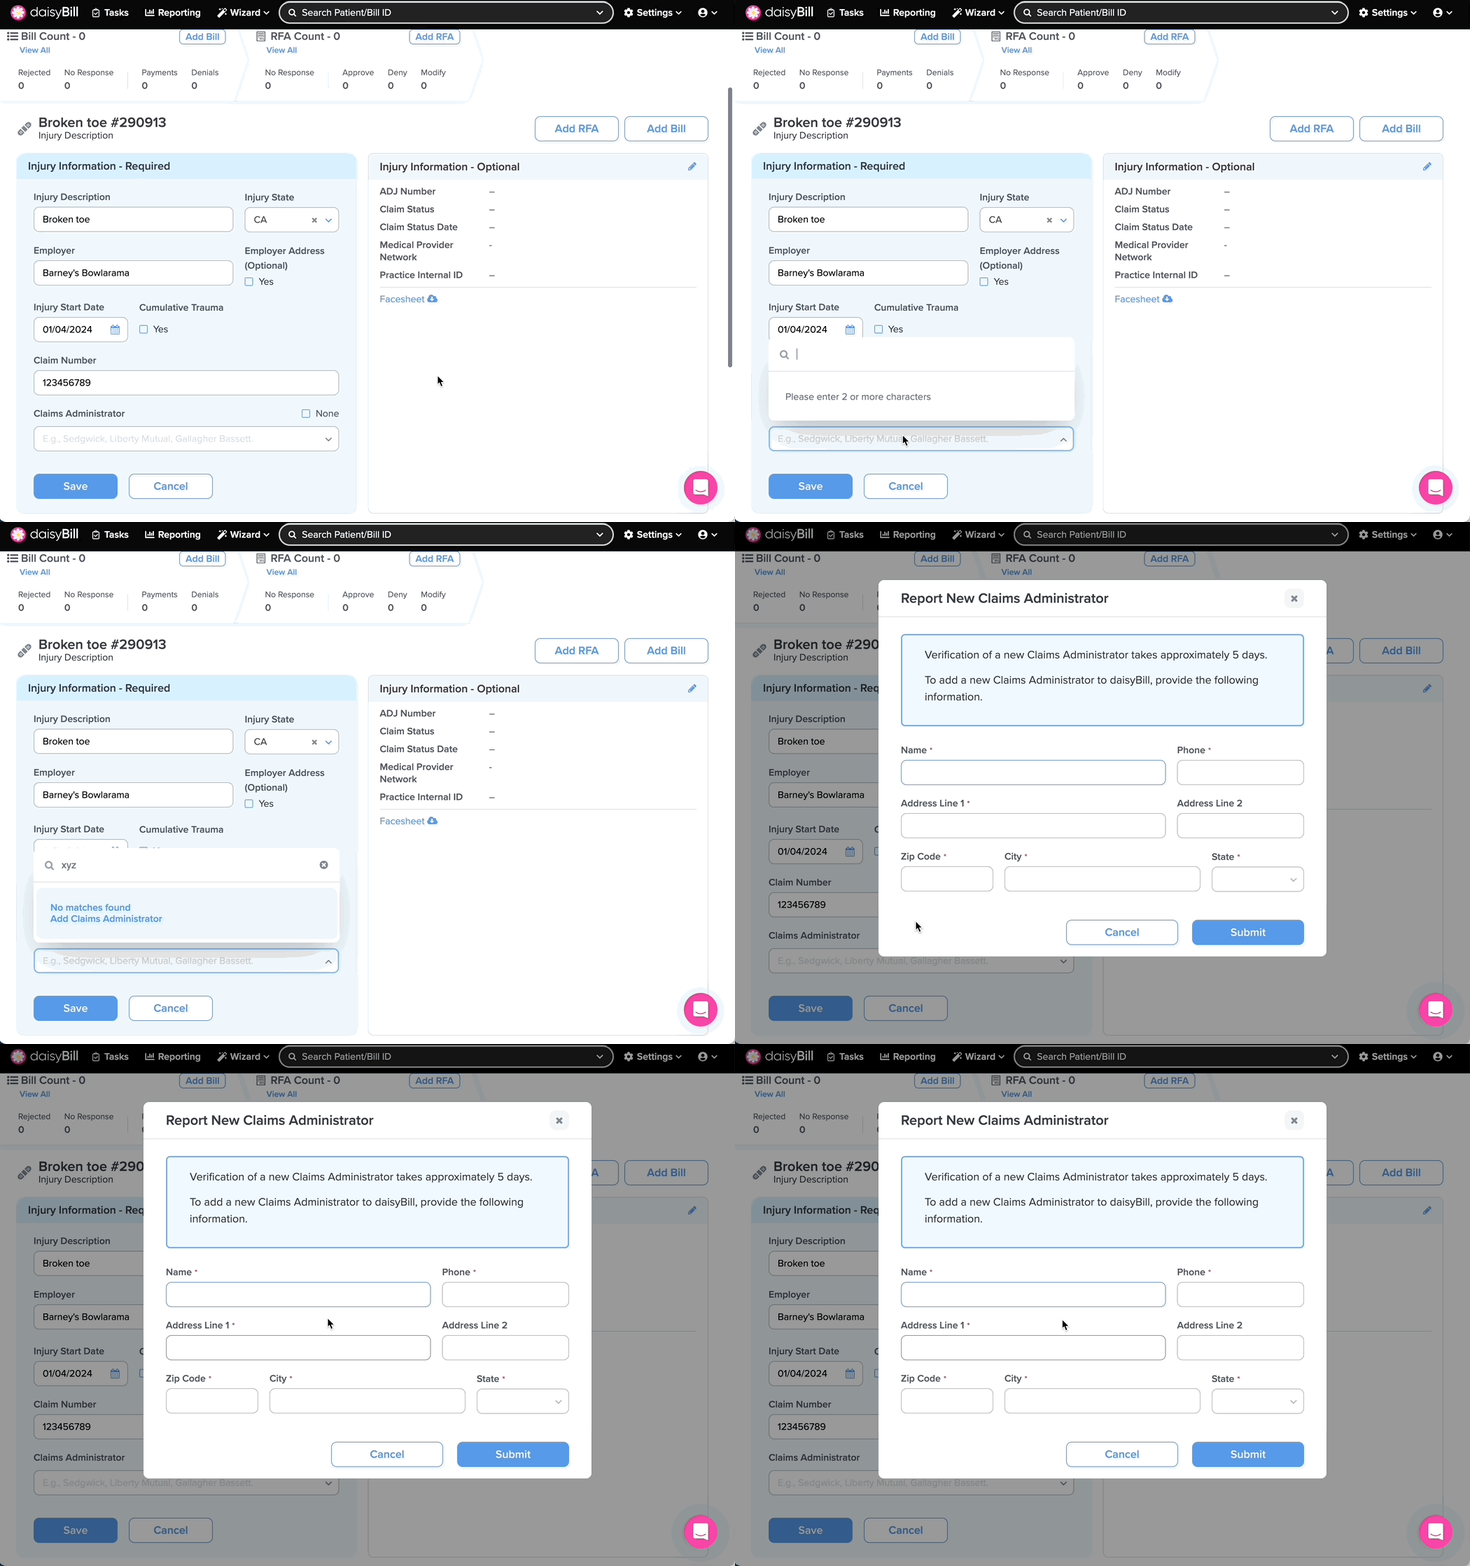
Note: If you can’t find the correct claims administrator, select Add Claims Administrator or contact the Help Center for assistance.
Step 8. Optional: select ‘Claim Status’ and ‘Claim Status Date’
Designating a Claim Status and Claim Status Date allows for reporting on these two fields. Injuries identified as Denied are indicated in the Injury Breadcrumb.
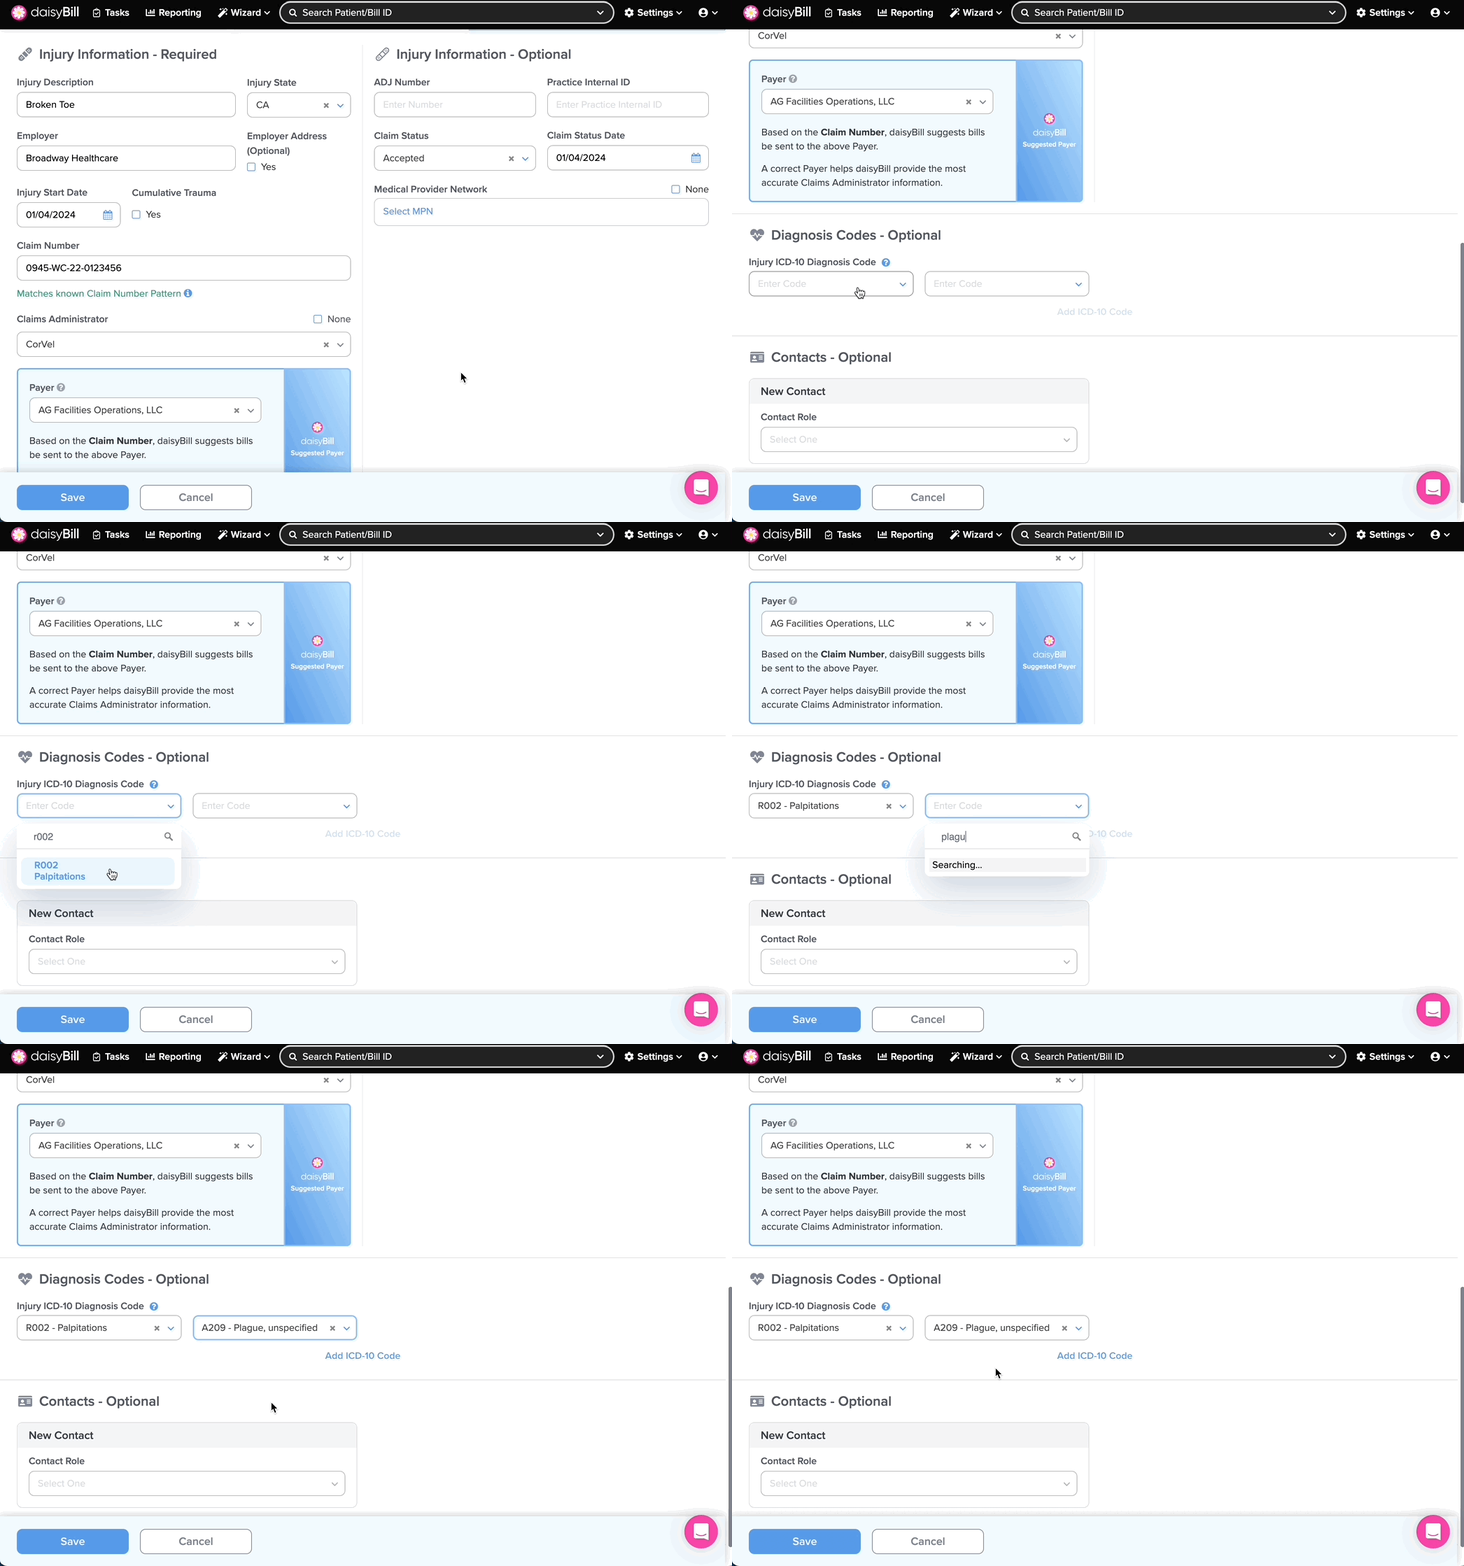
Step 9. Optional (recommended): enter ‘Diagnosis Codes’
Diagnosis Codes entered on the Injury page automatically populate on all future Bills and RFAs. Diagnosis codes can be entered with or without the decimal. Click on the diagnosis code to select it.
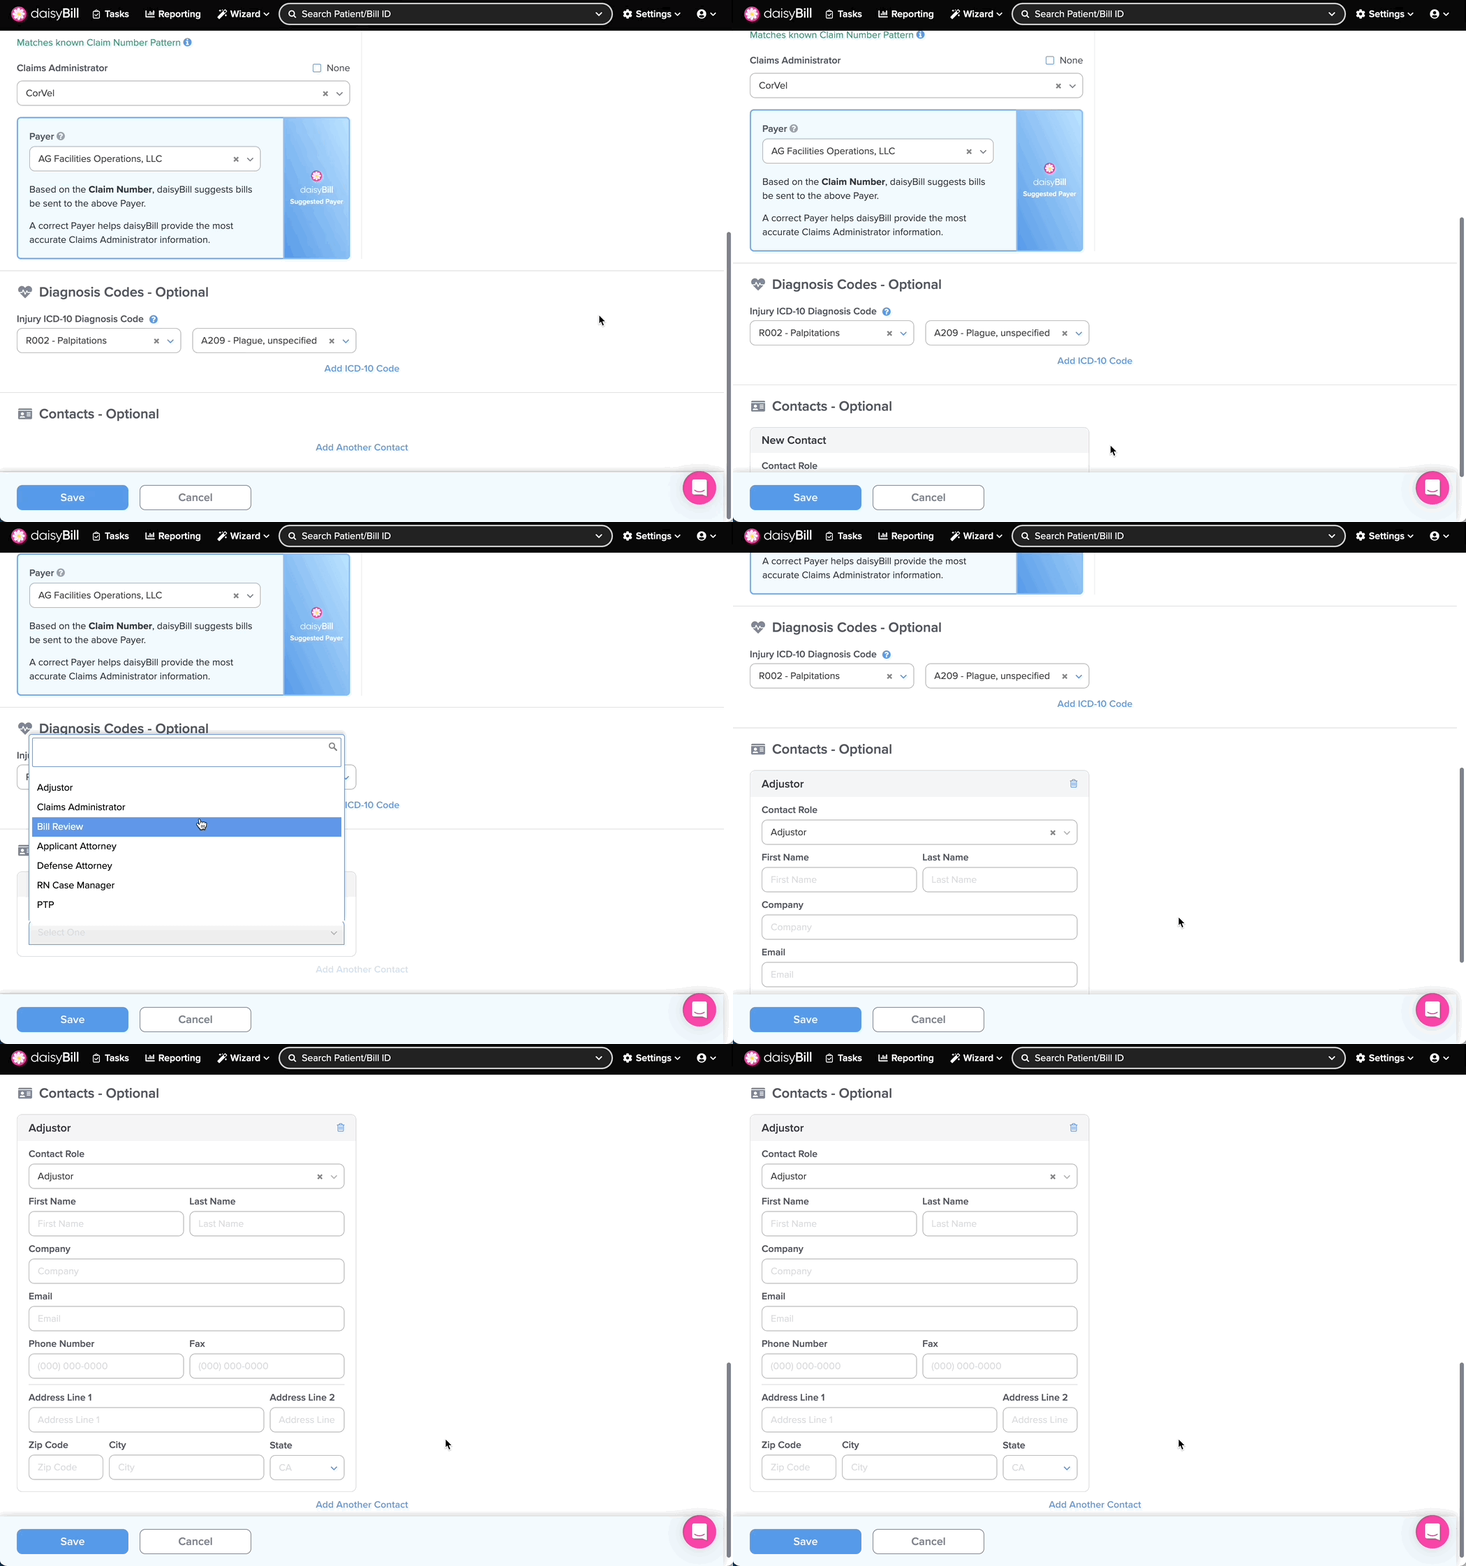
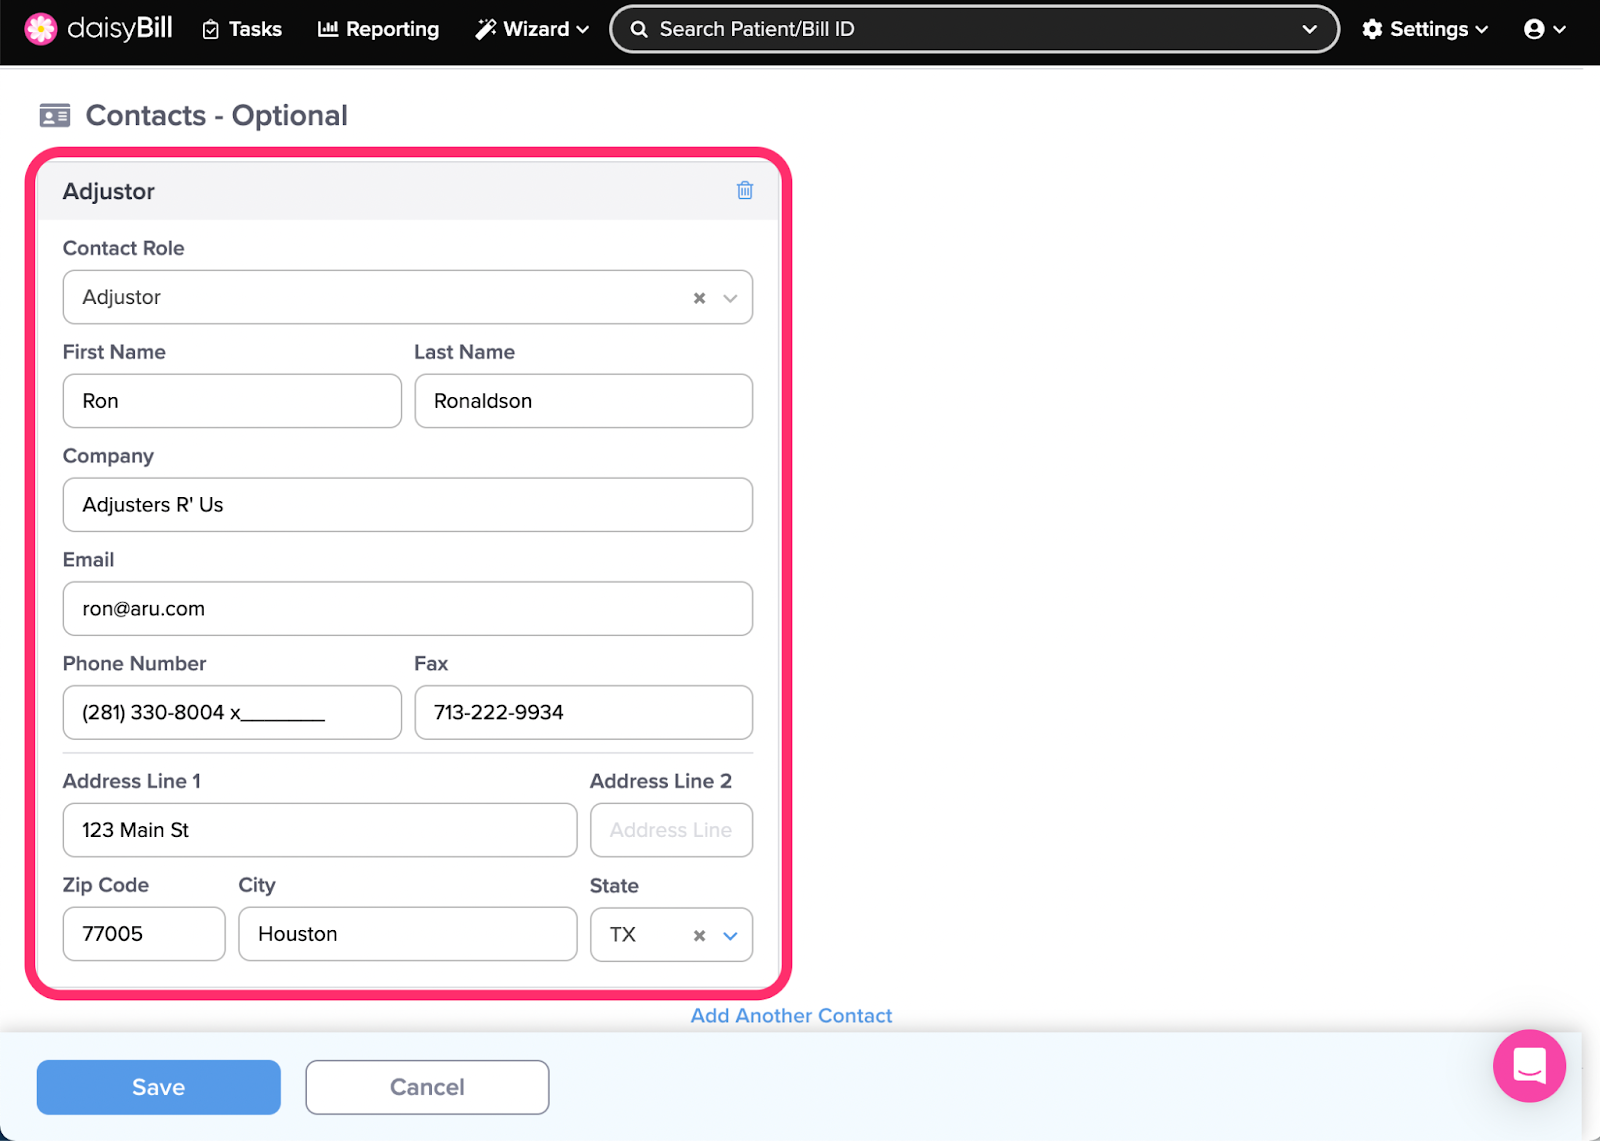
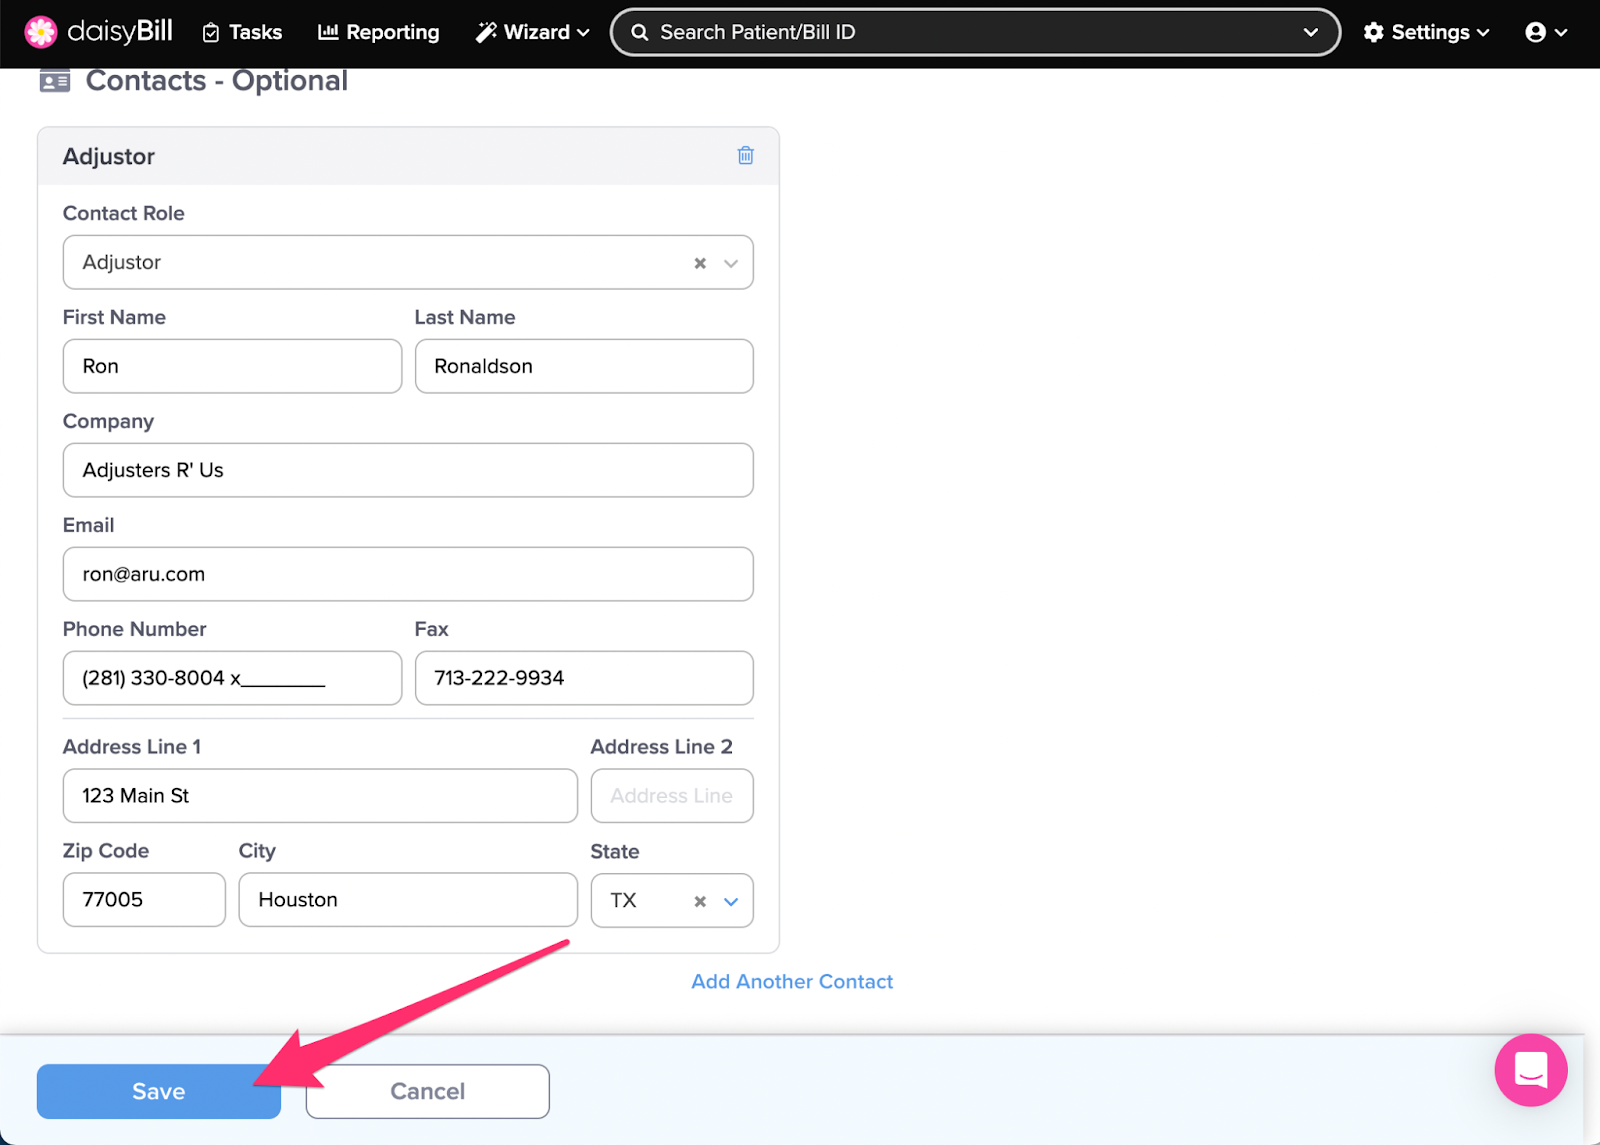
Step 10. Optional: enter Injury Contacts
Examples of injury contacts include attorneys, adjusters, or nurse case managers.
Choose the contact type, then enter in their contact information.
Step 11. Click ‘Save’
Billing Tip: If you’re missing any required information, leave the field blank. daisyBill will prompt you in the form of a Injury Failed Review task to return to the injury page and enter this information prior to being able to submit a bill.
Nice work!
