Adding an Injury to a patient’s record is easy as pie. For multiple injuries, just repeat the process.
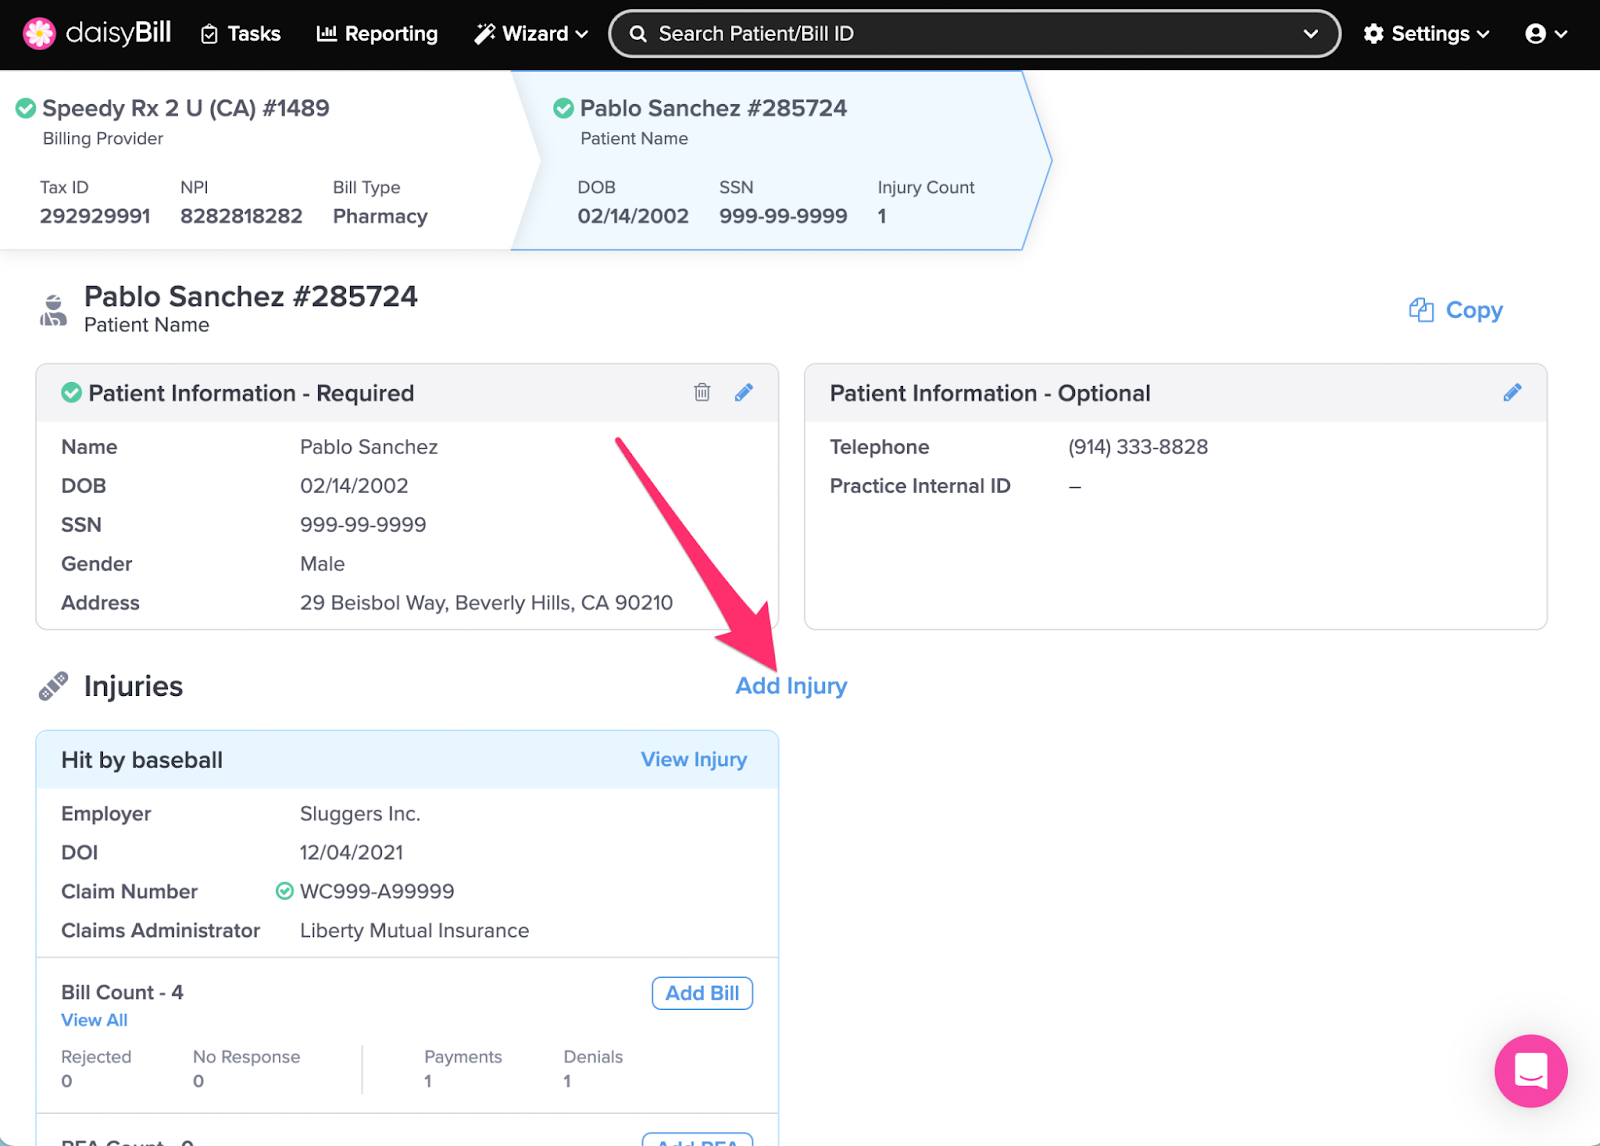
Step 1. From the Patient Page, click ‘Add Injury’
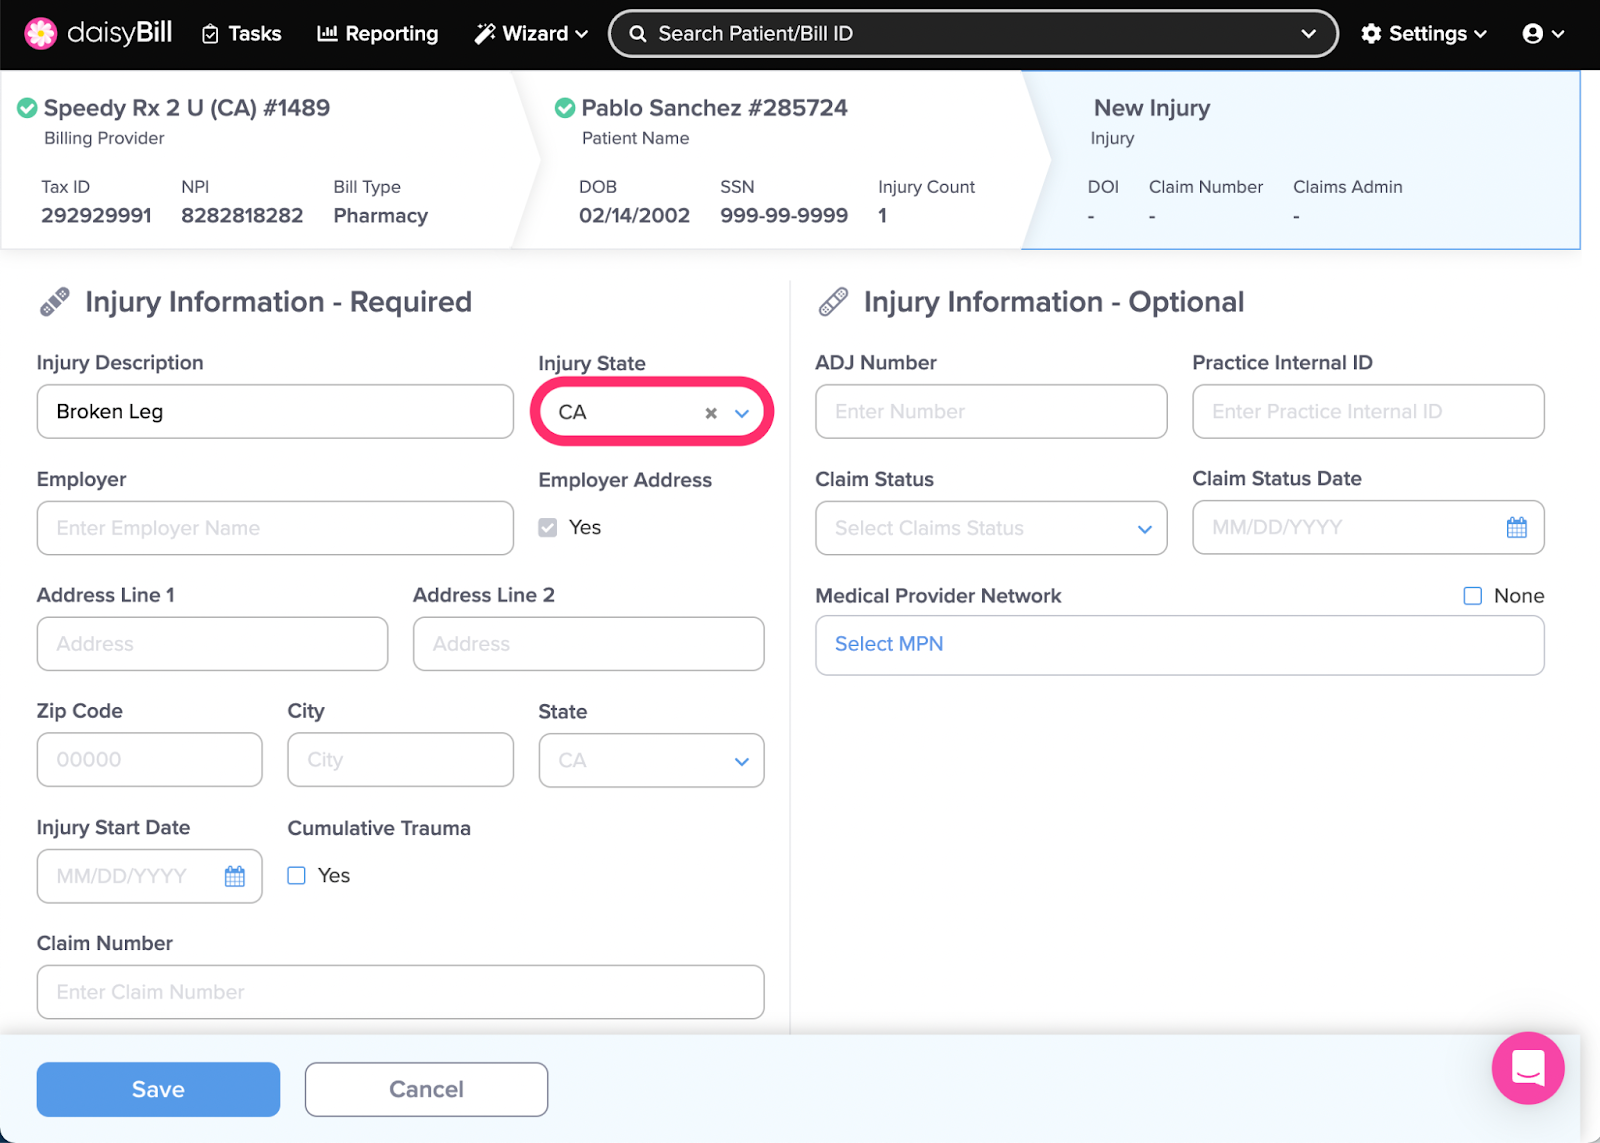
Step 2. Enter ‘Injury Description’
Injury Description does not populate on the bill; this information is only for internal reference.

Step 3. Enter ‘State’
Each Injury can be changed to a different state. The state dictates the required elements of the Injury and Bill.
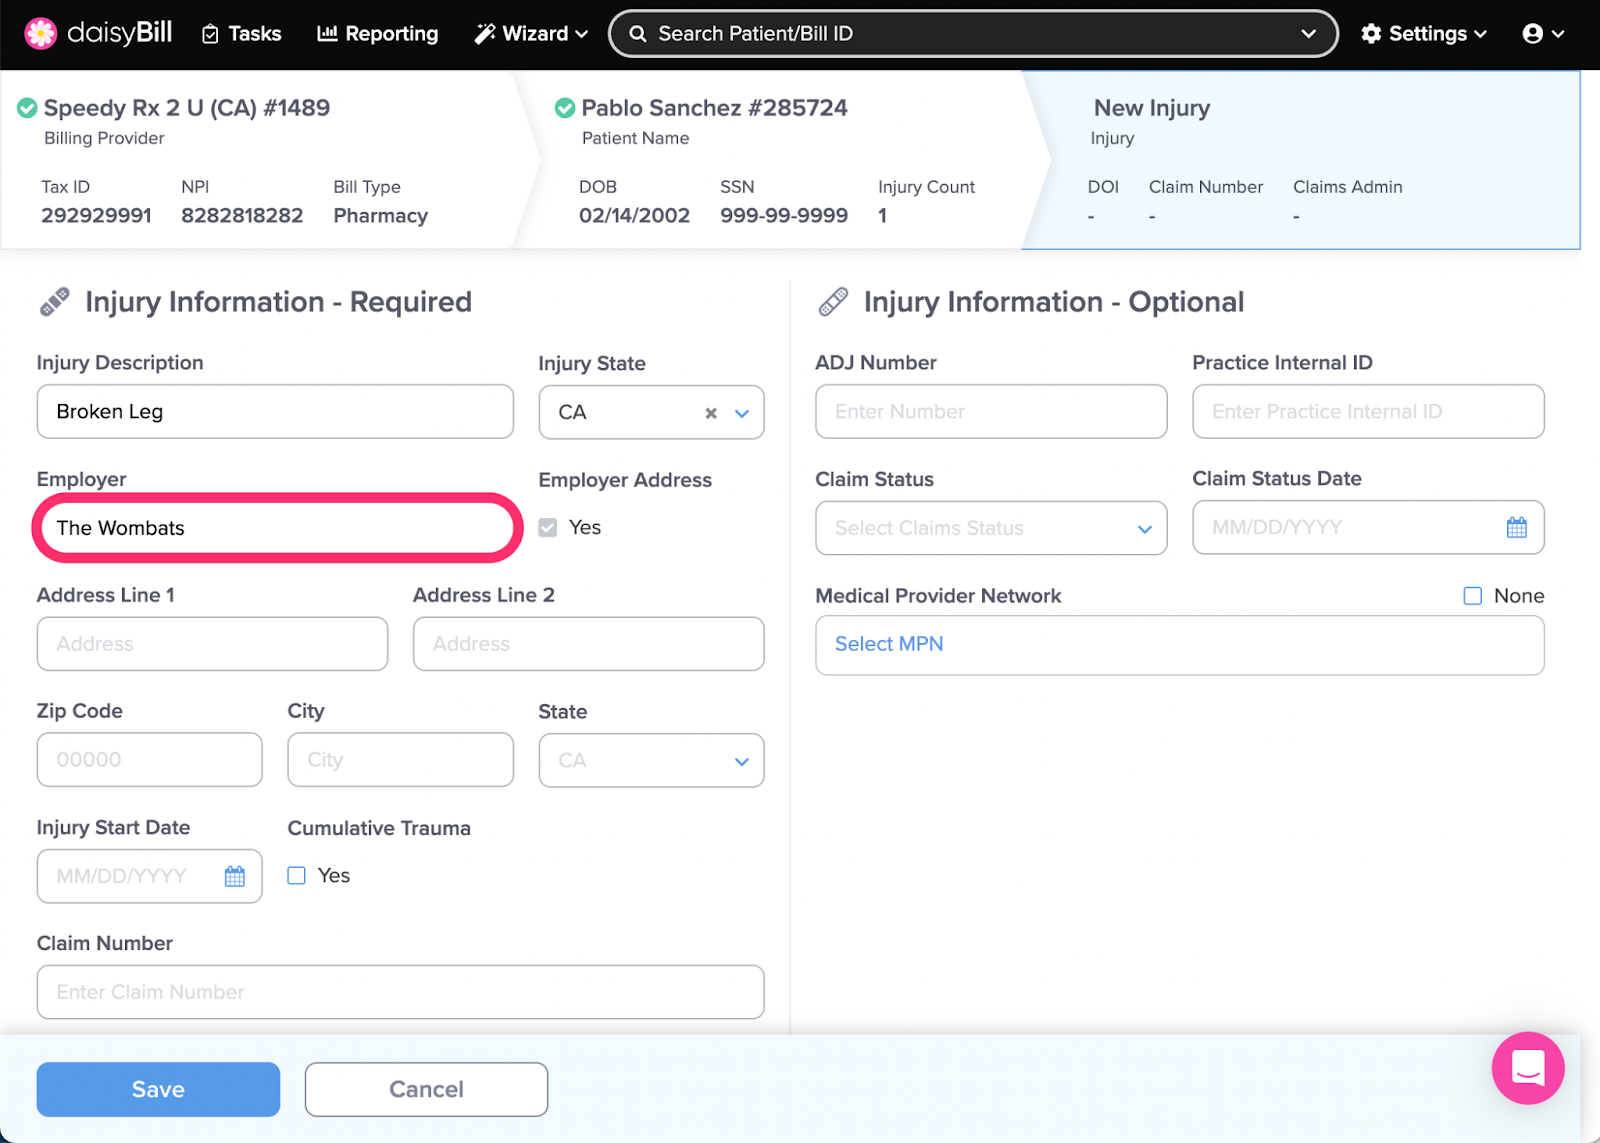
Step 4. Enter ‘Employer Name’
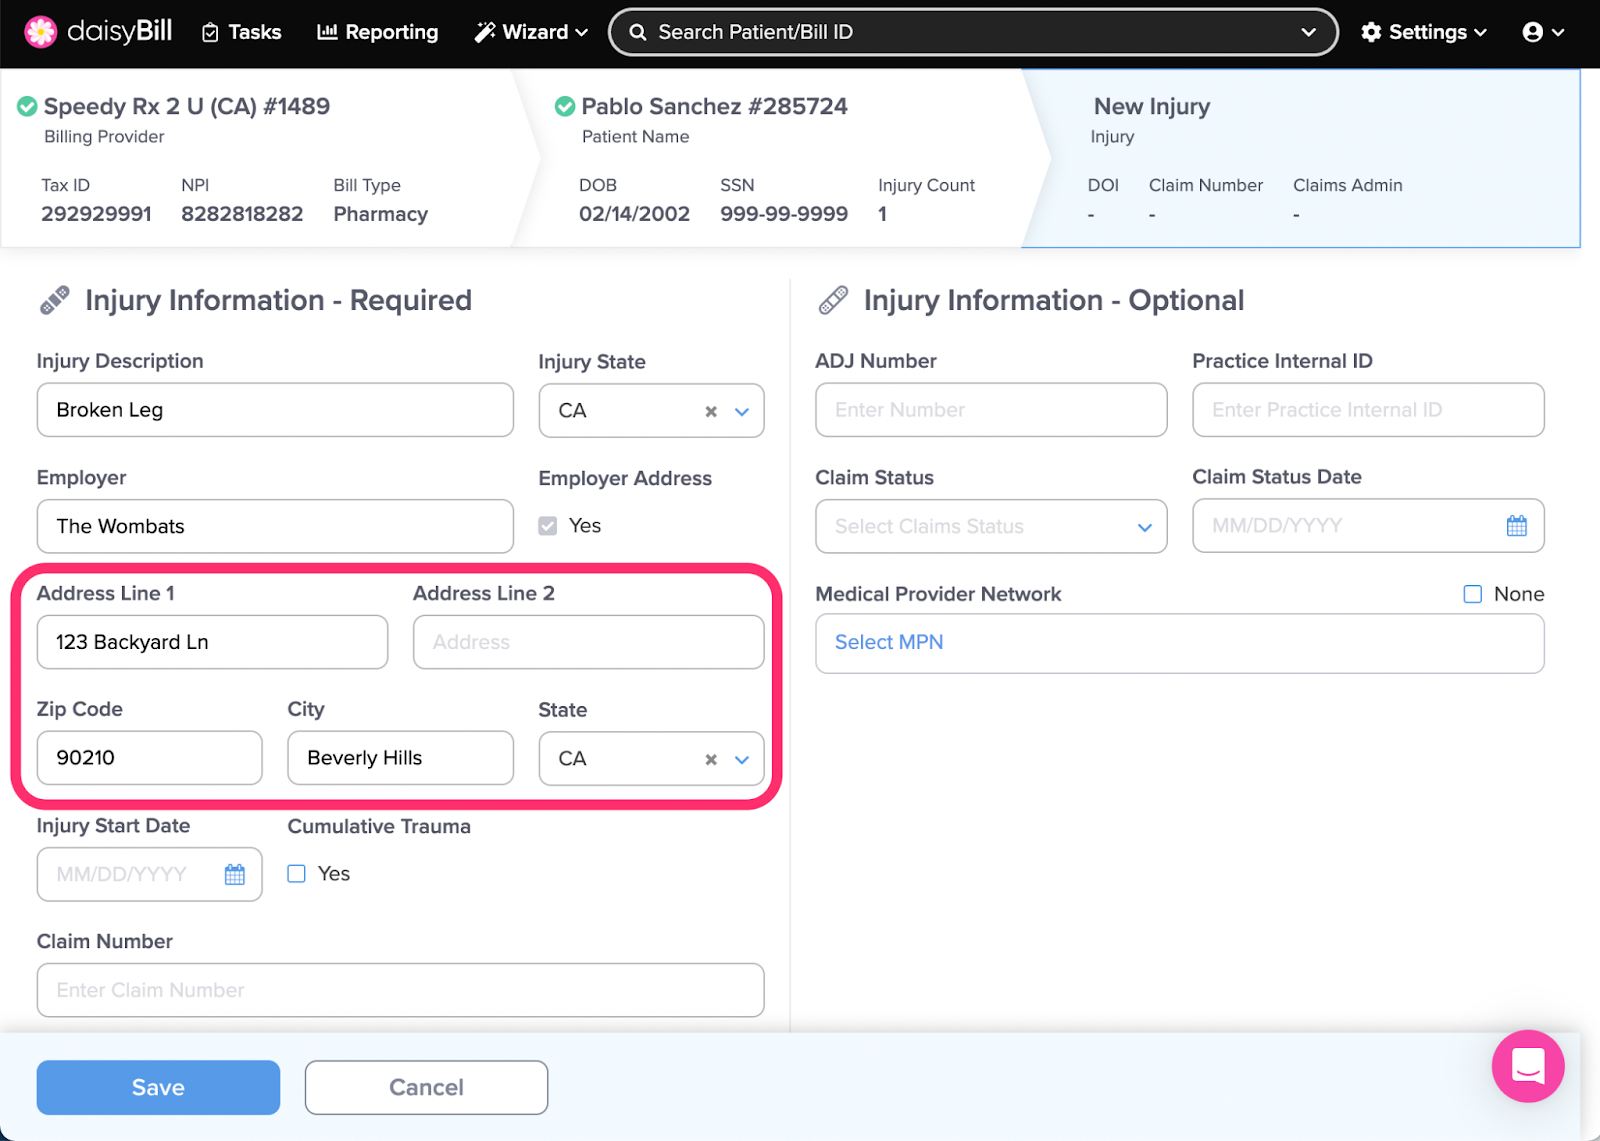
Step 5. Enter ‘Employer Address’
Employer Address is required for NCPDP bills.
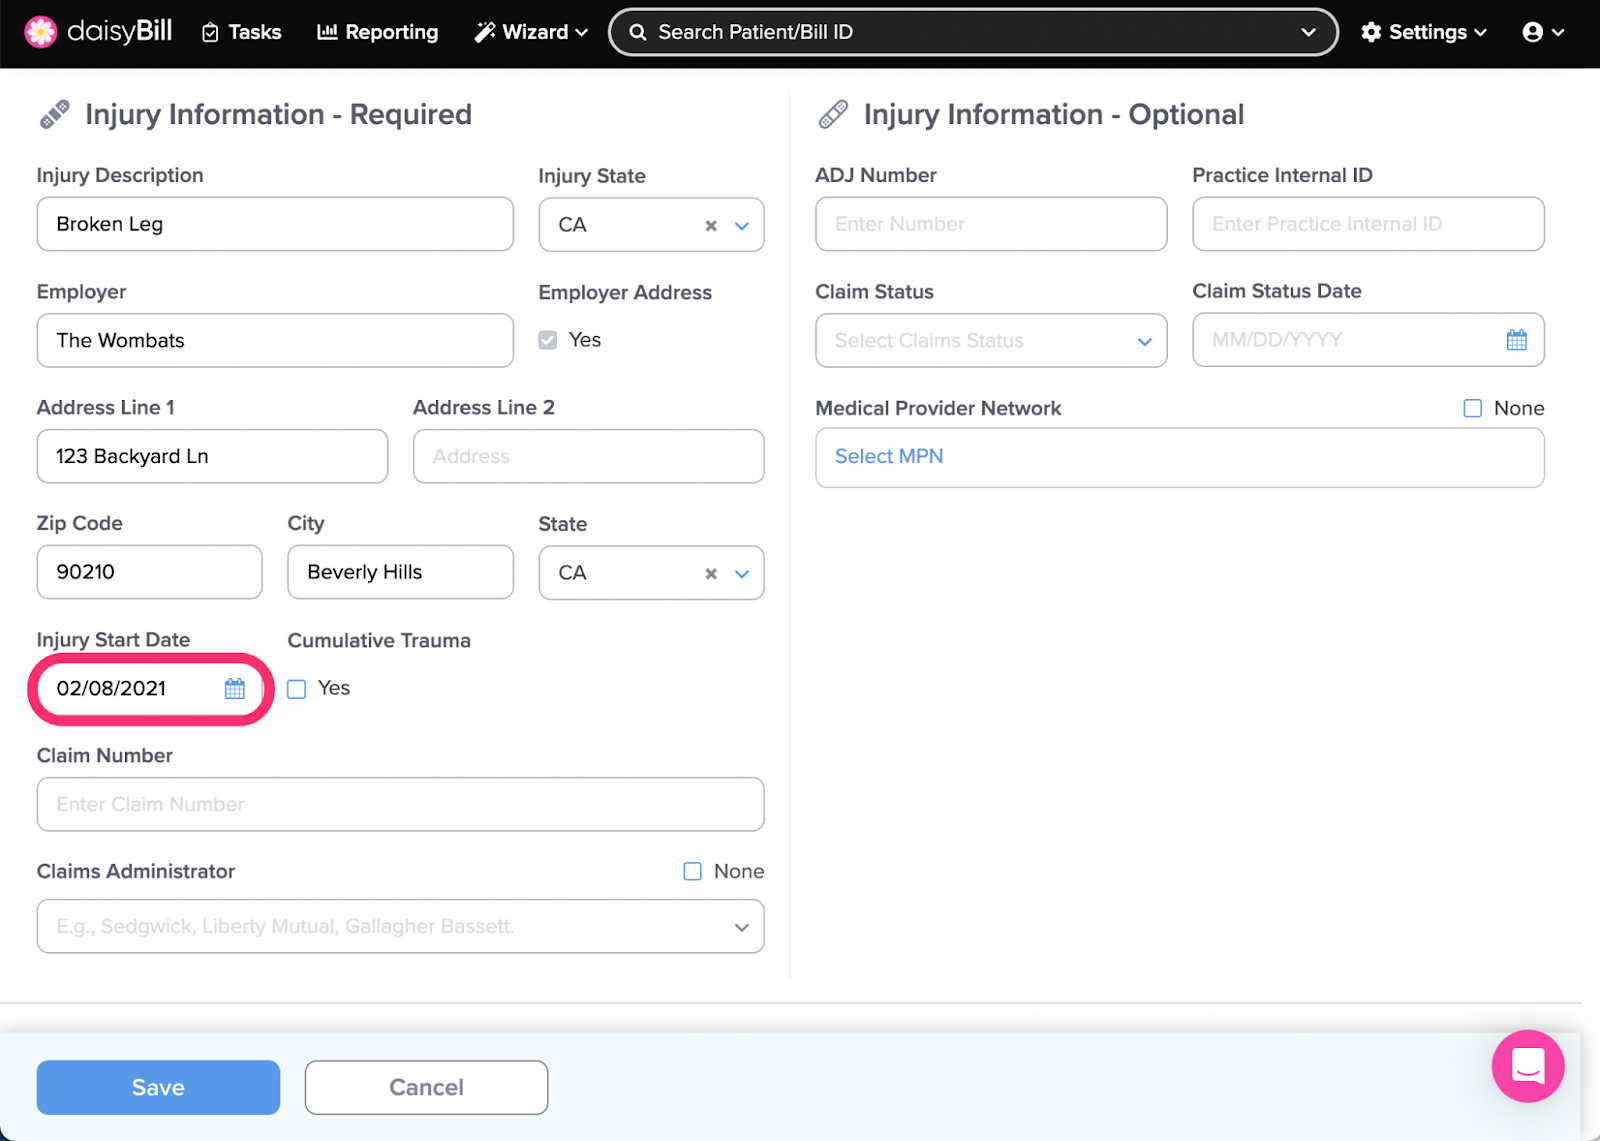
Step 6. Enter ‘Injury Start Date’
For cumulative trauma injuries, enter the Injury Start Date, select Yes under Cumulative Trauma, then enter the Injury End Date. If unsure of the Injury Start Date contact the claims administrator for clarification.
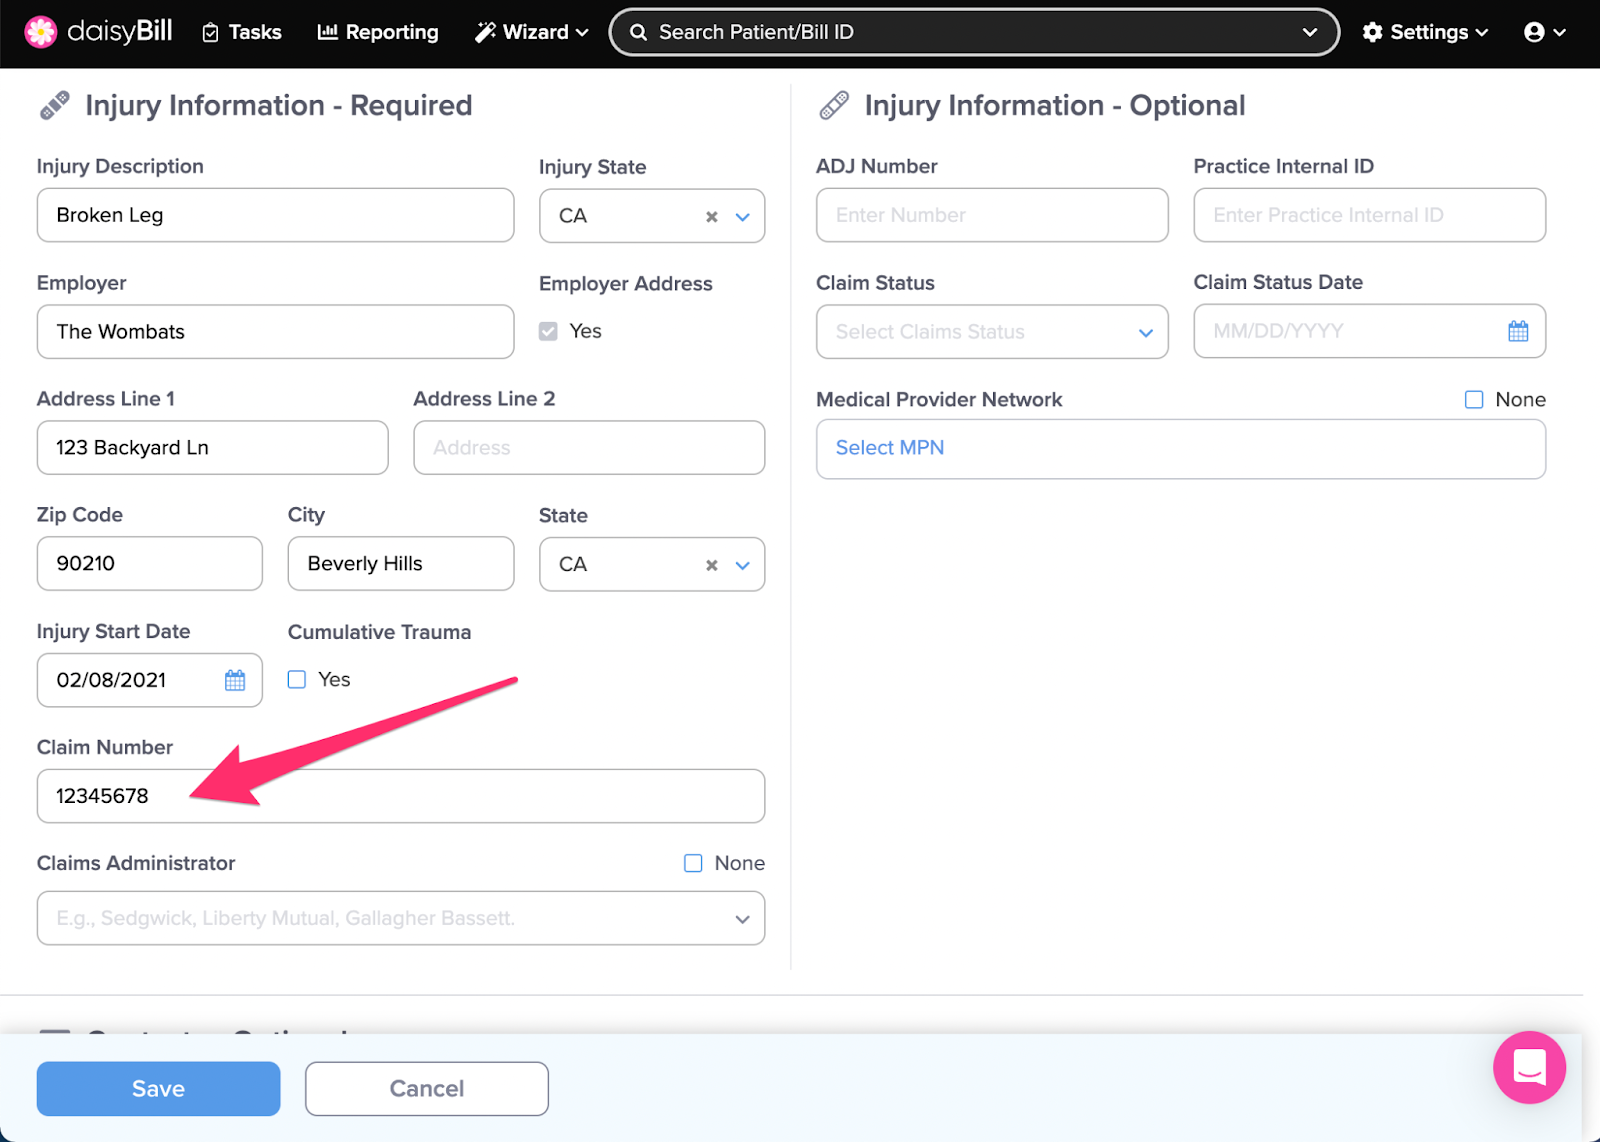
Step 7. Enter ‘Injury Claim Number’
Enter only ONE claim number per injury. For an injury with multiple claim numbers, contact the adjuster to determine the correct claim number for billing purposes. For a patient with multiple injuries, add a new injury (Step 1) for each claim number. For some Claims Administrators, daisyBill provides information on Claim Number Patterns.
Step 8. Search for ‘Claims Administrator’
Type a partial claims administrator name, and select from the dropdown menu. Some Claims Administrators require additional routing information. For more information, see the Help Article: Payer.
Note: If you can’t find the correct claims administrator, select Add Claims Administrator or contact daisyBill for assistance.
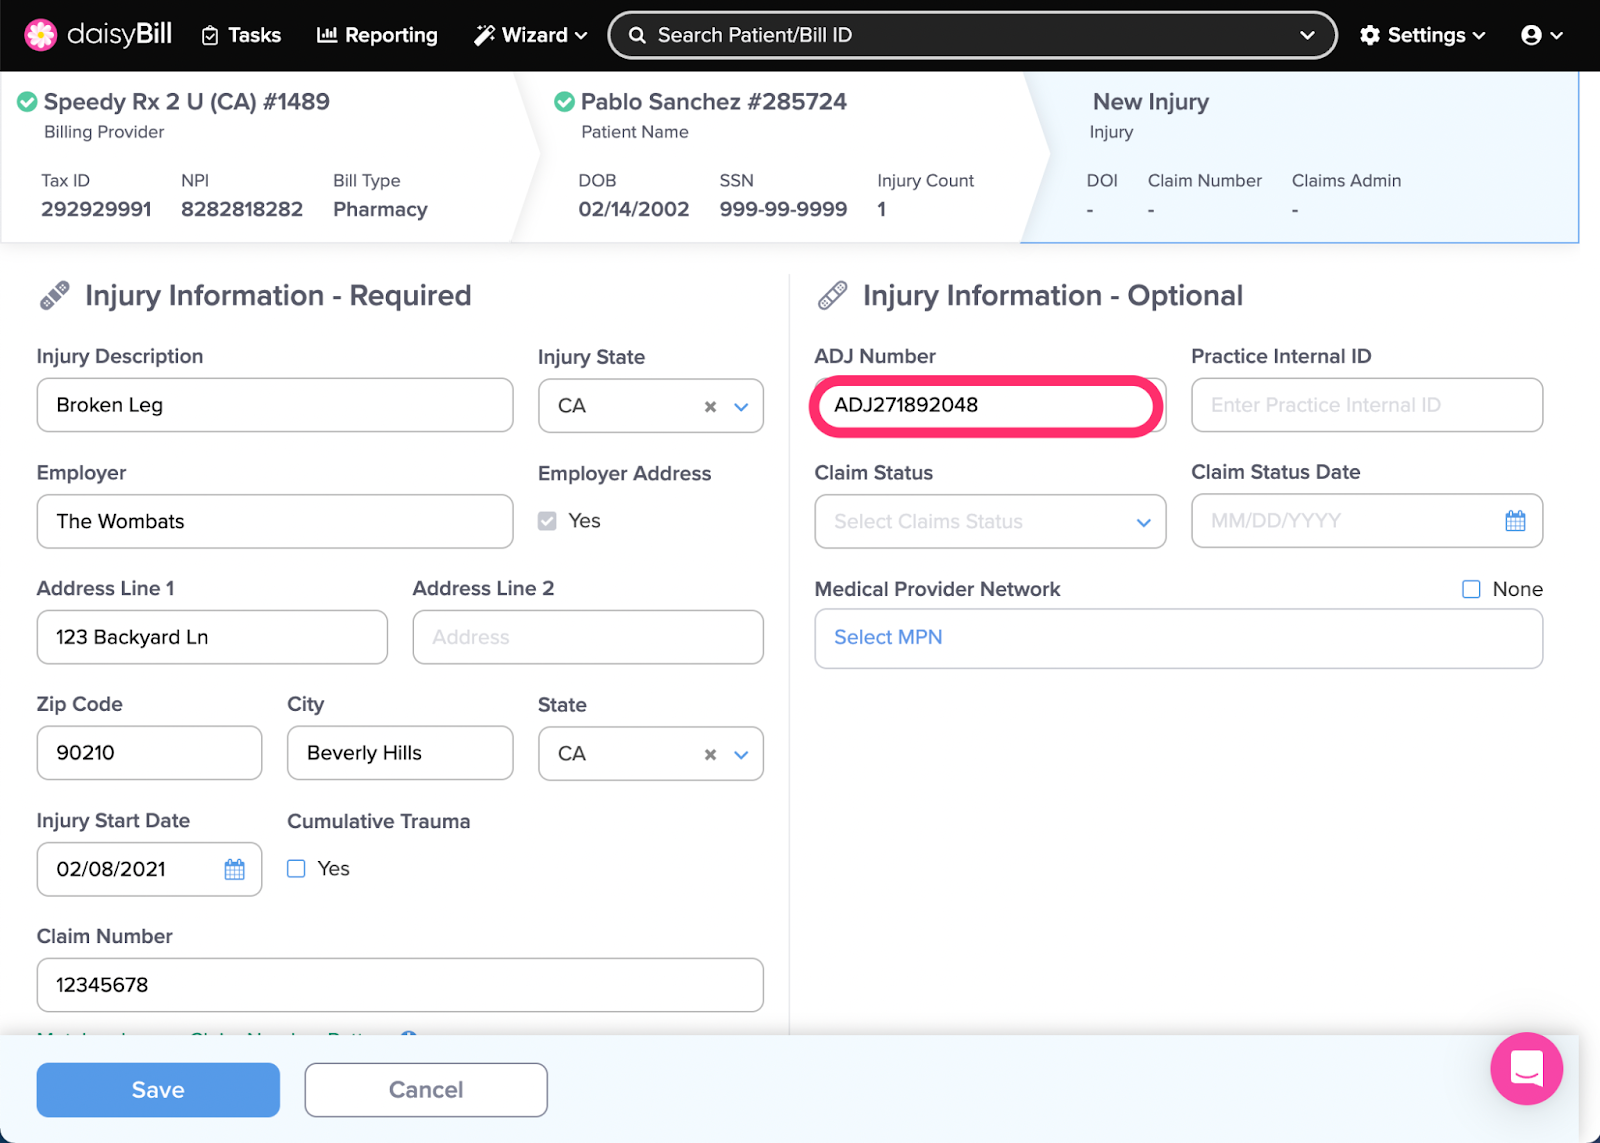
Step 9. Optional: enter ‘ADJ Number’
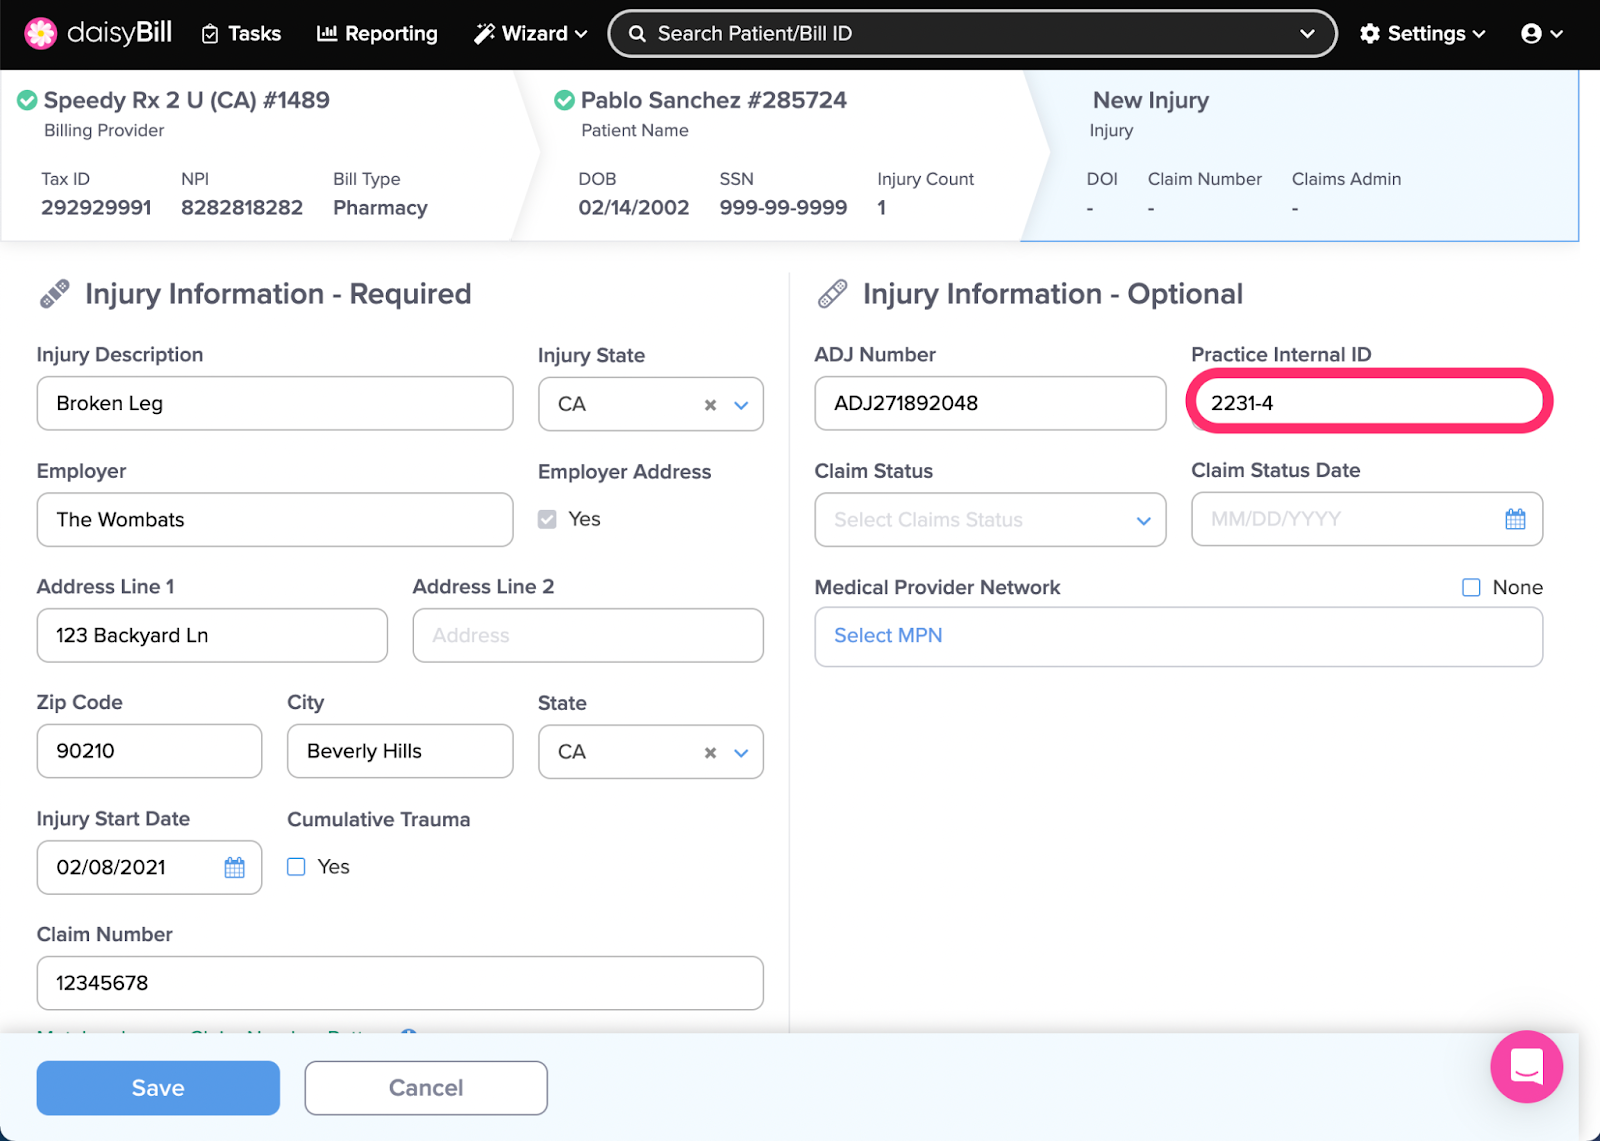
Step 10. Optional: enter a ‘Practice Internal ID’
This is intended for practices who integrate with daisyBill who wish to have a reference to the injury in their legacy system.
Step 11. Optional (recommended): select ‘Claim Status’ and enter ‘Claim Status Date’
Providing Claim Status and Claim Status Date allows for reporting on Injury status.
Step 12. Optional: select ‘Medical Provider Network’
Click Select to view the list of MPNs, then click Select next to the MPN’s name. For more information, see the Help Article: MPN List

Step 13. Click ‘Save’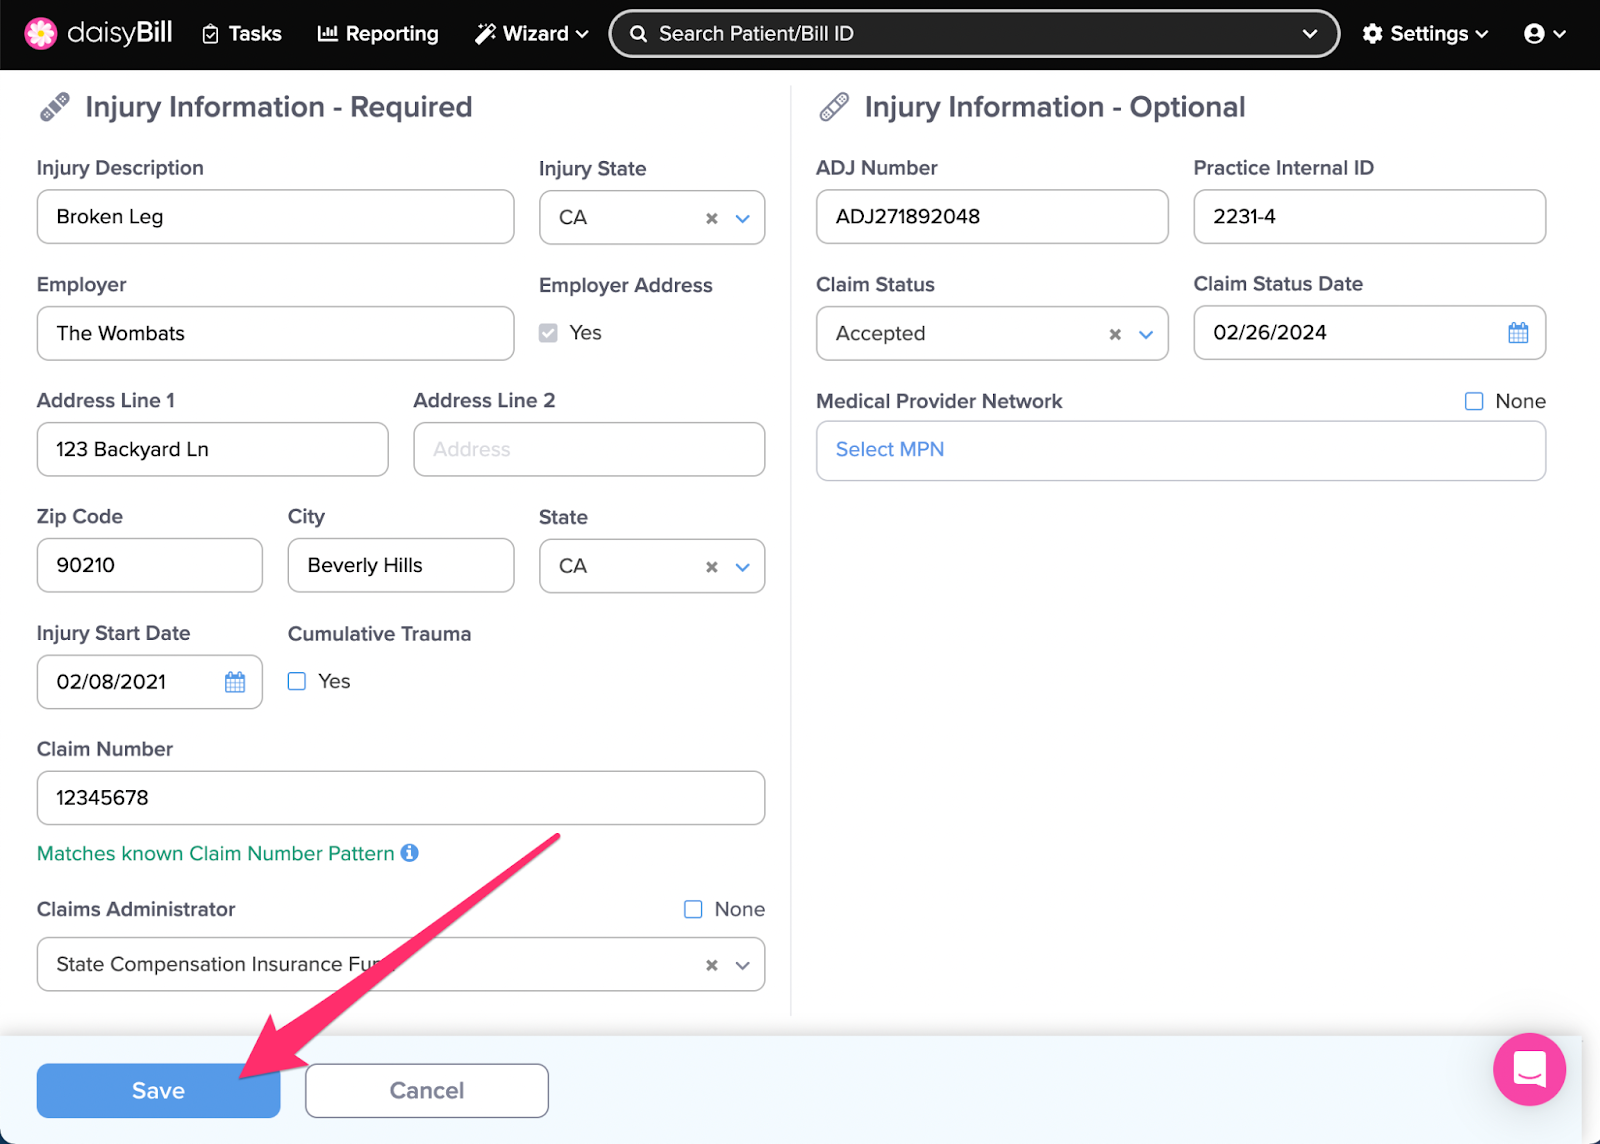
Nice work!