View Other Articles
Documents makes it easy to add Supporting Documents to a Bill.
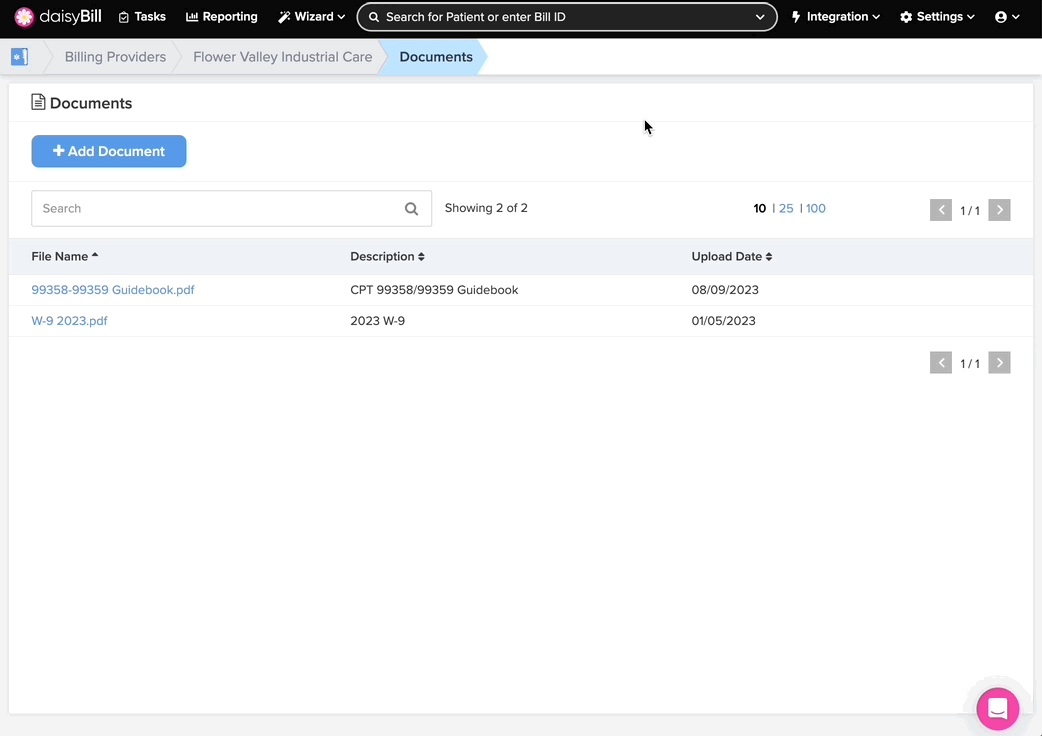
Documents stores common supporting documents, such as W-9s, testing standards, or IBR decisions for easy copying to a Bill. For more information about searching for IBR Decisions, see the Help Article: IBR Decisions Page Explained.
Step 1. On the navigation bar, click ‘Settings’, then click the name of the Billing Provider you want to view or edit
This will navigate directly to Billing Settings - Required for that Billing Provider.
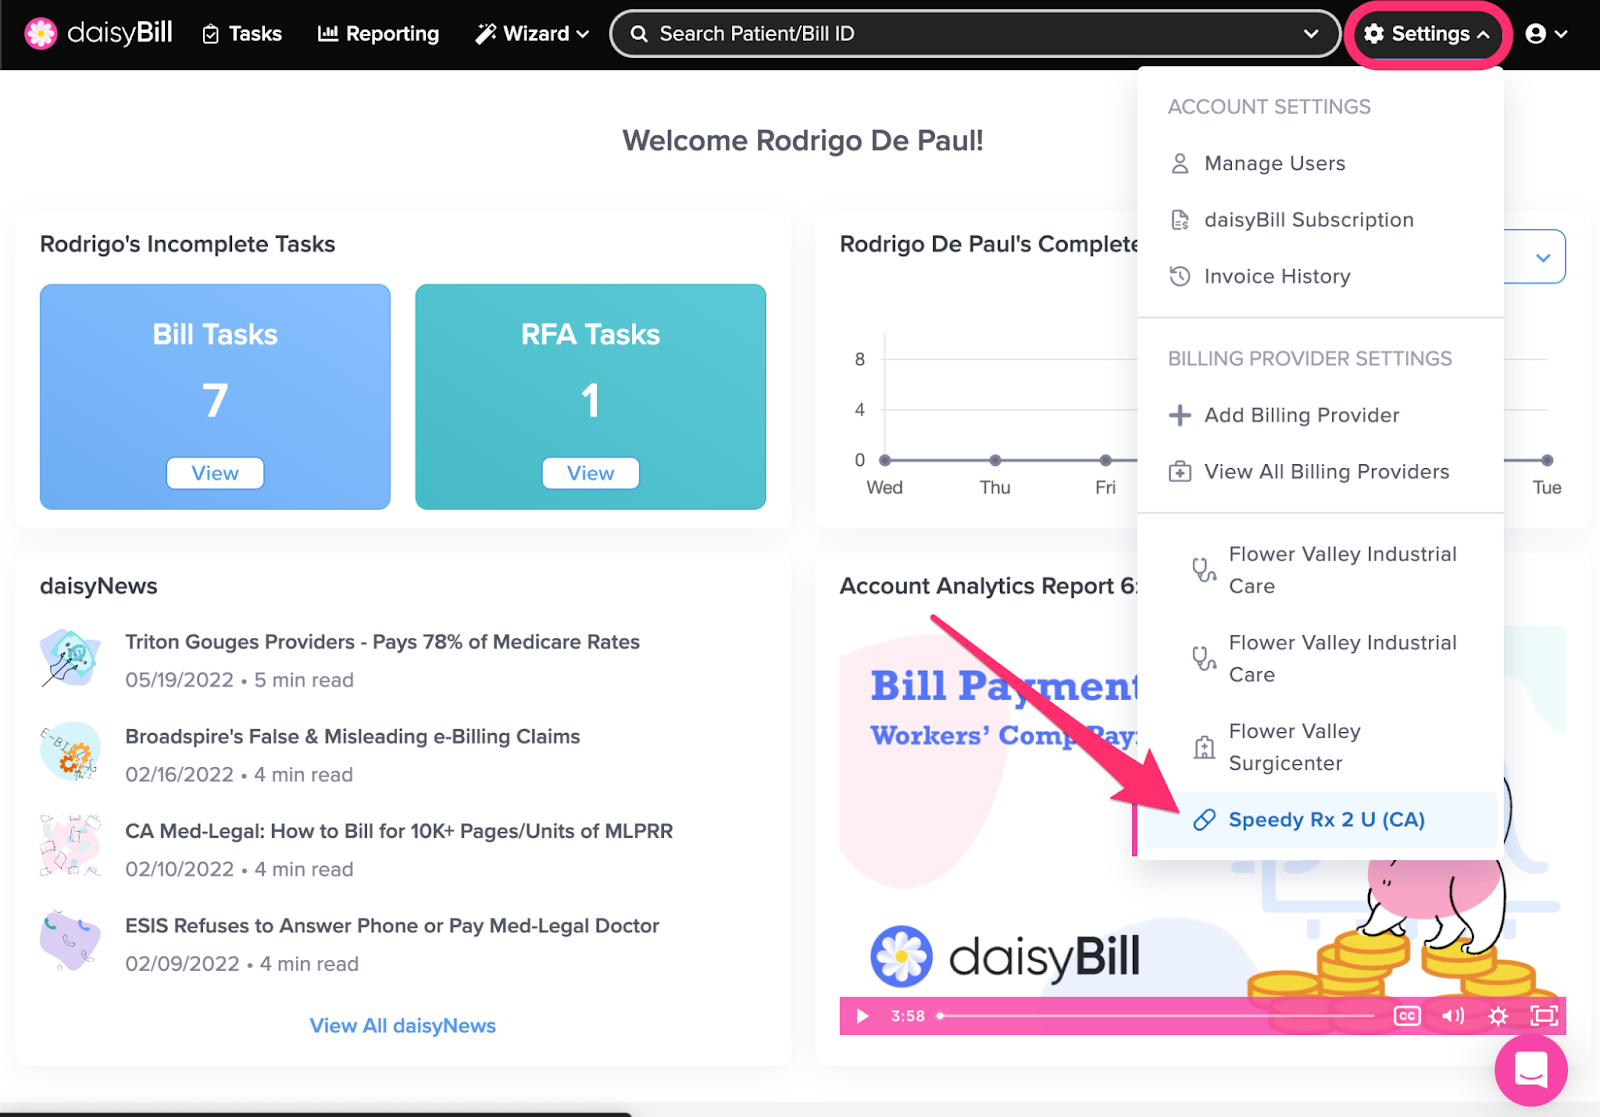
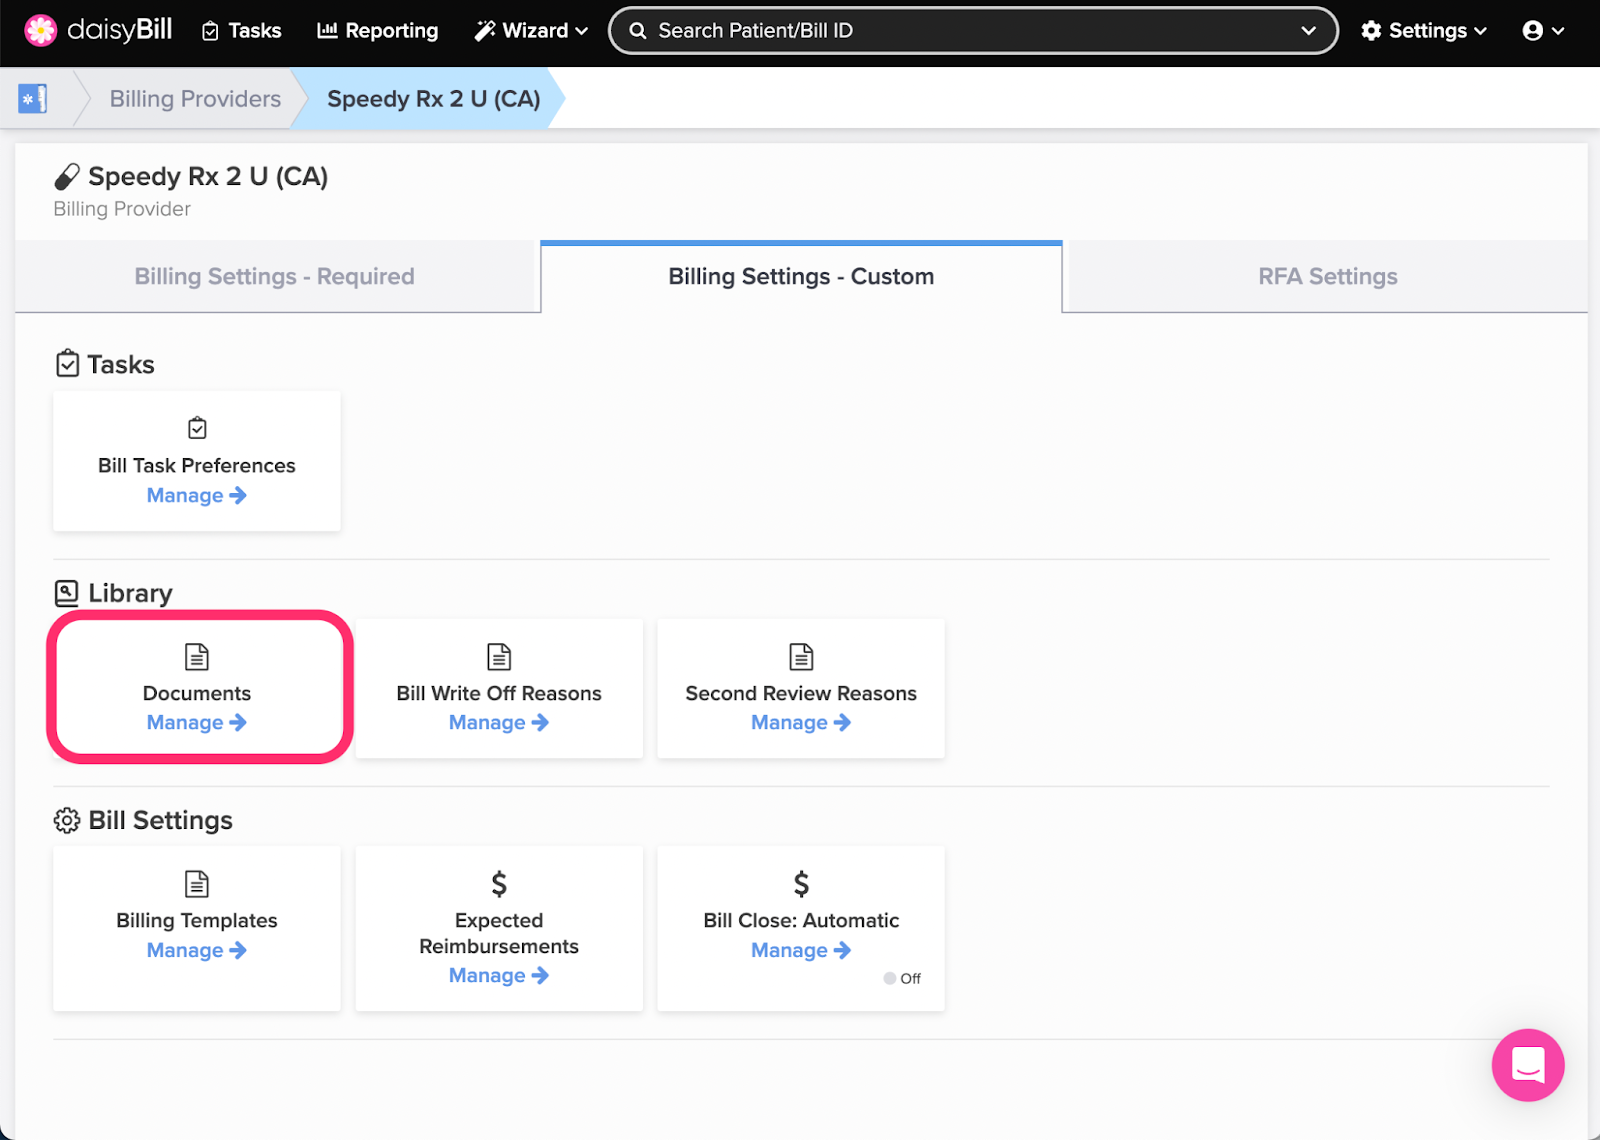
Step 2. Click the ‘Custom Settings’ tab

Step 3. Click the ‘Documents’ card
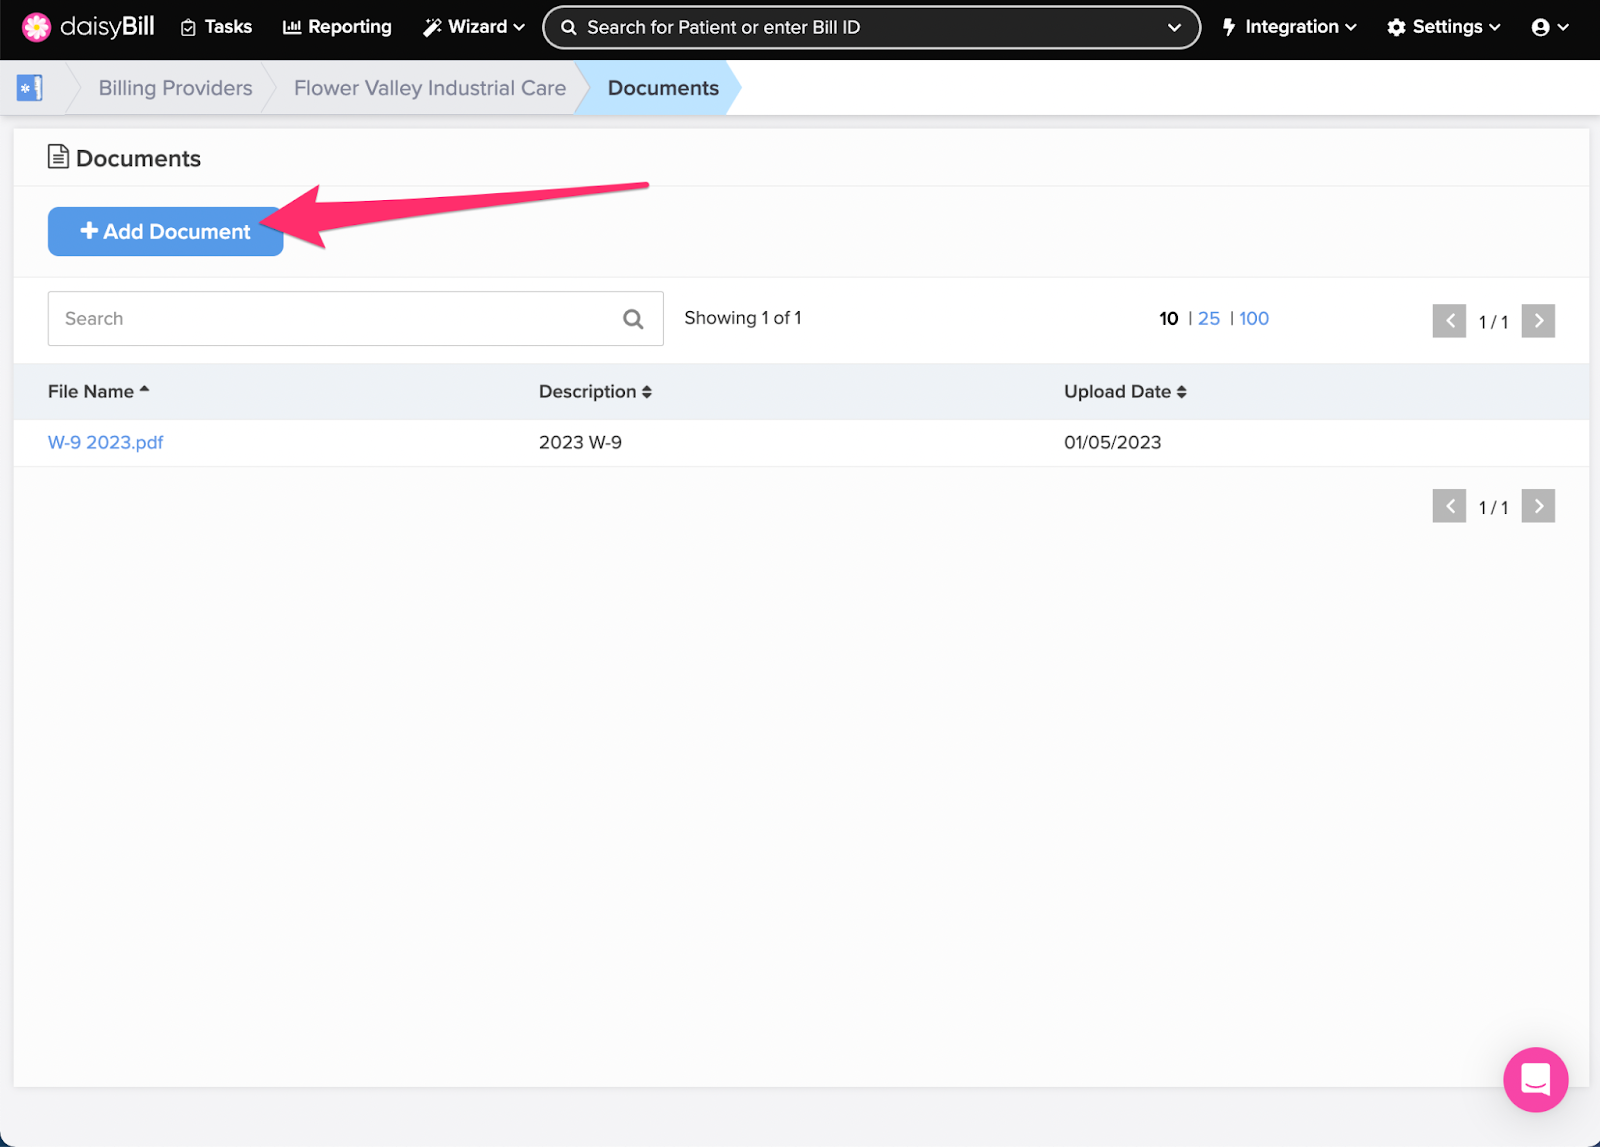
Step 4. Click the ‘Add Document’ button
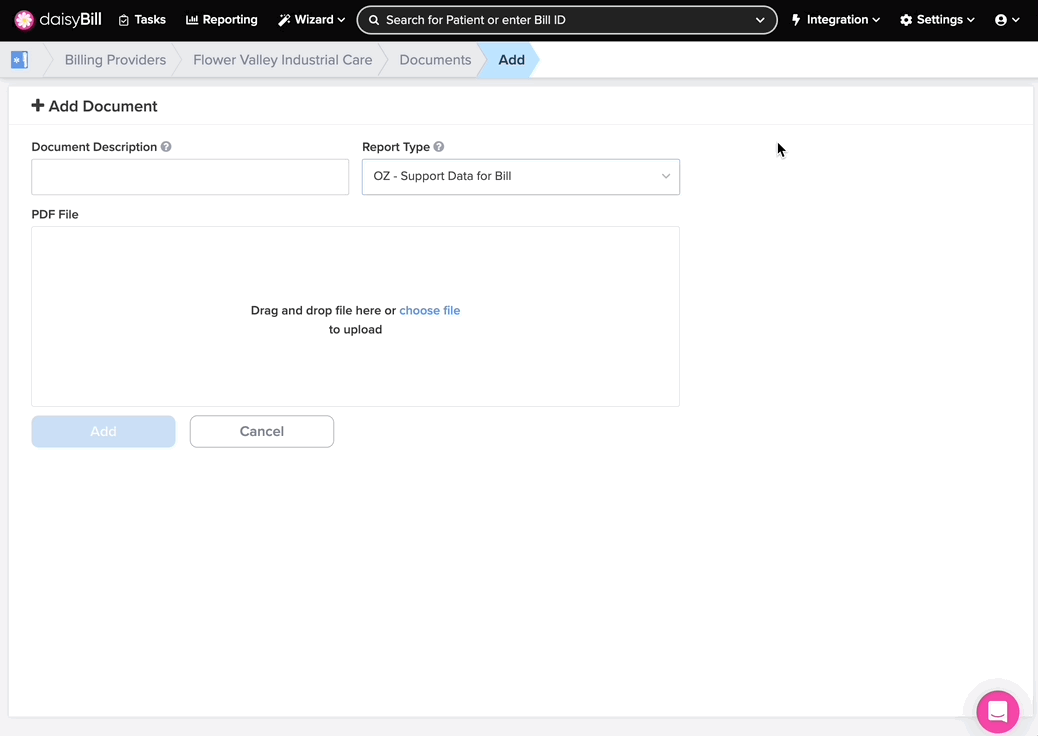
Step 5. Enter the ‘Document Description’ and upload the document, then click the ‘Add’ button
Create a naming convention which allows easy identification of the Supporting Documents stored in your library.
The default Report Type is OZ-Support Data for Bill. In the Report Type drop-down list, select the most accurate Report Type.
Step 6. To delete a document from the ‘Supporting Document Library,’ click its ‘File Name,’ then click the ‘Delete’ button
No more hunting for documents!