View Other Articles
RFA Templates get your authorizations done even faster. RFA Templates automatically populate RFAs with predesignated Service Line Item information.
Step 1. On the navigation bar, click ‘Settings’, then click the name of the Billing Provider you want to view or edit
This will navigate directly to Billing Settings - Required for that Billing Provider.
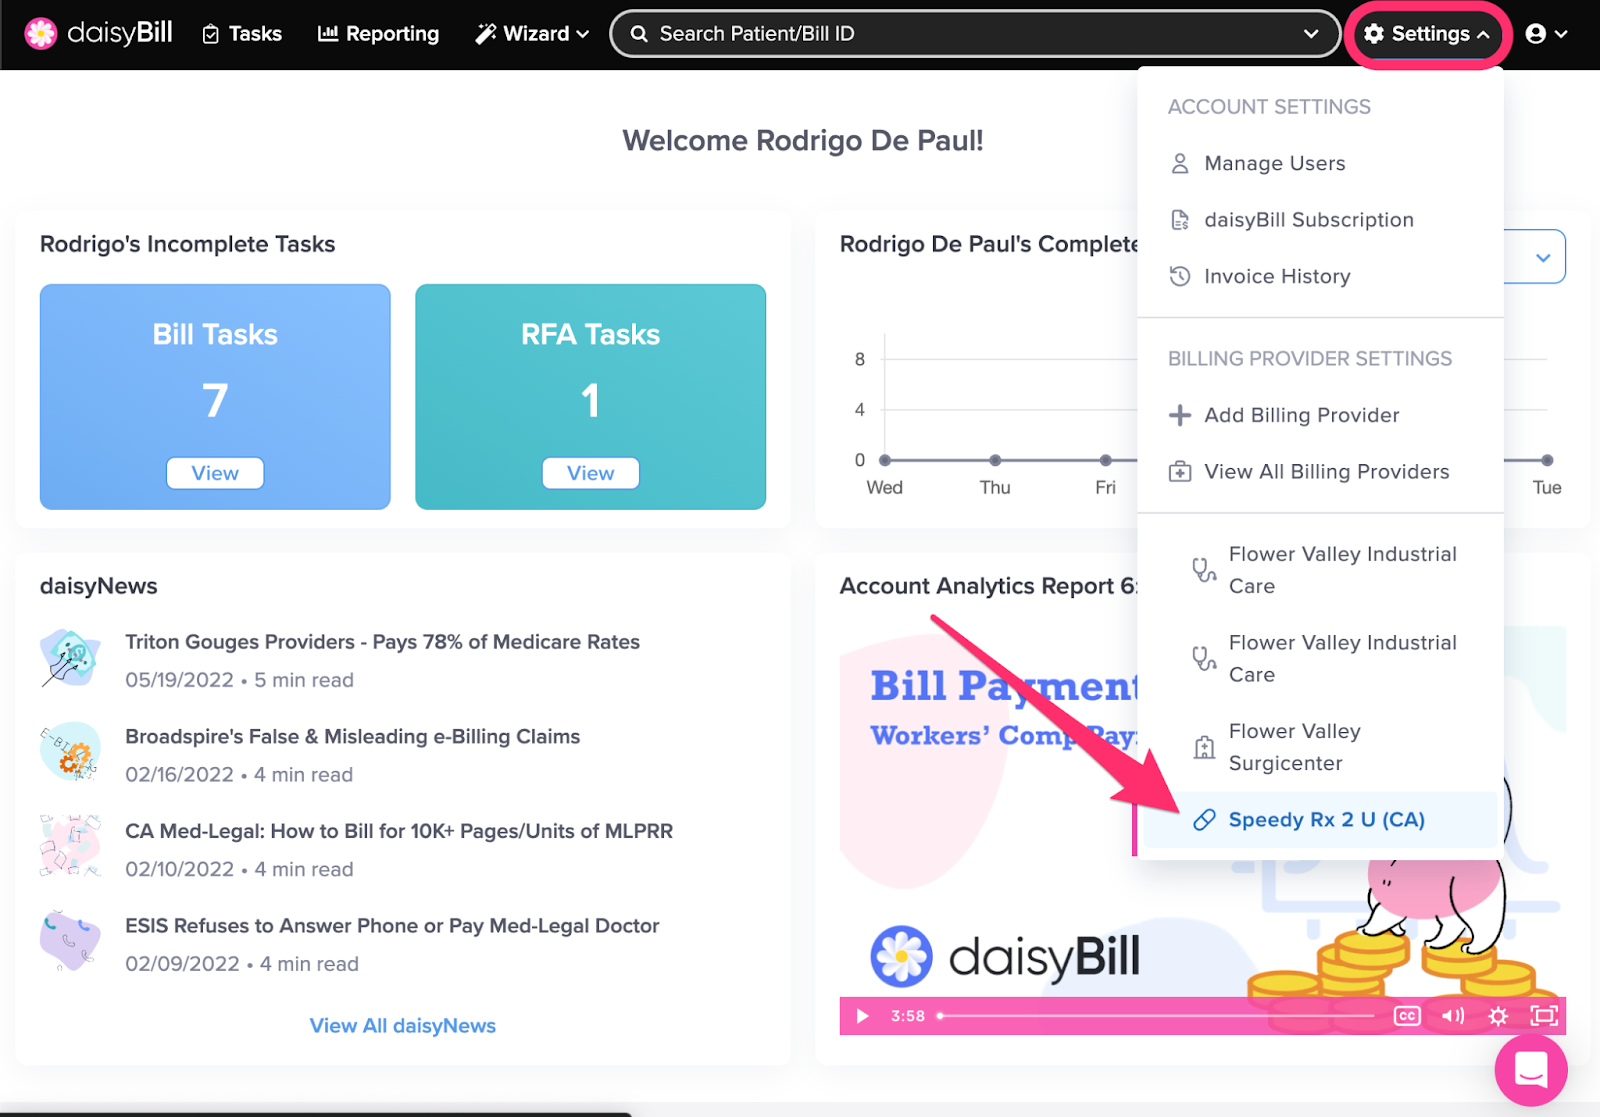
Step 2. Click the ‘RFA Settings’ tab
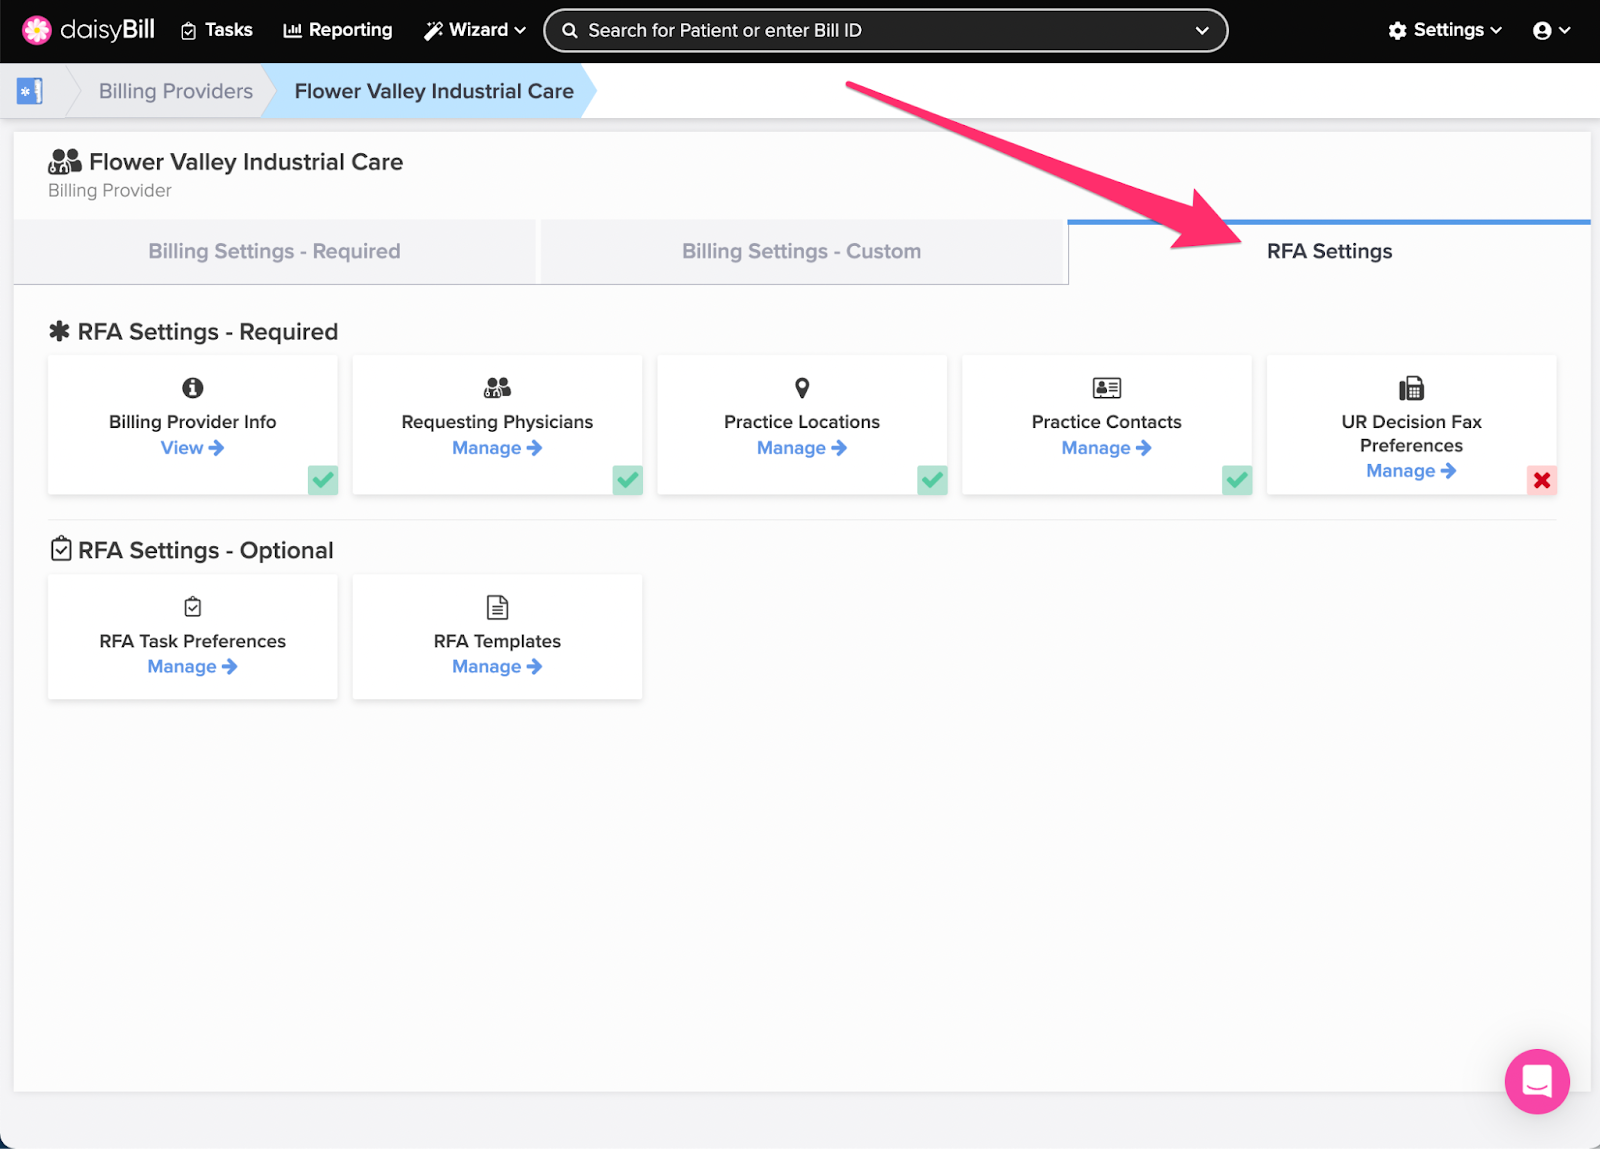
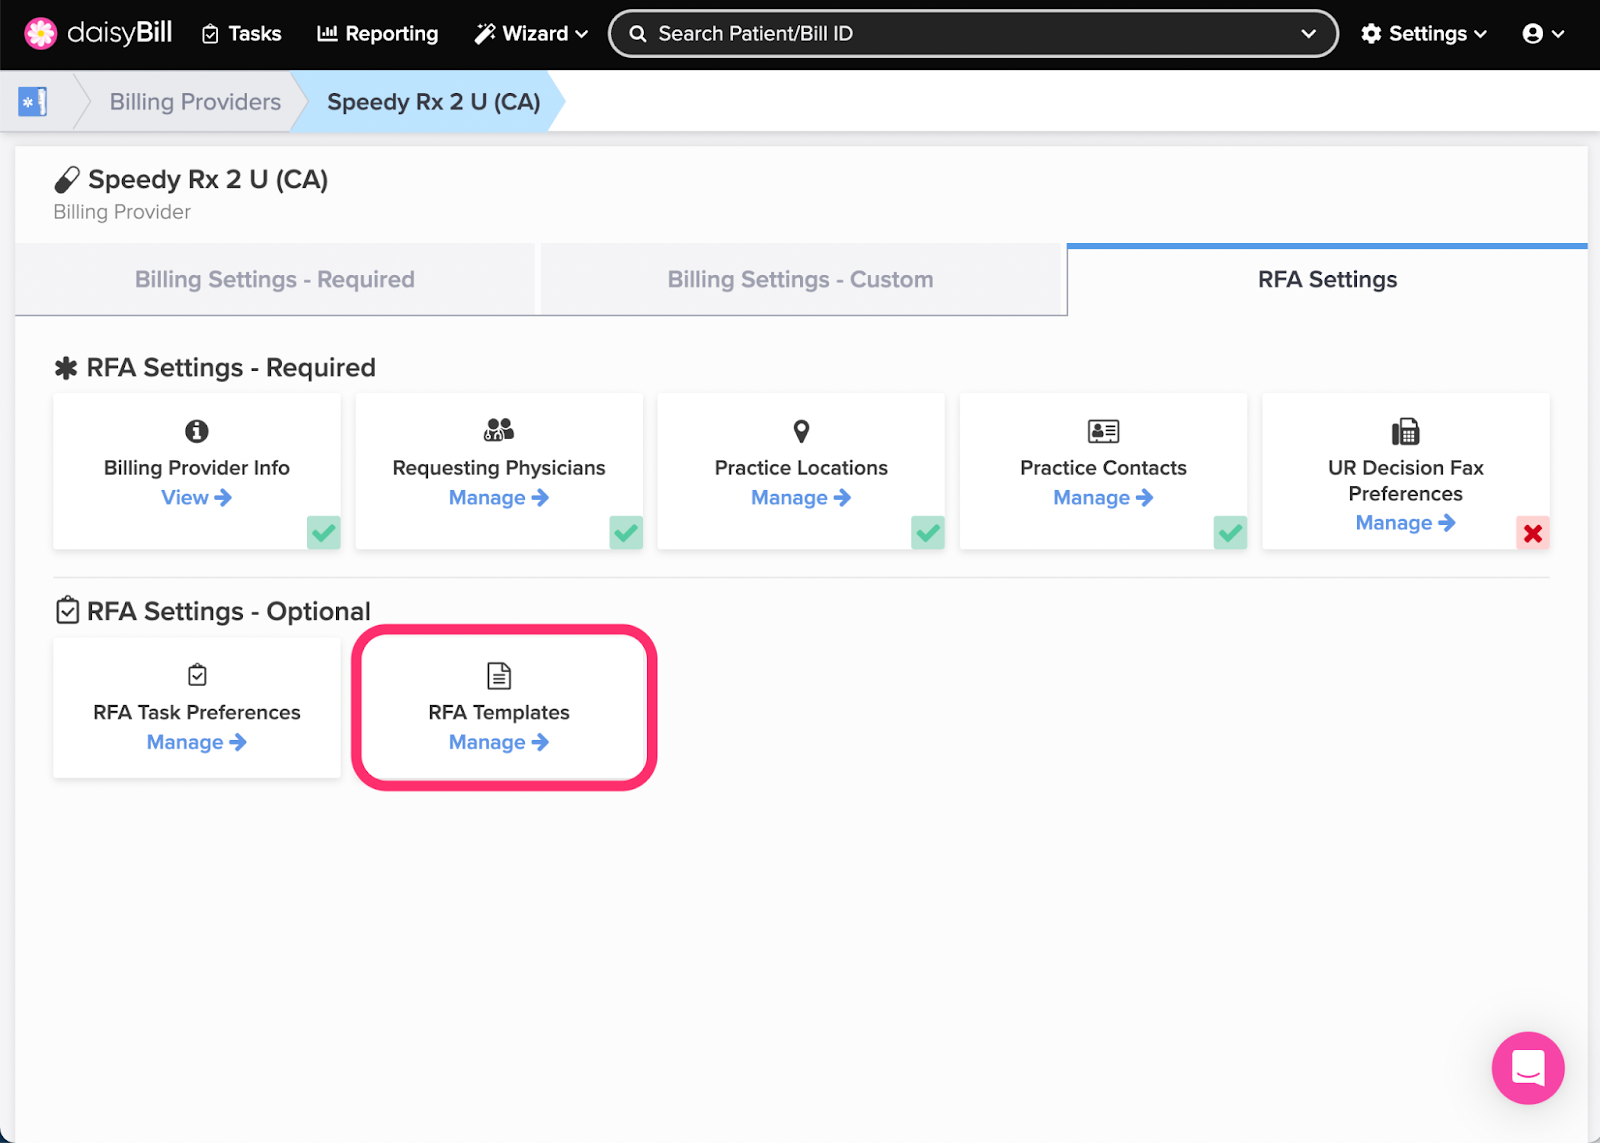
Step 3. Click the ‘RFA Templates’ card
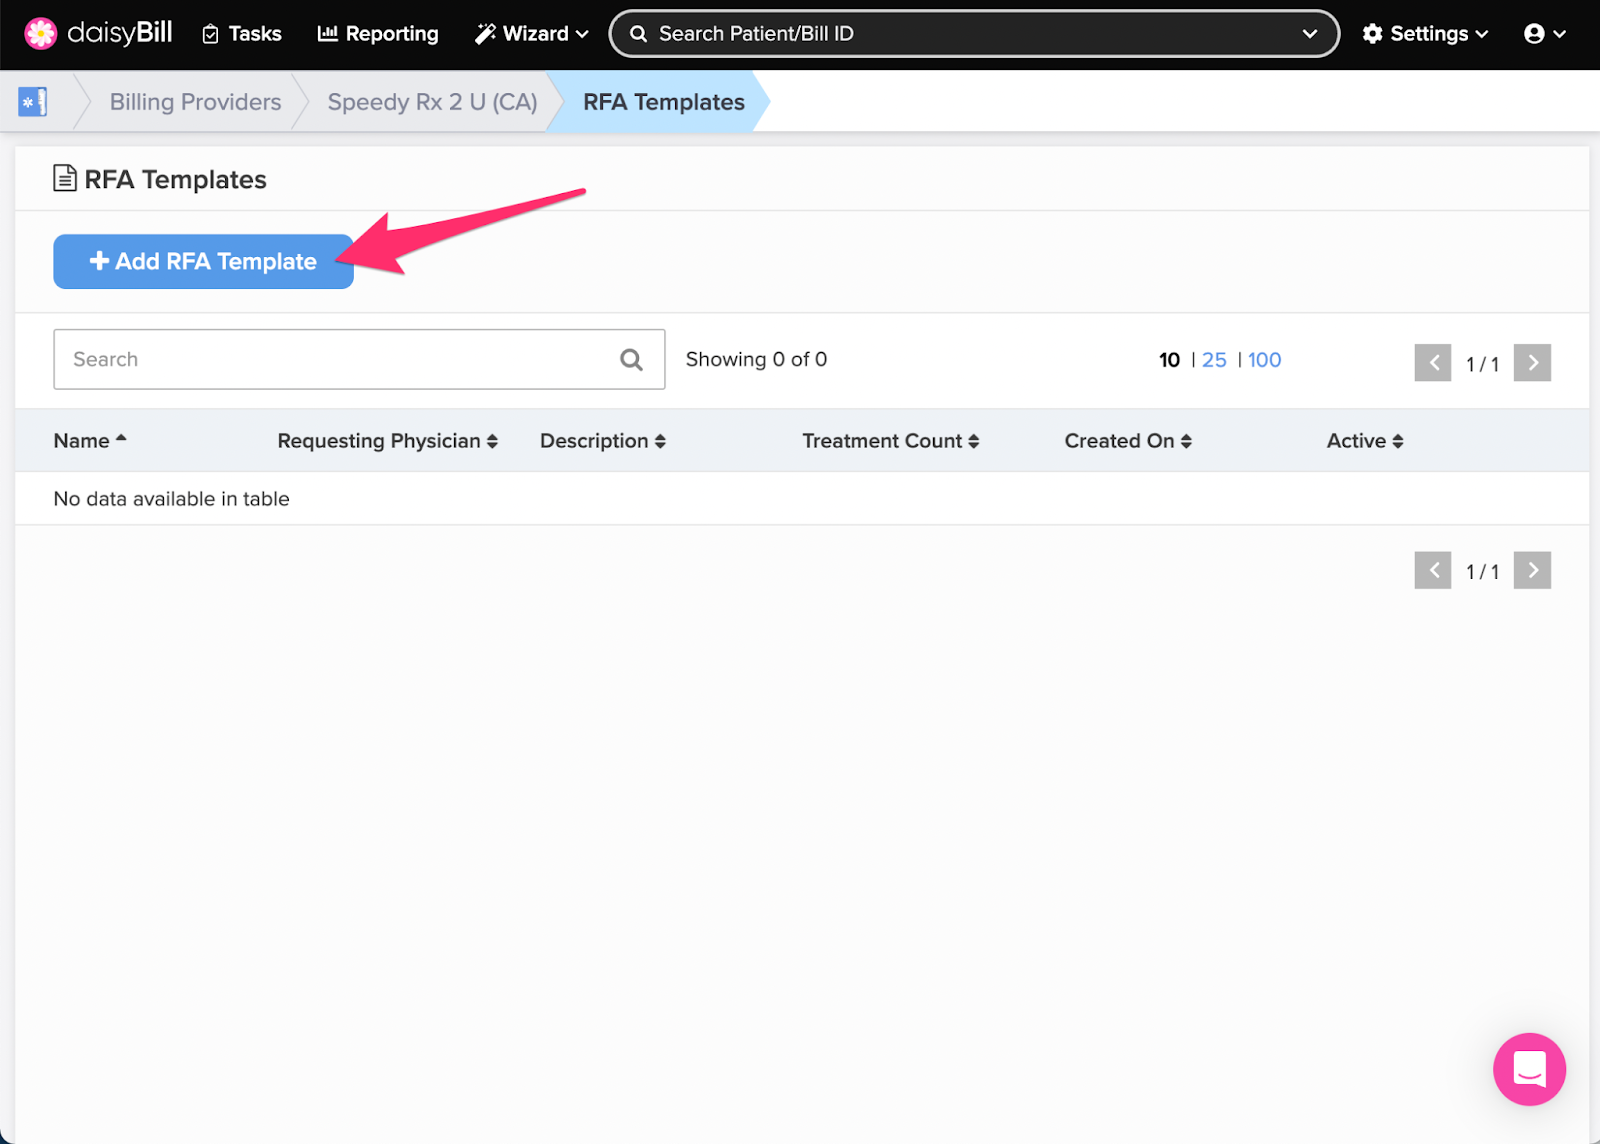
Step 4. To add a new ‘RFA Template,’ click the ‘Add RFA Template’ button
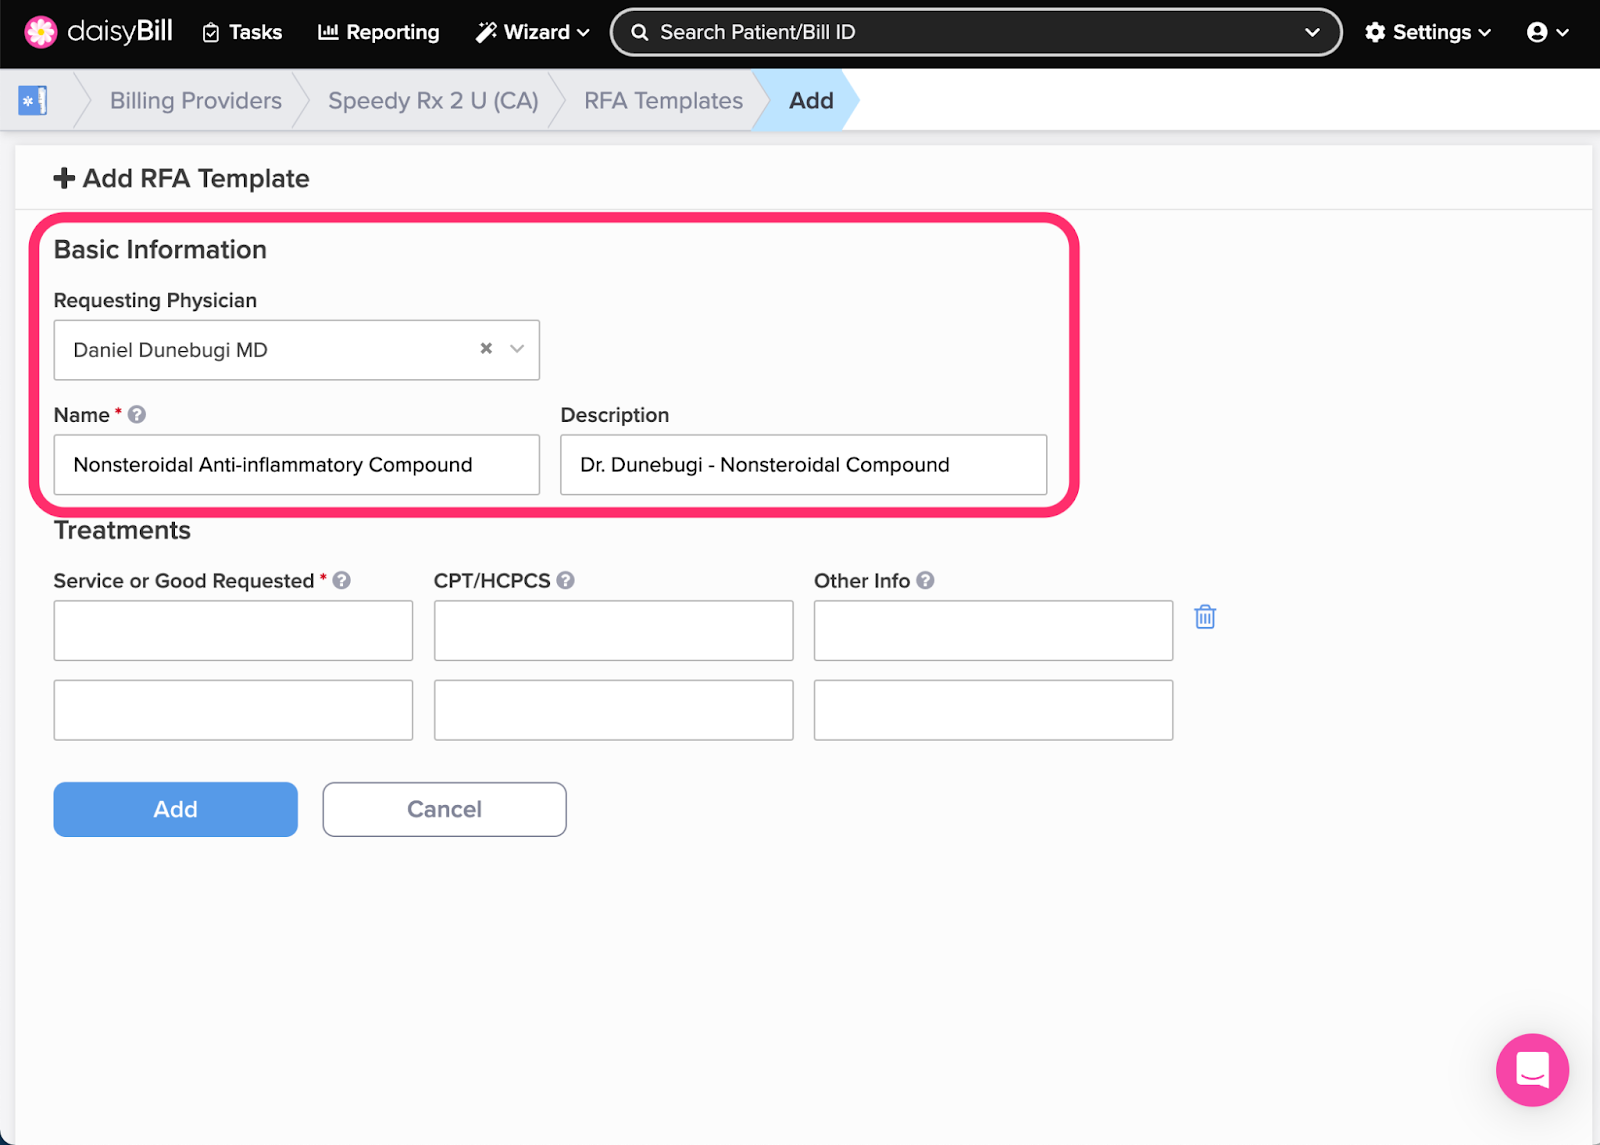
Step 5. Enter the ‘Basic Information’ and ‘Treatments’ for the ‘RFA Template,’ then click the ‘Add’ button
Create a naming convention so that all staff can easily identify RFA Templates in a list.
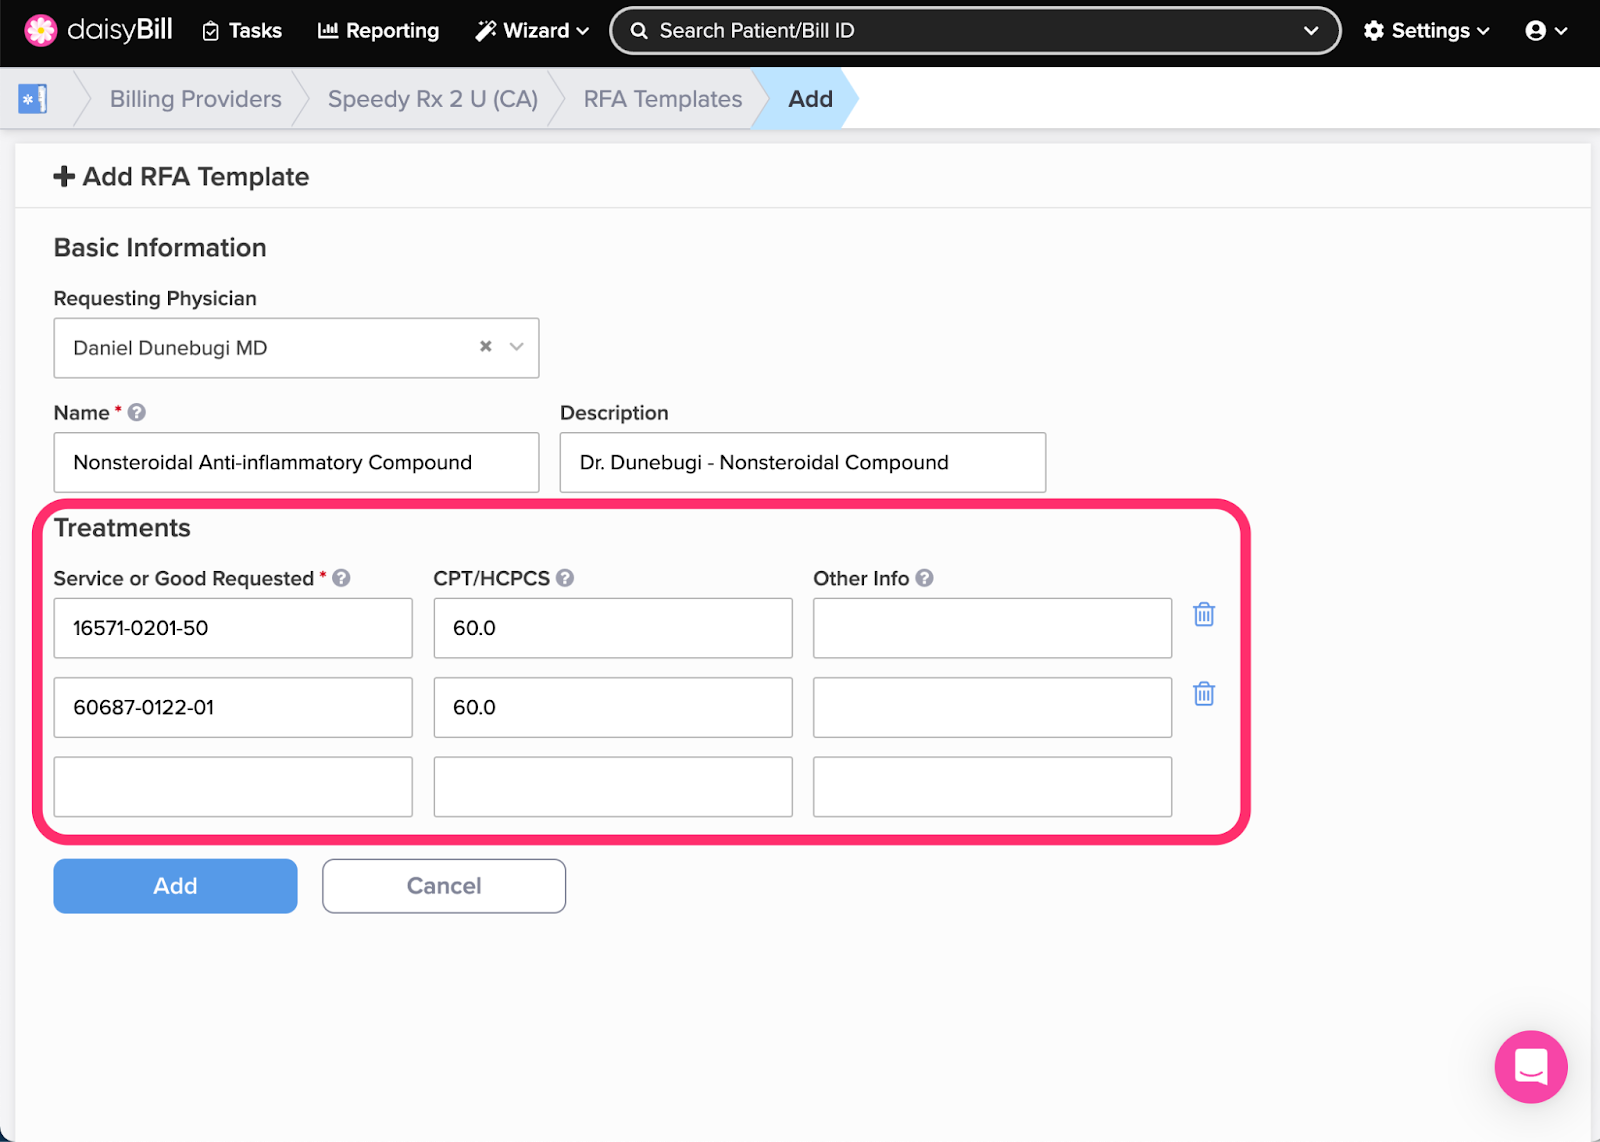
Step 6. Enter the ‘Service or Good Requested’ for the ‘RFA Template’
Additional Procedure Code lines automatically populate. To remove a line from the RFA Template, click the ‘Trash can’ icon.
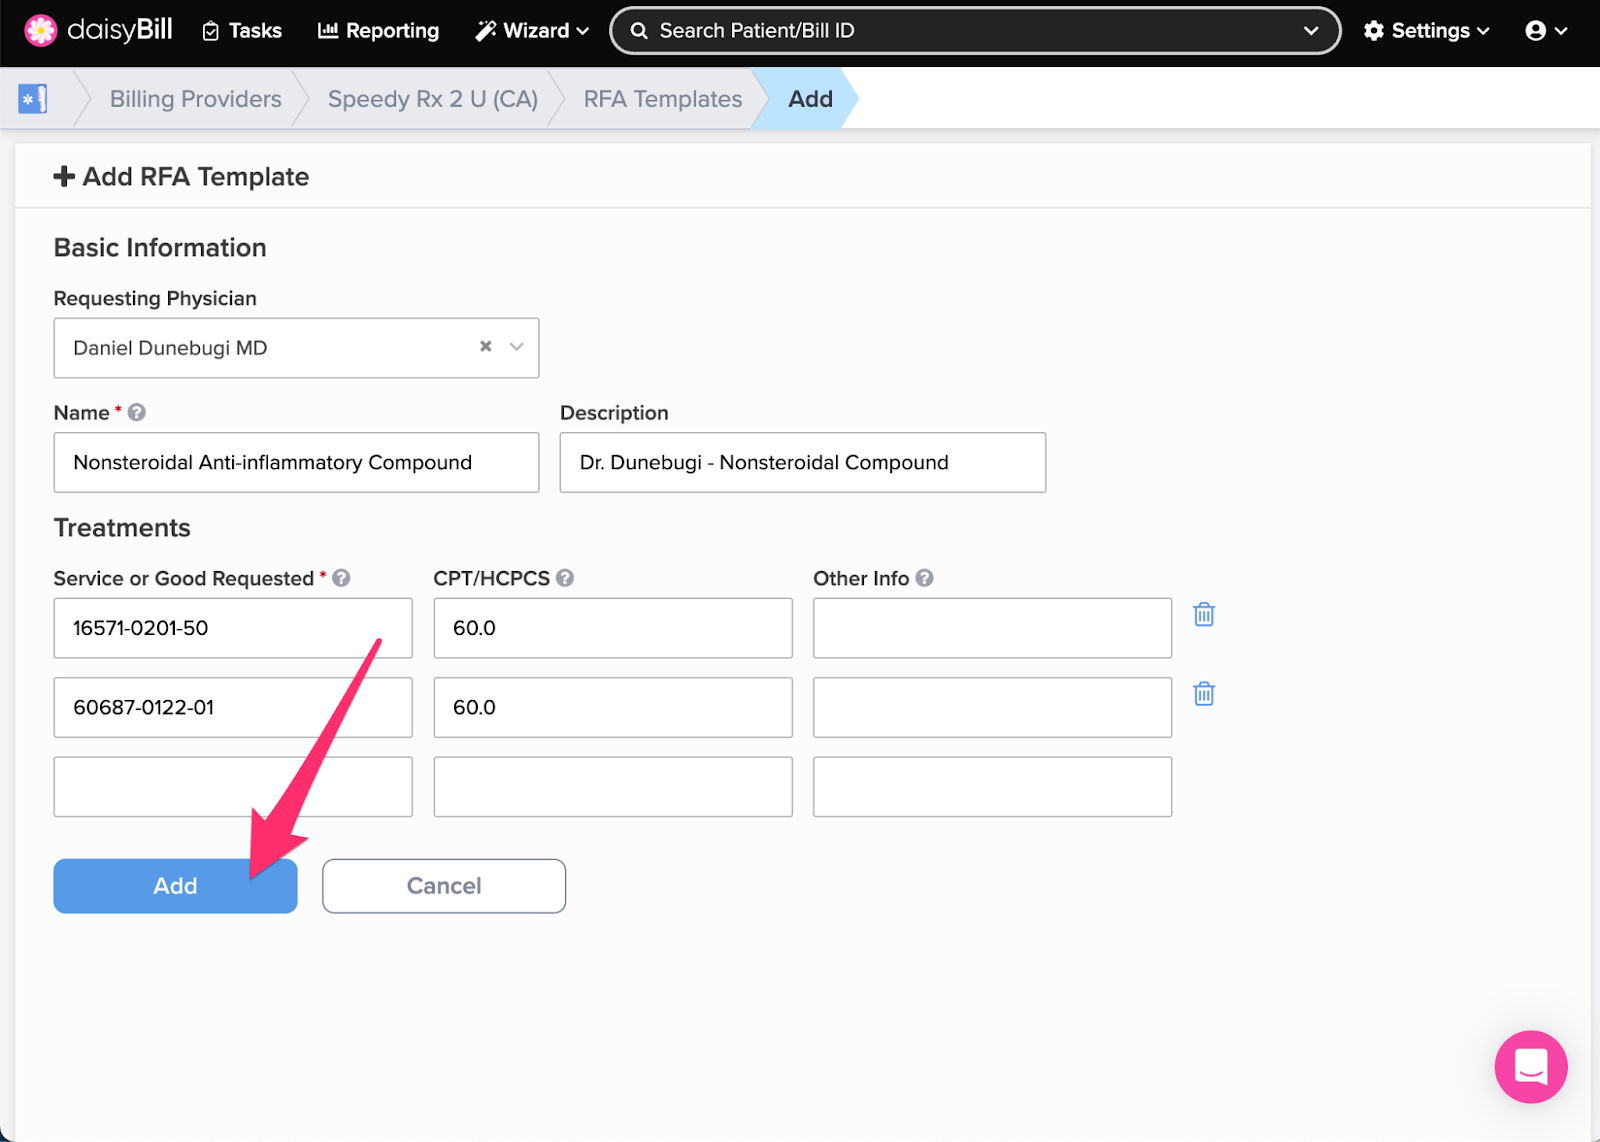
Step 7. Click the ‘Add’ button
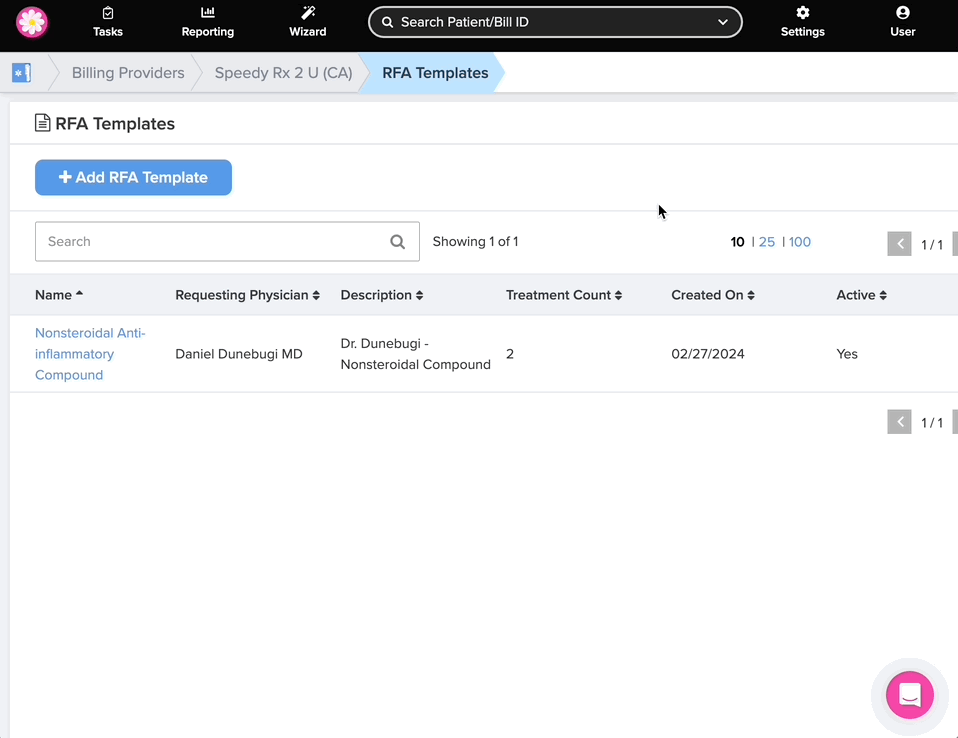
Step 8. To edit an ‘RFA Template,’ click the template’s ‘Name,’ make changes, then click the ‘Save Changes’ button
When adding a new RFA Template it is automatically marked as Active. To deactivate an RFA Template and prevent it from being selected on new bills, click ‘No.’
That’s a lot of saved time!