When an approved Service/Good Requested qualifies for One Call scheduling the One Call logo will appear in the Appointment area of the approved Service/Good. Select the Yes option to automatically send the Approved Service/Good directly to One Call to schedule the patient.
Step 1. Click ‘Yes’ under “Use One Call to schedule treatment?”
If an approved UR Decision is present and you don’t see the Yes/No option then the combination of the claims administrator and Service/Good Requested does not qualify for One Call scheduling.
If a service does not qualify for One Call scheduling, or you do not want to utilize One Call to schedule click ‘No’, and see the Help Article Add Appointment Details for information on how to add your own scheduling details

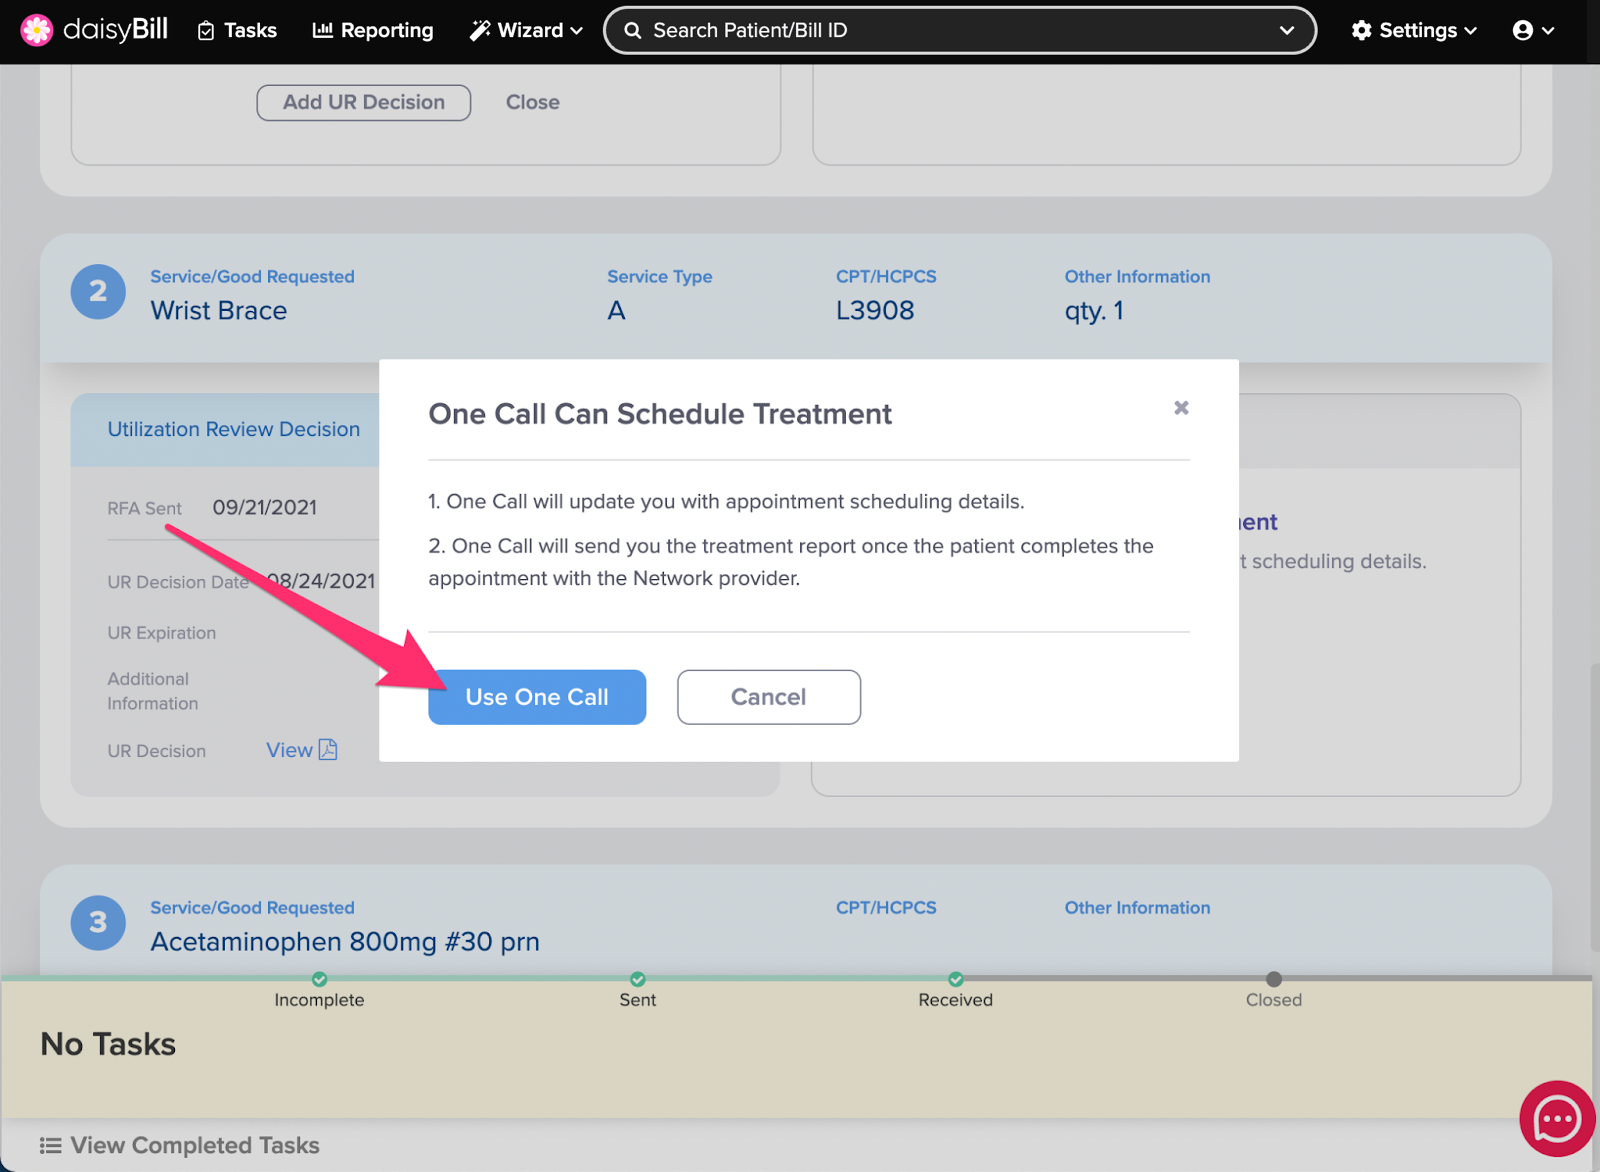
Step 2. Click ‘Use One Call’ to Confirm One Call Scheduling
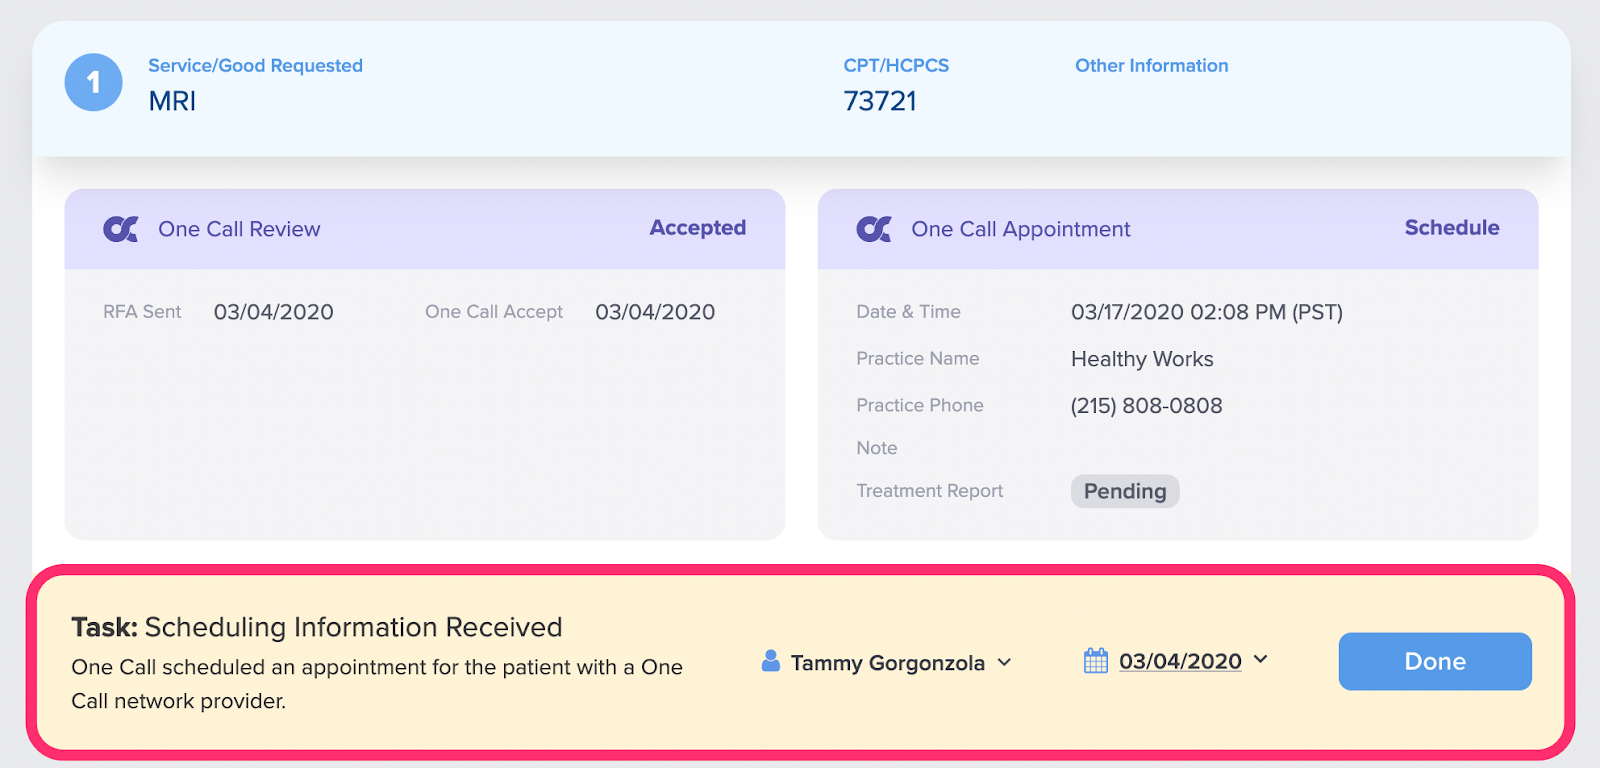
Step 3. When the service is scheduled, receive and view ‘Scheduling Information Received’ Task
When One Call schedules the patient for the Service/Good, a Scheduling Information Received task will automatically be generated. Click the ‘Done’ button to complete the task and acknowledge the scheduling information.
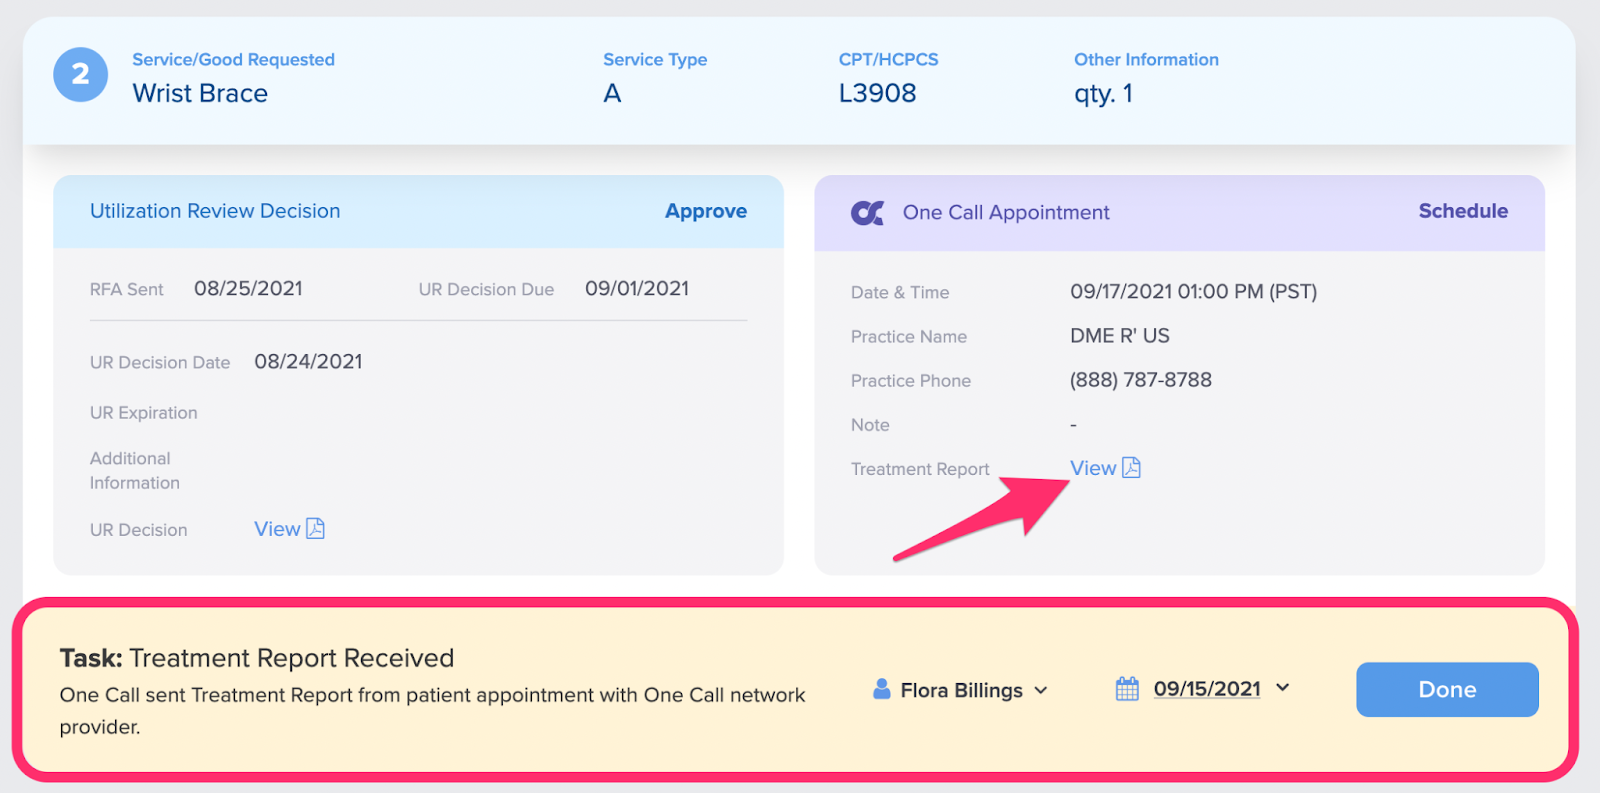
Step 4. Situational: When a treatment report is available for the service, receive and view Treatment Report Received’ Task
When a treatment report is available a ‘Treatment Report Received’ task will be automatically generated. Click the ‘View’ link to view the treatment report. Click the ‘Done’ button to complete the task and acknowledge receipt of the report.