daisyBill makes creating and submitting Requests for Authorization (RFAs) a snap. To get started, follow these steps.
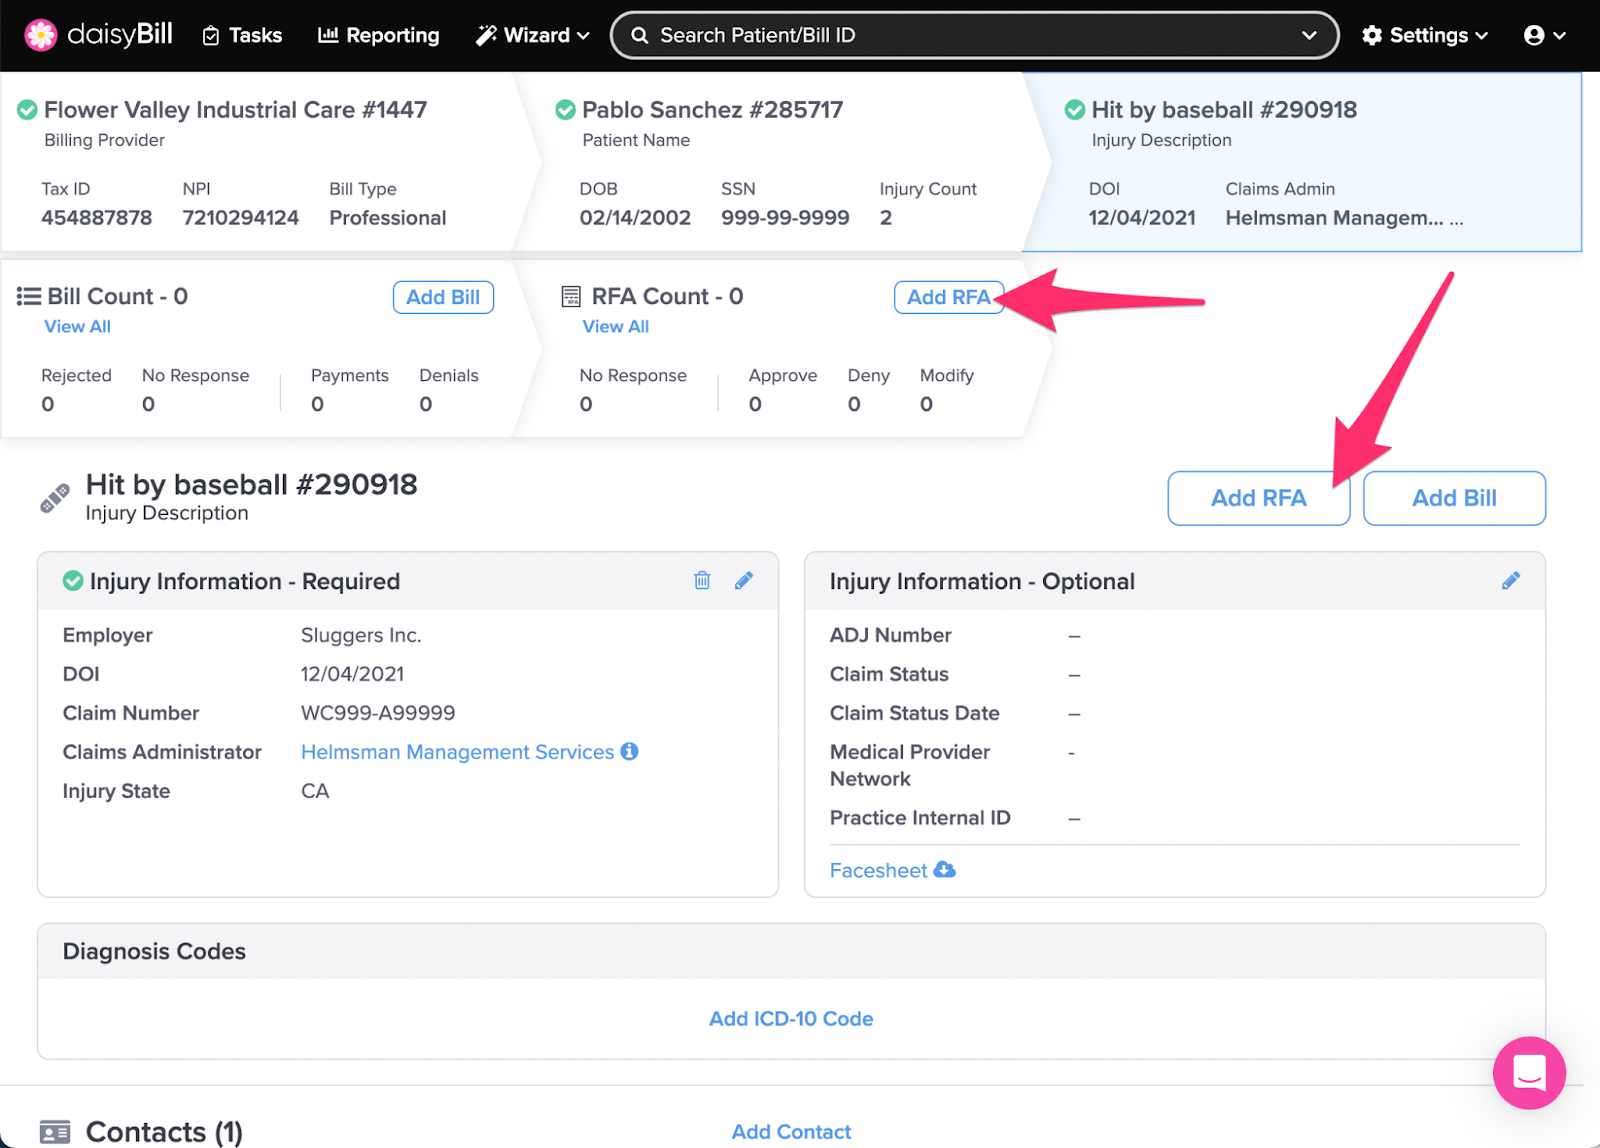
Step 1. From the Injury Page, click ‘Add RFA’
Alternatively, click ‘Add RFA’ on the RFA Count breadcrumb to create a new RFA.
Step 2. If there’s no RFA Claims Administrator Information you’ll have the option to add it.
An RFA requires RFA Claims Administrator Information before being sent. This information populates the following fields under the ‘Claims Administrator’ heading on the DWC Form RFA: Contact Name, Fax Number, Telephone, Email.
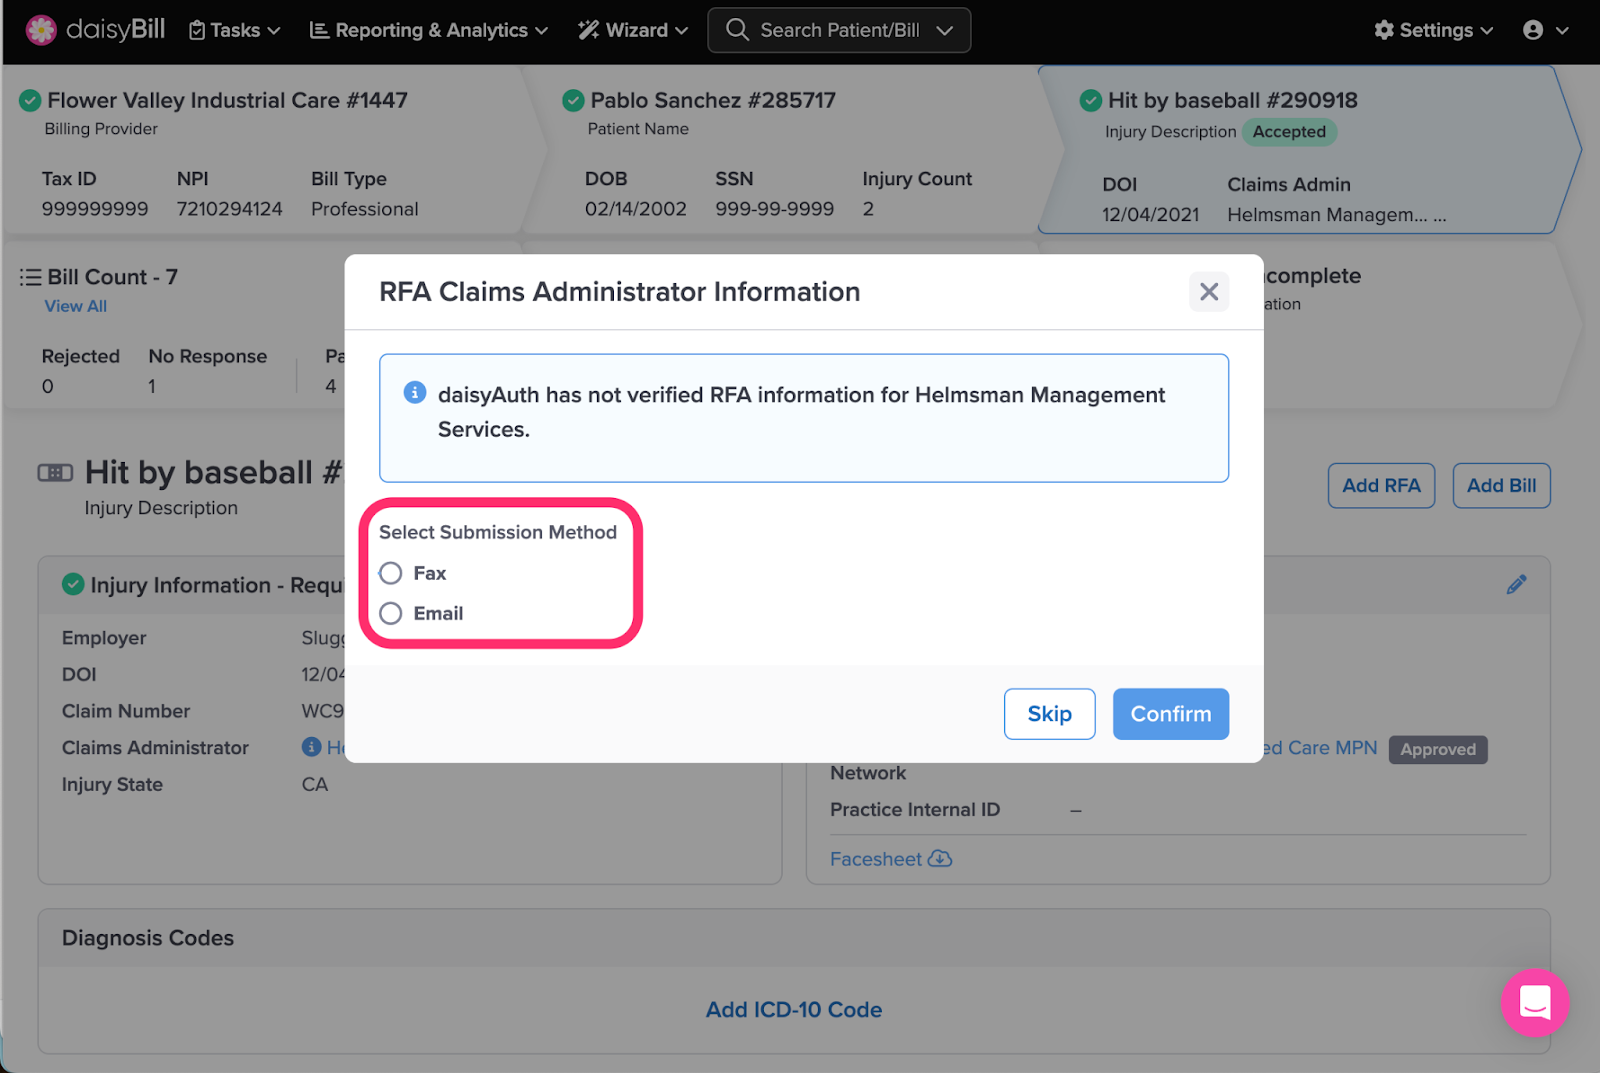
daisyBill provides extensive routing information for RFAs depending on the Claims Administrator selected on the Injury page.
Once RFA Claims Administrator Information is entered, this step will be skipped.
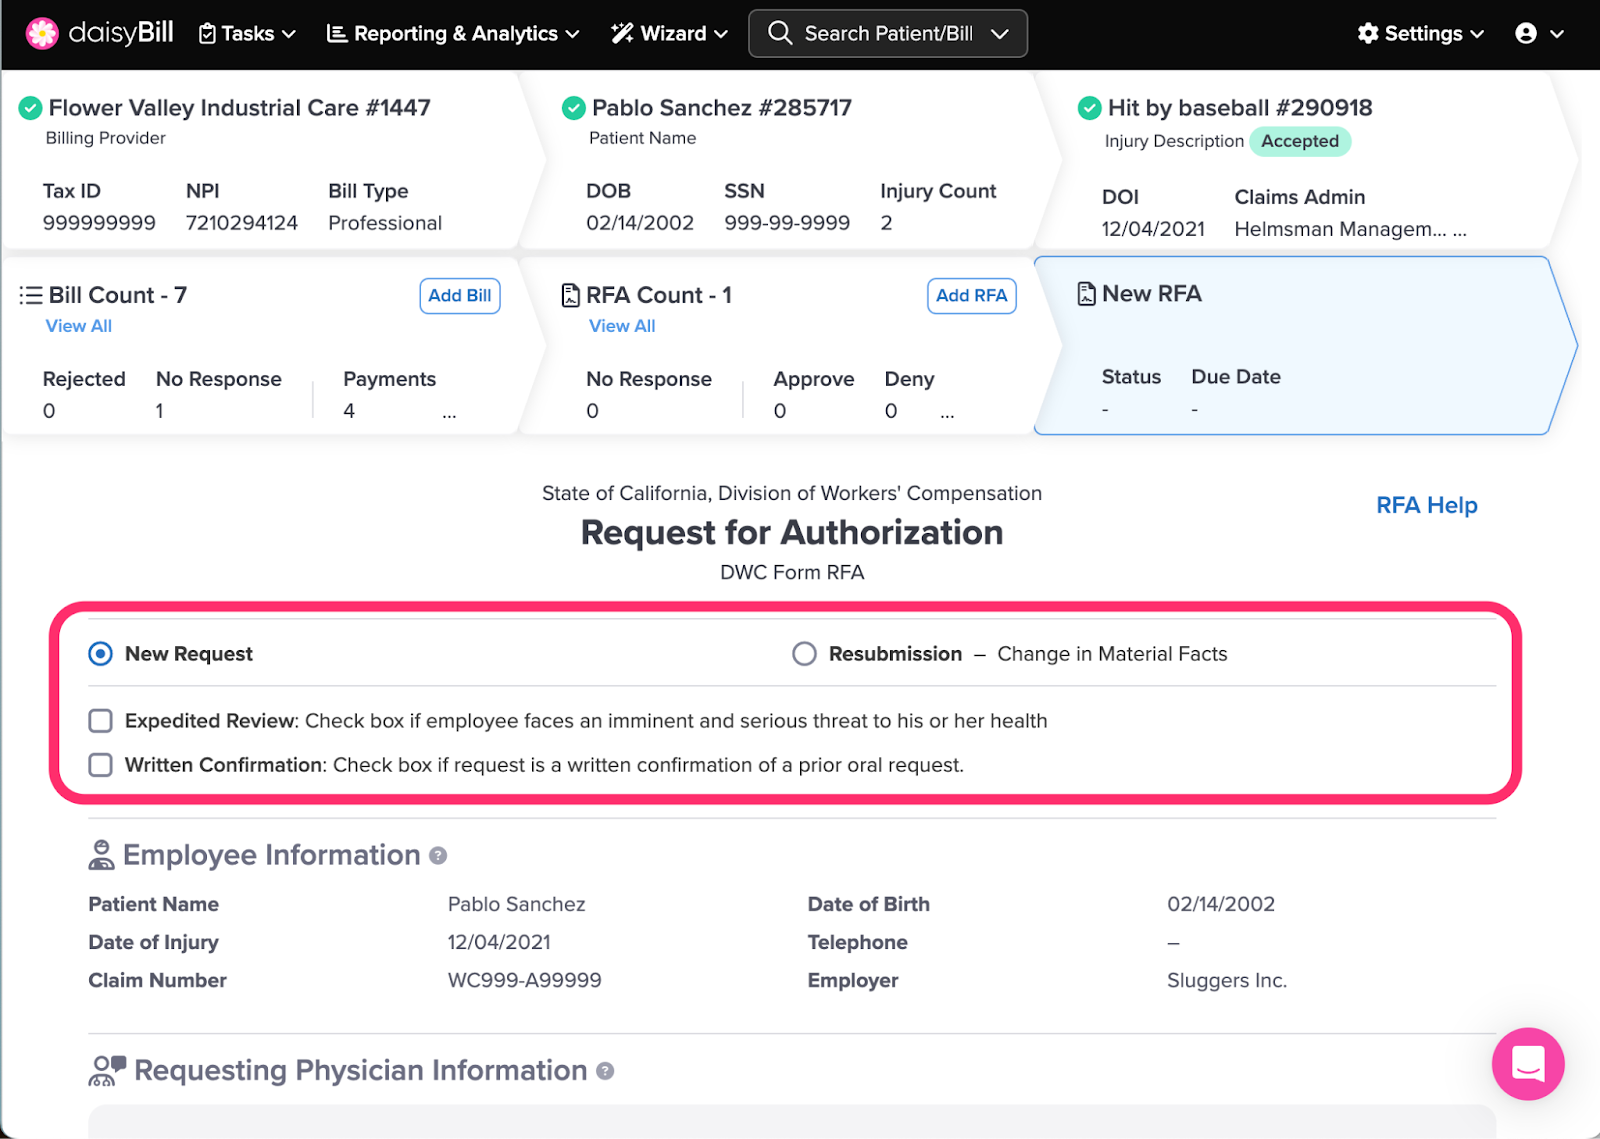
Step 3. Review ‘New Request’, ‘Resubmission – Change in Material Facts’ and Optional selections
Select New Request for treatment that has not been previously requested. For treatment being requested again after a denial or modification, select Resubmission - Change in Material Facts.
If the RFA review needs to be expedited by the Claims Administrator (within 72 hours) check the box for Expedited Review. Selecting this option changes when the RFA is due back from the Claims Administrator and should only be used when timeliness of review has a direct impact on the patient’s health and safety.
If the RFA services were previously discussed with the claims administrator check the option for Written Confirmation.
For more information, click the DWC Form RFA Instructions link.
Step 4. Select ‘Requesting Physician’
Start typing the name of the Requesting Physician to select an existing one or click New Requesting Physician to add a new one. This required field populates the following fields on the DWC Form RFA under the heading ‘Requesting Physician Information’: Name, Specialty, and NPI Number.
You can add / edit / deactivate Requesting Physicians in your daisyAuth Settings.
Step 5. Select ‘Practice Location’
Start typing the nickname of the Place of Service to select an existing one or choose New Practice Location to add a new one. This field populates the following fields on the DWC Form RFA under the heading ‘Requesting Physician Information’: Practice Name, Address, City, State, Zip Code, Phone Number, and Fax Number.
You can add / edit / deactivate Practice Locations in your daisyAuth Settings.
Step 6. Select ‘Practice Contact’
Start typing the name of the Practice Contact to select an existing one or choose New Practice Contact to add a new one. This field populates the following fields on the DWC Form RFA under the heading ‘Requesting Physician Information’: Contact Name, and Email.
You can add / edit / deactivate Practice Contacts in your daisyAuth Settings.

Step 7. Review or Add ‘Claims Administrator Information’
The fax number and email address entered here can be used for where your RFA is sent. This information populates the ‘Claims Administrator’ section on the DWC Form RFA: Contact Name, Fax Number, Address, Telephone, Email. If anything needs to be updated, click the pencil icon to make edits.

Step 8. Optional: Select an ‘RFA Template’
Start typing the name of the RFA Template to select an existing one or choose Add RFA Template to add a new one.
You can add / edit / deactivate RFA Templates in your daisyAuth Settings.
Step 9. Enter ‘Requested Treatment’
- ICD-10: ICD-10 codes for the patient substantiating the Services/Good Requested. If saved on the Injury page, these ICD10 codes automatically populate.
- Diagnosis: The description automatically populates based on the ICD-10 entered
- Service/Good Requested: the name of the treatment, procedure, product, device, etc. requiring authorization. Each Service/Good Requested should be in a separate Service/Good Requested field.
- CPT/HCPCS: optional field for the CPT/HCPC of the Services/Good Requested
- Other Information: optional field for additional information such as frequency and duration.
- To add an additional Requested Treatment on the same RFA click “Add Requested Treatment”. Each Service/Good Requested should be in a separate Service/Good Requested field.
To add another Service/Good, click the ‘Add Service/Good’ button.
Step 10. Select ‘Request Type’
Select appropriate Request Type. This information does not populate the RFA form, but is used to calculate the RFA Due Date.
- Concurrent requests are submitted during inpatient medical treatment. For a concurrent request, the RFA decision is due within five business days from the date of receipt.
- Prospective requests are submitted prior to medical treatment. For a prospective request, the RFA decision is due within five business days from the date of receipt.
- Retrospective requests are submitted after medical treatment. For a retrospective request, the RFA decision is due within 30 business days of the date of receipt.
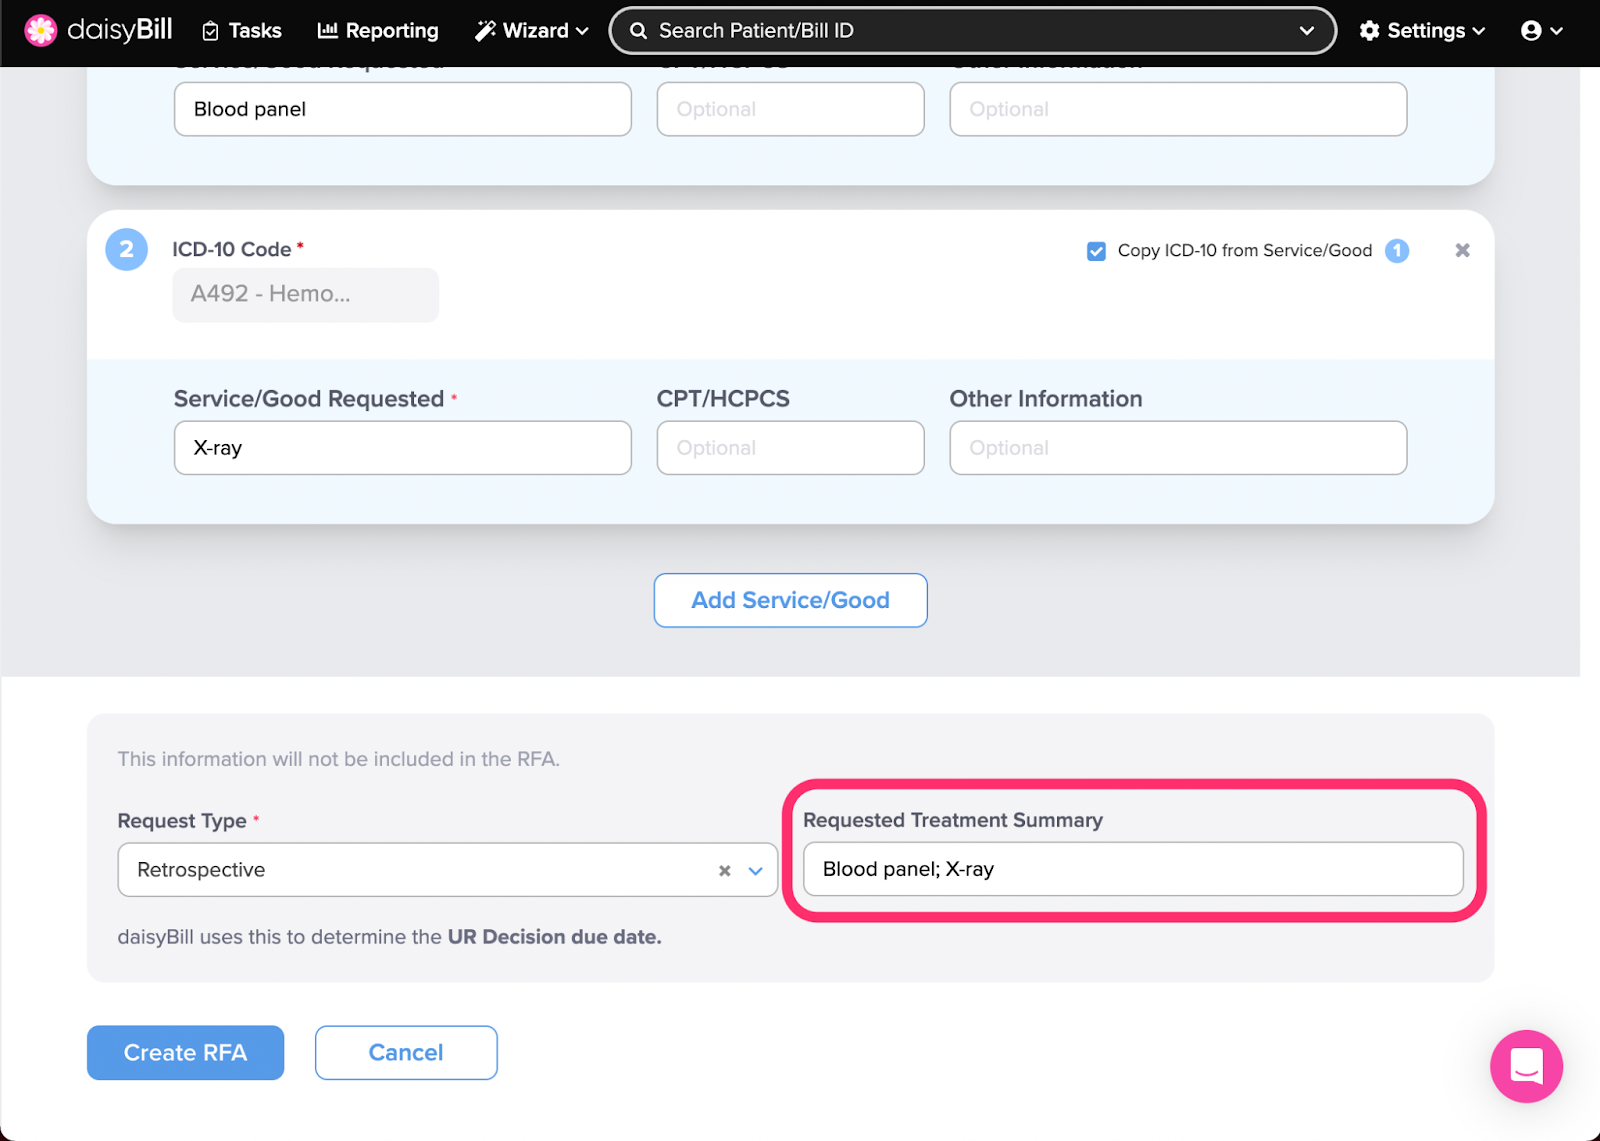
Step 11. View or Edit ‘Requested Treatment Summary’
The Requested Treatment Summary uses the first 50 characters of the service/good requested to automatically summarize the RFA. This does NOT go out on the RFA, and is for internal use only.
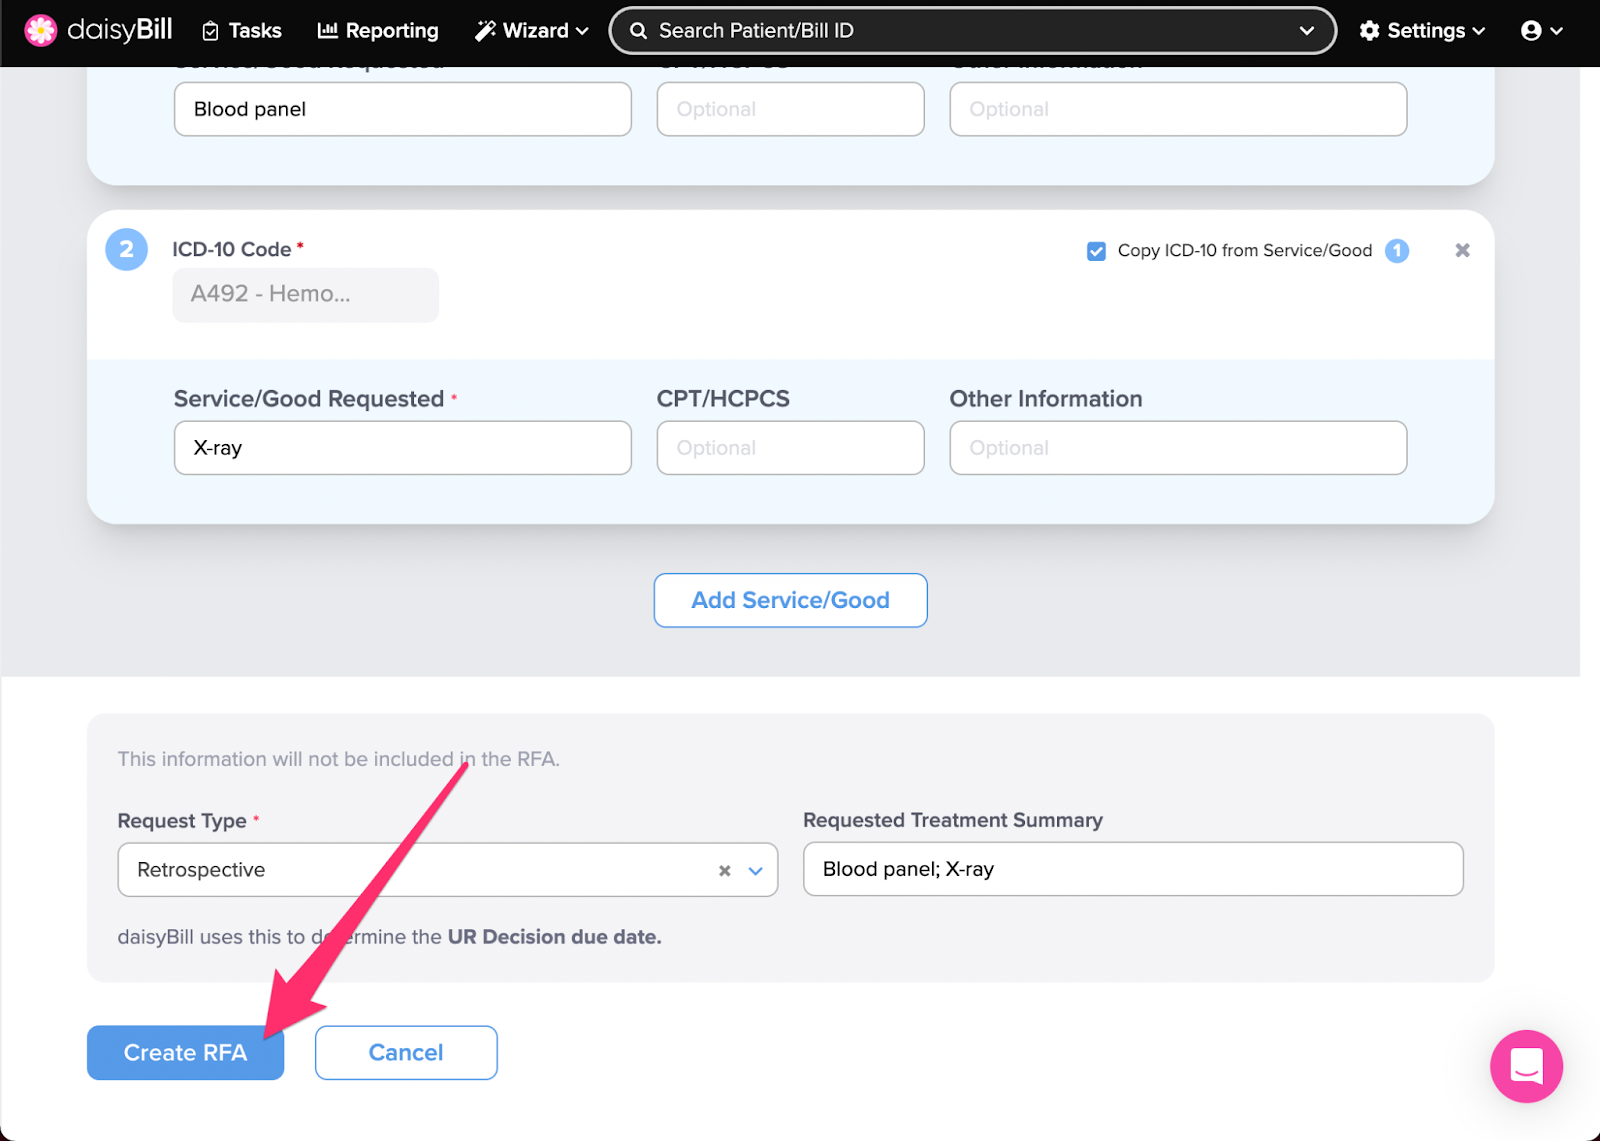
Step 12. Click ‘Create RFA’
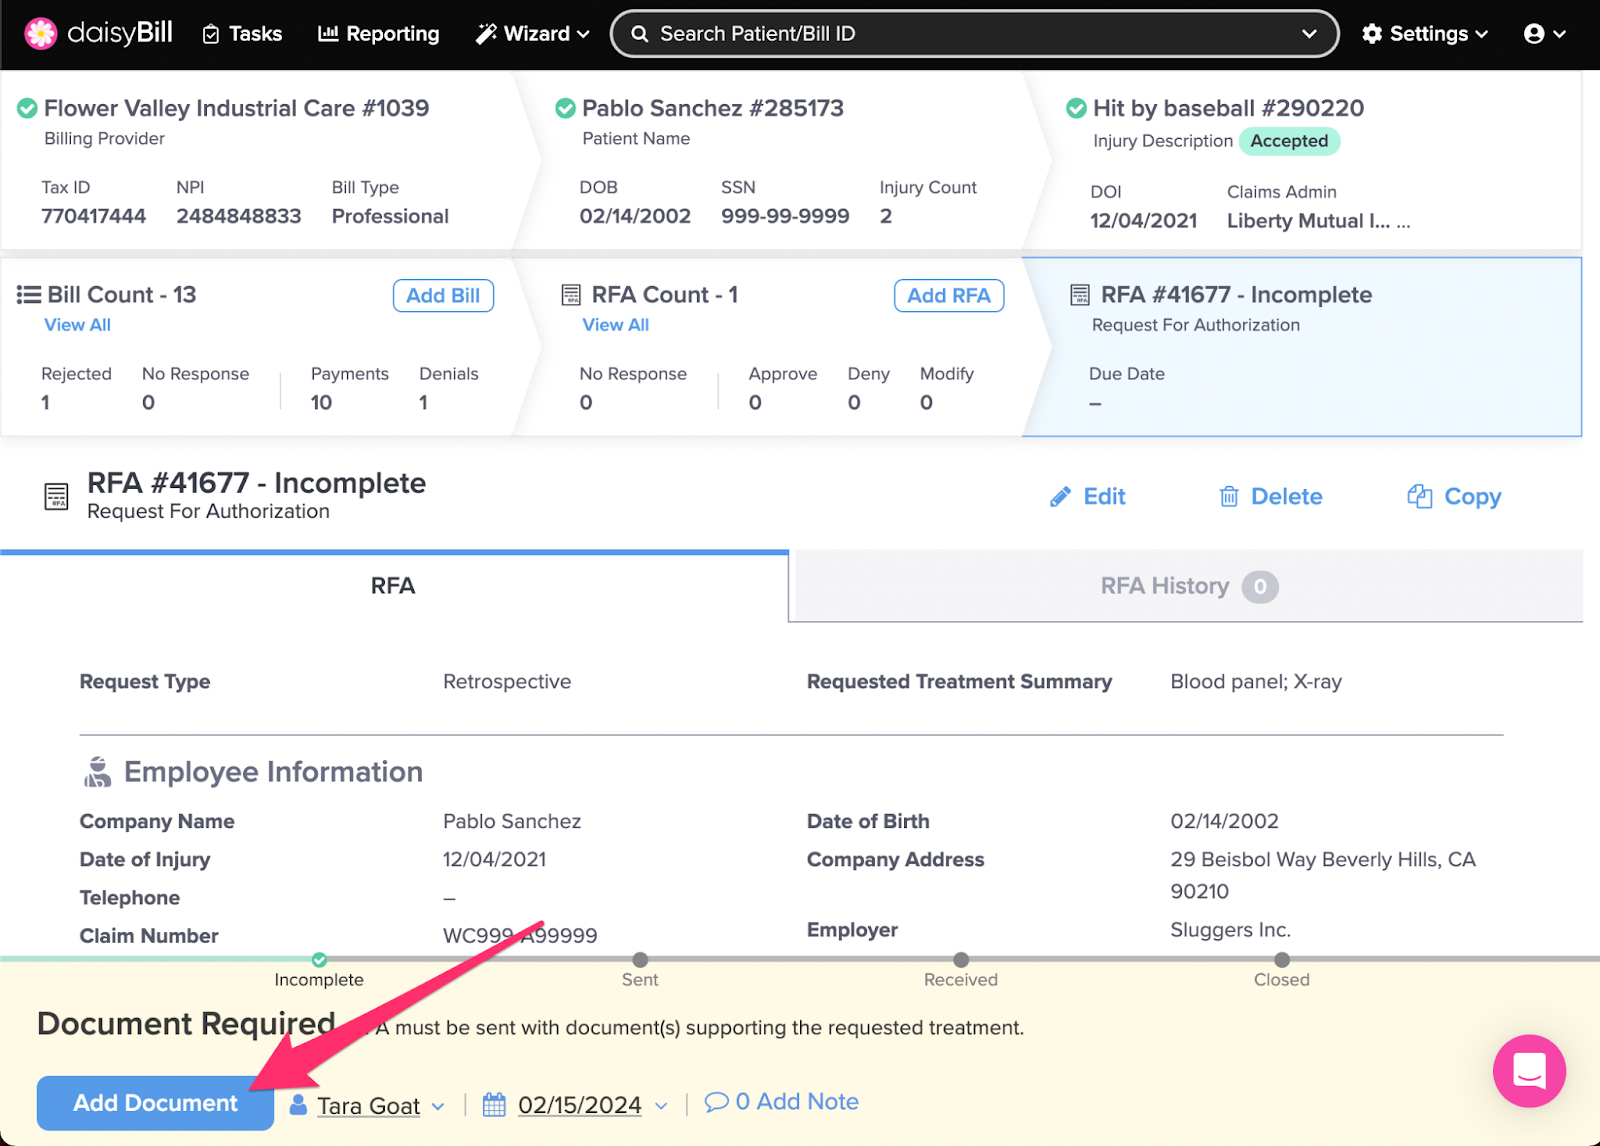
Step 13. To add Supporting Documents, click ‘Add Document’, then upload documents
Supporting Documents are required. Multiple documents can be attached to the RFA. Click Add to upload Supporting Documents one of two ways:
- Drag and drop file(s) into the box
- Click ‘Select Files’ and search for file(s) to upload
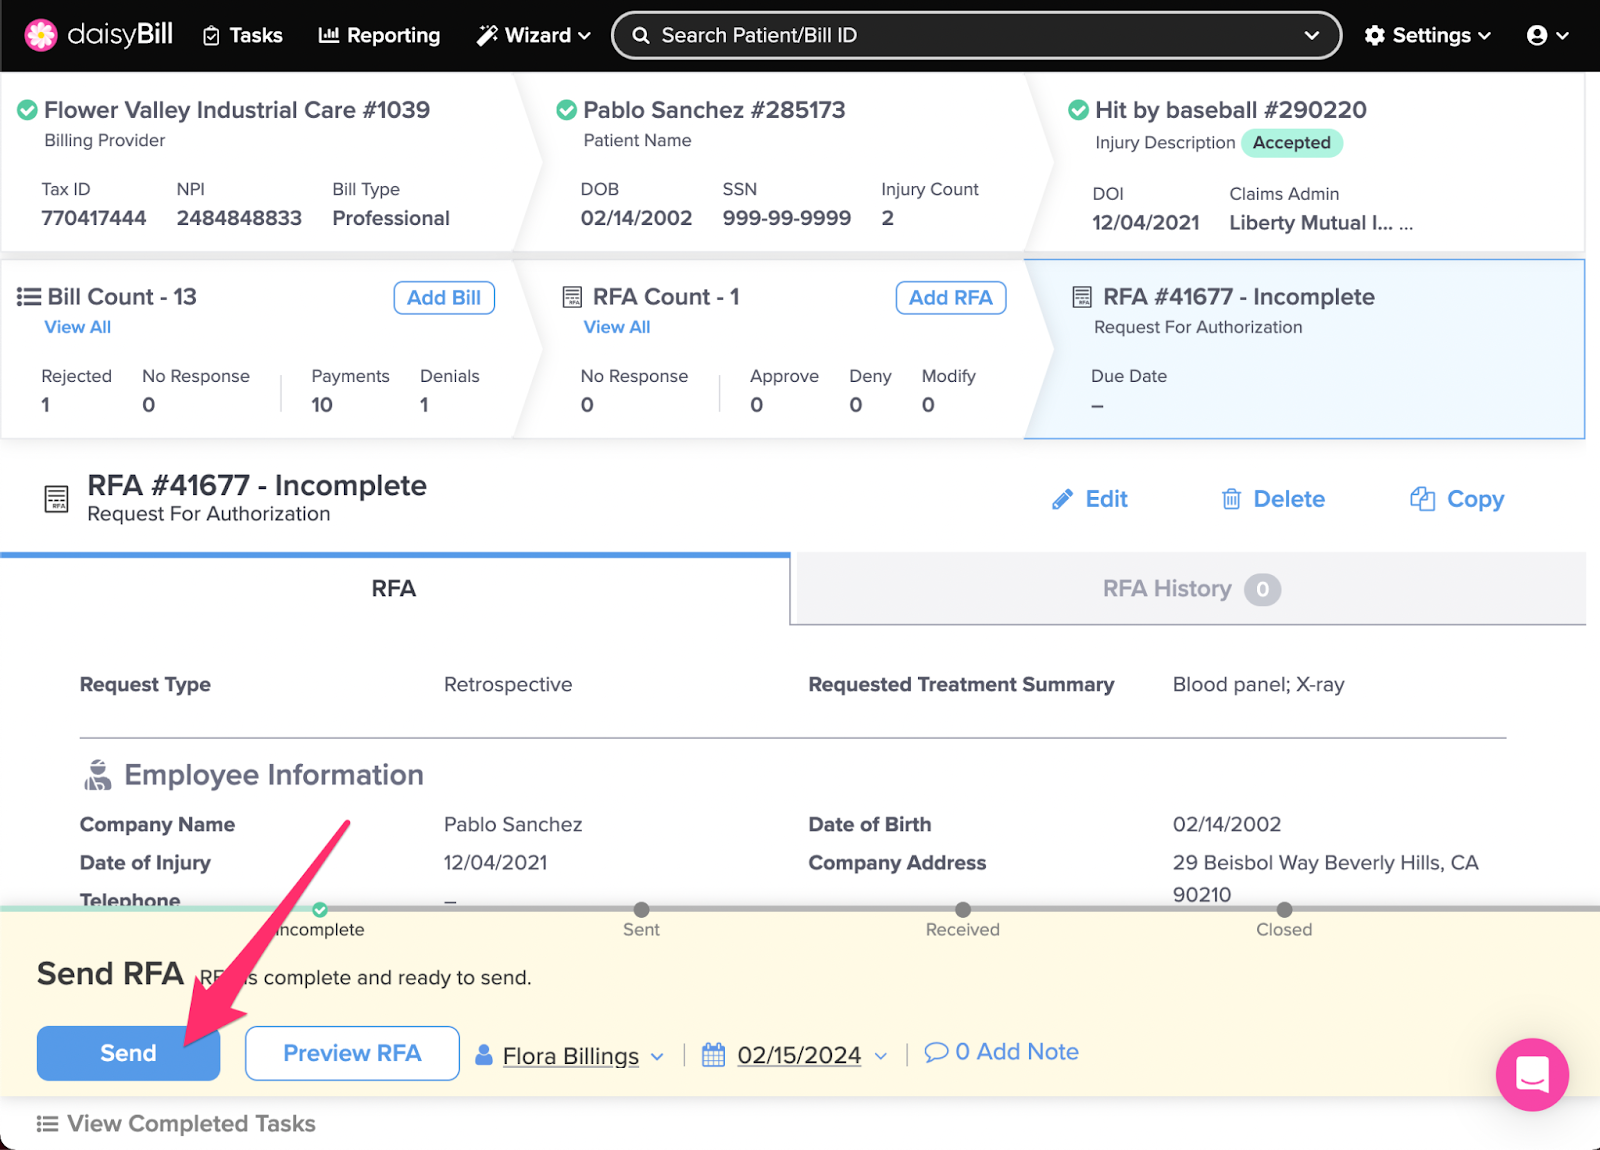
Step 14. Click ‘Send’
To preview the RFA before sending, click Preview RFA.
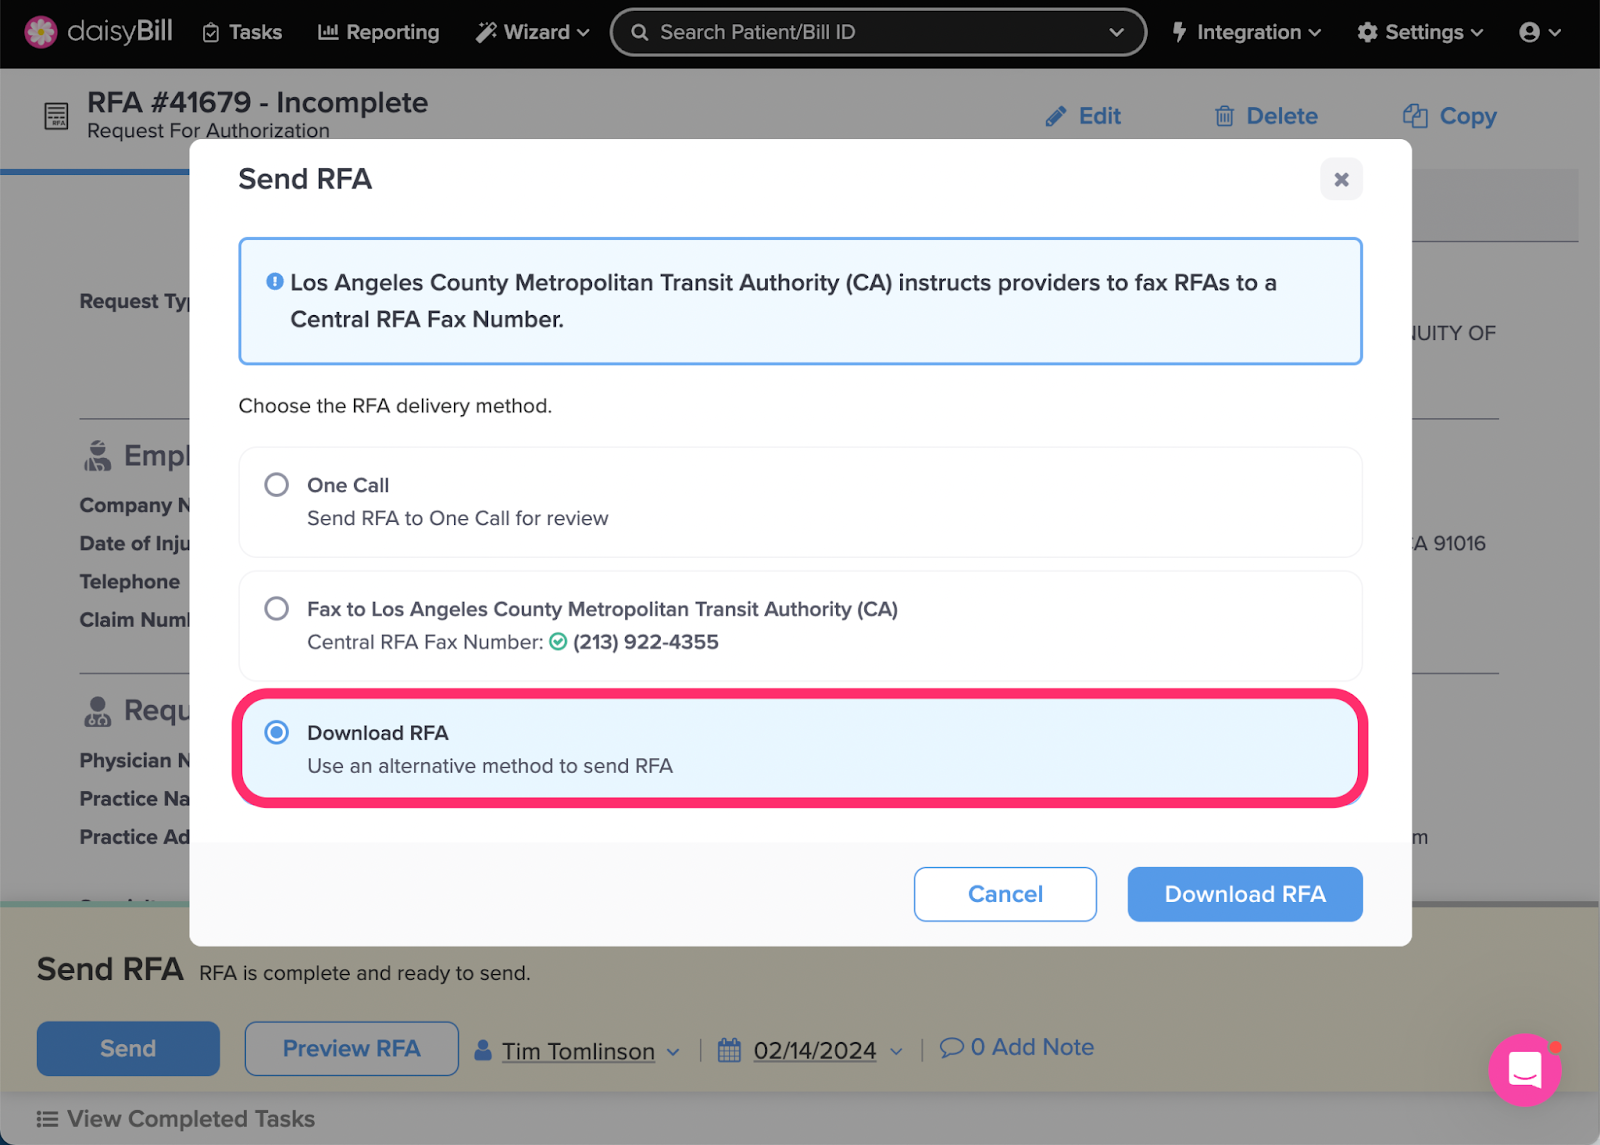
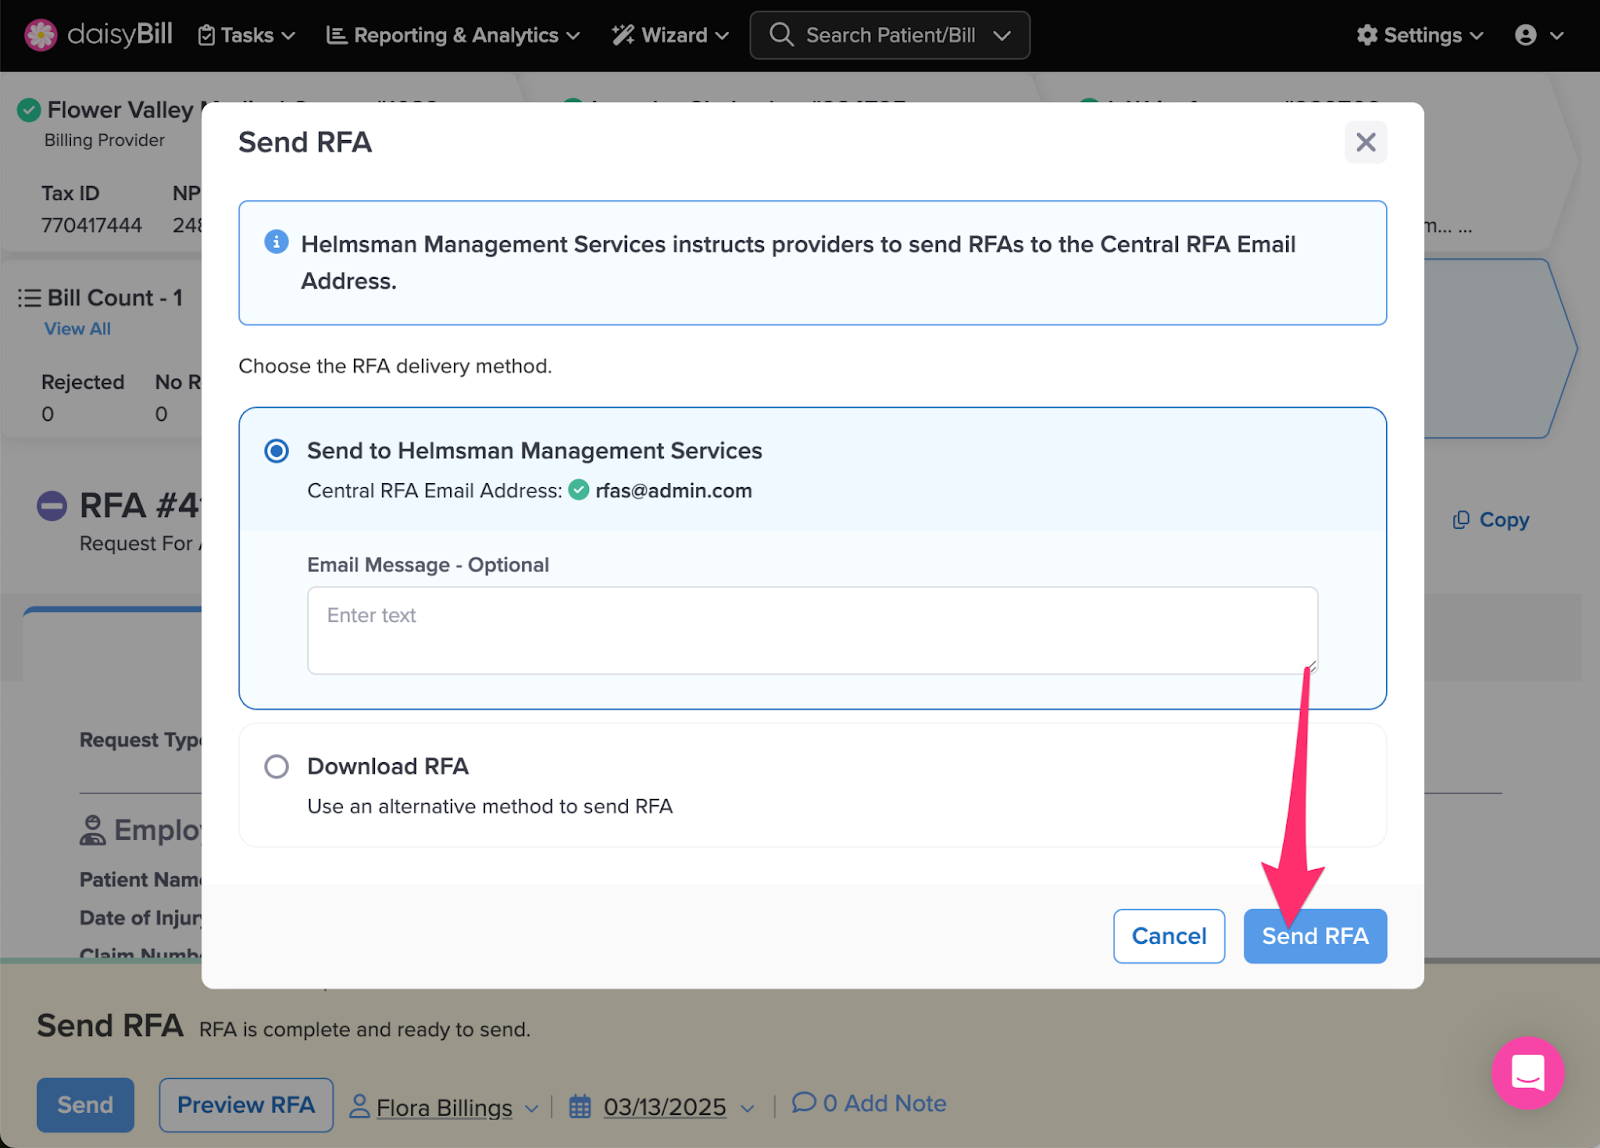
Step 15. Select your Recipient
Select RFAs, based on Claims Administrator and Service/Good Requested can be sent directly to One Call to manage. RFAs sent to One Call will receive Scheduling Information and Treatment Reports (where applicable) returned directly through daisyAuth via tasks.
All RFAs can be sent to the Claims Administrator, or can be downloaded to your computer.
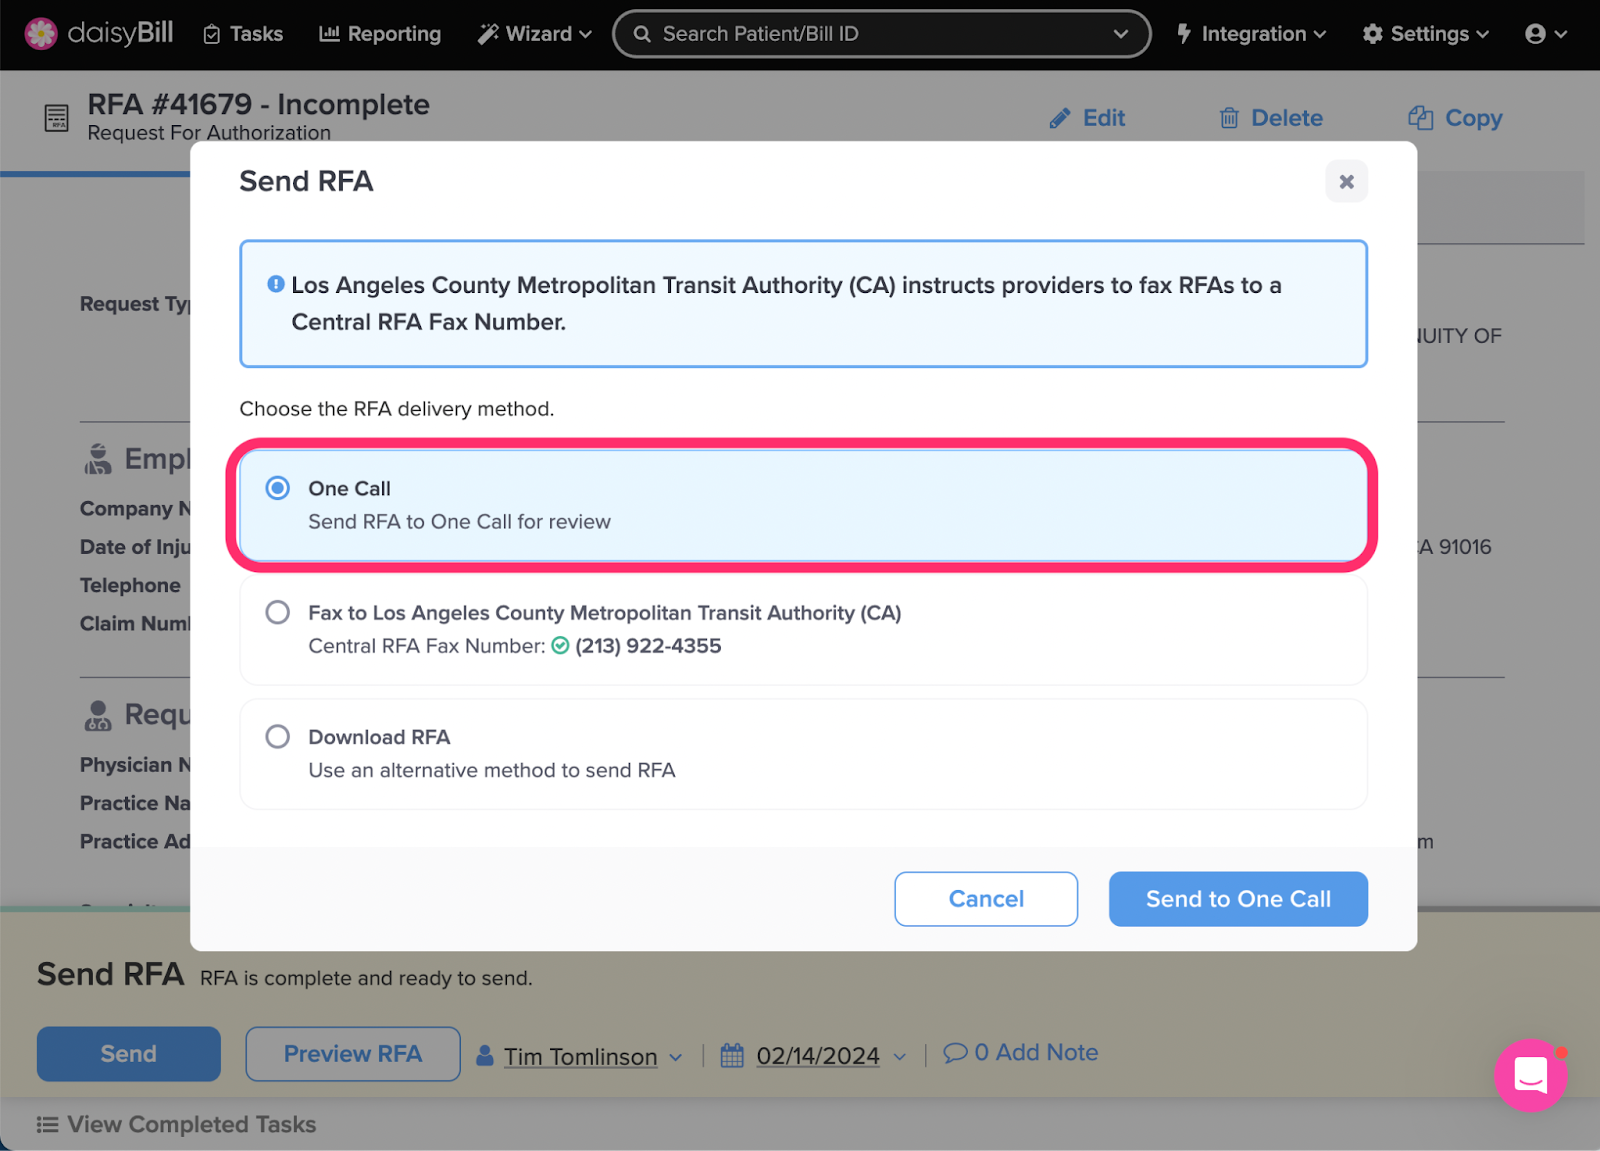
Select the claims administrator’s name to send the RFA to the claims administrator.
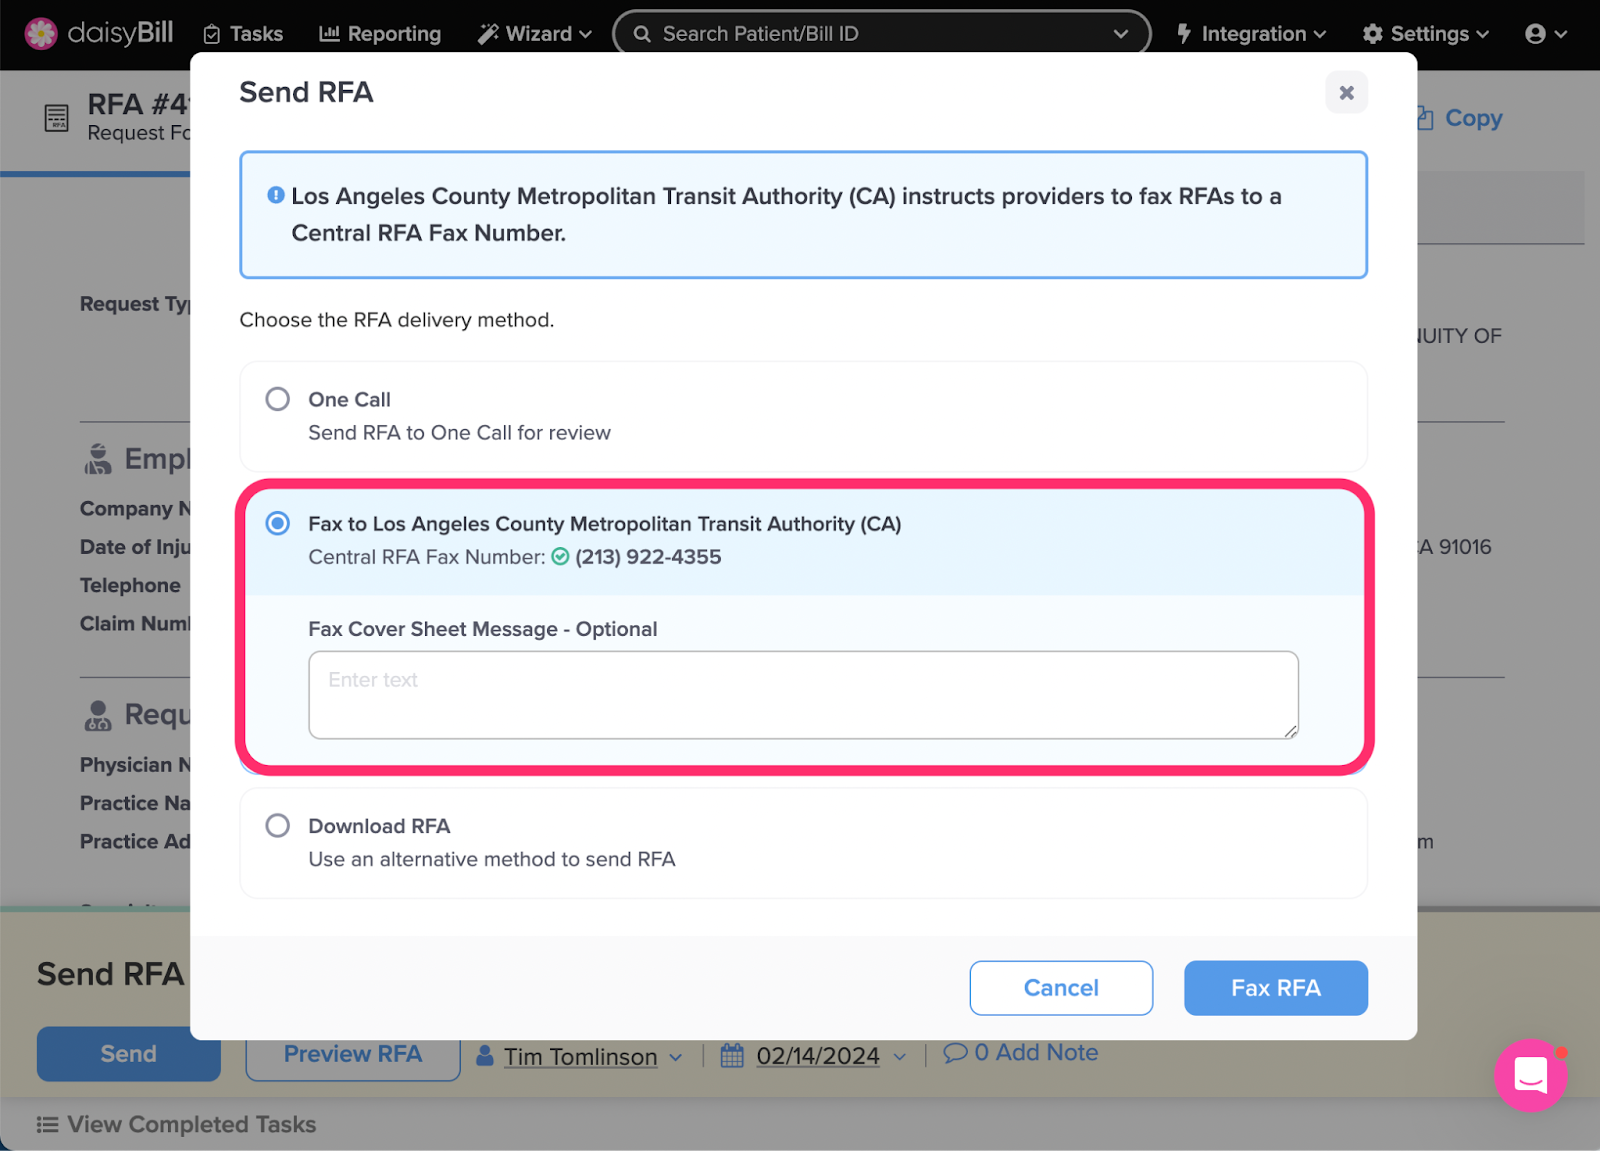
Select ‘Download Rfa’ to download the RFA to your computer for manual submission.
Step 16. Click ‘Send’
Once you have determined your recipient, click the blue ‘Send’ button to confirm your selection.
You’re all set!