Use Bill Write Off Reasons to track and report on write offs for all your Bills. For more information on applying Bill Write Off Reasons, see the Help Article: Apply Write Off Reasons.
Step 1. On the navigation bar, click ‘Settings’, then click the name of the Billing Provider
This will navigate directly to the specified Billing Provider.
The Billing Provider Settings feature is limited to users with the Role of Administrator. For daisyBill accounts with multiple Billing Providers, daisyBill maintains separate Documents for each Billing Provider.
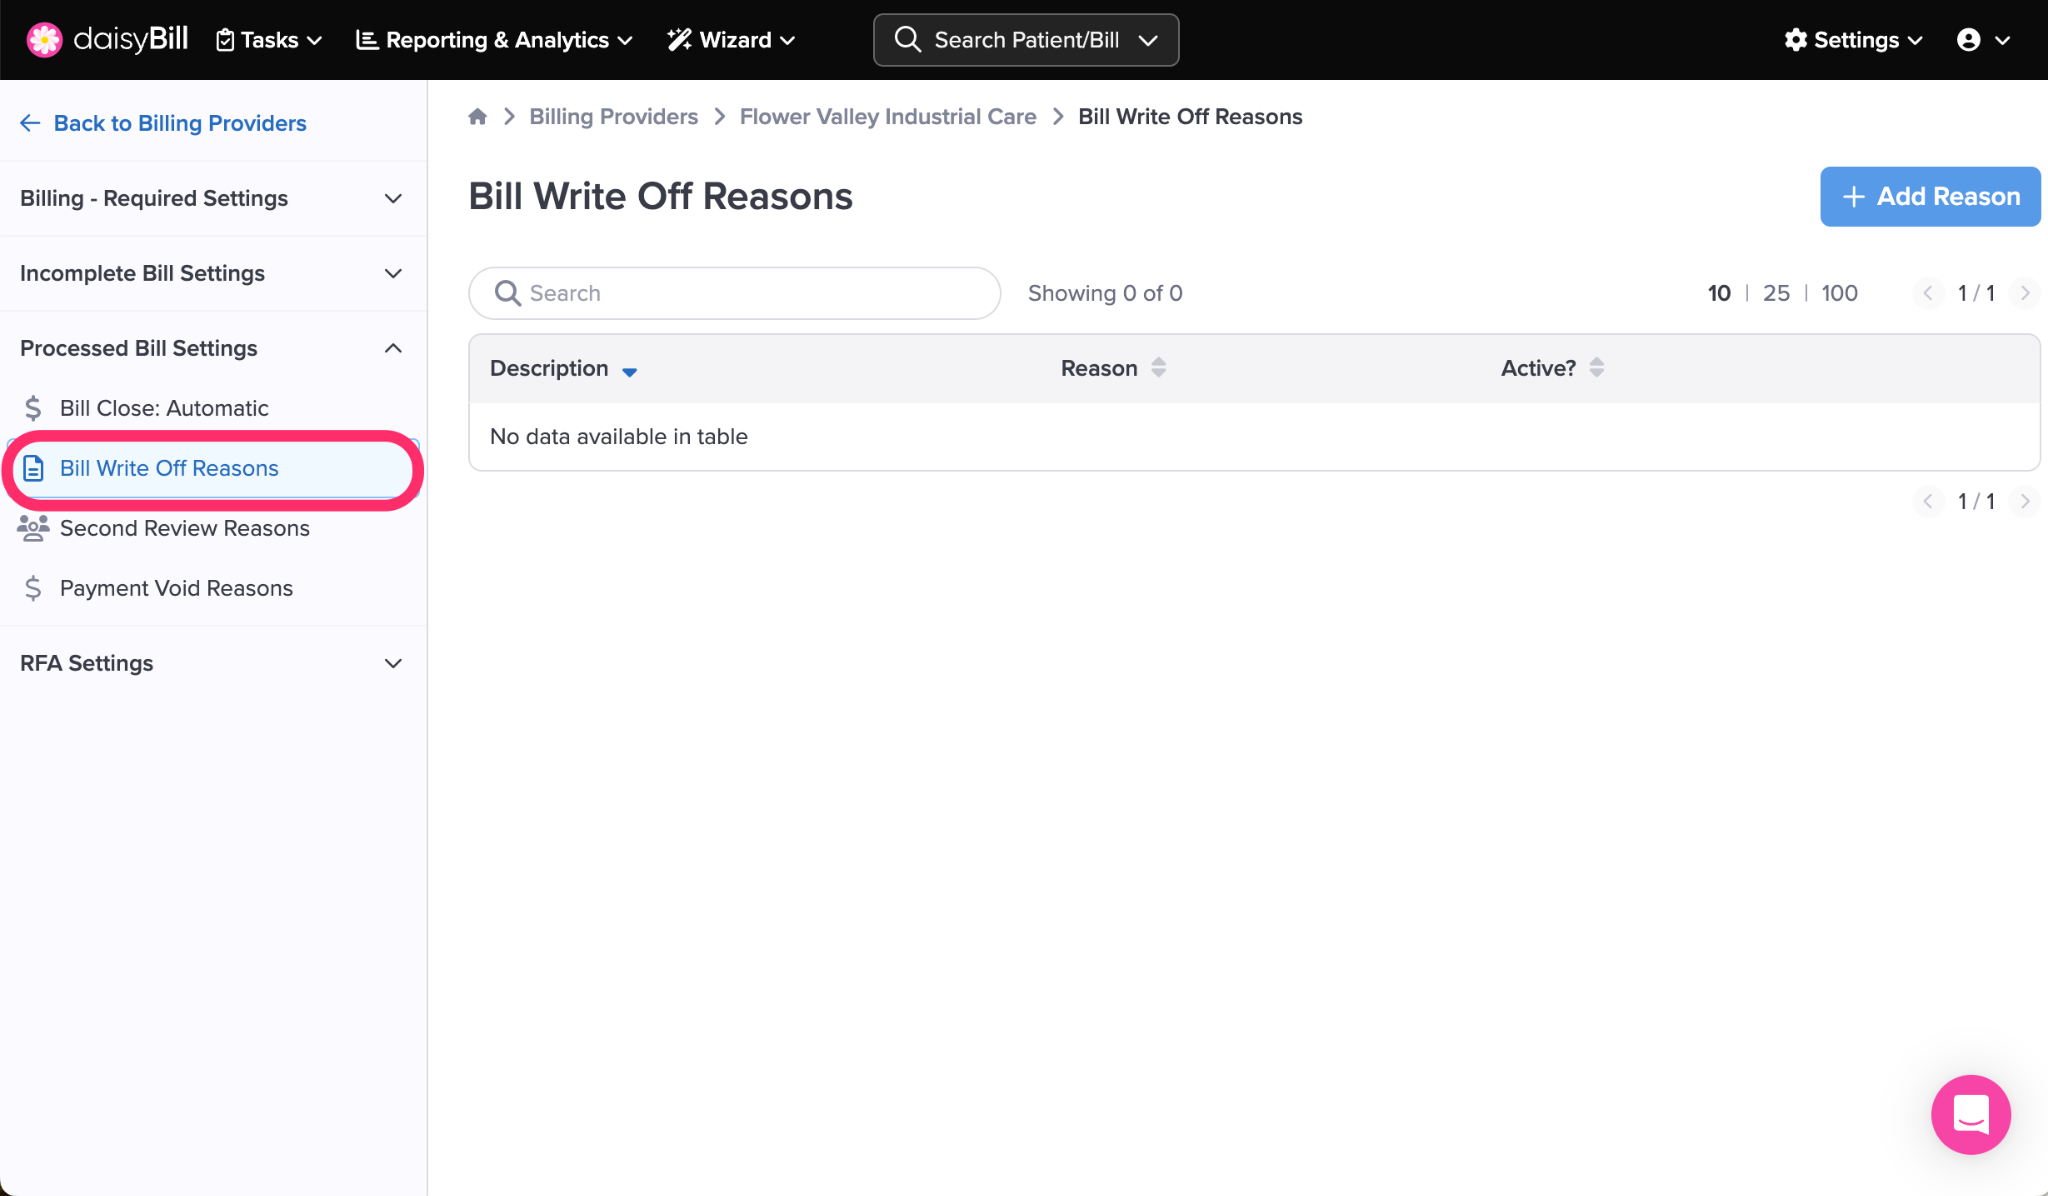
Step 2. Click the ‘Bill Write Off Reasons’ tab
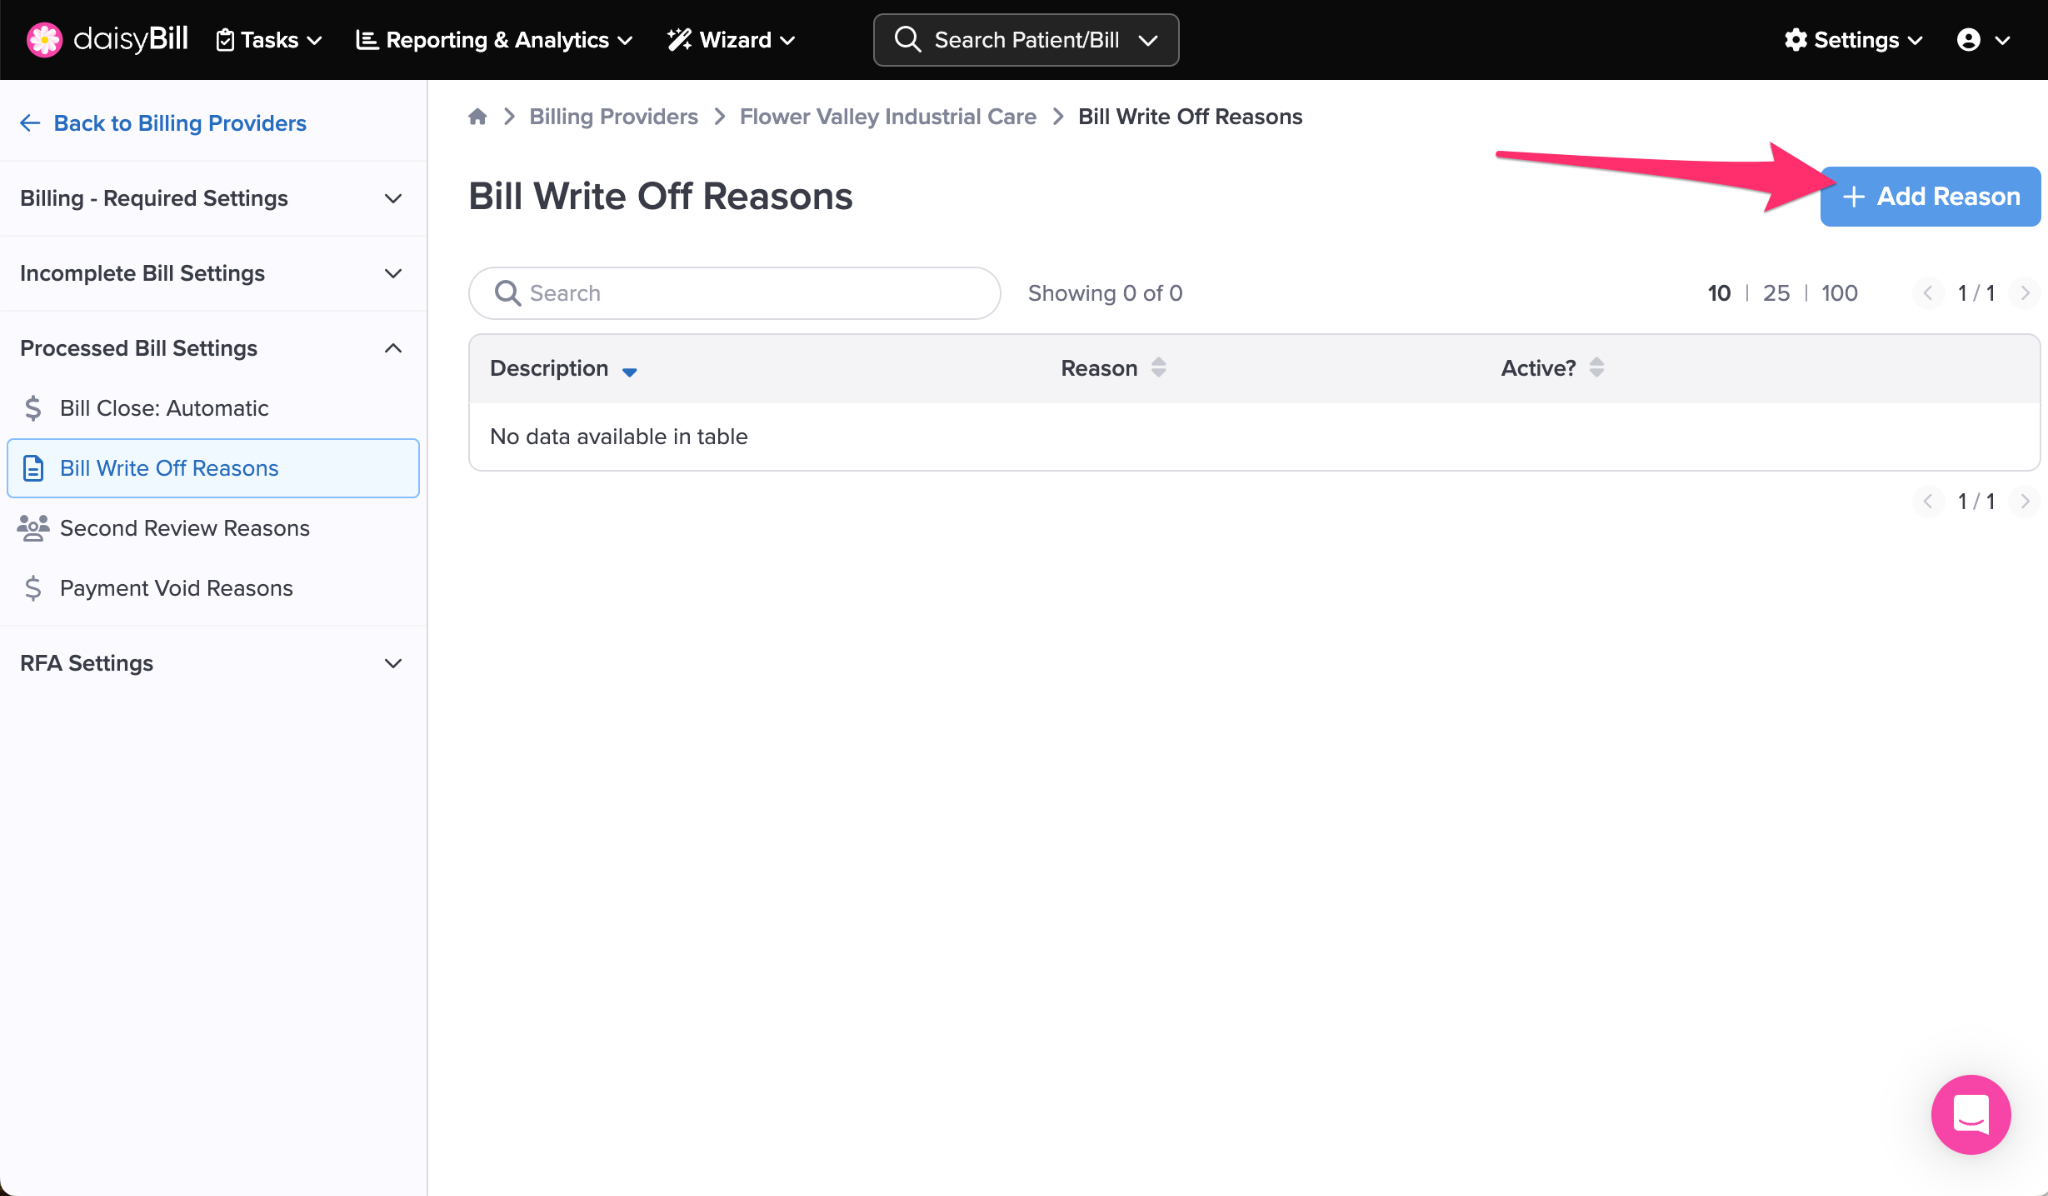
Step 3. To add a new ‘Bill Write Off Reason,’ click the ‘Add Reason’ button
Step 4. Enter the ‘Description’ and ‘Reason’, then click the ‘Add’ button
Create an easily identifiable Description of the Bill Write Off Reason. A good Description makes clear when the Bill Write Off Reason should be used.
In the Reason field, enter the language you want to appear on your Bill History when the Bill Write Off Reason is used. Click ‘Add Reason’ when done.
Step 5. To edit a ‘Bill Write Off Reason,’ click the ‘Edit’ icon
To deactivate a reason, toggle the ‘Active’ button
Step 6. To delete a ‘Bill Write Off Reason,’ click the ‘Trash can’ icon
Voila!