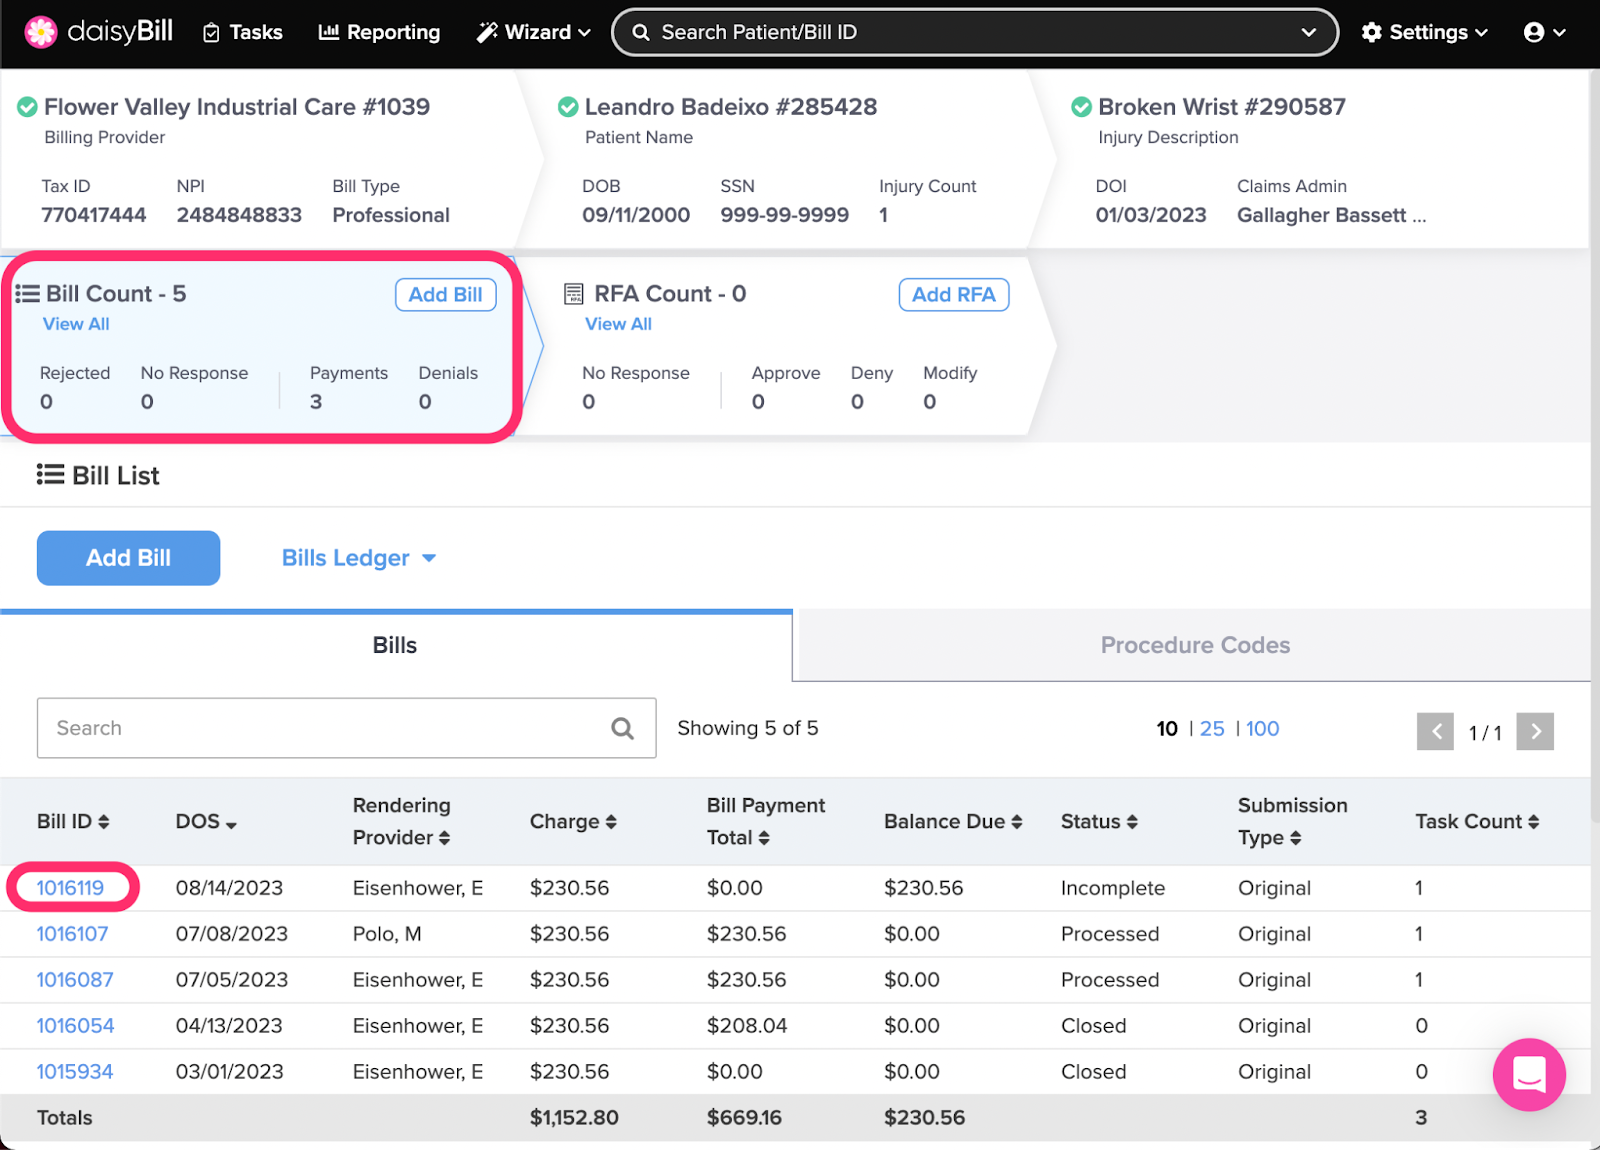
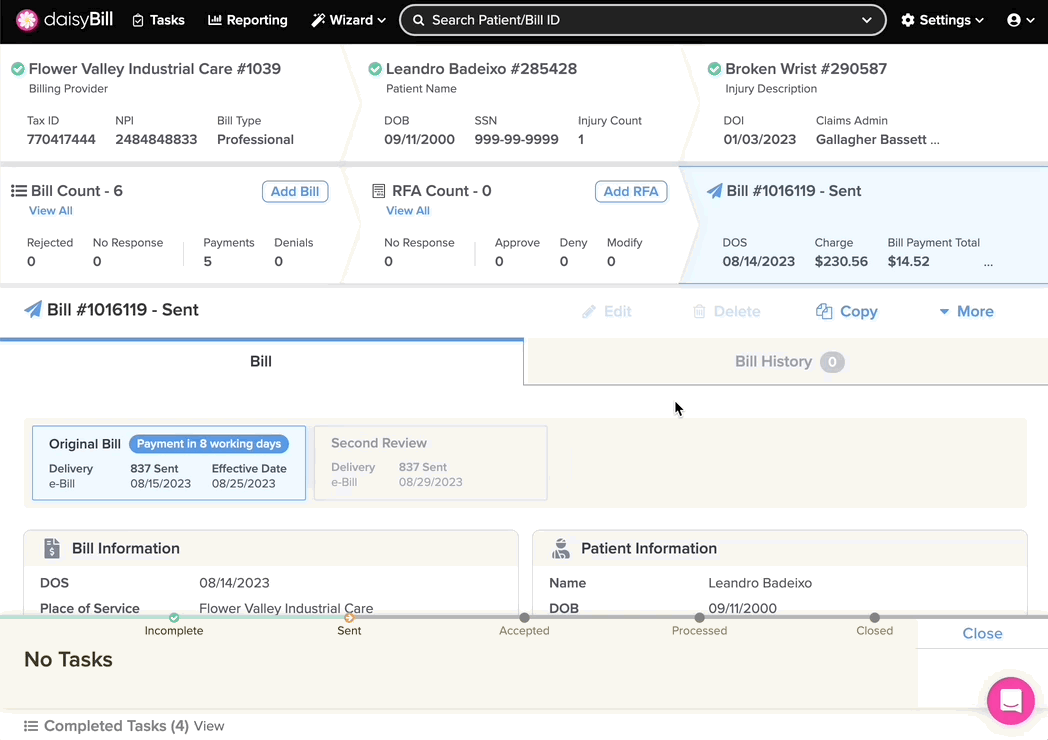
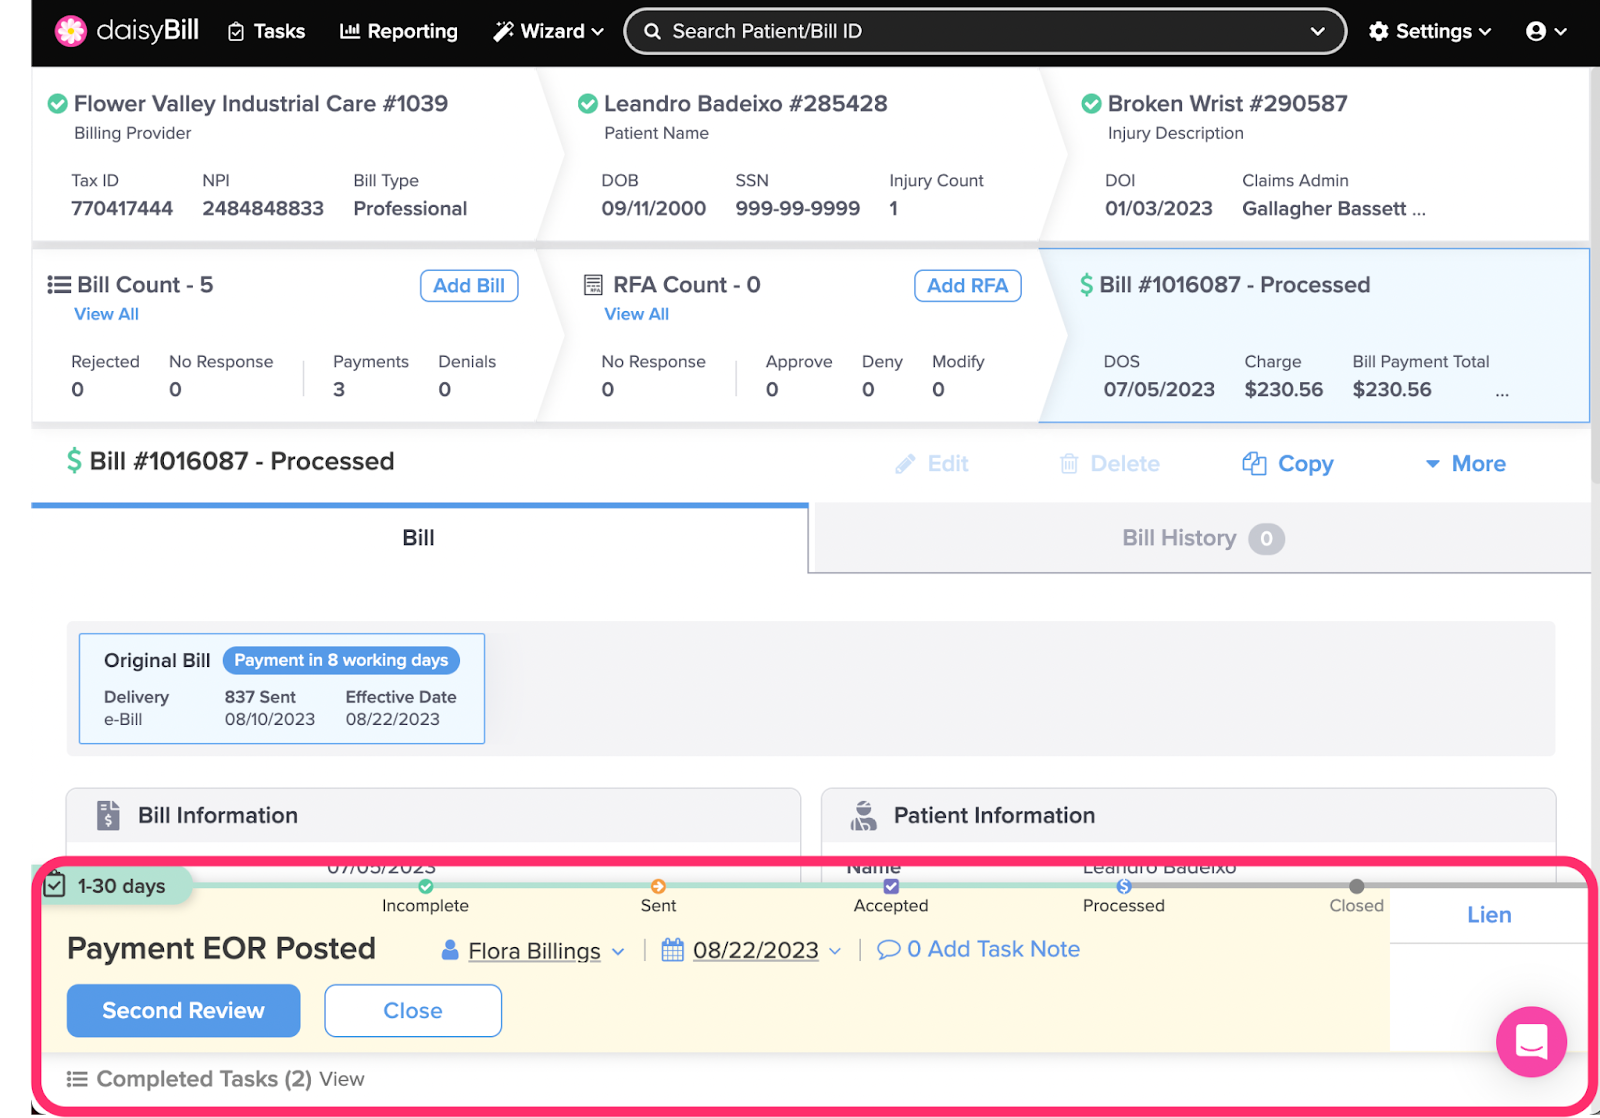
Here we are. The main event! From the Bill Page you can view and work on a specific Bill.
You can manage bills with these functions:
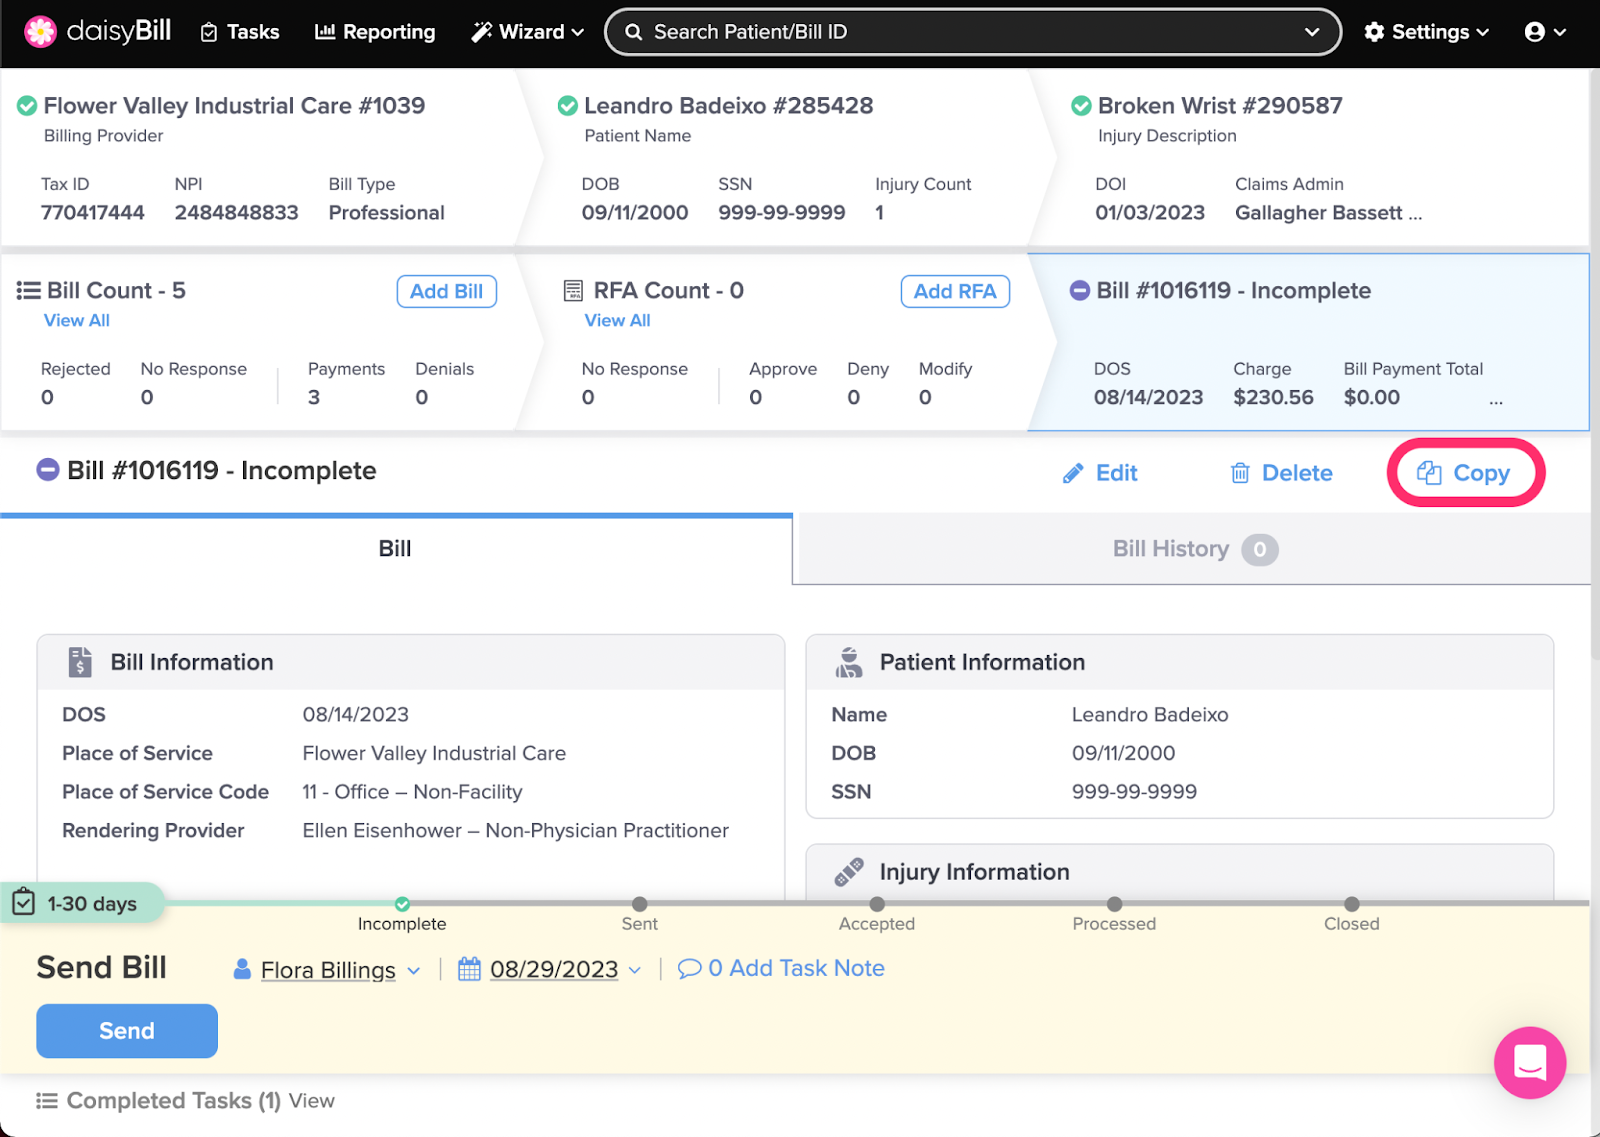
A. From ‘List of Bills,’ click on the Bill ID to view its details
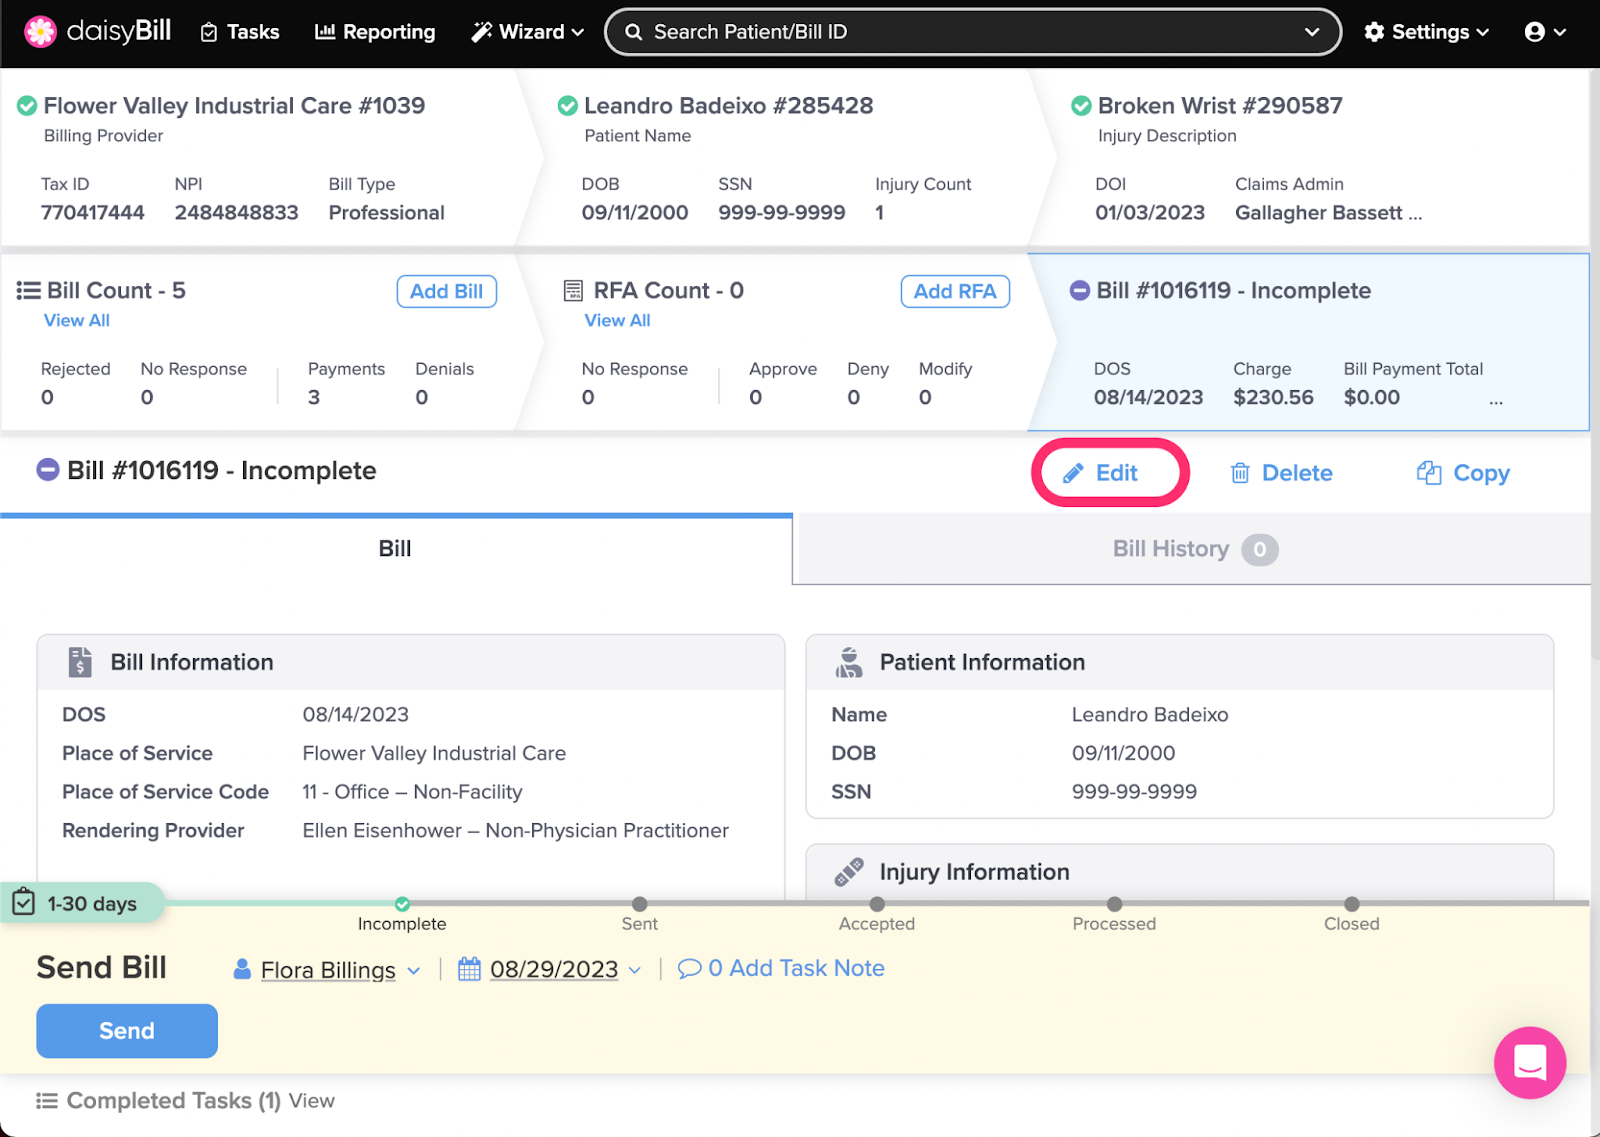
B. To edit a Bill, click ‘Edit’
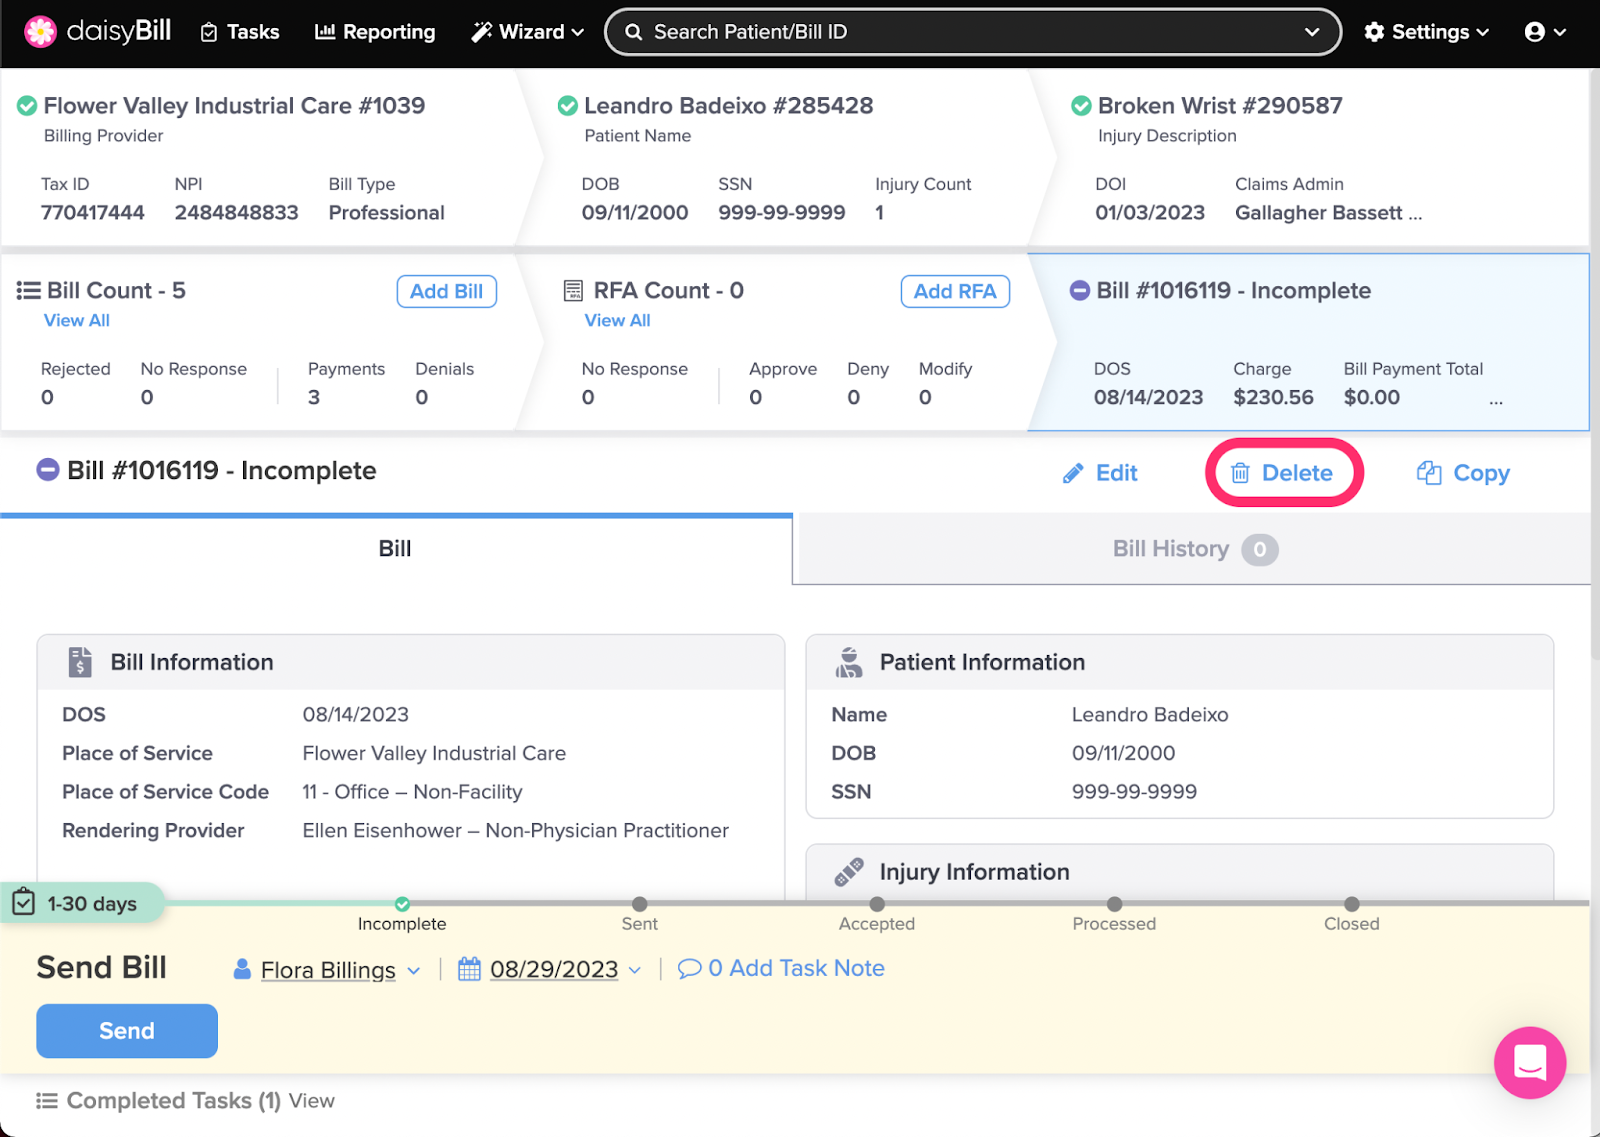
C. To delete a Bill, click ‘Delete’
D. To copy a Bill, click ‘Copy’
E. To report a submission error, click ‘More’, then select ‘Report Error’
F. To forward a Bill, click ‘More’, then select ‘Forward’
G. To create an Audit Complaint, click ‘More’, then select ‘Audit Complaint’
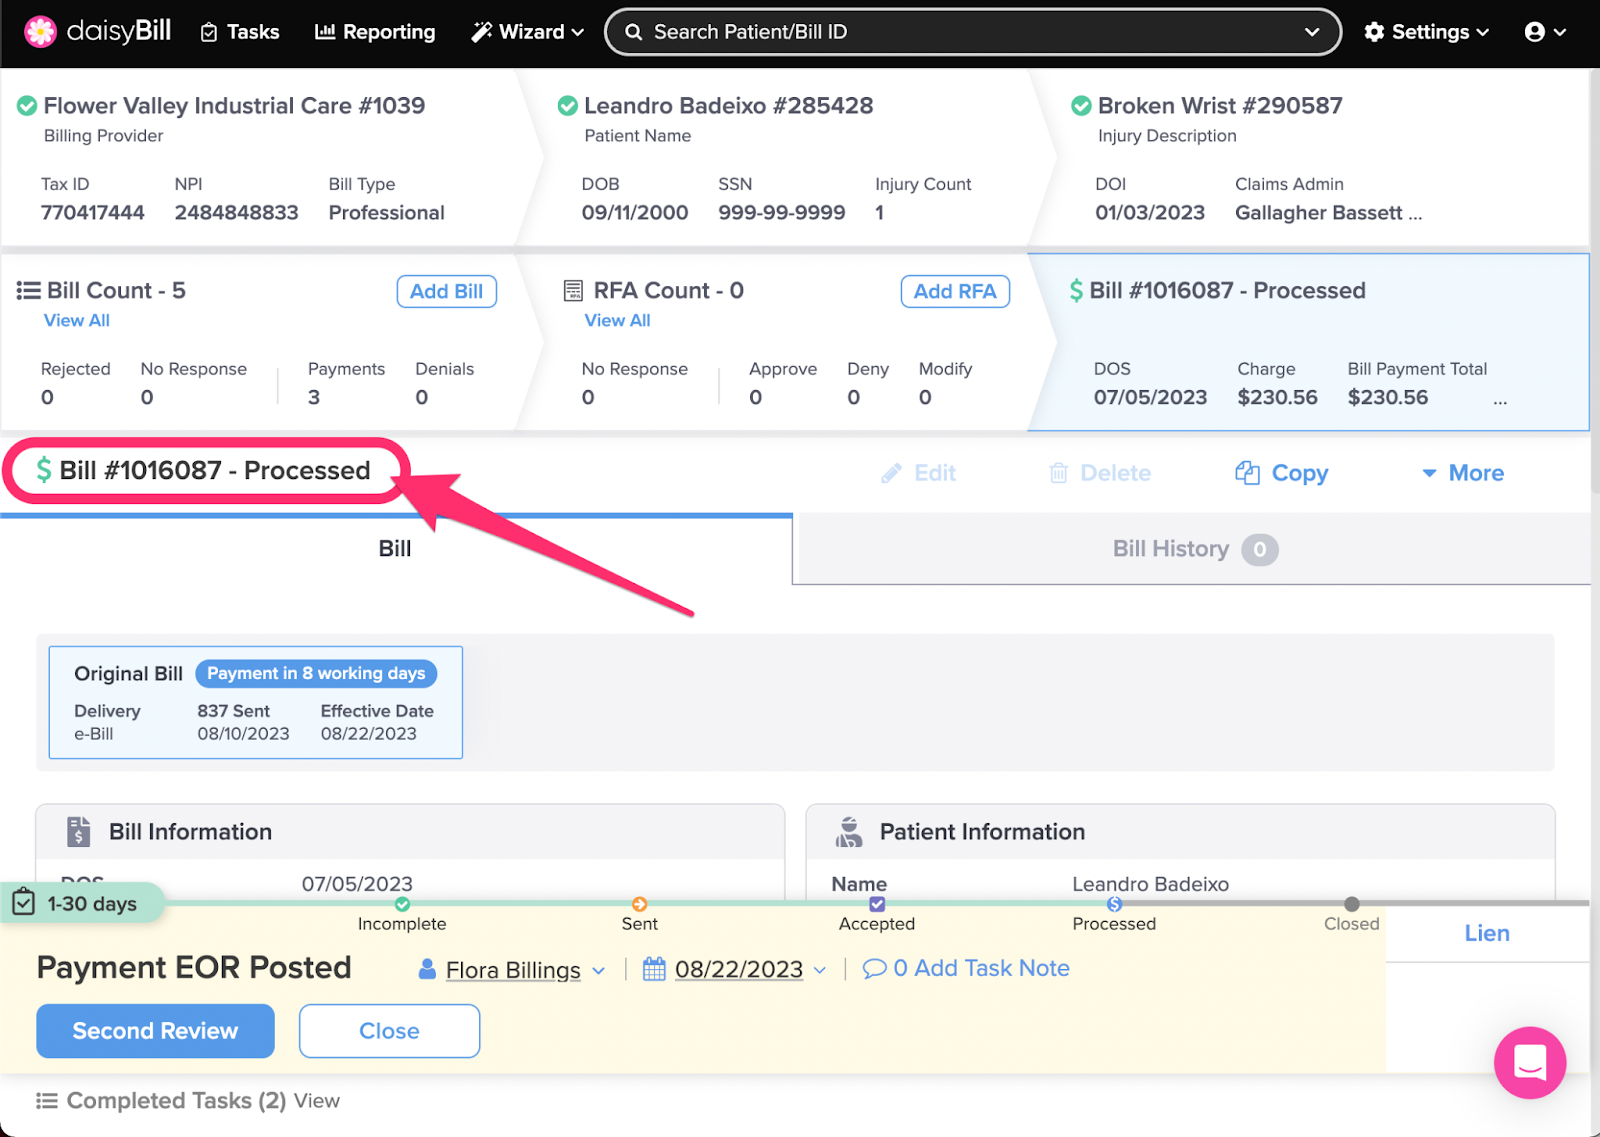
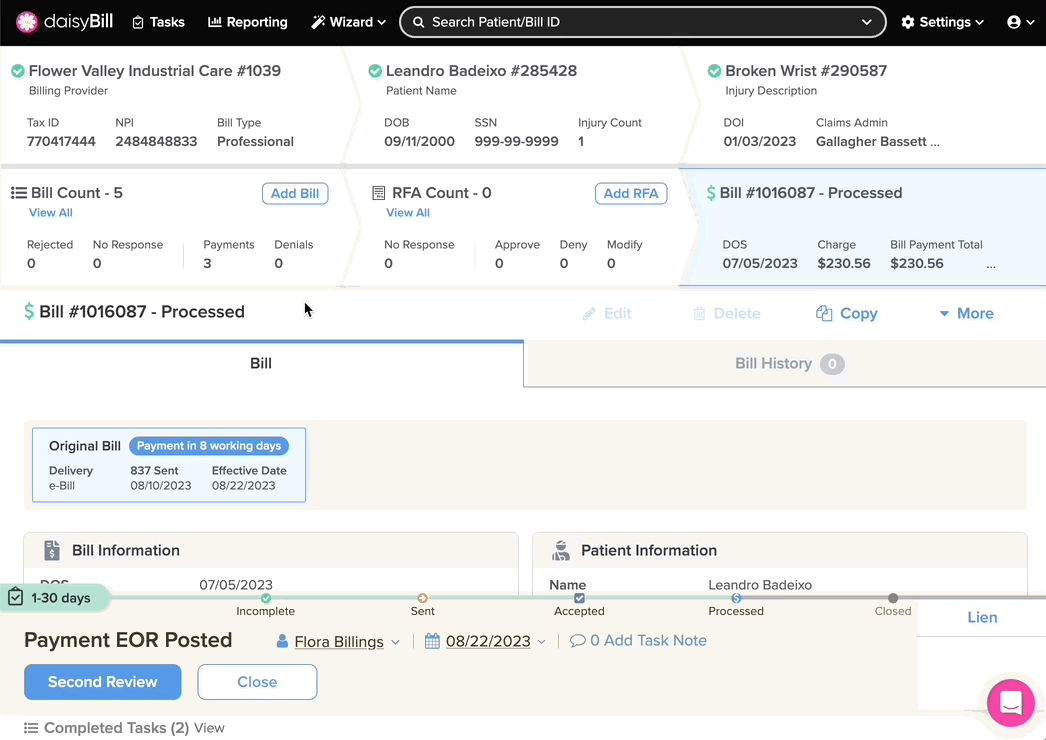
H. To view the bill history, click the ‘Bill History’ tab
I. To view details of each Bill Submission, click the Submission Tabs
J. To view Procedure Code details click the ‘i’ icon next to the Procedure Code
K. To view a Document submitted with your Bill, click its filename under ‘Documents Sent’
L. To view the CMS 1500, click ‘837 (e-Bill) - CMS 1500’
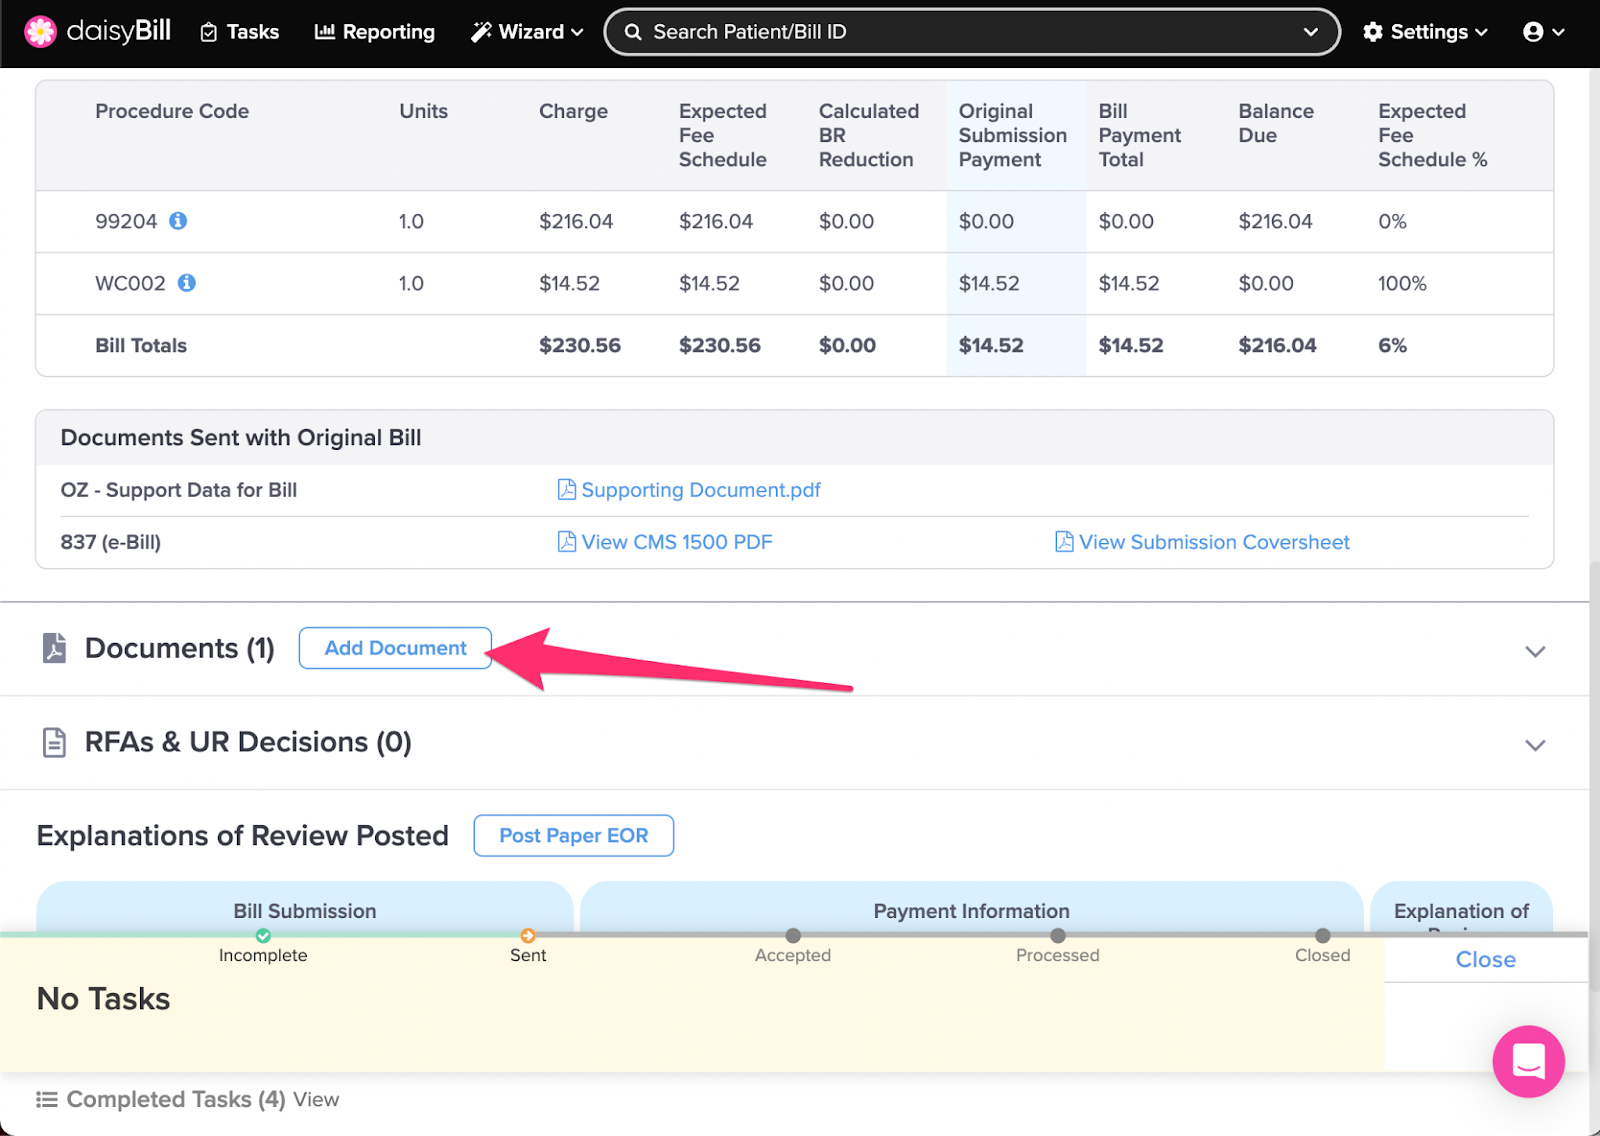
M. To add Documents, click ‘Add Document’
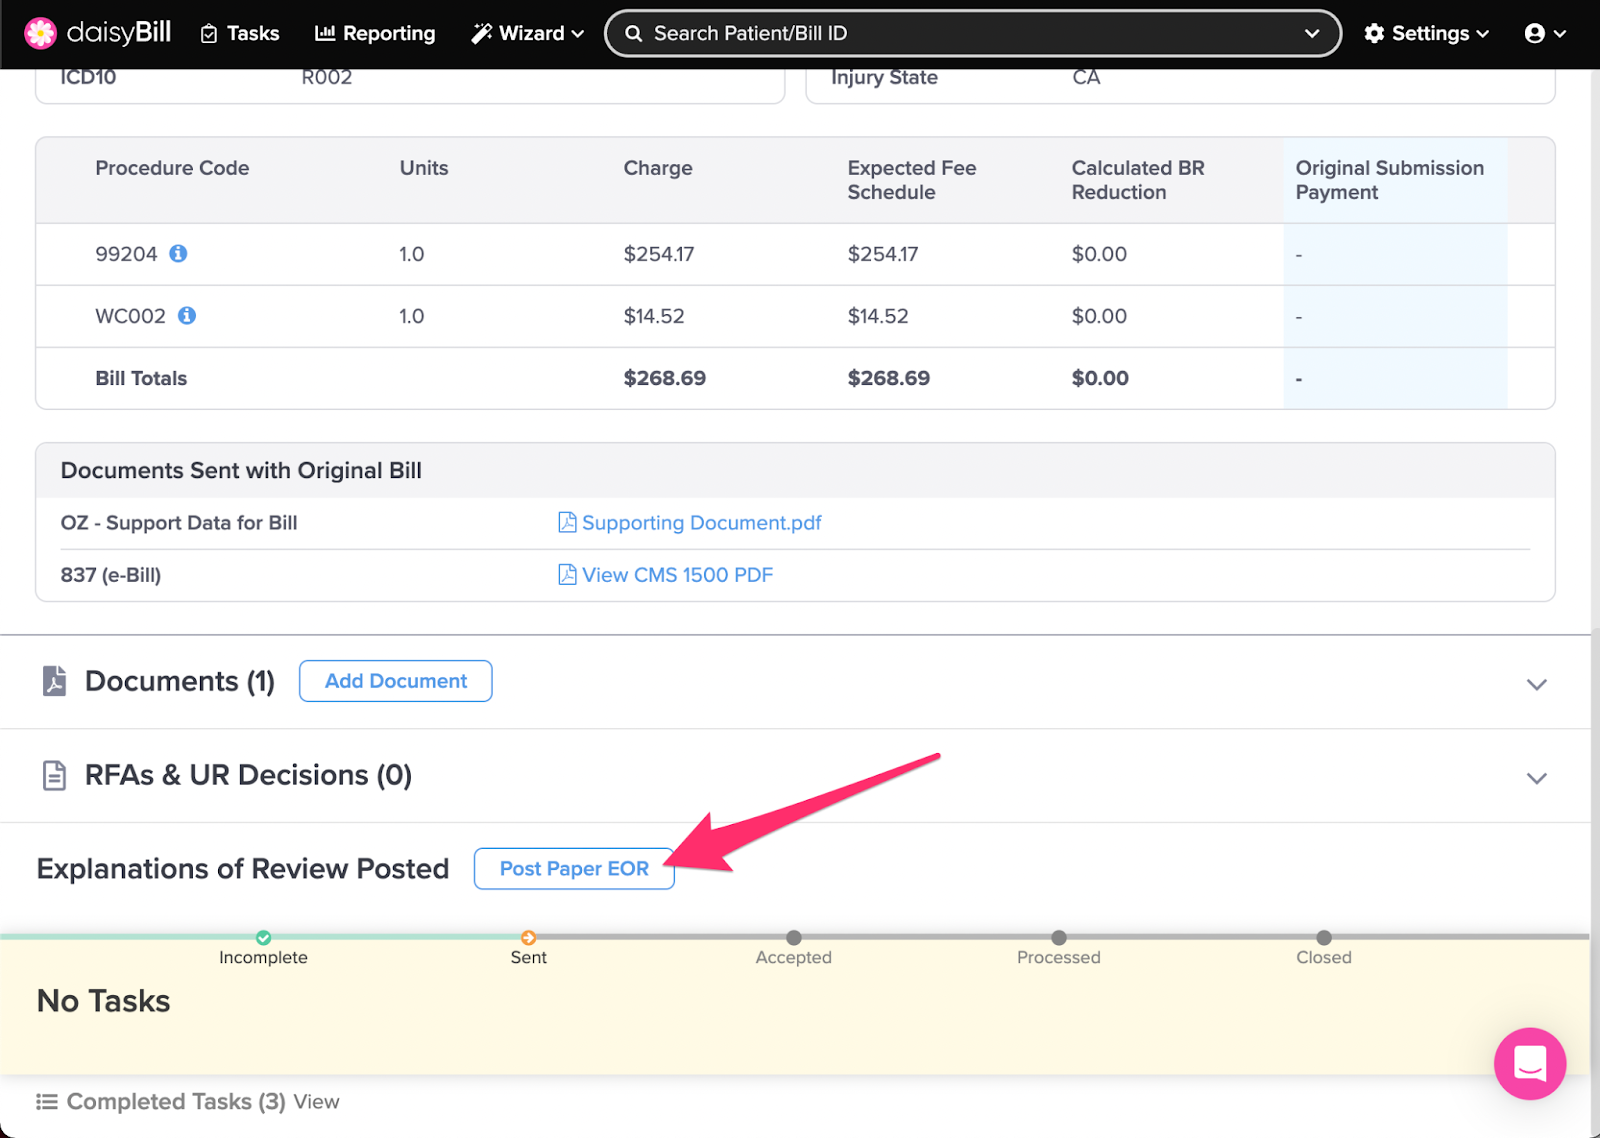
N. To post a paper EOR, click ‘Post EOR’
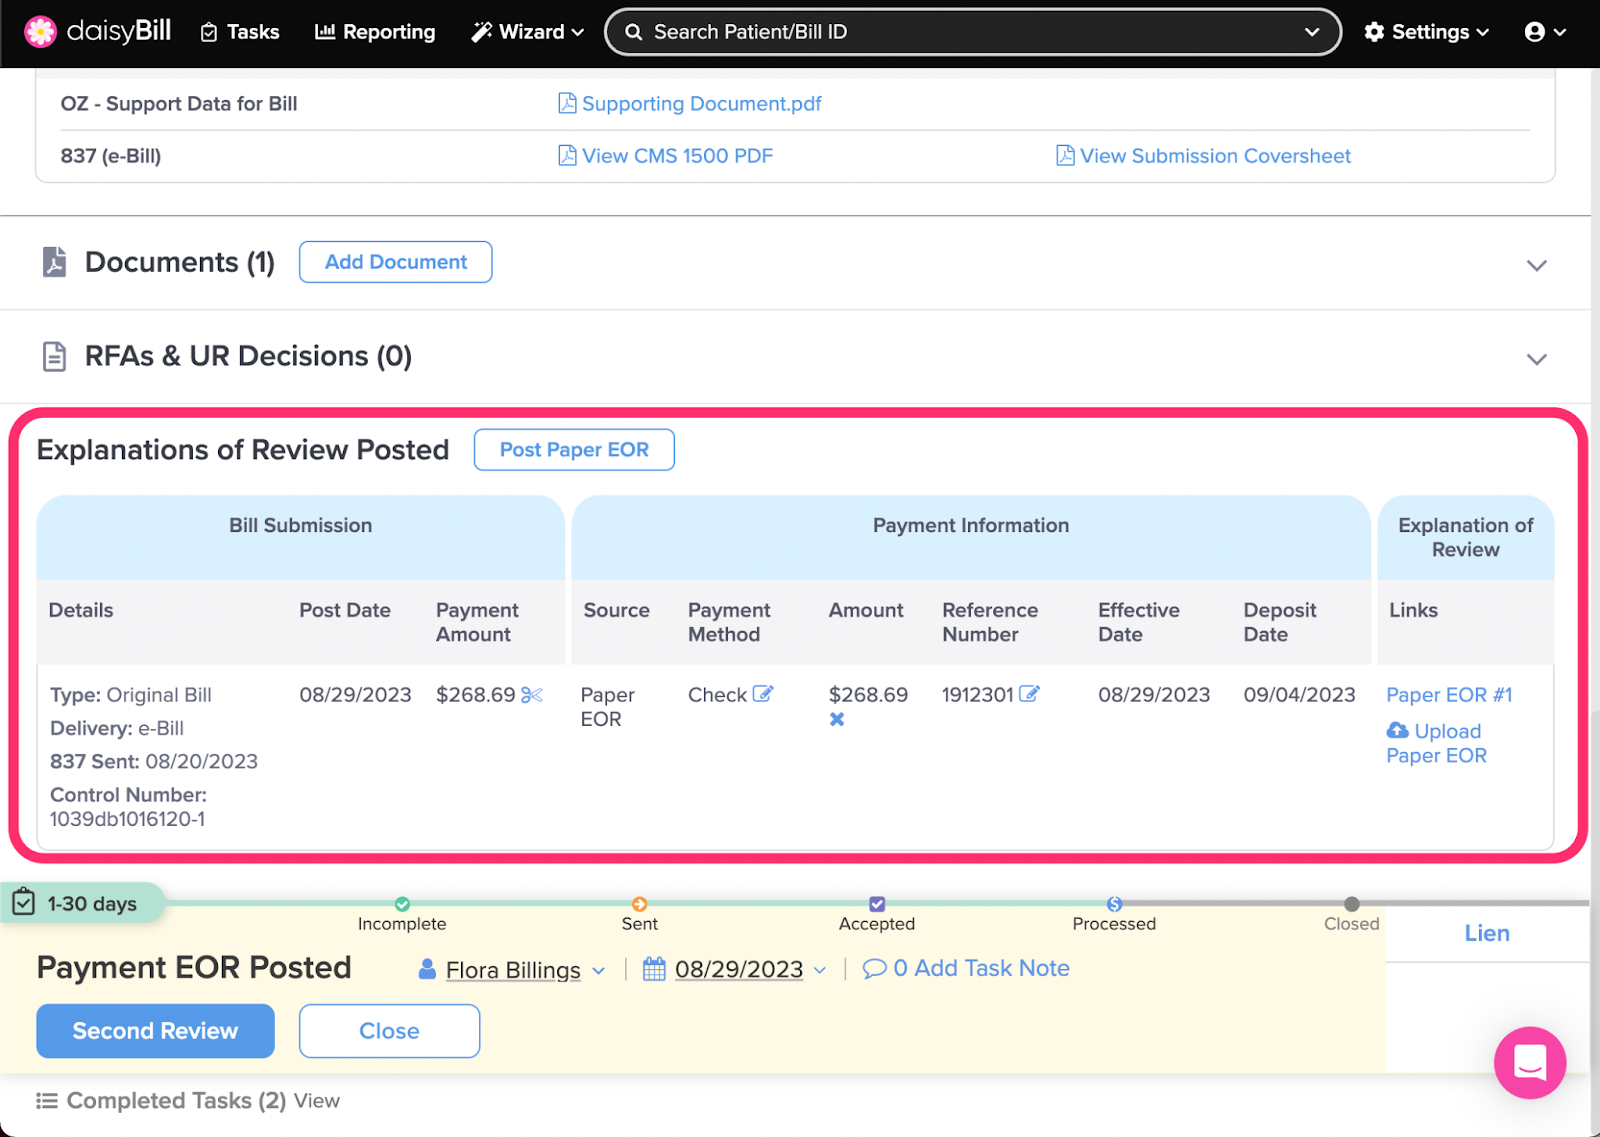
O. View posted EORs in Explanations of Review Posted
P. To determine next steps, view the ‘Action Bar’
A. From ‘List of Bills,’ click on the Bill ID to view its details
A bill’s ID will also always appear in the top left corner of the bill page.
B. To edit a Bill, click ‘Edit’
Edit Original Bills in Incomplete or Rejected Status. For more information, see the Help Article: Edit Bill.
Once sent, a bill cannot be modified, deleted, or rescinded.
C. To delete a Bill, click ‘Delete’
Bills can be deleted at any time prior to being sent. A Bill cannot be deleted once sent. For more information, see the Help Article: Delete Bill.
D. To copy a Bill, click ‘Copy’
Copy creates an editable duplicate of the current Bill. For more information, see the Help Article: Copy Bill.
E. To report a submission error, click ‘More’, then select ‘Report Error’
The Report Error feature appears after a Bill has been sent. Use this functionality in the following circumstances:
- Documents Not On File - The claims administrator or bill review informed you that the bill submission supporting documents are not on file. daisyBill will review the submission and resubmit on your behalf.
- Other - Any other type of bill submission problem, other than an incorrect rejection or a submission not on file.
For an Incorrect Rejection, please report the error via the Rejected Bill task.
For a Submission not on File, please report the error via the No Response task.
For more information, see the Help Article: Report Error.

F. To forward a Bill, click ‘More’, then select ‘Forward’
The Forward feature appears after a Bill is sent. For more information, see the Help Article: Forward Bill Submission. Additional charges may apply for Bill forwards.
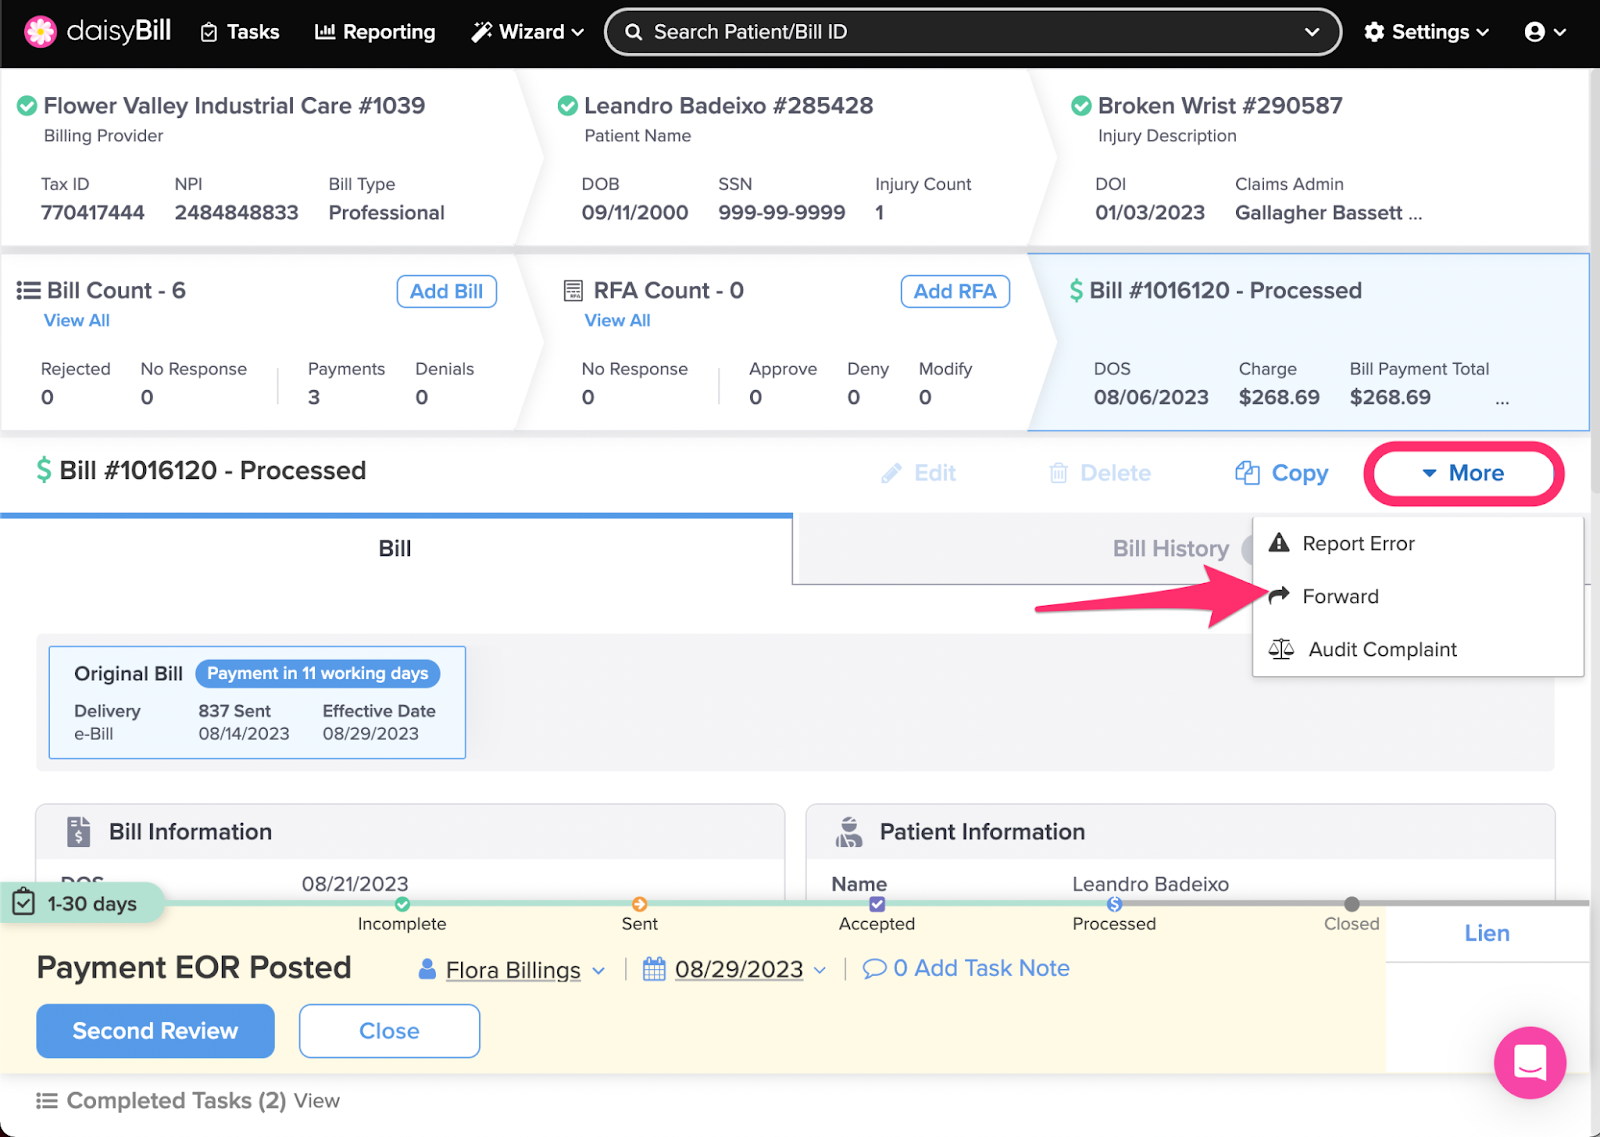
G. To create an Audit Complaint, click ‘More’, then select ‘Audit Complaint’
The Audit Complaint feature is applicable only to California bills and appears after a Bill is sent. For more information, see the Help Article: Create Audit Complaint.
H. To view the bill history, click the ‘Bill History’ tab
Bill History displays submission information, Task creation and completion information, claims administrator acknowledgements, payment information, and notes. For more information, see the Help Article: Bill History Explained.
I. To view details of each Bill Submission, click the Submission Tabs
Click through the tabs to view details of each Bill Submission. Help Article: Bill Submission Tabs
J. To view Procedure Code details click the ‘i’ icon next to the Procedure Code
From here you can view where the ‘Charge’ and ‘Expected Fee Schedule’ populate from (e.g. Practice Charge, By Report Code, or AG Modifier) and, when applicable, any Billing Ground Rules or NCCI Edits.
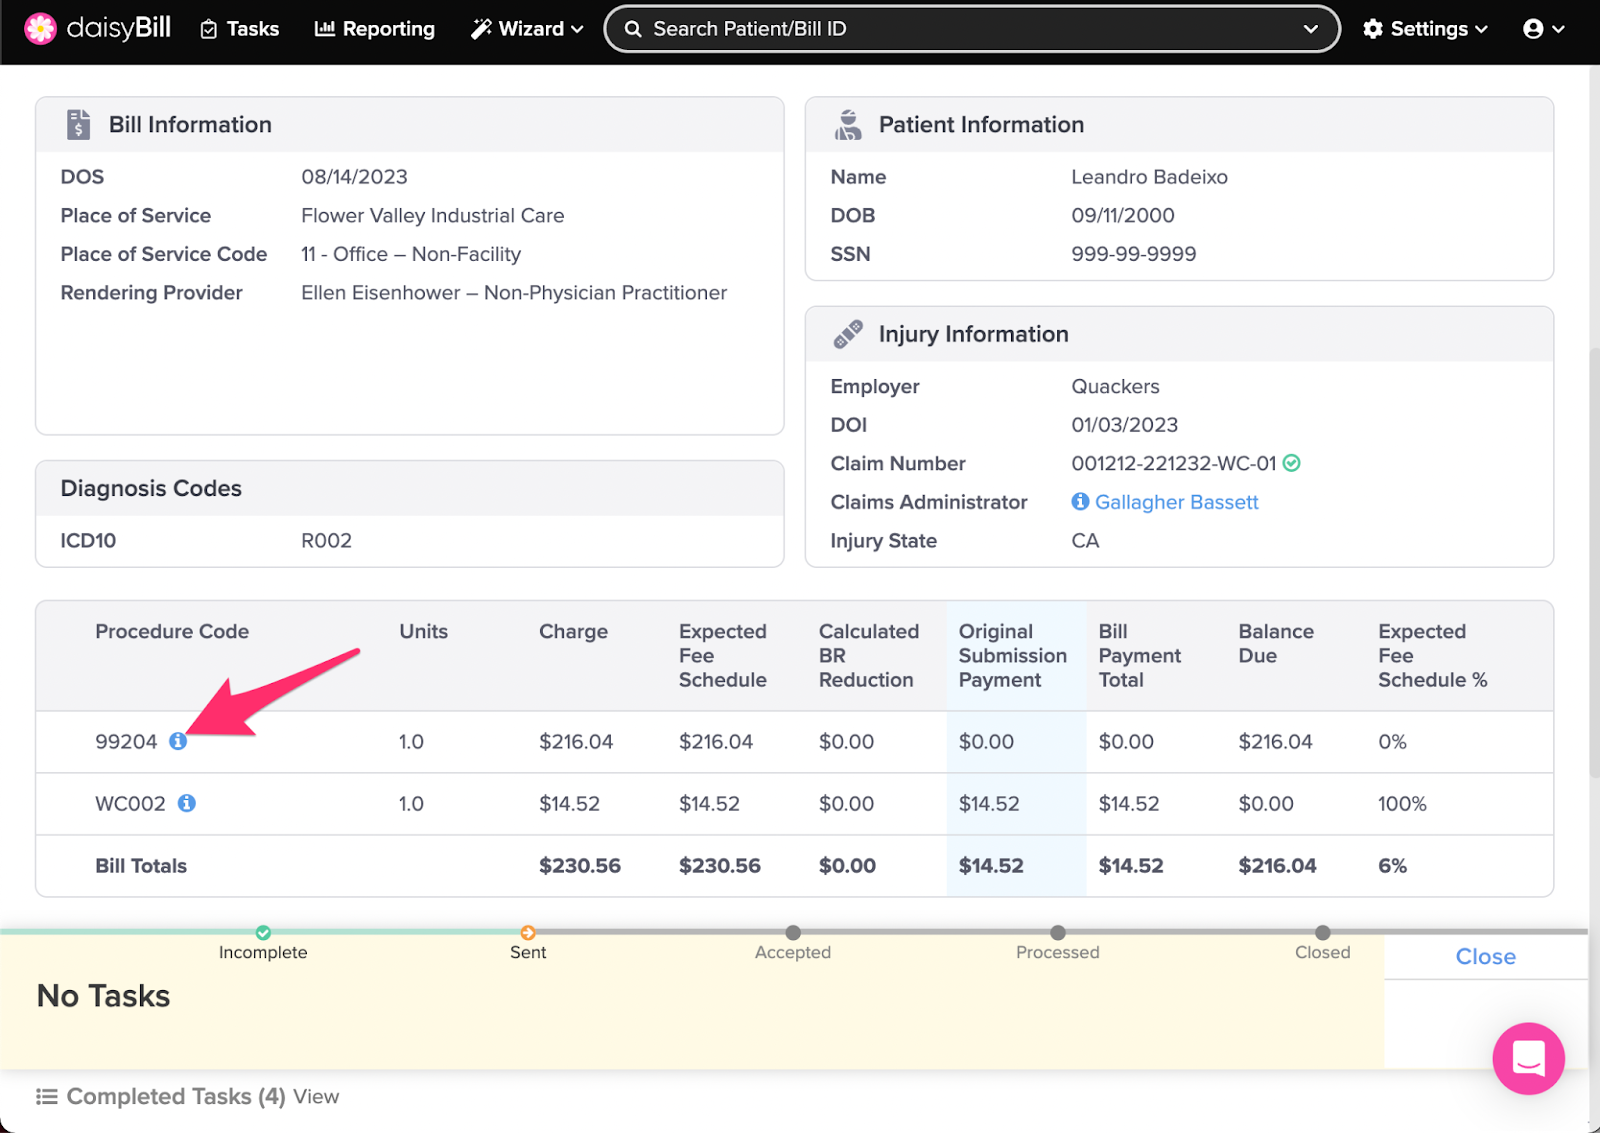
When the Expected Fee Schedule Explanation is provided by daisyBill, click ‘Expected Fee Schedule Calculation’ to open the detailed calculation information in a new tab in your browser.
K. To view a Document submitted with your Bill, click its filename under ‘Documents Sent’
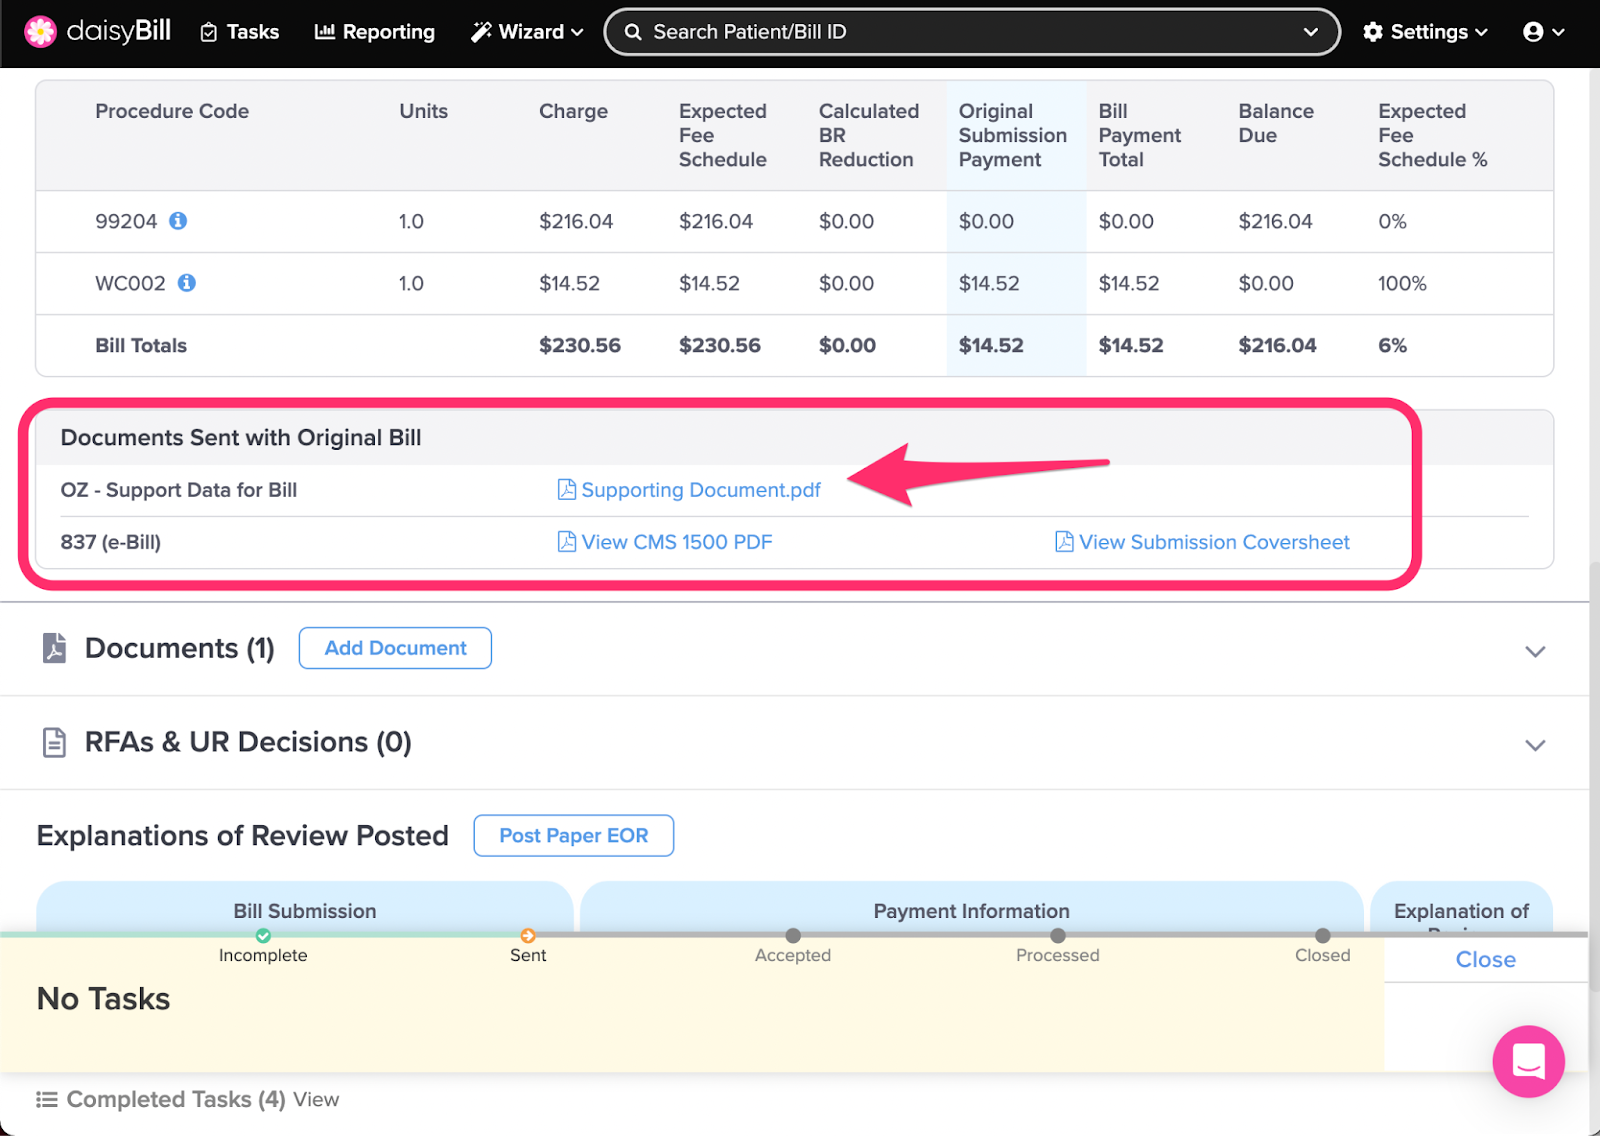
L. To view the CMS 1500, click ‘CMS 1500 PDF’
The ‘CMS 1500 PDF’ feature appears after you submit a Bill. For more information, see the Help Article: View CMS 1500.
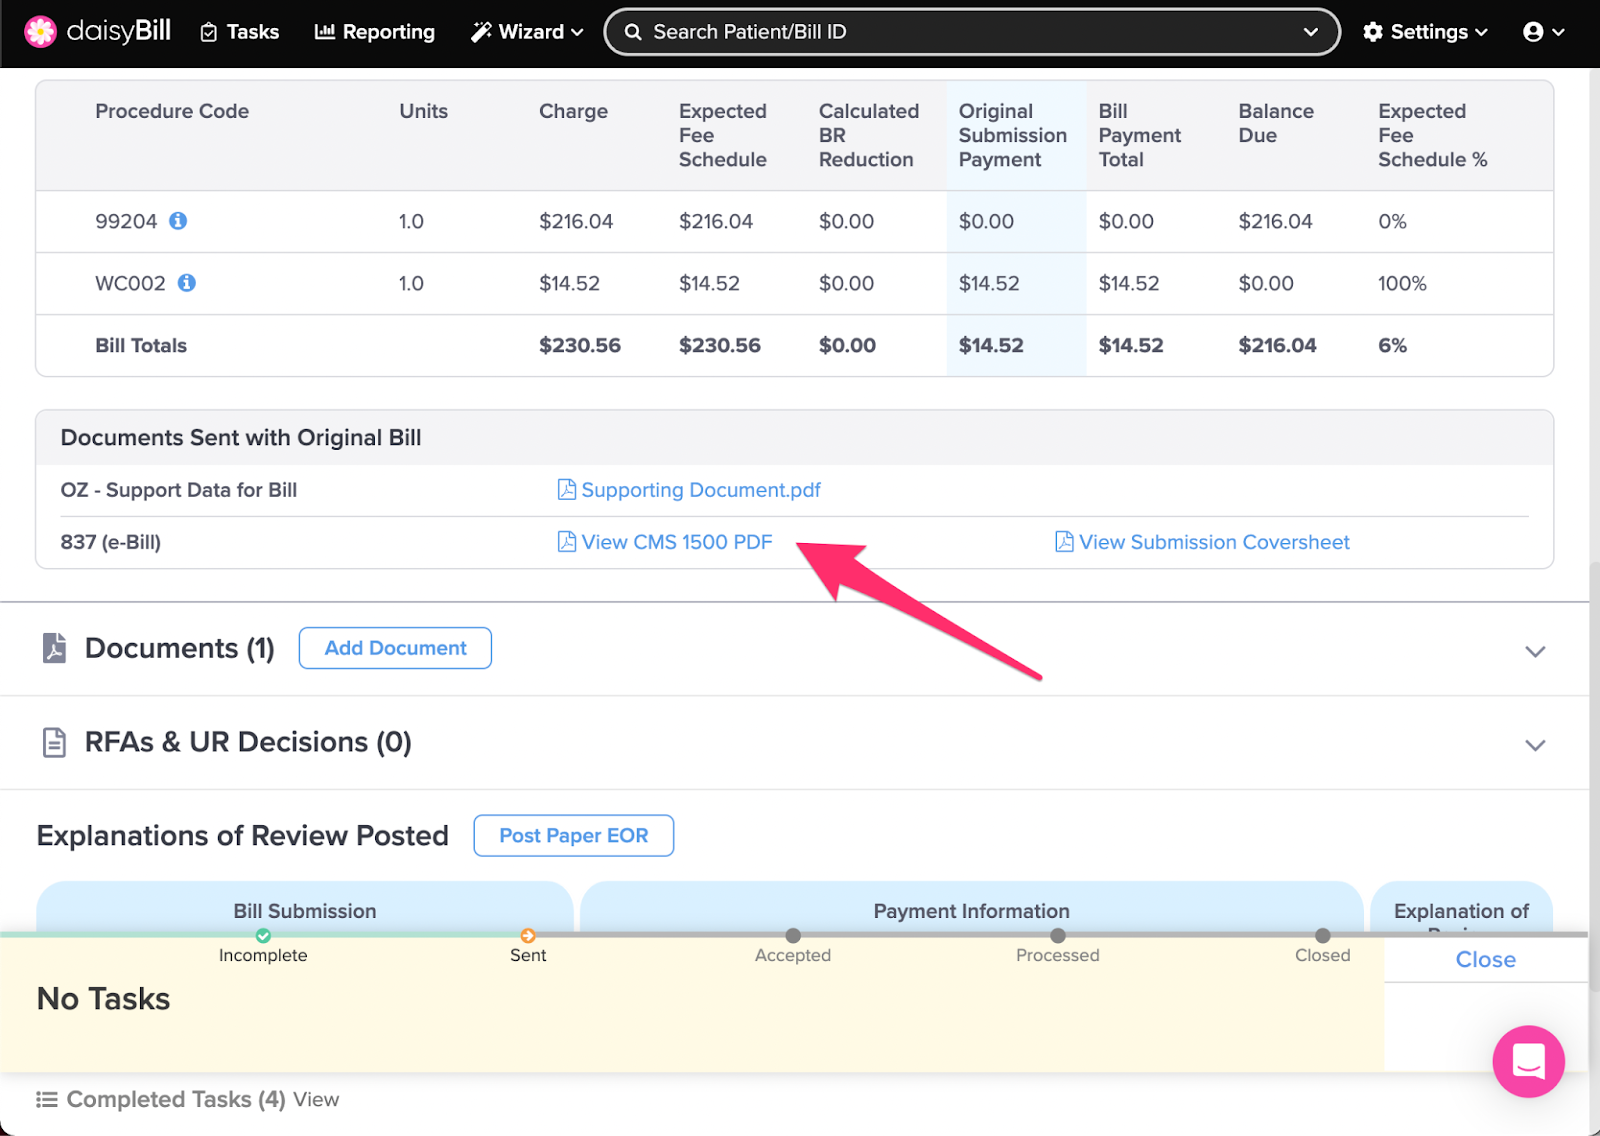
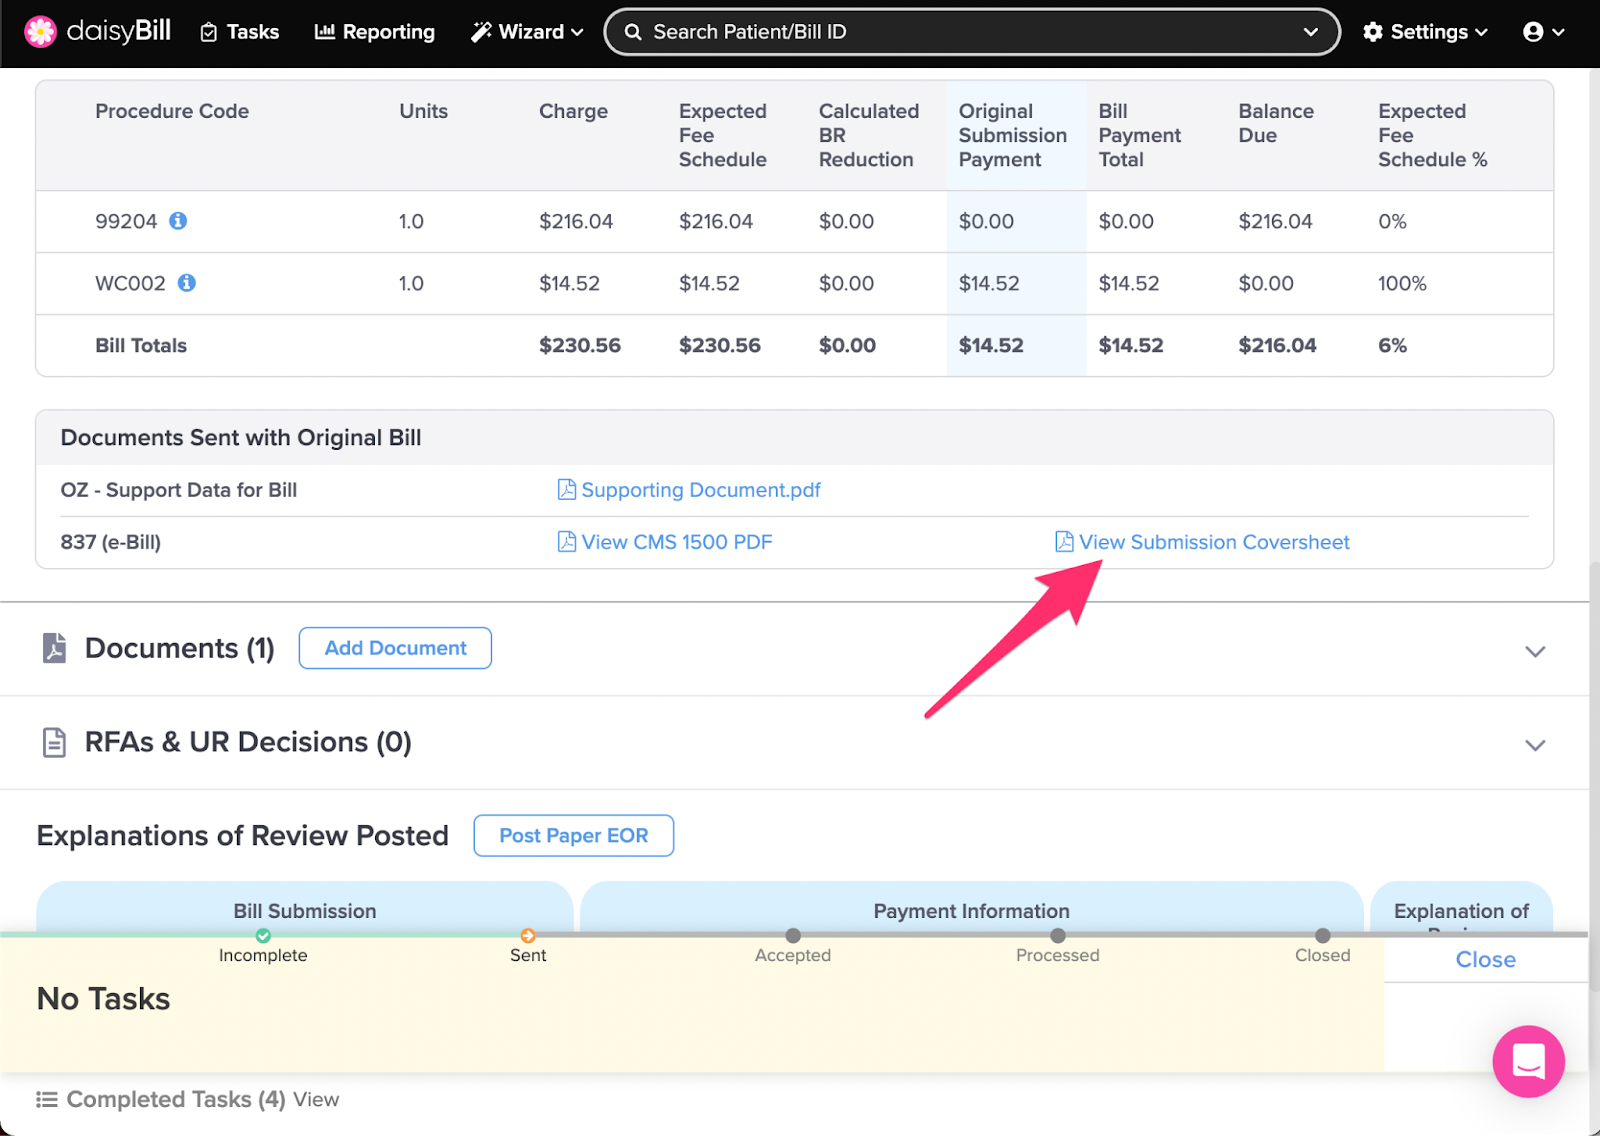
M. To view the coversheet submitted with the bill, click ‘View Submission Coversheet’
N. To add Documents, click ‘Add Document’
daisyBill requires most Bills to be sent with at least one supporting document. Attached Documents should support the charges on the Bill. Additional documents can be added after a Bill has been sent and will be included with the next bill submission. For more information, see the Help Article: Documents - Add / View / Edit / Delete.
O. To post a paper EOR, click ‘Post Paper EOR’
For more information, see the Help Article: Post: Paper EOR.
P. View posted EORs in Explanations of Review Posted
The Explanations of Review Posted is comprised of 3 sections: Bill Submission, Payment Information, and Explanation of Review.
The Bill Submission section displays details of the bill submission the EOR is posted to and, of the payment amount applied to the Bill.
Payment Information displays the Payment amount issued and the Paper Check/EFT/Virtual Credit Card details.
Explanation of Review displays how the EOR information was received, Paper EOR, or, e-EOR (837) and links to view the EOR.
For more information, see the Help Article: Explanations of Review Posted.
Q. To determine next steps, view the ‘Action Bar’
The Action Bar provides information on the submission and prompts you on the next action.
Did you ever think it would be this easy?